1. Introduction
This manual provides essential information for the installation, understanding, and basic maintenance of the Bore Replacement Optical Pickup Unit, Model UX-V30. This unit is specifically designed as a spare part for JVC UX-V30 CD Players, replacing the original laser lens and optical assembly (Lasereinheit ASSY Unit / BlocOptique).
The optical pickup unit is a critical component responsible for reading data from compact discs. Proper installation and handling are crucial for its functionality and longevity.
2. Product Overview
The UX-V30 Optical Pickup Unit consists of the laser diode, lens assembly, and associated circuitry, typically connected via a flexible ribbon cable. It is a precision component that emits a laser beam to read the pits and lands on a CD, converting them into electrical signals.
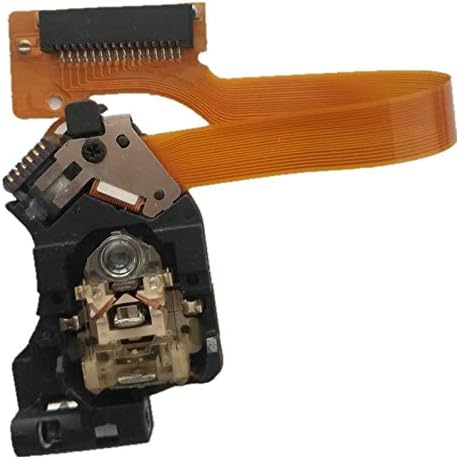
Figure 2.1: Main view of the UX-V30 Optical Pickup Unit, showing the lens and ribbon cable connector.
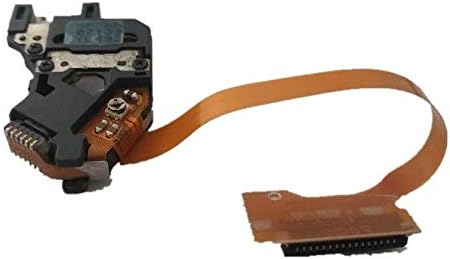
Figure 2.2: Alternative view of the UX-V30 unit, detailing the connection interface.
3. Setup and Installation
Important: Installation of an optical pickup unit requires technical expertise and careful handling. It is highly recommended that this procedure be performed by a qualified technician to avoid damage to the unit or the CD player.
3.1 Safety Precautions
- Always disconnect the CD player from the power supply before beginning any installation or repair work.
- Avoid touching the laser lens directly with bare hands. Fingerprints or oils can impair performance.
- Handle the flexible ribbon cable with extreme care to prevent tearing or creasing.
- Be aware of static electricity. Use anti-static precautions (e.g., anti-static wrist strap) when handling sensitive electronic components.
3.2 Installation Steps (General Guide)
- Disassembly: Carefully open the JVC UX-V30 CD player casing to gain access to the CD mechanism and the existing optical pickup unit. Document screw locations and cable connections.
- Disconnect Old Unit: Gently disconnect the ribbon cable and any mounting screws securing the old optical pickup unit. Remove the old unit.
- Remove Anti-Static Solder Point: Many new optical pickup units come with a protective anti-static solder point (often a small blob of solder connecting two pads on the circuit board) to prevent electrostatic discharge damage during shipping. This point MUST be carefully desoldered and removed before installation. Failure to do so will prevent the unit from functioning. Consult the specific unit for its location, typically near the ribbon cable connector.
- Install New Unit: Carefully position the new UX-V30 optical pickup unit into its designated slot. Secure it with the appropriate screws.
- Connect Ribbon Cable: Gently insert the flexible ribbon cable into its connector on the main board, ensuring it is fully seated and properly aligned. Secure any locking mechanisms on the connector.
- Reassembly: Carefully reassemble the CD player casing, ensuring all screws are tightened and no cables are pinched.
- Testing: Connect the CD player to power and test its functionality with a known good audio CD.
4. Operating Principles
Once installed, the UX-V30 optical pickup unit operates by emitting a focused laser beam onto the surface of a rotating CD. The beam reflects off the disc, and variations in the reflected light (due to pits and lands on the disc) are detected by a photodiode array within the unit. These variations are then converted into electrical signals, which are processed by the CD player's circuitry to reproduce audio or data.
The unit also contains mechanisms for focusing the laser beam and tracking the spiral data path on the disc, ensuring accurate data retrieval.
5. Maintenance
The optical pickup unit is a sealed and delicate component. User maintenance is generally not required or recommended beyond keeping the CD player's environment clean and dust-free.
- Dust Prevention: Keep the CD player in a clean environment to minimize dust accumulation, which can affect the lens and internal mechanisms.
- Lens Cleaning: If performance degrades due to a dirty lens, professional cleaning may be required. Avoid using abrasive materials or harsh chemicals. A specialized CD lens cleaner disc can sometimes offer a temporary solution, but direct access and cleaning by a technician is more effective.
- Disc Condition: Always use clean, scratch-free CDs. Damaged discs can cause the optical pickup to work harder, potentially shortening its lifespan.
6. Troubleshooting
If you experience issues after installing the new optical pickup unit, consider the following common problems and solutions:
| Problem | Possible Cause | Solution |
|---|---|---|
| CD Player displays "NO DISC" or does not recognize discs. |
|
|
| Disc skips, stutters, or audio distorts. |
|
|
| Disc tray opens/closes but disc does not spin or read. |
|
|
If troubleshooting steps do not resolve the issue, professional diagnosis and repair are recommended.
7. Specifications
- Model Number: UX-V30
- Compatibility: Designed for JVC UX-V30 CD Players
- Component Brand (as per product description): ZUCZUG
- Package: Yes (typically includes the optical pickup unit)
- Include Display: No (this unit does not include a display)
- Use: Home Audio Equipment Repair/Replacement
8. Warranty Information
Specific warranty terms for this replacement part are typically provided by the seller or manufacturer at the time of purchase. Please refer to your purchase documentation or contact the seller directly for details regarding warranty coverage, duration, and claims procedures.
Damage resulting from improper installation, mishandling, or failure to remove the anti-static solder point may void the warranty.
9. Support
For technical assistance, installation guidance, or inquiries regarding your Bore Replacement Optical Pickup Unit UX-V30, please contact the retailer or the manufacturer directly through their official support channels. When contacting support, please have your purchase details and the model number (UX-V30) readily available.
Online resources and forums dedicated to audio equipment repair may also provide valuable community support and shared experiences.