Introduction
This user manual provides detailed instructions for the setup, operation, maintenance, and troubleshooting of your Technical Pro Professional Dual UHF Rechargeable Wireless Microphone System. Please read this manual thoroughly before using the product to ensure proper function and longevity.
Product Features
- Sturdy all-metal construction for the UHF wireless microphone receiver and high-sensitivity unidirectional handheld microphones.
- High-quality dynamic cartridge engineered to limit feedback and interference, delivering clear, robust, and optimal true sound.
- Professional receiver with LCD display showing frequency number and individual volume control for precise vocal balancing.
- Individual XLR outputs per channel and one 1/4'' mixed output.
- Frequency stability: ±0.005%, Modulation mode: FM, Maximum deviation range: ±45kHz with limiting compressor.
- Rack-mountable metal receiver ideal for various activities such as parties, weddings, speeches, conferences, small gigs, and karaoke.
- Rechargeable microphones that charge in 2-3 hours and provide 6-8 hours of usage when fully charged.

Figure 1: Key Features Overview. This diagram highlights the main features including output types, battery cases, signal-to-noise ratio, frequency response, frequency stability, dual signal UHF high band, silence circuit, maximum deviation range, and auto mute circuit.
Package Contents
Please ensure all items are present and in good condition upon unboxing:
- 1 x Dual UHF Wireless Microphone Receiver
- 2 x Cordless Handheld Microphones
- 2 x Rechargeable Lithium Battery Cases (for microphones)
- 2 x AA Battery Cases (for microphones)
- 1 x Power Adapter for Receiver
- 1 x 1/4'' Audio Cable
- User Manual (this document)

Figure 2: System Components. This image displays the main receiver unit, two handheld microphones, and the rechargeable battery components.
Setup Guide
1. Unpacking and Placement
Carefully remove all components from the packaging. Place the receiver unit on a stable, flat surface, away from strong electromagnetic interference sources. Ensure adequate ventilation around the unit.
2. Power Connection
- Connect the provided power adapter to the DC IN port on the rear of the receiver.
- Plug the power adapter into a standard electrical outlet.
- Press the power button on the front panel of the receiver to turn it on. The LCD display should illuminate.
3. Microphone Battery Installation and Charging
- Unscrew the bottom cap of each handheld microphone.
- Insert the rechargeable battery into the provided rechargeable battery case, then insert the case into the microphone. Alternatively, use two AA batteries with the AA battery case.
- Screw the bottom cap back on.
- To charge the microphones, place them into the charging docks on the receiver unit. The charging indicator lights will illuminate. Charging typically takes 2-3 hours.
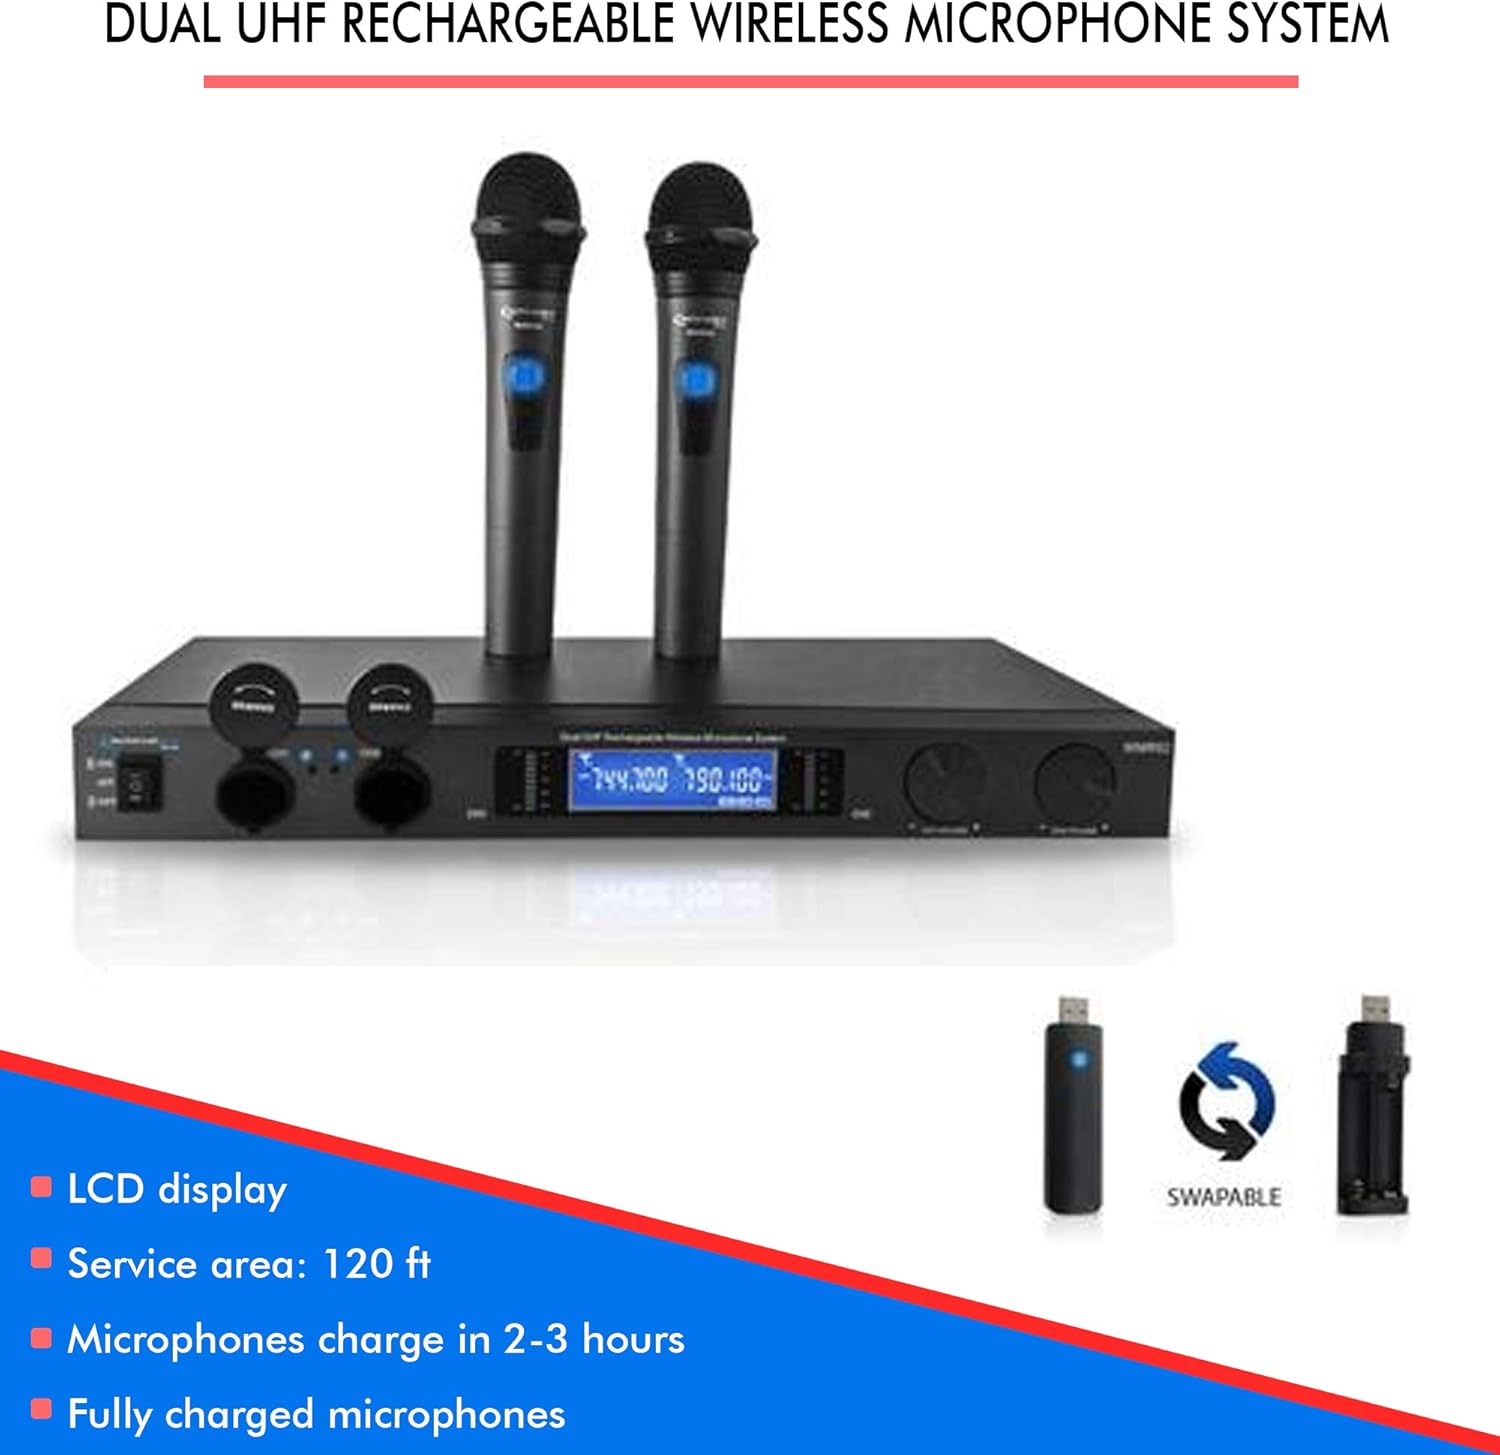
Figure 3: Microphone Charging and Battery Options. This image shows the charging ports on the receiver and the swappable rechargeable battery sticks and AA battery cases for the microphones.
4. Audio Output Connection
Connect the receiver to your audio mixer, amplifier, or sound system using one of the following methods:
- Mixed Output: Use a 1/4'' TS cable (provided) to connect the "MIXED OUT" jack on the receiver to an input on your audio device. This combines both microphone signals into a single output.
- Individual XLR Outputs: For separate control of each microphone, use XLR cables (not provided) to connect the "CH1 OUT" and "CH2 OUT" XLR jacks on the receiver to individual XLR inputs on your audio mixer.
Operating Instructions
1. Powering On and Off
- To power on the receiver, press the "ON/OFF" switch on the front panel.
- To power on each microphone, slide the power switch on the microphone handle to the "ON" position.
- To power off, reverse the steps.
2. Frequency Synchronization
The system is designed for automatic frequency synchronization. Once the receiver and microphones are powered on, they should automatically connect. The LCD display on the receiver will show the active frequencies for CH1 and CH2.
3. Adjusting Volume
- Use the "CH1 VOLUME" and "CH2 VOLUME" knobs on the receiver's front panel to adjust the output level of each microphone independently.
- Further volume adjustments can be made on your connected audio mixer or amplifier.
4. Usage Tips
- Maintain a clear line of sight between the microphones and the receiver for optimal signal strength.
- Avoid placing the receiver near large metal objects or other wireless devices that may cause interference.
- Keep microphones within the recommended operating range (Service area: 120 ft).
- Ensure microphones are fully charged before extended use.

Figure 4: Versatile Applications. This image illustrates the system's suitability for diverse settings such as family gatherings, business meetings, and public performances.
Maintenance
1. Cleaning
- Wipe the receiver and microphones with a soft, dry cloth.
- Do not use liquid cleaners or abrasive chemicals, as they may damage the finish or internal components.
2. Battery Care
- For rechargeable batteries, fully charge them before long periods of storage.
- If using AA batteries, remove them from the microphones if the system will not be used for an extended period to prevent leakage.
3. Storage
Store the system in a cool, dry place, away from direct sunlight and extreme temperatures.
Troubleshooting
| Problem | Possible Cause | Solution |
|---|---|---|
| No sound from microphone | Microphone or receiver not powered on; low microphone battery; microphone out of range; incorrect audio connection; receiver volume too low. | Ensure all units are powered on. Check microphone battery level and recharge if necessary. Move microphone closer to receiver. Verify audio cables are correctly connected. Increase receiver volume. |
| Interference or static noise | Other wireless devices nearby; strong electromagnetic interference; microphone too far from receiver; low microphone battery. | Move receiver away from other electronic devices. Ensure clear line of sight. Recharge microphone batteries. |
| Microphone not charging | Microphone not properly seated in charging dock; faulty battery; power adapter not connected. | Ensure microphone is firmly placed in the charging dock. Check if the power adapter is connected to the receiver. If problem persists, the battery may need replacement. |
| LCD display not working | Receiver not powered on; power adapter issue. | Ensure receiver is powered on. Check power adapter connection and try a different outlet. |
Specifications
| Feature | Detail |
|---|---|
| Model Number | TWMR52T |
| Microphone Form Factor | Microphone System (Dual Handheld) |
| Frequency Stability | ±0.005% |
| Modulation Mode | FM |
| Maximum Deviation Range | ±45kHz with limiting compressor |
| Frequency Range | 40Hz - 20KHz |
| Frequency Response | 45 Hz |
| Signal-to-Noise Ratio | 100 dB |
| Audio Sensitivity | 10 dB |
| Impedance | 8 Ohm |
| Number of Channels | 20 |
| Power Source | Rechargeable (Microphones) |
| Microphone Charge Time | 2-3 hours |
| Microphone Usage Time | 6-8 hours (fully charged) |
| Material | Metal (Receiver and Microphones) |
| Color | Black |
| Item Dimensions (L x W x H) | 19 x 9.5 x 1.75 inches |
| Item Weight | 7.5 Pounds |
| Connectivity Technology | XLR |
| Polar Pattern | Unidirectional |

Figure 5: Product Dimensions. This image provides a visual representation of the receiver's dimensions: 19 inches (length), 9.5 inches (width), and 1.75 inches (height).
Warranty and Support
For warranty information and technical support, please refer to the manufacturer's official website or contact their customer service directly. Keep your purchase receipt as proof of purchase for any warranty claims.
Manufacturer: Technical Pro


