Introduction
This manual provides comprehensive instructions for the installation, operation, and maintenance of your EMKE Bathroom Mirror with LED Lights, 3X Magnifier, Shaver Socket, and Demister Pad. Please read this manual thoroughly before installation and use to ensure safe and optimal performance of your mirror.
The EMKE Bathroom Mirror is designed to enhance your bathroom experience with its multi-functional features, including energy-efficient LED lighting, a convenient touch switch, an integrated demister, and a 3x magnification area. It is constructed with a 5mm environmentally friendly bronze-free mirror, durable crystal glass, polished edges, and an aluminum frame.
Safety Information
- Ensure power is disconnected at the main circuit breaker before installation or maintenance.
- Installation should be performed by a qualified electrician in accordance with local wiring regulations.
- Do not expose the mirror to excessive moisture or direct water spray.
- Keep children away from the installation area.
- Handle the mirror with care to prevent damage to the glass or internal components.
Package Contents
Verify that all components are present and undamaged before proceeding with installation.
- EMKE LED Bathroom Mirror (1 unit)
- Fixing Material (mirror bracket, screws, and wall plugs)
- Assembly Instructions (this manual)
Setup and Installation
The EMKE Bathroom Mirror is designed for horizontal wall mounting. Ensure the wall is capable of supporting the mirror's weight (approximately 7.7 kg / 16.94 lbs).
Tools Required (Not Included):
- Drill
- Measuring Tape
- Pencil
- Spirit Level
- Screwdriver
Installation Steps:
- Preparation: Choose a suitable location on the wall. Ensure there are no hidden electrical wires or pipes. Mark the desired height and center point for the mirror.
- Mounting Bracket Installation: Using the provided mirror bracket as a template, mark the drilling points on the wall. Drill holes and insert the wall plugs. Secure the mirror bracket firmly to the wall with screws.
- Electrical Connection: Ensure the main power supply is OFF. Connect the mirror's electrical wires to your household wiring. The mirror is ready for connection to a power source. Consult a qualified electrician if you are unsure.
- Mounting the Mirror: Carefully lift the mirror and align the mounting slots on the back of the mirror with the installed wall bracket. Gently lower the mirror until it is securely seated on the bracket.
- Final Check: Ensure the mirror is level and securely attached to the wall. Restore power and test all functions.
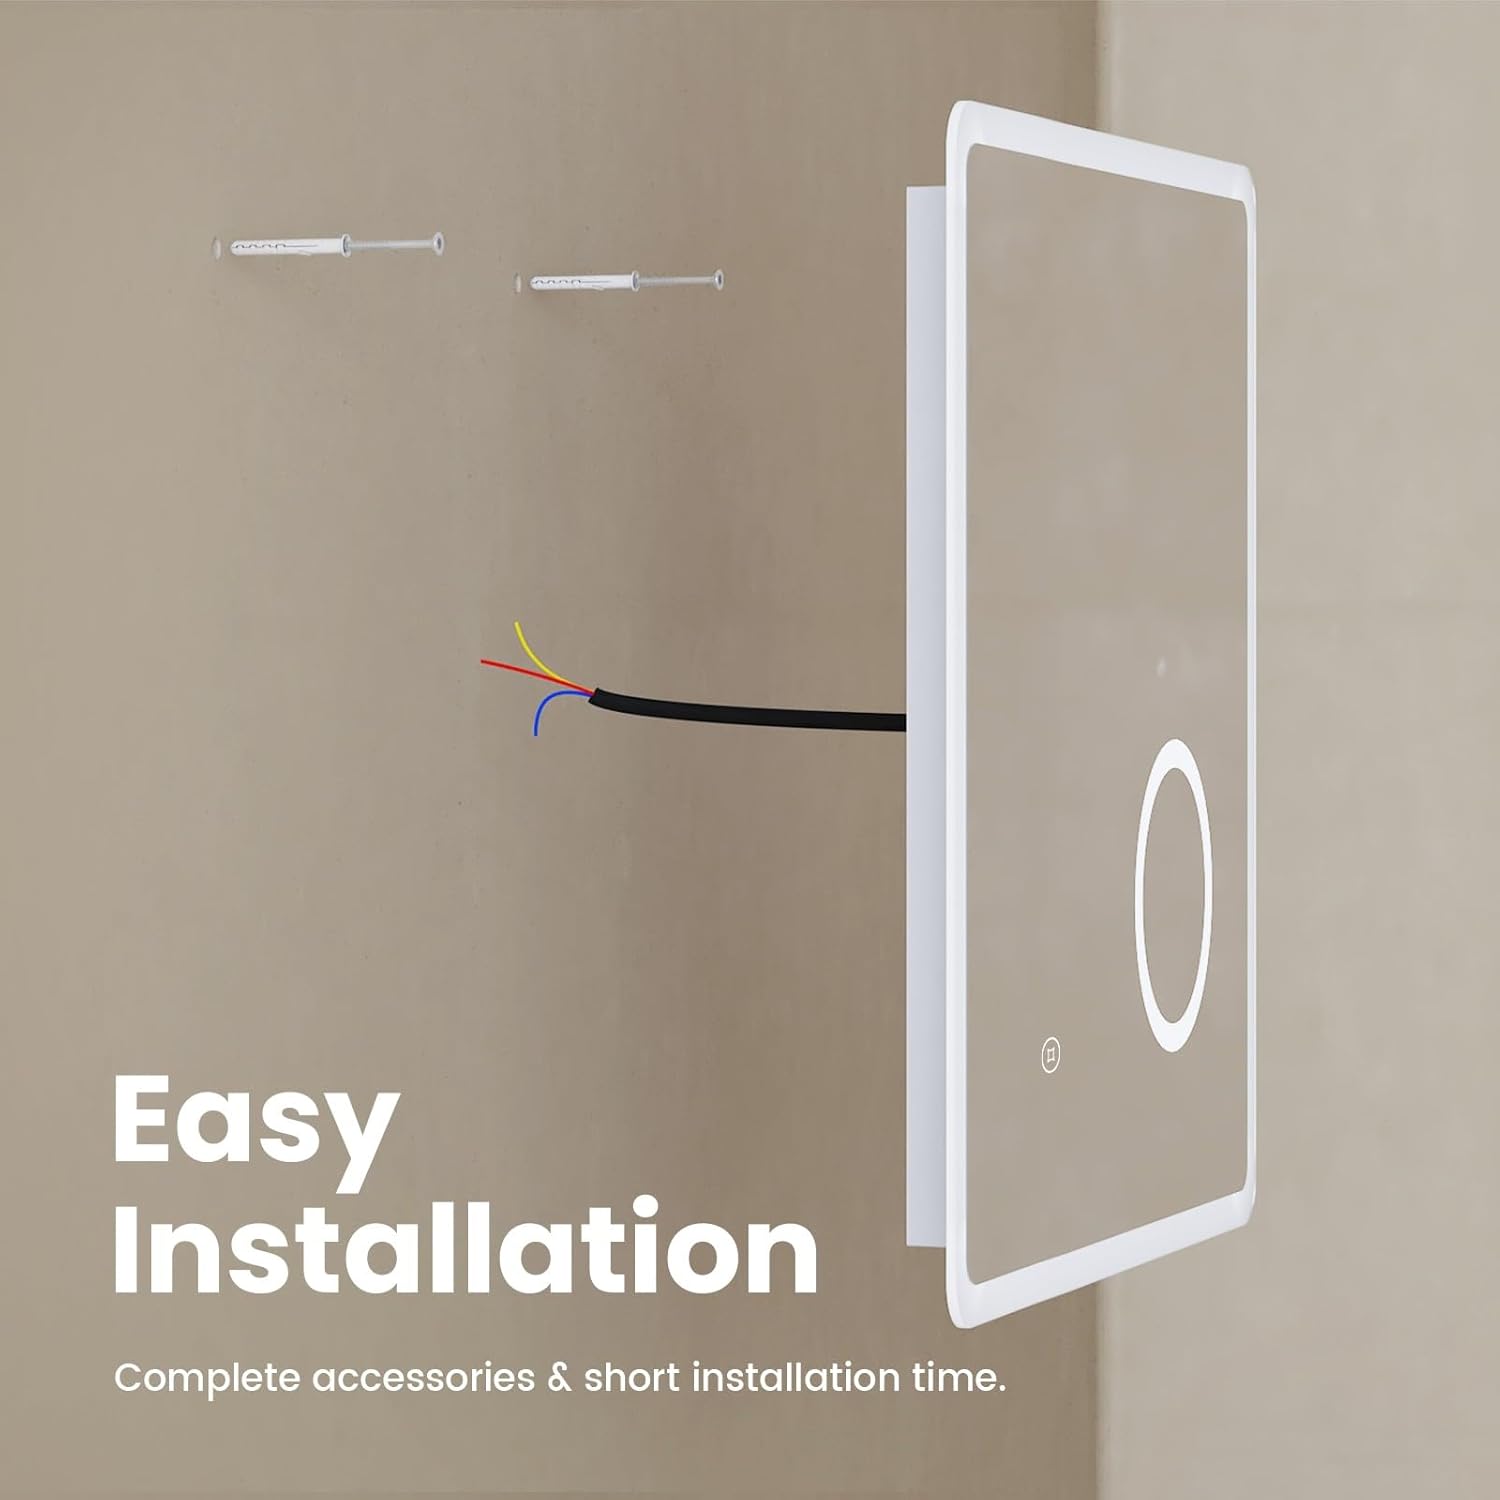
Figure 1: Easy Installation. This image illustrates the process of preparing the wall for mounting, showing the wall plugs inserted and the electrical wires ready for connection to the mirror's power input. It highlights the simplicity of the installation process.
Operating Instructions
LED Lighting and Touch Switch:
The mirror features an integrated LED lighting system controlled by a touch switch. A light touch on the designated sensor area on the mirror surface will turn the LED lights on or off. The lighting is dimmable, allowing you to adjust the brightness to your preference by holding the touch switch.
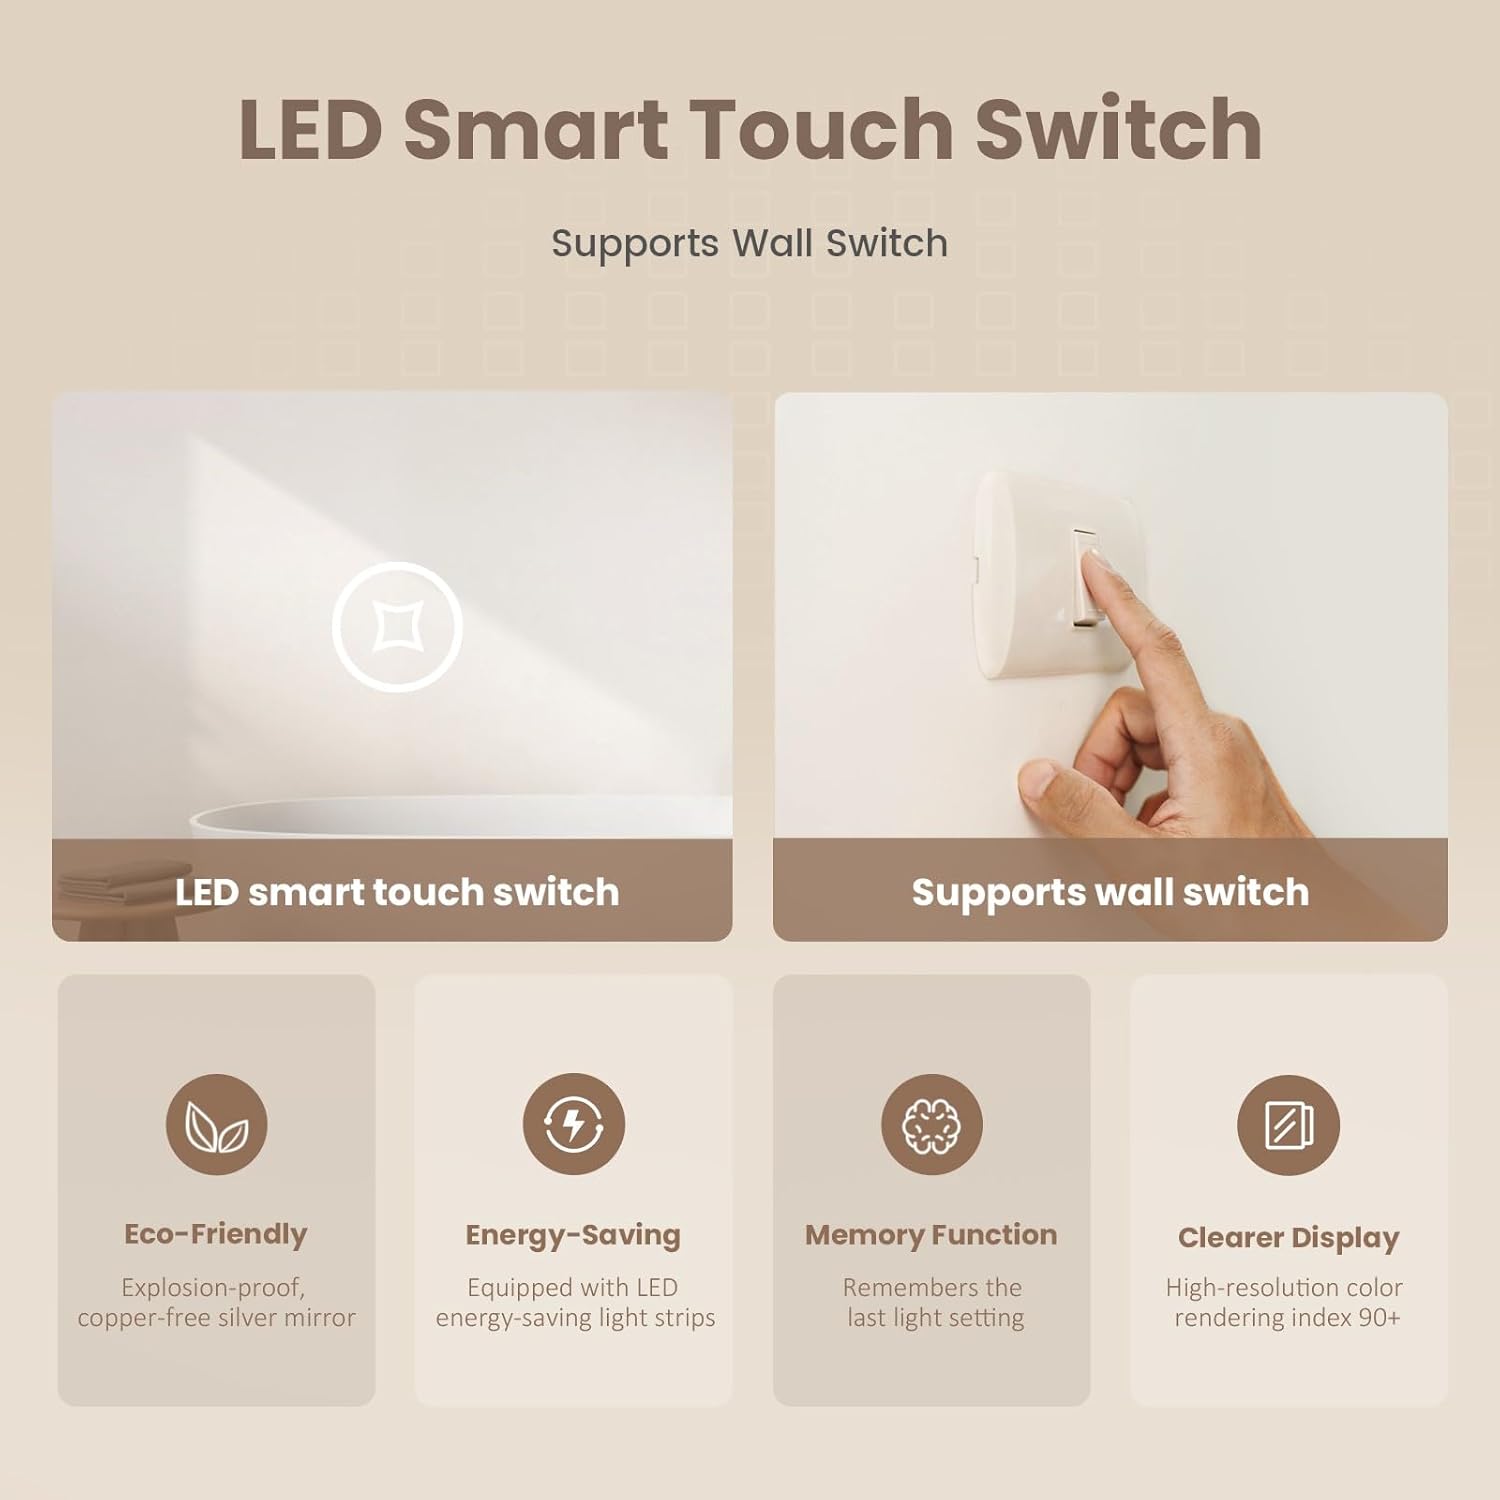
Figure 2: LED Smart Touch Switch. This image displays the touch sensor on the mirror for controlling the LED lights and anti-fog function, alongside an illustration of how it supports connection to a standard wall switch for power control. It also highlights features like eco-friendliness, energy-saving, memory function, and clearer display.
Anti-Fog Function (Demister Pad):
The anti-fog function is automatically activated when the LED light is switched on. This feature quickly heats a portion of the mirror surface to prevent condensation, ensuring a clear reflection even in steamy bathroom conditions.

Figure 3: Demister Pad in Action. This image visually represents the demister pad's effectiveness, showing arrows indicating steam clearing from the mirror surface, maintaining a clear reflection during and after showers.
3X Magnification Mirror:
A dedicated 3X magnification area is integrated into the mirror for detailed tasks such as makeup application, shaving, or skincare. For optimal clarity, use this area at a distance of approximately 15 cm (6 inches).

Figure 4: 3X Magnification Feature. This image demonstrates the utility of the 3x magnification zone for precise grooming and beauty routines, showing a woman applying makeup and smaller insets illustrating various detailed applications.
Shaver Socket:
The mirror includes a built-in 2-pin shaver socket, conveniently located for charging electric toothbrushes, shavers, and other low-power bathroom devices. Ensure devices are compatible with a 2-pin socket.

Figure 5: Integrated Shaver Socket. This image highlights the discreetly placed 2-pin charging socket, illustrating its use for powering common bathroom appliances like electric shavers and toothbrushes.
Maintenance and Care
- Cleaning: Use a soft, damp cloth and a mild glass cleaner to clean the mirror surface. Avoid abrasive cleaners or harsh chemicals that may damage the mirror finish or electrical components.
- Electrical Components: Do not attempt to service or repair any electrical components yourself. Refer to qualified personnel for any electrical issues.
- General Care: Regularly inspect the mirror for any signs of damage or loose fittings. Tighten screws if necessary.
Troubleshooting
| Problem | Possible Cause | Solution |
|---|---|---|
| LED lights do not turn on. | No power supply; faulty wiring; touch switch malfunction. | Check circuit breaker. Verify electrical connections. Contact a qualified electrician. |
| Anti-fog function not working. | LED lights not activated; demister pad malfunction. | Ensure LED lights are on. If problem persists, contact customer support. |
| Shaver socket not providing power. | No power supply; internal wiring issue. | Check main power. Ensure mirror is correctly wired. Contact a qualified electrician. |
| Mirror surface is distorted. | Physical damage to the mirror. | Inspect for cracks or damage. If damaged, replacement may be necessary. |
Specifications
- Brand: EMKE
- Model Number: ULM13BTDSX1
- Product Dimensions: 23.62"L x 31.5"W (600mm x 800mm)
- Frame Material: Aluminum
- Mirror Material: 5mm Environmentally Friendly Bronze-Free Crystal Glass
- Mounting Type: Wall Mount (Horizontal)
- Special Features: LED Lighting, Touch Sensor, Dimmable, 3X Magnification, Shaver Socket, Demister Pad (Anti-Fog)
- LED Lifespan: Approximately 50,000 hours
- Energy Class: A++
- Item Weight: 7.7 Kilograms (16.94 pounds)
- Assembly Required: No (comes fully assembled)

Figure 6: Mirror Construction. This diagram illustrates the multi-layer protection structure of the 5mm HD Silver Mirror, detailing layers such as the energy-efficient LED strip, waterproof paint, silver reflection layer, and high-grade float glass, ensuring durability and clarity.
Warranty and Support
EMKE products are manufactured to high-quality standards. For information regarding warranty coverage, please refer to the documentation provided with your purchase or visit the official EMKE website.
If you encounter any issues during installation or operation, or require assistance, please contact EMKE customer service. We aim to resolve any issues within 24 hours.
- Customer Service: Refer to your purchase documentation or the EMKE brand store for contact details.
- Product Inquiries: For questions about product features or usage.
- Installation Assistance: For guidance during the setup process.