1. Product Overview
The DeLOCK 11483 KVM Switch is a practical solution designed to connect up to four computers, each with an HDMI output, to a single HDMI monitor. This device allows for seamless sharing of a single set of peripheral devices, including a keyboard and mouse, across multiple computers.
It features two USB 2.0 ports specifically for connecting a keyboard and mouse, and two additional USB 3.0 ports for connecting external storage devices such as hard drives or USB memory sticks. The active computer can be flexibly selected using various methods: a mouse gesture, a keyboard hotkey, a button directly on the device, or an infrared remote control.
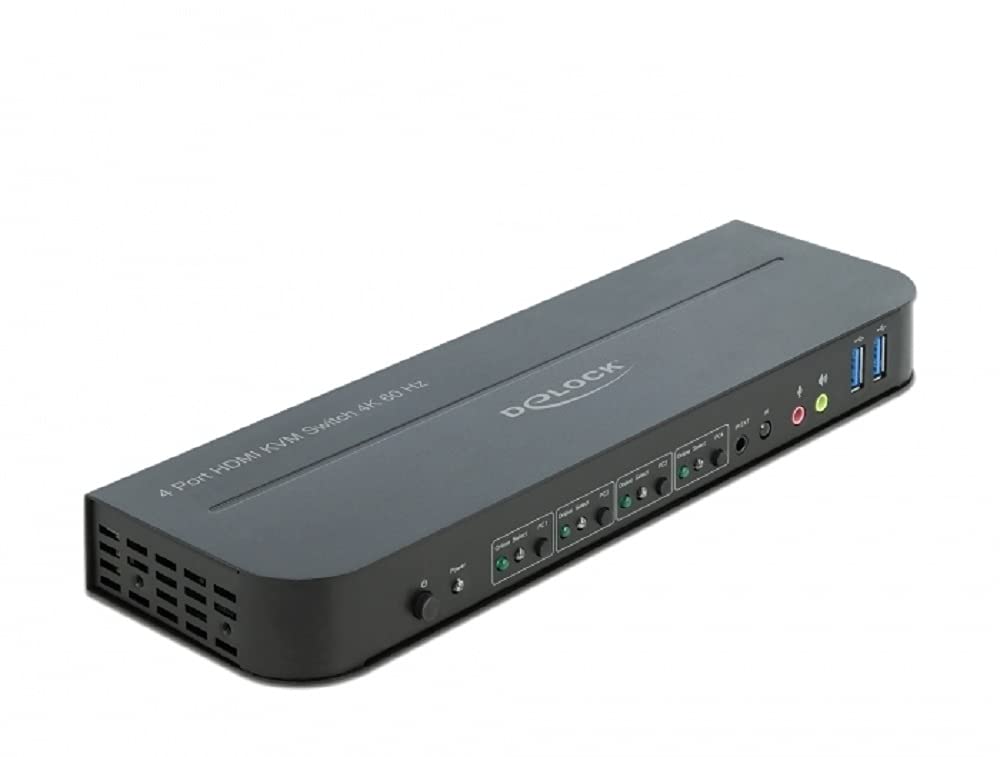
Figure 1: Front view of the DeLOCK 11483 KVM Switch, showing the power button, port selection buttons, and USB ports.
2. Features
- Connects up to four HDMI-enabled computers to one HDMI monitor.
- Supports resolutions up to 4K at 60Hz for high-quality video output.
- Integrated 2-port USB 2.0 hub for keyboard and mouse connectivity.
- Integrated 2-port USB 3.0 hub for high-speed data transfer with external storage devices.
- Multiple switching methods: front panel push buttons, keyboard hotkeys, mouse gestures, and infrared remote control.
- LED indicators for active port status.
- Durable plastic housing with compact design.
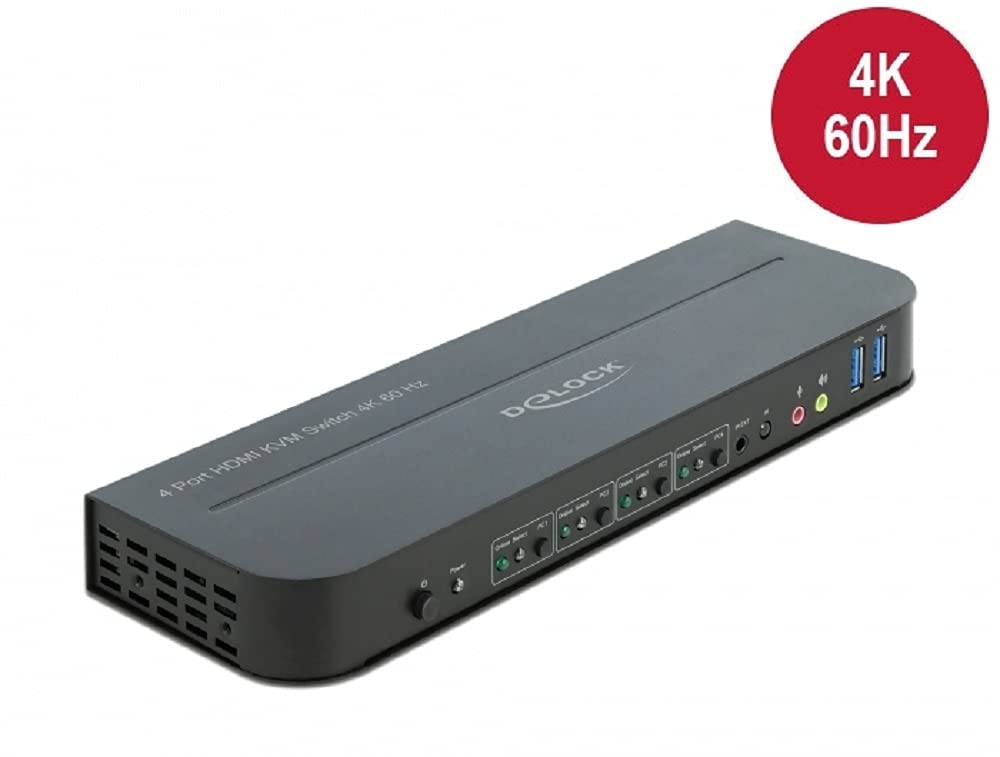
Figure 2: The KVM Switch highlighting its 4K 60Hz video resolution capability.
3. Package Contents
Please verify that all items listed below are included in your package:
- DeLOCK 11483 KVM Switch Unit
- Power Adapter
- USB 3.0 Type-A to Type-B Cables (4x)
- Mounting Brackets (2x)
- Mounting Screws
- Infrared Remote Control
- User Manual (this document)
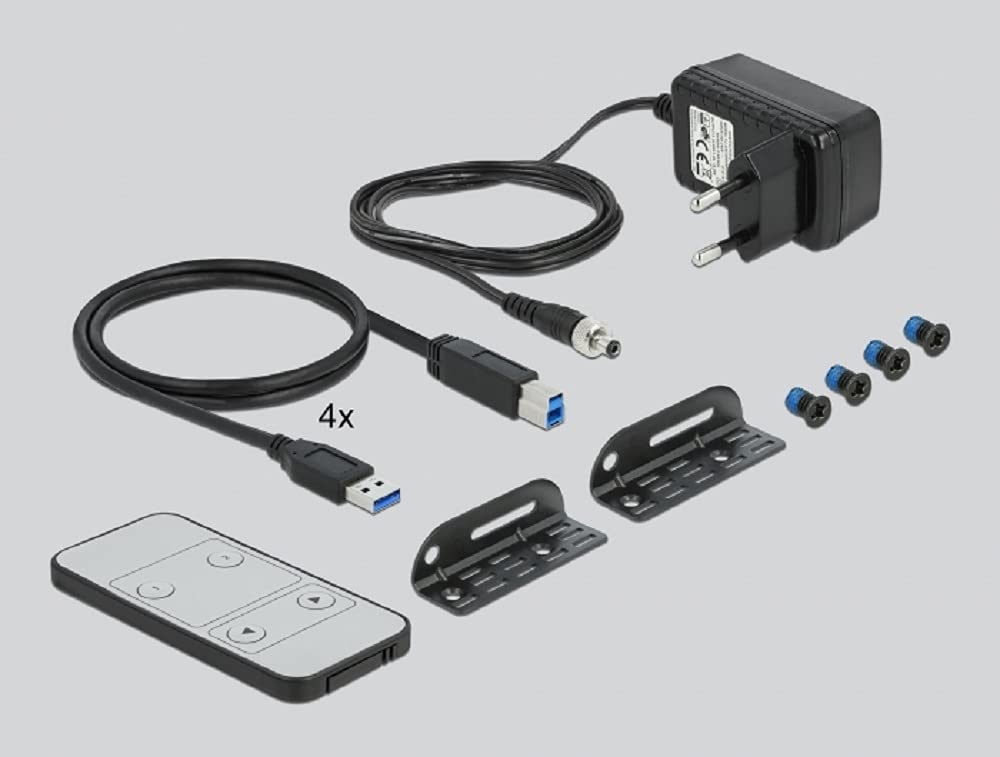
Figure 3: All components included in the DeLOCK 11483 KVM Switch package: the KVM unit, power adapter, four USB 3.0 cables, mounting brackets, screws, and the infrared remote control.
4. Setup
Follow these steps to set up your DeLOCK 11483 KVM Switch:
- Power Off: Ensure all computers and the monitor are powered off before making any connections.
- Connect Monitor: Connect your HDMI monitor to the "HDMI OUT" port on the KVM switch.
- Connect Computers (HDMI): Connect the HDMI output of each computer to the "HDMI IN" ports (PC1, PC2, PC3, PC4) on the KVM switch.
- Connect Computers (USB): For each computer, connect one end of a supplied USB 3.0 Type-A to Type-B cable to a free USB port on your computer and the other end to the corresponding "USB IN" port (PC1, PC2, PC3, PC4) on the KVM switch. These connections enable keyboard, mouse, and USB peripheral sharing.
- Connect Keyboard & Mouse: Connect your USB keyboard to the dedicated USB 2.0 port marked with a keyboard icon and your USB mouse to the dedicated USB 2.0 port marked with a mouse icon on the front panel of the KVM switch.
- Connect USB Peripherals: If desired, connect other USB devices (e.g., USB flash drives, external hard drives) to the USB 3.0 ports on the front panel.
- Connect Power: Connect the provided power adapter to the "DC 5V" input on the KVM switch and then plug it into a power outlet.
- Power On: Power on the KVM switch, then your monitor, and finally your computers.
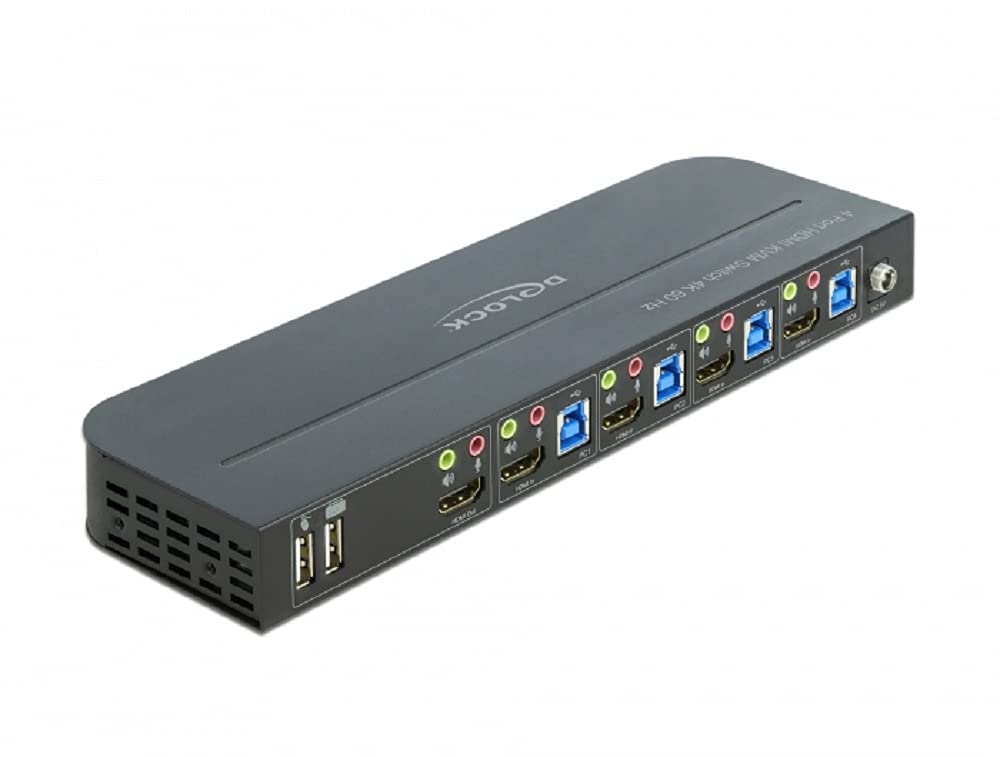
Figure 4: Rear view of the KVM Switch, illustrating the HDMI input ports for four PCs, corresponding USB input ports, and the HDMI output port for the monitor.
5. Operating Instructions
The DeLOCK 11483 KVM Switch offers several methods for switching between connected computers:
5.1. Front Panel Buttons
Press the corresponding "PC1", "PC2", "PC3", or "PC4" button on the front panel of the KVM switch to select the desired computer. The LED indicator next to the button will illuminate to show the active computer.
5.2. Keyboard Hotkeys
Use the following hotkey combinations to switch between computers:
- Press [Scroll Lock] twice quickly, then [1], [2], [3], or [4] to switch to the corresponding PC.
- Press [Scroll Lock] twice quickly, then [Up Arrow] or [Down Arrow] to cycle through connected PCs.
Note: Some keyboards may require using the right Scroll Lock key. If hotkeys do not work, ensure your keyboard is connected to the dedicated USB 2.0 keyboard port.
5.3. Mouse Gesture Switching
Move the mouse cursor quickly to the left or right edge of the screen twice to switch to the previous or next computer. This feature can usually be enabled/disabled via a hotkey combination (refer to the full manual for specific hotkey).
5.4. Infrared Remote Control
Point the infrared remote control towards the KVM switch and press the desired PC selection button (1, 2, 3, or 4) to switch to that computer.
6. Maintenance
To ensure the longevity and optimal performance of your DeLOCK 11483 KVM Switch, follow these maintenance guidelines:
- Cleaning: Use a soft, dry cloth to clean the exterior of the device. Do not use liquid cleaners or aerosol sprays.
- Ventilation: Ensure the KVM switch is placed in a well-ventilated area. Do not block the ventilation openings.
- Environment: Avoid exposing the device to extreme temperatures, humidity, or direct sunlight. Keep it away from sources of strong electromagnetic interference.
- Handling: Handle the device with care. Avoid dropping it or subjecting it to strong impacts.
7. Troubleshooting
If you encounter issues with your KVM switch, refer to the following common problems and solutions:
7.1. No Display on Monitor
- Check Cables: Ensure all HDMI cables are securely connected between the computers, KVM switch, and monitor.
- Power: Verify that the KVM switch is powered on and its power adapter is properly connected.
- Monitor Input: Confirm your monitor is set to the correct HDMI input source.
- Resolution: Ensure the output resolution of your computers is supported by your monitor and the KVM switch. Try lowering the resolution on the computer if necessary.
- Reboot: Try restarting the KVM switch and the connected computers.
7.2. Keyboard or Mouse Not Responding
- USB Connections: Ensure the keyboard and mouse are connected to the dedicated USB 2.0 ports on the front of the KVM switch.
- USB Cables to PCs: Verify that the USB 3.0 Type-A to Type-B cables are securely connected from each computer to the corresponding USB IN port on the KVM switch.
- Hotkeys: If using hotkeys, ensure the hotkey function is enabled and you are using the correct sequence.
- Direct Connection Test: Try connecting the keyboard and mouse directly to the computer to confirm they are functioning correctly.
7.3. USB 3.0 Peripherals Not Detected
- USB 3.0 Ports: Ensure the peripheral is connected to one of the USB 3.0 ports on the front panel.
- USB Cables to PCs: Confirm the USB 3.0 Type-A to Type-B cables are properly connected from the computers to the KVM switch.
- Power Requirements: Some high-power USB 3.0 devices may require external power. Ensure such devices are adequately powered.
8. Specifications
| Feature | Specification |
|---|---|
| Model Number | 11483 |
| Brand | DeLOCK |
| Dimensions (L x W x H) | 24.3 x 7.5 x 2.6 cm (9.57 x 2.95 x 1.02 inches) |
| Weight | 1.08 kg (2.38 lbs) |
| Material | Plastic |
| Video Ports | 4 x HDMI Input, 1 x HDMI Output |
| USB Ports (Peripheral) | 2 x USB 2.0 Type-A (for Keyboard/Mouse), 2 x USB 3.0 Type-A |
| USB Ports (PC Connection) | 4 x USB 3.0 Type-B |
| Max Resolution | 4K (3840 x 2160) @ 60Hz |
| Control Methods | Front Panel Buttons, Keyboard Hotkeys, Mouse Gesture, IR Remote Control |
| Power Supply | DC 5V (via included power adapter) |
9. Warranty and Support
Information regarding specific warranty terms and conditions for the DeLOCK 11483 KVM Switch is not available in the provided product data. For warranty claims or technical support, please refer to the official DeLOCK website or contact your point of purchase.
For further assistance, you may visit the DeLOCK support page or contact their customer service department.


