1. Product Overview
The SKYSHL SS101PVA is a portable optical fiber power meter designed for precise optical power measurements in telecommunication and broadband networks. It features a built-in Visual Fault Locator (VFL) and supports multiple calibration wavelengths, making it an essential tool for fiber optic technicians.

Figure 1: Front view of the SKYSHL SS101PVA Optical Fiber Power Meter, showing the color display and control buttons.
Key Features:
- Multiple Calibration Wavelengths: Supports 850nm, 1300nm, 1310nm, 1490nm, 1550nm, and 1625nm for diverse network testing.
- Built-in VFL (650nm): Integrated Visual Fault Locator for quick fiber break detection.
- Comprehensive Fiber Test Kit: Includes universal 2.5mm, SC, FC, and LC UPC adapters.
- 2.4-inch Color LCD Display: Provides clear and intuitive data visualization with wide viewing angles and LED backlight.
- Compact and Durable Design: Small size for portability, ergonomic design for comfortable handling, and high-strength plastic casing for durability against drops.
2. Package Contents
Verify that all items listed below are included in your package. If any items are missing or damaged, please contact customer support.
- 1x SKYSHL SS101PVA Optical Fiber Power Meter
- 1x Universal 2.5mm Connector
- 1x SC Adapter
- 1x FC Adapter
- 1x SC-LC Connector
- 1x Backpack Strap
- 1x User Manual
- 1x Oxford Bag
- 3x AA Batteries (included)
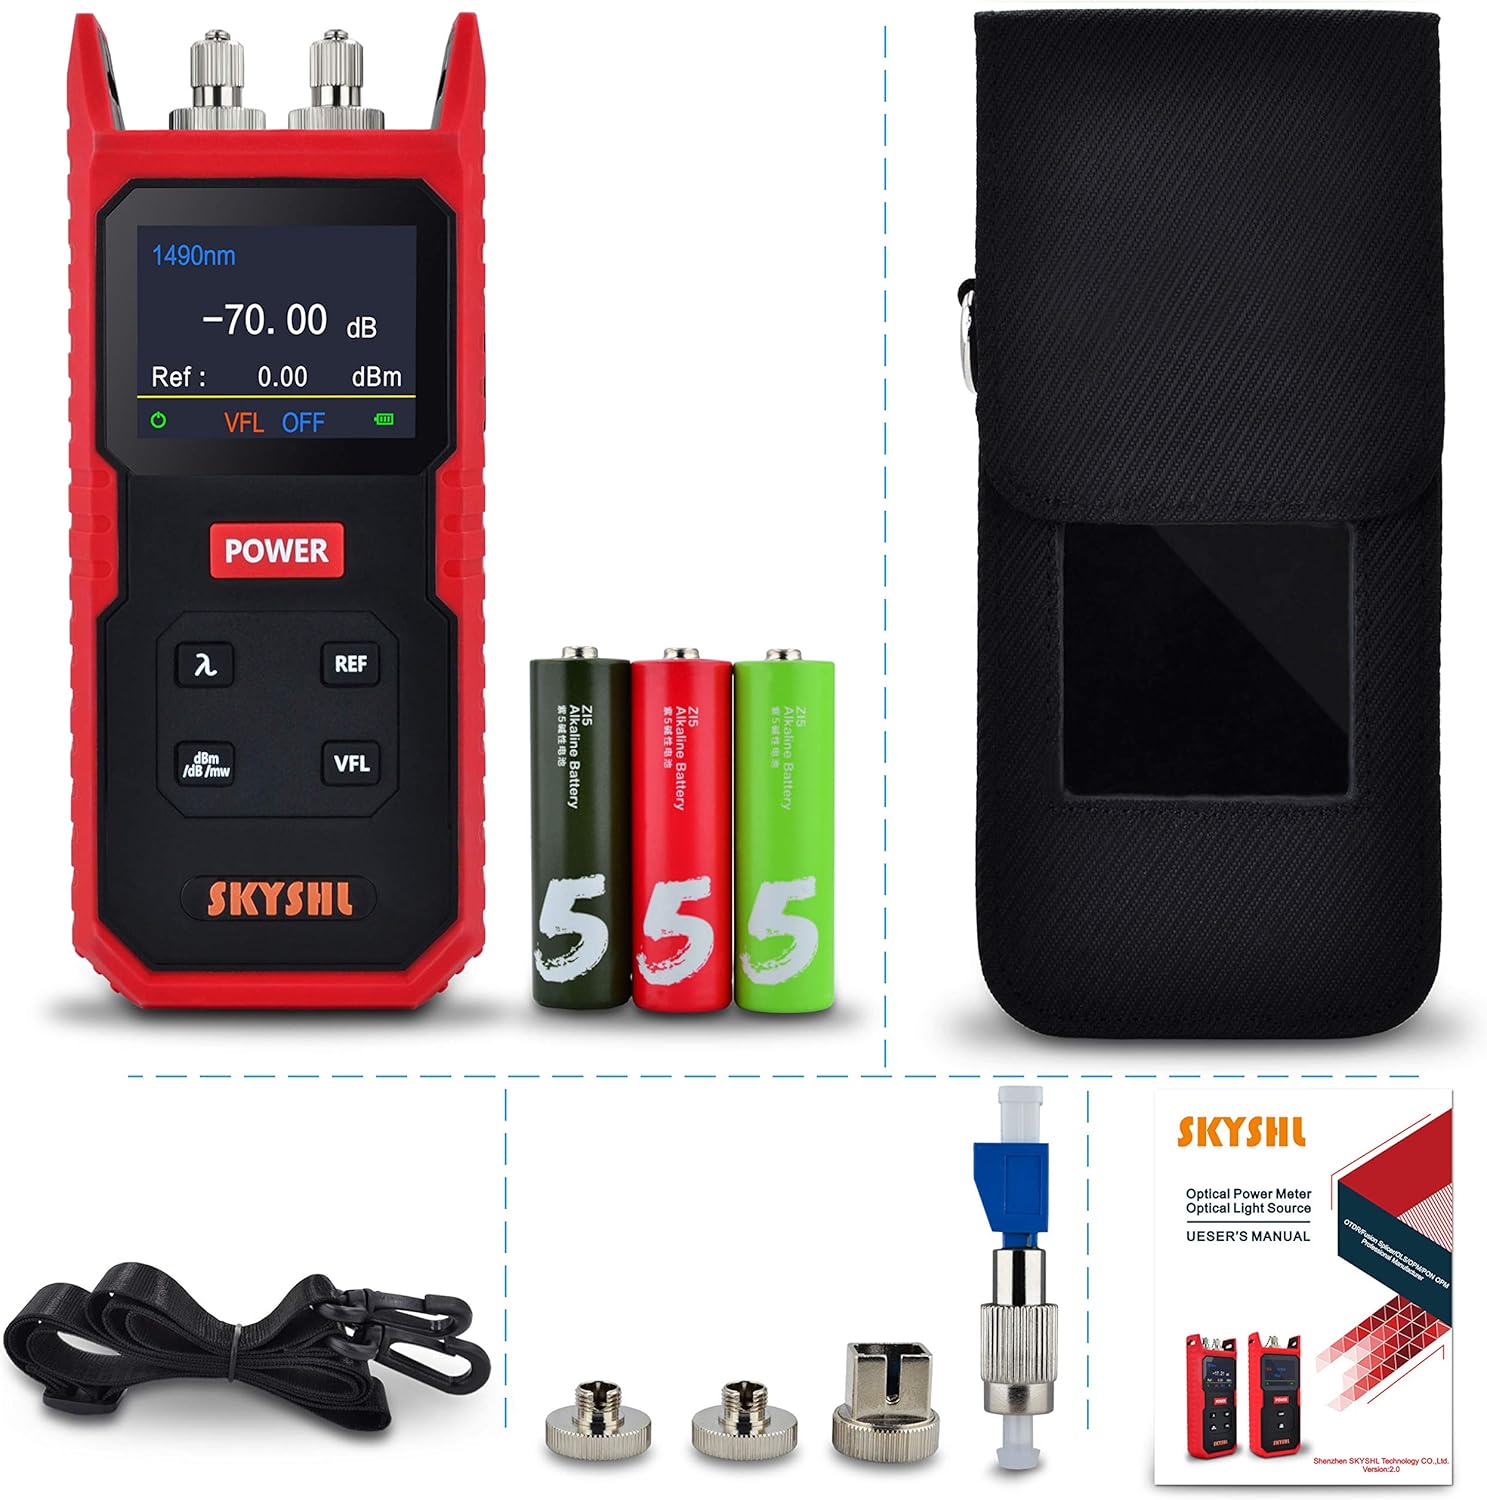
Figure 2: All components included in the SKYSHL SS101PVA package.
3. Device Layout
Familiarize yourself with the various parts and controls of your SS101PVA device.
Video 1: This video provides a visual overview of the SKYSHL SS101PVA, highlighting its key components such as the optical power meter port, VFL port, power button, and various function buttons. It also shows the battery compartment and different connector types.
Front Panel:
- Color LCD Display: Shows measurement results, selected wavelength, reference value, VFL status, and battery level.
- POWER Button: Turns the device on/off.
- λ (Wavelength) Button: Cycles through available wavelengths (850nm, 1300nm, 1310nm, 1490nm, 1550nm, 1625nm).
- REF Button: Sets the current power reading as the reference value (0dB).
- dBm/dB/mW Button: Toggles between absolute power (dBm, mW) and relative power (dB) measurement units.
- VFL Button: Activates/deactivates the Visual Fault Locator.
Top Panel:
- OPM Port: Optical Power Meter input port for fiber connection.
- VFL Port: Visual Fault Locator output port.
Rear Panel:
- Battery Compartment: Houses 3 AA batteries.

Figure 3: Side view of the device showing the OPM and VFL ports with protective caps and various adapters.

Figure 4: Rear view of the device with the battery compartment open, showing the slots for AA batteries.
4. Setup
4.1 Battery Installation
- Locate the battery compartment on the rear of the device.
- Slide the battery cover open.
- Insert three (3) AA batteries, ensuring correct polarity (+/-).
- Close the battery cover securely.
4.2 Attaching Fiber Optic Connectors
The SS101PVA comes with various interchangeable adapters. Select the appropriate adapter for your fiber optic cable.
- Remove the dust cap from the OPM or VFL port.
- Screw the desired adapter (e.g., SC, FC, LC, or universal 2.5mm) onto the port until it is finger-tight. Do not overtighten.
- Carefully insert the fiber optic cable connector into the adapter.

Figure 5: The SS101PVA device shown with its various interchangeable fiber optic adapters.
5. Operating Instructions
5.1 Power On/Off
- To turn on the device, press and hold the POWER button until the screen illuminates.
- To turn off the device, press and hold the POWER button until the screen turns off.
5.2 Optical Power Measurement (OPM)
- Power on the device.
- Connect the fiber optic cable to the OPM port using the appropriate adapter.
- Press the λ button to select the desired measurement wavelength (e.g., 1310nm, 1550nm). The selected wavelength will be displayed on the screen.
- The optical power reading will be displayed in real-time.
- To change the measurement unit (dBm, dB, mW), press the dBm/dB/mW button.
- To set a reference value for relative measurements (dB), press the REF button. The current power reading will be set as 0dB, and subsequent measurements will show the relative loss or gain.

Figure 6: The device's color display showing optical power measurements at different wavelengths.
5.3 Visual Fault Locator (VFL) Operation
- Power on the device.
- Connect the fiber optic cable to the VFL port using the appropriate adapter.
- Press the VFL button to activate the red laser. The VFL status will be indicated on the display.
- Observe the fiber for any visible red light leakage, which indicates a break or fault in the fiber.
- Press the VFL button again to turn off the laser.
Warning: Do not look directly into the VFL output port or the end of a fiber connected to the VFL, as the laser light can cause eye damage.
6. Maintenance
6.1 Cleaning Fiber Optic Connectors
Regular cleaning of fiber optic connectors is crucial for accurate measurements and to prevent damage.
- Always turn off the device before cleaning.
- Use a specialized fiber optic cleaning tool (e.g., one-click cleaner, lint-free wipes with isopropyl alcohol) to clean the connector end-faces.
- Clean both the adapter on the device and the fiber optic cable connector.
- Replace dust caps on ports when not in use to prevent contamination.
6.2 Battery Replacement and Storage
- Replace batteries when the low battery indicator appears on the display.
- If the device will not be used for an extended period, remove the batteries to prevent leakage and damage.
- Store the device in its Oxford bag in a cool, dry place, away from direct sunlight and extreme temperatures.
7. Troubleshooting
Common Issues and Solutions:
- Device does not power on:
- Check if batteries are installed correctly and have sufficient charge. Replace if necessary.
- Ensure the POWER button is pressed and held for a few seconds.
- Inaccurate OPM readings:
- Clean all fiber optic connectors and adapters thoroughly.
- Ensure the correct wavelength is selected for the measurement.
- Verify that the fiber connection is secure and free from bends or damage.
- VFL not working:
- Check battery level.
- Ensure the fiber is properly connected to the VFL port.
- Clean the VFL port and fiber connector.
- Display is dim or unreadable:
- Adjust screen brightness if available (refer to device settings, though not explicitly mentioned for this model).
- Ensure sufficient battery power.
8. Specifications
| Feature | Specification |
|---|---|
| Brand | SKYSHL |
| Model Number | SS101PVA |
| Part Number | SS101PVA-1 |
| Measurement Range | 800nm~1700nm |
| Power Measurement Range | -70~+8dBm |
| Calibrated Wavelengths | 850nm, 1300nm, 1310nm, 1490nm, 1550nm, 1625nm |
| VFL Wavelength | 650nm |
| Connectors Included | Universal 2.5mm, SC, FC, LC UPC Adapter |
| Display | 2.4-inch Color LCD |
| Power Source | 3x AA Batteries (included) |
| Material | Plastic (device casing), Oxford (bag) |
| Color | Red + Black |
| Dimensions (L x W x H) | 17.5 x 7.5 x 4 cm |
| Weight | 320 g |
| Specific Uses | Fiber Testing |
9. Warranty and Support
SKYSHL products are manufactured to high-quality standards and undergo rigorous testing. For warranty information and technical support, please refer to the contact details below.
Customer Support:
- Email: af@skyshl.net (Available 7x24h)
- Brand Store: Visit the official SKYSHL Store on Amazon for more products and information.
