
1. Introduction
This manual provides instructions for the installation and operation of the VSDISPLAY VS-RTD2556HV-V1 VGA LCD Controller Board. This board is designed to work with 30-Pin EDP interface WLED backlight LCD screens with a resolution of 1920x1080. Please read these instructions carefully before proceeding with installation.
2. Package Contents
Verify that all items listed below are included in your package:
- 1 × VGA LCD Controller Board VS-RTD2556HV-V1
- 1 × EDP Inverter Board
- 1 × 2pcs Signal Cable (E000202, E000203)
- 1 × Keyboard With Cable
Note: A power adapter is not included in the packing list. A 12Vdc, 2A or greater power adapter is required for operation.
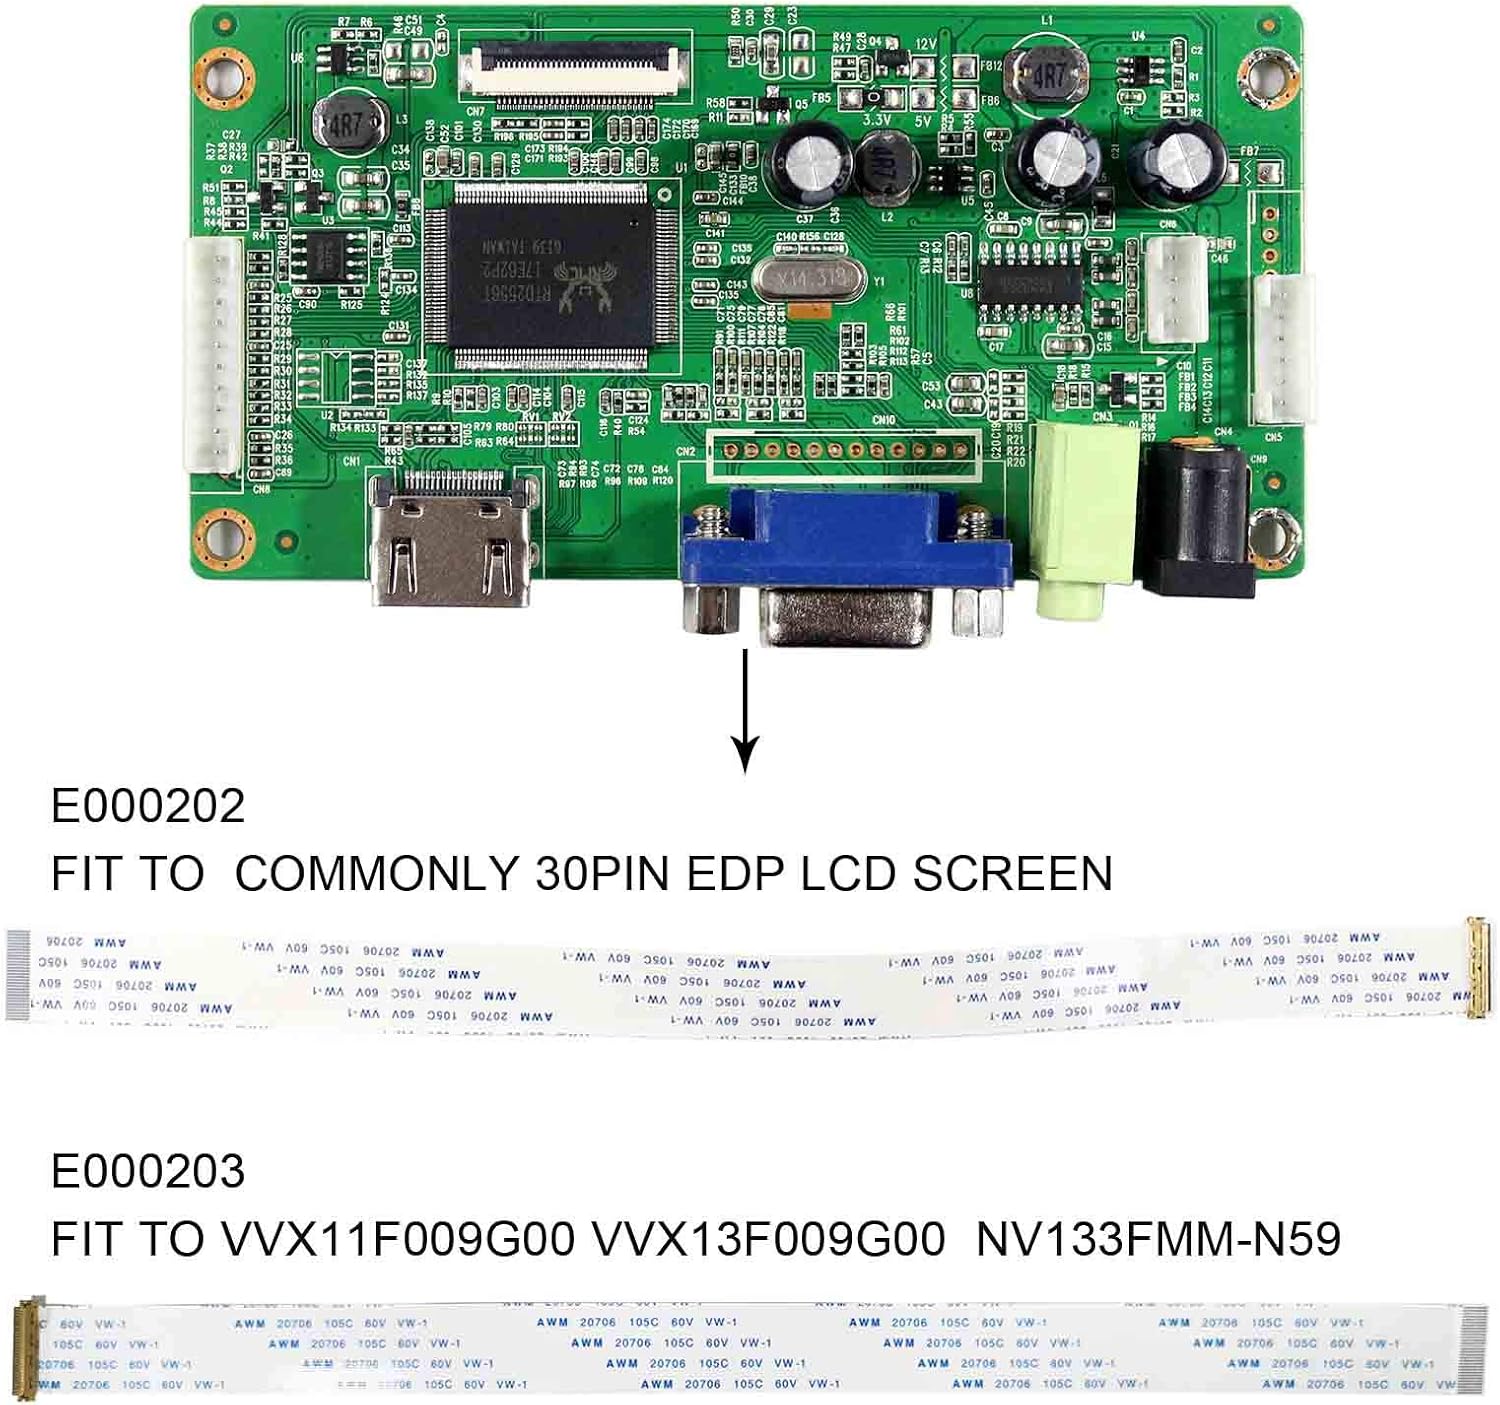
Image 2.1: Contents of the VSDISPLAY VS-RTD2556HV-V1 package, showing the main controller board, EDP inverter board, and the control keyboard with its connecting cable.
3. Product Overview
The VS-RTD2556HV-V1 controller board provides VGA connectivity for compatible EDP LCD screens. It features various ports for display, audio, and control.

Image 3.1: Detailed view of the VS-RTD2556HV-V1 controller board with labeled ports including EDP Output, Keyboard, HDMI, VGA, Earphone, Power Supply, Inverter, and Speaker connections.
- EDP Output Port: Connects to the 30-Pin EDP LCD screen.
- Keyboard: Connects to the included control keyboard for OSD menu navigation.
- HDMI: Digital video input port.
- VGA: Analog video input port.
- Earphone: Audio output jack for headphones.
- Power Supply: Input for 12Vdc power adapter.
- Inverter: Connects to the EDP Inverter Board.
- Speaker: Audio output for external speakers.
4. Setup Instructions
Follow these steps to correctly set up your VSDISPLAY VS-RTD2556HV-V1 controller board with a compatible LCD screen.
4.1 Power Requirements
The controller board requires a 12Vdc power adapter with a current output of 2A or more. Ensure the power adapter meets these specifications to prevent damage to the board or connected components.
4.2 Connecting the Components
- Connect the EDP Inverter Board: Attach the EDP Inverter Board to the designated 'Inverter' port on the main controller board.
- Connect the Signal Cables: Use the provided 2pcs Signal Cable (E000202 and E000203) to connect the controller board to your 30-Pin EDP LCD screen. Ensure proper orientation and secure connections.
- Connect the Keyboard: Attach the Keyboard with Cable to the 'Keyboard' port on the controller board. This keyboard is used for navigating the On-Screen Display (OSD) menu.
- Connect the LCD Screen: Connect the 30-Pin EDP cable from the controller board to the corresponding port on your LCD screen.
- Connect Video Source: Connect your VGA or HDMI video source to the respective input port on the controller board.
- Connect Power: Finally, connect the 12Vdc power adapter to the 'Power Supply' port on the controller board. The board will enter standby mode if no signal is detected.

Image 4.1: The VS-RTD2556HV-V1 controller board with the E000202 and E000203 signal cables, illustrating connections for 30-Pin EDP LCD screens.
4.3 Compatible LCD Screens
This controller board is compatible with various 1920x1080 resolution 30-Pin EDP WLED LCD screens, including but not limited to:
- 11.6 inch: N116HSE-EA1, N116HSE-EJ1, N116HSE-EB1, N116HSE-EAC, N116HSE-EBC
- 13.3 inch: N133HSE-EA1, N133HSE-EA3, N133HSE-EB1, N133HSE-EB3
- 14 inch: B140HAN01.0, B140HAN01.1, B140HAN01.2, B140HAN01.3
- 15.6 inch: B156HAN01.1, B156HAN01.2, B156HTN03.0, LP156WF4-SPB1, N156HGE-EA1, NV156FHM-N31, NV156FHM-N41, LP156WF4-SP, LTN156HL01, LTN156HL02-201, LTN156HL06-C01, LTN156HL07-401, LTN156HL09-401
- 17.3 inch: N173HCE-E31, N173HGE-E11, N173HGE-E21, B173HTN01.0, B173HTN01.1, LP173WF4-SPD1, LP173WF4-SPF1, LP173WF4-SPF2, LP173WF4-SPF3, LP173WF4-SPF4, LTN173HL01-401
- Also compatible with commonly 30Pin eDP LCD screens and specific models like VVX11F009G00, VVX13F009G00, NV133FMM-N59.
5. Operating Instructions
Once the controller board is powered on and connected to a compatible LCD screen and video source, you can use the included keyboard to adjust display settings.
5.1 On-Screen Display (OSD) Menu
The keyboard allows access to the OSD menu for various adjustments:
- Brightness: Adjusts the display's luminance.
- Contrast: Adjusts the difference between light and dark areas of the display.
- VOL+ / VOL-: Controls the audio output volume.
- Language: Selects the OSD menu language (English is supported).
- Other settings may include color temperature, input selection, and aspect ratio.
5.2 Audio Functionality
The board supports audio input and output:
- Audio Input: Audio can be received via the HDMI input.
- Audio Output: Connect earphones to the 'Earphone' jack or external speakers to the 'Speaker' port for audio playback.
5.3 Standby Mode
The controller board will automatically enter a standby mode (power consumption less than 0.3W) when no input signal is detected from the connected video source.
6. Maintenance
To ensure the longevity and proper functioning of your VSDISPLAY VS-RTD2556HV-V1 controller board, follow these general maintenance guidelines:
- Keep Dry: Avoid exposing the board to moisture or liquids, as this can cause short circuits and damage.
- Clean Gently: If cleaning is necessary, use a soft, dry cloth. Do not use harsh chemicals or abrasive materials.
- Handle with Care: Electronic components are sensitive. Avoid dropping the board or subjecting it to strong impacts.
- Proper Ventilation: Ensure the board is installed in an environment with adequate airflow to prevent overheating.
7. Troubleshooting
If you encounter issues with your controller board, refer to the following common problems and solutions:
| Problem | Possible Cause | Solution |
|---|---|---|
| No display / Black screen | No power, incorrect power adapter, loose cable connections, incompatible LCD screen, no video signal. | Verify 12Vdc >2A power adapter. Check all cable connections (EDP, inverter, signal). Ensure LCD screen is compatible. Confirm video source is active and connected. |
| No audio output | Loose earphone/speaker connection, volume too low, no audio signal from source. | Check earphone/speaker connections. Adjust volume using OSD menu. Ensure video source is sending audio. |
| OSD menu not appearing or unresponsive | Keyboard not connected properly, faulty keyboard. | Ensure keyboard cable is securely connected to the 'Keyboard' port. Test with another compatible keyboard if available. |
| Image distortion or flickering | Loose signal cable, faulty signal cable, incompatible screen timing. | Check EDP signal cable connection. Ensure the LCD screen is fully compatible with the board's output. |
8. Specifications
| Feature | Detail |
|---|---|
| Model | VS-RTD2556HV-V1 |
| Input Power Adapter | 12Vdc, >2A |
| Standby Model Power | <0.3W |
| Compatible LCD Interface | 30-Pin EDP WLED LCD Screen |
| Supported Resolution | 1920x1080 |
| Video Inputs | VGA, HDMI |
| Audio Input | Via HDMI |
| Audio Output | Earphone, Speaker |
| OSD Functions | Brightness, Contrast, VOL+, VOL-, Language, etc. |
| Board Size | 107mm x 55mm x 16mm |
| Item Weight | 0.08 Kilograms |
9. Warranty and Support
9.1 Warranty Information
VSDISPLAY products typically come with a manufacturer's warranty covering defects in materials and workmanship. Please refer to the specific warranty terms provided at the time of purchase or contact VSDISPLAY customer service for detailed information regarding your product's warranty period and coverage.
9.2 Technical Support
For technical assistance, troubleshooting beyond this manual, or inquiries regarding product compatibility, please contact VSDISPLAY customer support. You can usually find contact information on the VSDISPLAY official website or through the retailer where the product was purchased.


