Introduction
This instruction manual provides essential information for the safe and effective operation, maintenance, and troubleshooting of your Makita GA4550 Angle Grinder. Please read this manual thoroughly before using the tool to ensure proper handling and to prevent injury or damage.

Figure 1: Makita GA4550 Angle Grinder. This image shows the complete angle grinder assembly, including the main body, side handle, and a grinding disc attached.
Important Safety Instructions
Always follow basic safety precautions when using electrical tools to reduce the risk of fire, electric shock, and personal injury. Keep this manual for future reference.
- Work Area Safety: Keep the work area clean and well-lit. Cluttered or dark areas invite accidents. Do not operate power tools in explosive atmospheres, such as in the presence of flammable liquids, gases, or dust.
- Electrical Safety: Power tool plugs must match the outlet. Never modify the plug in any way. Do not expose power tools to rain or wet conditions.
- Personal Safety: Always wear eye protection. Use hearing protection when operating the tool for extended periods. Wear a dust mask if operations create dust. Dress properly; avoid loose clothing or jewelry.
- Tool Use and Care: Do not force the power tool. Use the correct power tool for your application. Disconnect the plug from the power source before making any adjustments, changing accessories, or storing power tools.
- Specific Grinder Safety: Ensure the guard is properly positioned and secure before operation. Use only grinding wheels with the correct size and speed rating for this tool. Always hold the tool firmly with both hands during operation.
Product Components
The Makita GA4550 Angle Grinder consists of several key components:
- Main Body: Houses the motor and internal mechanisms.
- Gear Housing: The metal head where the spindle and disc are attached.
- Side Handle: Provides additional grip and control during operation. Can be attached to either side of the gear housing.
- Wheel Guard: Protects the user from sparks, debris, and accidental contact with the rotating disc.
- Spindle Lock Button: Used to lock the spindle for easy disc changes.
- Paddle Switch: The main power switch for operating the grinder.
- Power Cord: Connects the tool to an AC power source.

Figure 2: Close-up view of the grinder's main body, highlighting the Makita branding and the robust construction.

Figure 3: Rear section of the grinder, showing the ventilation slots designed for motor cooling and the power cord entry point.
Setup and Assembly
Before operating the angle grinder, ensure all components are correctly assembled.
1. Attaching the Side Handle
The side handle can be screwed into either the left or right side of the gear housing, depending on user preference and application.
- Locate the threaded holes on both sides of the gear housing.
- Screw the side handle clockwise into the desired hole until it is securely tightened.
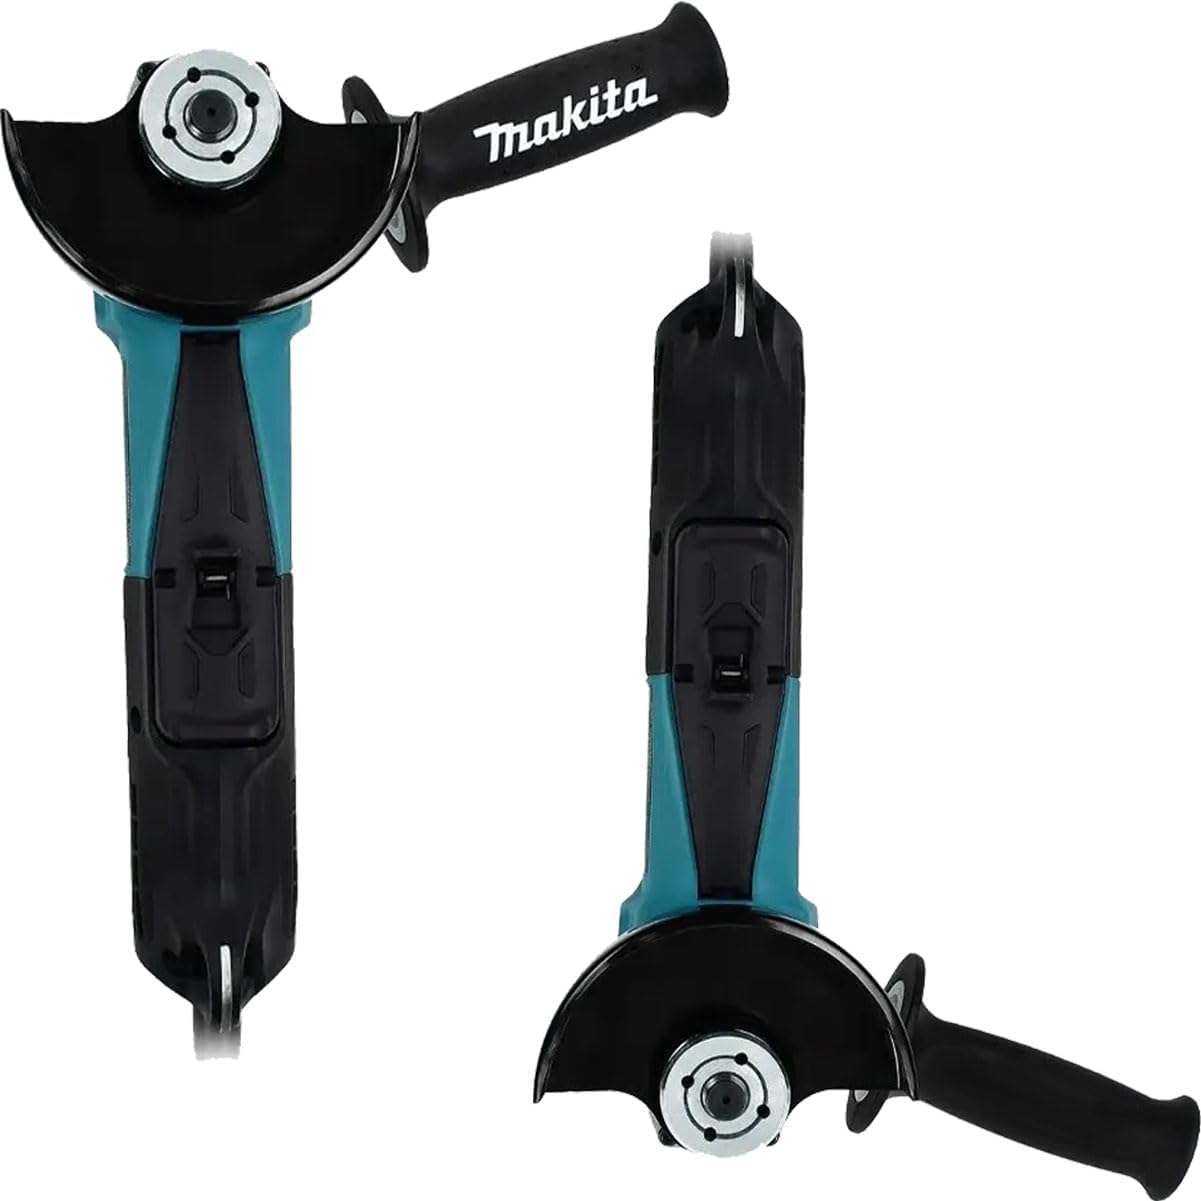
Figure 4: Top and bottom views illustrating the available attachment points for the side handle on the grinder's gear housing.

Figure 5: A user's hand demonstrating the proper grip on the side handle once it is attached to the angle grinder.
2. Attaching and Adjusting the Wheel Guard
The wheel guard is essential for safety and must be properly installed and adjusted.
- Ensure the grinder is unplugged from the power source.
- Place the wheel guard over the gear housing collar.
- Rotate the guard to the desired position, ensuring it covers the maximum possible area of the grinding disc, especially towards the user.
- Secure the guard by tightening its locking mechanism. Refer to the inset image for the locking mechanism.

Figure 6: Hands demonstrating the adjustment of the wheel guard. The inset shows a close-up of the guard's locking lever or screw for secure positioning.
3. Installing/Changing Grinding Discs
Always use discs appropriate for the material and application, and ensure they are rated for the grinder's speed.
- Unplug the tool.
- Press and hold the spindle lock button.
- Using the provided wrench, loosen the flange nut by turning it counter-clockwise.
- Remove the old disc (if any) and clean the flanges.
- Place the new disc onto the inner flange, ensuring it is centered.
- Screw the outer flange nut back on and tighten it firmly with the wrench while holding the spindle lock button.
Operating Instructions
Follow these steps for safe and effective operation of your angle grinder.
1. Powering On/Off
The Makita GA4550 features a paddle switch for operation.
- To turn ON: Grip the tool firmly and depress the paddle switch. The tool will start.
- To turn OFF: Release the paddle switch. The tool will stop.

Figure 7: Detailed view of the paddle switch mechanism, which controls the power to the grinder.
2. Grinding Techniques
Always hold the grinder firmly with both hands. Apply light, even pressure. Do not force the tool.
- Surface Grinding: Hold the grinder at a 15-30 degree angle to the workpiece. Move the grinder back and forth evenly across the surface.
- Cutting: For cutting applications, use a thin cutting disc. Hold the grinder perpendicular to the workpiece and make straight, controlled cuts. Ensure the workpiece is securely clamped.
- Deburring: Use a grinding disc or flap disc to smooth rough edges after cutting.

Figure 8: The angle grinder in operation, demonstrating typical use for grinding metal, with sparks visible. Always wear appropriate personal protective equipment.
Maintenance
Regular maintenance ensures the longevity and safe operation of your Makita GA4550 Angle Grinder.
- Cleaning: Regularly clean the ventilation openings to prevent overheating. Use a soft cloth to wipe down the tool. Do not use water or chemical cleaners.
- Carbon Brushes: The motor uses carbon brushes. If the motor power decreases or the tool stops, the carbon brushes may need replacement. This should be performed by a qualified service technician.
- Power Cord: Inspect the power cord for any damage before each use. If damaged, have it repaired by a qualified professional.
- Storage: Store the tool in a dry, secure place out of reach of children.
Troubleshooting
This section addresses common issues you might encounter with your angle grinder.
| Problem | Possible Cause | Solution |
|---|---|---|
| Tool does not start. | No power supply; faulty power cord; worn carbon brushes. | Check power outlet and cord. If cord is damaged, seek professional repair. Have carbon brushes inspected/replaced by a service center. |
| Excessive sparking from motor. | Worn carbon brushes; dirty commutator. | Have carbon brushes and commutator inspected by a qualified technician. |
| Tool overheats. | Blocked ventilation slots; continuous heavy use. | Clean ventilation slots. Allow tool to cool down during prolonged use. Reduce load. |
| Disc wobbles or vibrates excessively. | Improperly installed disc; damaged disc; worn flanges. | Reinstall disc correctly. Replace damaged disc. Inspect and replace worn flanges. |
For issues not listed here, or if solutions do not resolve the problem, contact a Makita authorized service center.
Specifications
| Feature | Detail |
|---|---|
| Model Number | GA4550/2 |
| Brand | Makita |
| Disc Diameter | 115mm (4-1/2'') |
| Power Source | AC (Alternating Current) |
| Voltage | 240 Volts (Note: Product description mentions 220V, specifications state 240V. Always verify with product label.) |
| Power Input | 1300W (from product description) |
| Switch Type | Paddle Switch |
| Item Weight | 2.5 Kilograms |
| Product Dimensions | 35 x 7.5 x 7.5 cm |
| Material | Metal, Plastic |
| Included Components | Angle Grinder, 115mm, 1300W, 220V, Paddle Switch (as per product description) |
| Country of Origin | China |
Note: The specification data provided indicates "12V batteries required" and "Batteries Included? No", "Batteries Required? No". This appears to be a data discrepancy as the tool is listed as AC powered (240 Volts). Please refer to the product label for definitive power requirements.
Warranty and Support
For warranty information, please refer to the warranty card included with your product or visit the official Makita website for your region. Keep your purchase receipt as proof of purchase.
For technical support, service, or to locate an authorized service center, please contact Makita customer service or visit their official website. Always use genuine Makita replacement parts for repairs.
Official Makita Website: www.makita.com


