1. Important Safety Instructions
Read all instructions carefully before using the appliance. Keep this manual for future reference.
- Electrical Safety: Ensure the voltage indicated on the appliance matches your local power supply before connecting. Do not operate with a damaged cord or plug.
- Placement: Place the dehumidifier on a stable, level surface. Maintain adequate clearance around the unit for proper airflow (at least 20 cm from walls or furniture). Do not block air inlets or outlets.
- Water Handling: Always empty the water tank before moving the unit. Do not drink the collected water.
- Refrigerant Gas (R290): This appliance contains R290 refrigerant gas. R290 is a flammable gas. Handle with care and ensure the appliance is not damaged during transport or installation. Do not attempt to service the unit yourself if you suspect a refrigerant leak.
- Children and Pets: Keep the appliance out of reach of children and pets. Supervise children to ensure they do not play with the appliance.
- Cleaning: Disconnect the power supply before cleaning or performing any maintenance.
2. Product Overview
2.1 Components
- Control Panel
- Air Inlet (rear)
- Air Outlet (top/front)
- Water Collection Tank (front/bottom)
- Removable Air Filter (side/rear)
- Casters for easy movement
2.2 Control Panel

Image: Top view of the control panel.
The control panel features a digital display and touch-sensitive buttons for various functions:
- Power Button: Turns the unit on or off.
- Humidity Display: Shows the current ambient humidity level and the set target humidity.
- Humidity Setting Buttons: Adjust the desired humidity level.
- Fan Speed Button: Selects fan speed (if available).
- Timer Button: Sets the 24-hour timer for automatic operation.
- Water Full Indicator: Illuminates when the water tank is full, triggering automatic shut-off.
3. Setup
3.1 Unpacking
Carefully remove the dehumidifier from its packaging. Retain the packaging materials for future storage or transport. Check for any signs of damage. If the unit appears damaged, do not operate it and contact customer support.
3.2 Placement
For optimal performance, place the dehumidifier in a central location within the room. Ensure the room size does not exceed 25 square meters for effective dehumidification.
- Place the unit on a firm, level surface to prevent vibrations and ensure proper water collection.
- Allow at least 20 cm of space around the air inlet and outlet to ensure unrestricted airflow.
- Avoid placing the unit near heat sources or in direct sunlight.
3.3 Power Connection
Plug the power cord into a grounded electrical outlet. Ensure the outlet meets the power requirements of the dehumidifier (210W, 240V).
4. Operating Instructions
4.1 Power On/Off
Press the Power button on the control panel to turn the dehumidifier on or off. The unit will start operating in its default mode or resume previous settings.
4.2 Setting Desired Humidity Level
The dehumidifier features a humidity sensor that detects the ambient humidity. Use the humidity setting buttons to adjust your desired humidity level. The unit will operate until this level is reached, then cycle on and off to maintain it. Recommended humidity levels are typically between 40% and 60%.
4.3 Using the Timer Function
Press the Timer button to set the 24-hour timer. This allows you to program the unit to turn on or off automatically after a set number of hours, providing flexible operation.
4.4 Water Tank Management
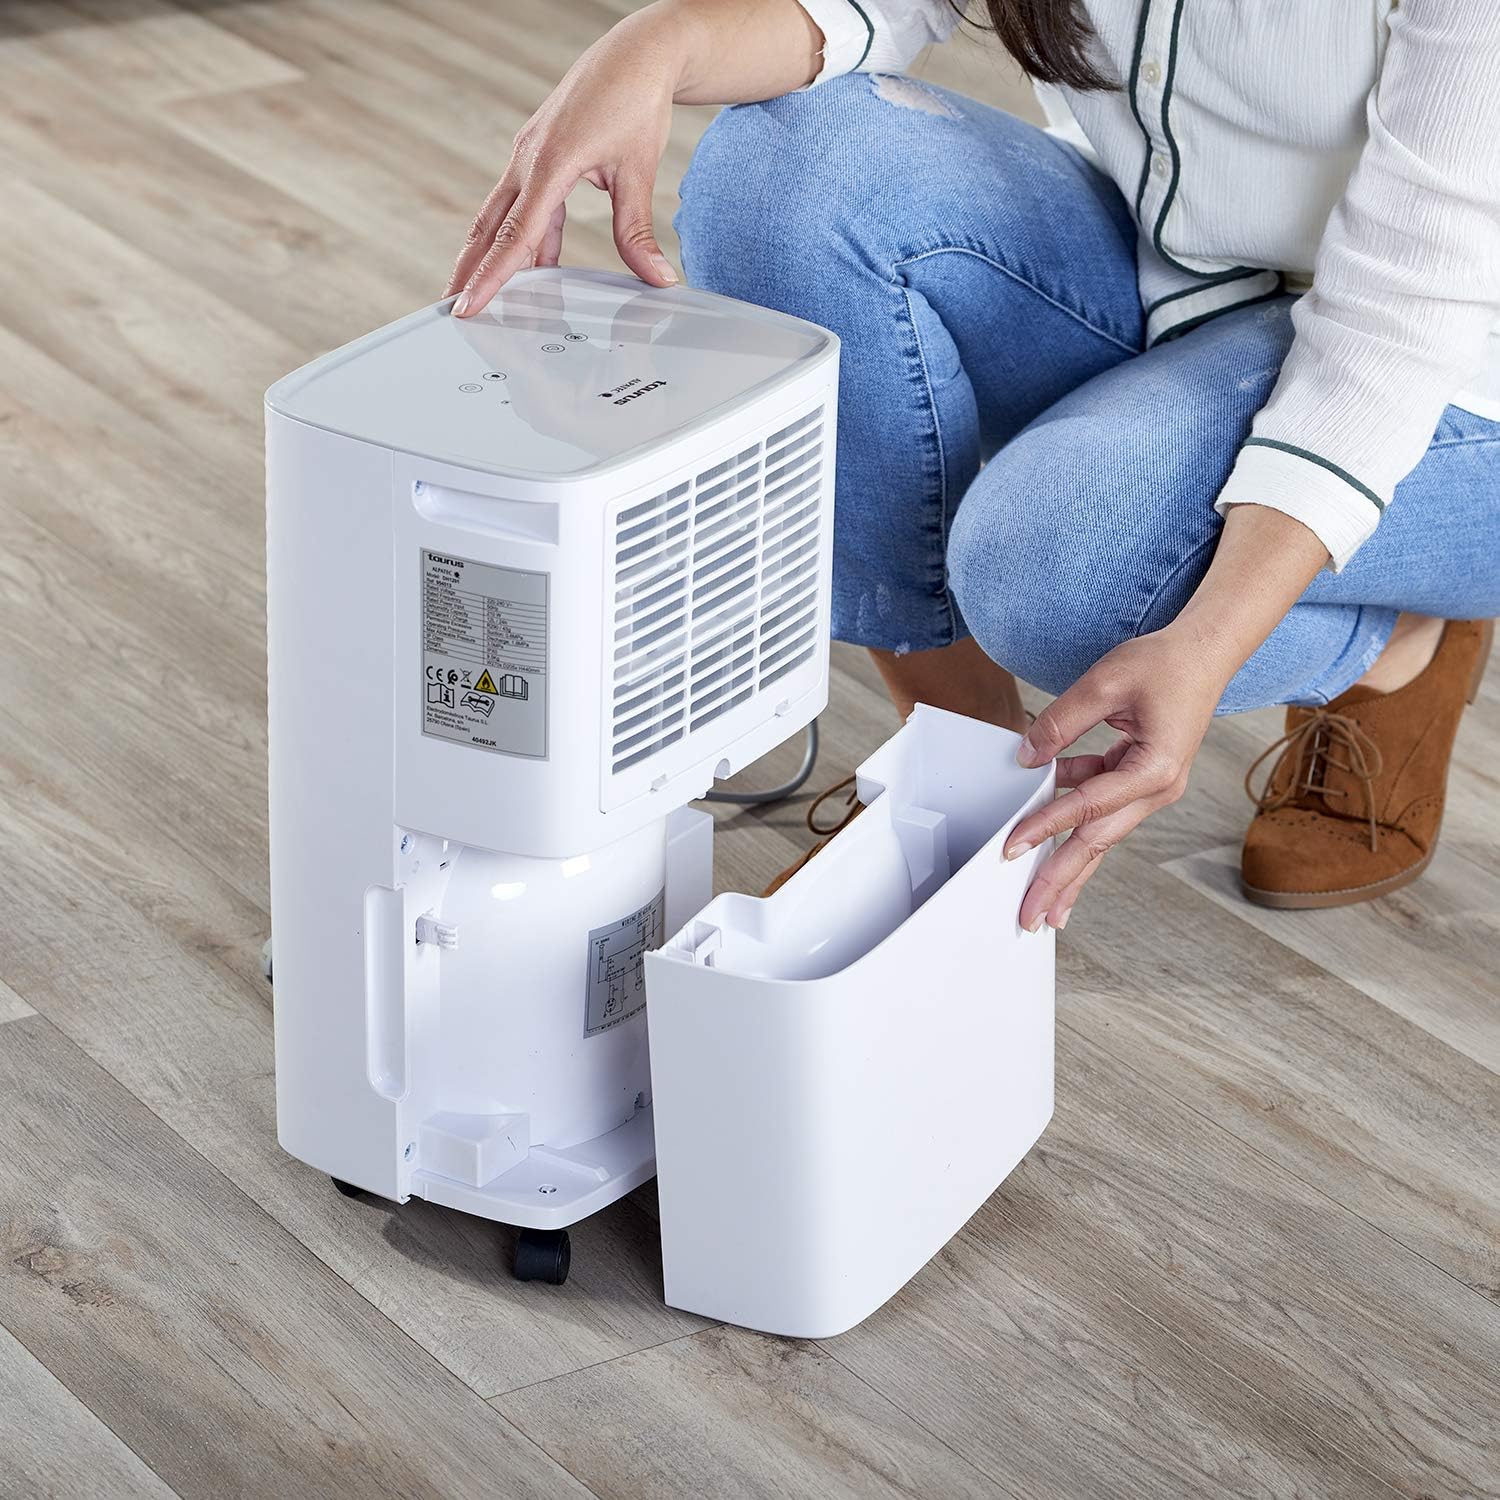
Image: Removing the water collection tank.
- Water Full Indicator: The dehumidifier has a 2.5-liter water tank. When the tank is full, the Water Full Indicator light will illuminate, and the unit will automatically shut off to prevent overflow.
- Emptying the Tank: Carefully pull out the water tank from the front of the unit. Dispose of the collected water. Reinsert the empty tank firmly until it clicks into place. The unit will resume operation.
- Continuous Drainage: For continuous operation without needing to empty the tank, connect a drainage hose (not included) to the continuous drainage outlet (usually located at the back or side of the unit). Ensure the hose is sloped downwards to allow gravity drainage into a suitable receptacle.
5. Maintenance
5.1 Cleaning the Air Filter

Image: Removing the air filter for cleaning.
Regular cleaning of the air filter is essential for efficient operation.
- Turn off the dehumidifier and unplug it from the power outlet.
- Locate the air filter cover (typically on the side or rear of the unit) and remove it.
- Carefully pull out the air filter.
- Wash the filter with warm, soapy water or vacuum it to remove dust and debris.
- Rinse thoroughly and allow the filter to air dry completely before reinserting.
- Place the dry filter back into its slot and secure the cover.
5.2 Cleaning the Unit Exterior
Wipe the exterior of the dehumidifier with a soft, damp cloth. Do not use abrasive cleaners, solvents, or harsh chemicals, as these can damage the surface.
5.3 Automatic Defrost Control
The dehumidifier is equipped with an automatic defrost function. If frost builds up on the evaporator coils, the unit will temporarily stop dehumidifying and run the fan to melt the frost. This is a normal operation and ensures efficient performance in cooler environments.
6. Troubleshooting
Before contacting customer service, review the following common issues and solutions:
| Problem | Possible Cause | Solution |
|---|---|---|
| Unit does not turn on | No power supply; Power cord not plugged in; Water tank full or not correctly inserted. | Check power connection; Empty and reinsert water tank correctly. |
| No dehumidification or low efficiency | Air filter clogged; Room temperature too low; Air inlet/outlet blocked; Desired humidity level already reached. | Clean the air filter; Ensure room temperature is above 5°C; Clear obstructions; Lower the desired humidity setting. |
| Water Full Indicator is on, but tank is not full | Water tank not correctly positioned; Float switch malfunction. | Remove and reinsert the water tank firmly; If problem persists, contact support. |
| Unusual noise during operation | Unit not on a level surface; Internal component issue. | Ensure unit is on a flat, stable surface; If noise is excessive or persistent, discontinue use and contact support. |
7. Specifications
7.1 Technical Data
| Feature | Detail |
|---|---|
| Brand | Taurus |
| Model Number | 954513000 (PLEASANT) |
| Color | White |
| Dimensions (L x W x H) | 34.5 x 20 x 10 cm |
| Weight | 9.5 Kilograms |
| Water Tank Capacity | 2.5 Liters |
| Dehumidification Capacity | Up to 12 liters/24 hours |
| Power | 210 Watts |
| Voltage | 240V |
| Material | Plastic |
| Energy Class | A to G |
| Recommended Floor Area | Up to 25 square meters |
| Special Features | Humidity level detector, 24h timer, R290 refrigerant gas, Easy maintenance, Washable filters, Automatic defrost |
8. Warranty and Support
This product is covered by a manufacturer's warranty. Please refer to the warranty card included with your purchase or contact your retailer for specific warranty terms and conditions. For technical support, spare parts, or service inquiries, please contact the Taurus customer service department or your local distributor. Information regarding spare parts availability is not provided in this manual.


