
BOBLOV T5
BOBLOV N9 Mini Body Camera User Manual
Model: T5
1. Introduction
The BOBLOV N9 Mini Body Camera is a compact and portable full HD body-worn camera designed for various applications, including law enforcement, security, outdoor sports, and personal protection. Despite its small size, it offers comprehensive features such as 1296P video recording, 4000-pixel photo capture, powerful infrared night vision, and long battery life.
This manual provides detailed instructions on how to set up, operate, and maintain your BOBLOV N9 Mini Body Camera to ensure optimal performance and longevity.

Figure 1.1: Front and back view of the BOBLOV N9 Mini Body Camera, showcasing its compact design and integrated screen.

Figure 1.2: The BOBLOV N9 Mini Body Camera is significantly smaller and lighter (96g) compared to other body cameras (250g), making it highly portable.
2. Setup
2.1 Initial Charging
Before first use, fully charge the camera's internal 2400 mAh lithium polymer battery. Connect the camera to a power source using the provided USB cable. The charging indicator will show the charging status. A full charge ensures maximum recording time.
- 1296P Recording: Up to 8 hours
- 1080P Recording: Up to 10 hours
- 720P Recording: Up to 12 hours
- 480P Recording: Up to 14 hours
- Standby Time: Up to 72 hours

Figure 2.1: Battery capacity and estimated recording times for the BOBLOV N9 Mini Body Camera.
2.2 Memory Card Installation
The BOBLOV N9 Mini Body Camera uses an external Micro SD card for storage. It supports capacities from 32GB up to 256GB. Ensure the camera is powered off before inserting or removing the Micro SD card.
- Locate the Micro SD card slot on the side of the camera.
- Gently insert the Micro SD card into the slot until it clicks into place.
- To remove, push the card in slightly until it springs out.

Figure 2.2: The camera supports external Micro SD cards up to 256GB for flexible storage.
2.3 Attaching the Clip
The camera comes with rotatable clips for secure attachment to clothing or gear. Choose the appropriate clip (short or long) based on your preference and intended use.
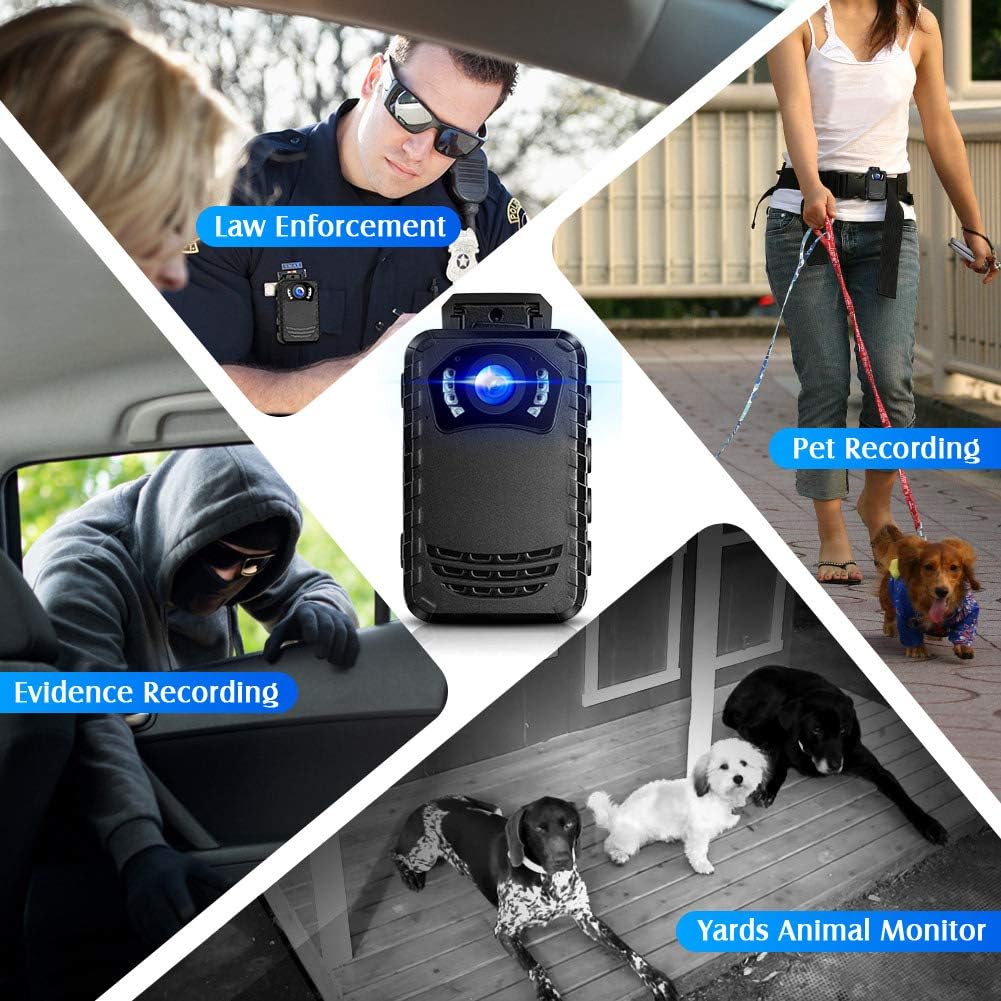
Figure 2.3: The rotatable clips allow for flexible mounting options on uniforms or belts.
3. Operating Instructions
3.1 Power On/Off
To power on the camera, press and hold the Power button until the screen illuminates. To power off, press and hold the Power button again until the device shuts down.
3.2 Video Recording
Press the Record button to start video recording. Press it again to stop. The camera supports various resolutions including 1296P, 1080P, 720P, and 480P. The default resolution is 1296P Full HD.
- Video Resolution: 1296P/1080P/720P/480P
- Encoding Format: H.264
- Video Format: MP4
3.3 Photo Capture
In standby mode, press the Photo button to capture still images. The camera supports up to 4000M (40-megapixel equivalent) photo resolution.
- Photo Resolution: 4000M
- Image Format: JPEG
3.4 Night Vision
The camera features manual infrared night vision with 6 built-in high-intensity IR LEDs. This allows for clear footage capture up to 9.8 meters (32 feet) in low-light conditions, with facial detection capabilities.
3.5 Menu Settings and Playback
Navigate the camera's settings and review recorded footage using the 1.54-inch LTPS TFT LCD screen. Use the menu buttons to access various options such as resolution, loop recording, stealth mode, and file management.

Figure 3.1: The 1.5-inch LCD screen allows for easy playback and menu navigation.

Figure 3.2: Key features include 1296P/1080P recording, manual night vision, long video fragments, stealth mode, 165-degree lens, and loop recording.
3.6 Blue-Red Flash Warning
The camera is equipped with blue-red flash warning lights that can be activated in emergency situations. Long press the designated button for 3 seconds to activate this feature.

Figure 3.3: The blue-red flash warning feature can be used for signaling in emergencies.
3.7 Data Transfer
Connect the camera to a computer using the USB 2.0 cable to transfer recorded files. The camera will appear as a removable disk, allowing you to access and manage your video and photo files directly.
The package also includes two USB adapters for direct Micro SD card access, allowing you to connect the card to a PC as a USB drive.
4. Maintenance
4.1 Cleaning
Use a soft, dry cloth to clean the camera body and lens. Avoid using harsh chemicals or abrasive materials that could damage the device. Ensure the USB port cover is properly sealed to prevent dust and moisture ingress.
4.2 Storage
Store the camera in a cool, dry place away from direct sunlight and extreme temperatures. If storing for extended periods, ensure the battery is partially charged (around 50%) to preserve its lifespan.
4.3 Battery Care
To maximize battery life, avoid fully discharging the battery frequently. Recharge the camera when the battery level is low. If the camera will not be used for a long time, charge it every 3-6 months to prevent deep discharge.
5. Troubleshooting
| Problem | Possible Cause | Solution |
|---|---|---|
| Camera does not power on. | Low battery; device frozen. | Charge the battery. If frozen, perform a soft reset by pressing and holding the power button for 10-15 seconds. |
| Cannot record video/take photos. | Memory card full or not inserted correctly; incorrect mode. | Check memory card status and free up space. Reinsert the card. Ensure the camera is in the correct recording mode. |
| Poor video/image quality. | Lens is dirty; low light conditions without IR; incorrect resolution setting. | Clean the lens. Activate night vision in low light. Adjust video resolution in settings. |
| Battery drains quickly. | Frequent use of IR or high resolution; aging battery. | Reduce IR usage or lower resolution if extended recording is needed. Ensure proper charging cycles. |
| Buttons are sticking or unresponsive. | Debris under buttons; manufacturing defect. | Gently clean around the buttons. If the issue persists, contact customer support. |
6. Specifications
| Feature | Detail |
|---|---|
| Model Number | T5 |
| Dimensions (LxWxH) | 5.59 x 2.29 x 7.37 cm (2.2 x 0.9 x 2.9 inches) |
| Weight | 64 grams (0.14 lbs) |
| Lens Angle | 165 Degrees |
| Screen | 1.54" LTPS TFT LCD |
| Video Resolution | 1296P/1080P/720P/480P |
| Video Encoding Format | H.264 |
| Video Format | MP4 |
| Photo Resolution | 4000M (40 Megapixels) |
| Image Format | JPEG |
| Audio Format | WAV |
| Infrared Night Vision | Supported (up to 10 meters / 32 feet) |
| USB Type | USB 2.0 |
| Battery | 2400 mAh Lithium Polymer |
| Continuous Recording Time | 1296P ≥ 8H, 1080P ≥ 10H, 720P ≥ 12H, 480P ≥ 14H (IR off) |
| Standby Time | ≥ 72 hours |
| Memory Support | External Micro SD (TF) card 32GB/64GB/128GB/256GB |
| Compatible Devices | Laptop, Desktop Computer |
| Power Source | Battery Powered |
| Controller Type | Button |
| Wireless Communication Technology | Wi-Fi |
| Recommended Use | Outdoor Security |
7. Warranty and Support
For warranty information and customer support, please refer to the documentation provided with your purchase or contact the seller directly. The standard return policy allows for returns within 30 days of receipt if you change your mind, or for defective/damaged products.
For direct support, you may contact the BOBLOV IT Store, the seller of this product.
No official product videos were found for this model from the seller.
Related documentsT5


Ask a question about this manual
Ask about setup, troubleshooting, compatibility, parts, safety, or missing instructions. Manuals+ will review the question and use this page’s manual context to help answer it.