
1. Introduction
The EACHPAI K200 is a high-definition dual-lens car camera designed to record both front and rear views of your vehicle. It features a 3-inch IPS screen, built-in GPS, Wi-Fi connectivity, and a super-capacitor for reliable operation. Key functions include loop recording, G-sensor collision detection, 24-hour parking monitoring, motion detection, and Wide Dynamic Range (WDR) for clear video quality in various lighting conditions.

Image: The EACHPAI K200 dashcam mounted in a vehicle, highlighting its core features.
2. Package Contents
Please verify that all items listed below are included in your package:
- 1 x EACHPAI K200 Front Car Recorder
- 1 x Small 1080P Rear Lens
- 1 x Suction Cup Bracket with Built-in GPS
- 1 x Car Charger (for cigarette lighter)
- 1 x 6M Connect Wire for Rear Camera
- 1 x User Manual
- 1 x Quick Start Guide
- 1 x Cleaning Cloth
- 3M Adhesive

Image: All components included in the EACHPAI K200 product package.
3. Setup
3.1 Memory Card Preparation
It is recommended to use a Class 10 or higher speed memory card. The device supports memory cards up to 128GB. Please format the memory card within the dashcam settings before initial use to ensure proper functionality.
3.2 Physical Installation
- Mount the Front Camera: Attach the suction cup bracket with built-in GPS to your car's windshield, ensuring it does not obstruct your view. Secure the EACHPAI K200 front camera to the bracket.
- Install the Rear Camera: Mount the small rear lens at the back of your vehicle. Connect the rear camera to the front dashcam using the provided 6-meter connection wire. Route the cable discreetly to avoid interference.
- Connect Power: Plug the car charger into your vehicle's cigarette lighter socket and connect the other end to the front dashcam. Ensure the power cord is securely connected. The working voltage of the recorder is 5V.

Image: Visual guide for installing the front and rear cameras in a vehicle.
4. Operating Instructions
4.1 Basic Operation
The dashcam features six control buttons on the screen:
- Up / Microphone Off: Navigates up in menus or toggles microphone.
- Footage Switching: Switches between front, rear, or picture-in-picture views.
- Down / Protect File: Navigates down in menus or manually protects current recording.
- Menu: Accesses settings menu. Note: The menu button cannot be pressed during active recording; recording must be paused first.
- OK / Pause: Confirms selections or pauses/resumes recording.
- Mode Choose: Switches between video, photo, and playback modes.
A red lamp in the lower left corner of the recorder indicates power connection. If the lamp is flickering, it indicates that recording is in progress.
4.2 Recording Modes and Features
- Dual Lens Recording: When both front and rear lenses are used simultaneously, the resolution for each will be 1080P@30fps. The device will generate two separate video files for the front and rear recordings.
- Loop Recording: This feature ensures continuous recording by overwriting the oldest footage with new recordings once the memory card is full. Footage locked by the G-sensor or manual protection will not be overwritten.
- G-Sensor: The built-in G-sensor automatically detects sudden shakes or collisions. Upon detection, it locks the current video footage to prevent it from being overwritten by loop recording.
- 24H Parking Monitor: To enable 24-hour parking monitoring, the dashcam requires a continuous power supply. This can be achieved by connecting a hardwire kit to the car's power system (professional installation recommended) or by using a high-power power bank. This allows the dashcam to monitor your car's surroundings even when the vehicle is parked and turned off.
- Motion Detection: When activated, the dashcam will begin recording if it detects movement in front of the camera. Recording will pause if the frame remains completely still for 10 seconds and will resume when motion is detected again. Activate this feature according to your needs.
- WDR (Wide Dynamic Range): This technology enhances video quality by balancing exposure in scenes with high contrast, ensuring clear recordings in both bright and dark areas simultaneously.
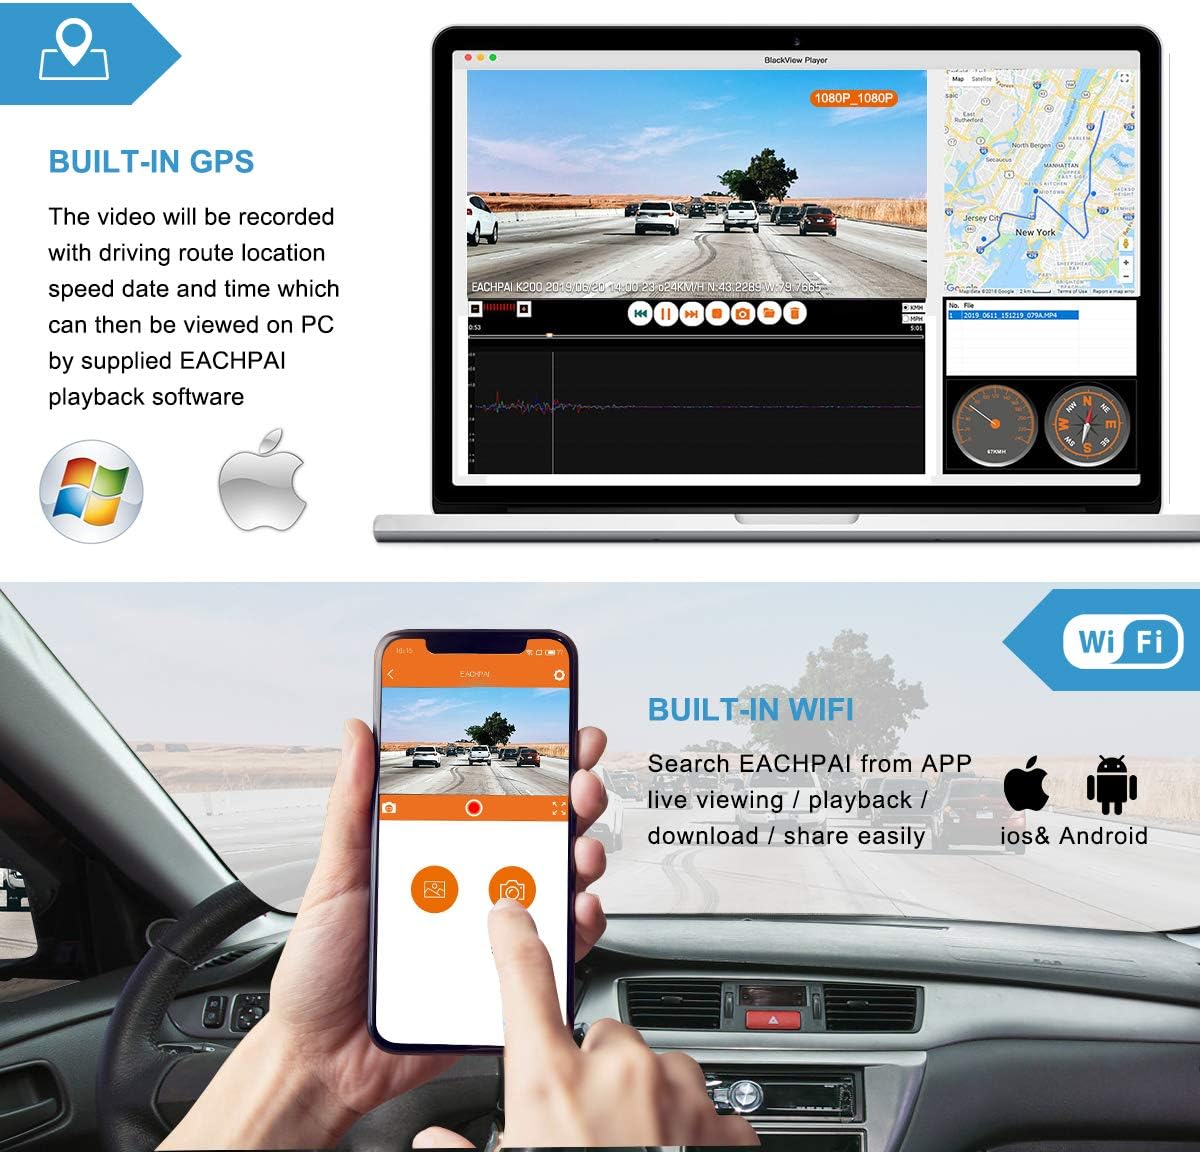
Image: Explanations of key recording features including Loop Recording, G-sensor, and Motion Detection.
4.3 Connectivity
- Wi-Fi Function: Press the "Menu" button twice to access the Wi-Fi function. You can choose to turn it on. This allows you to view recorded videos, capture photos, and transfer data to your mobile phone over a short distance using the dedicated app.
- Built-in GPS: The suction cup holder includes a built-in GPS module. This feature records the speed and trajectory of your car. You can download the "EACHPAI Player" software on your computer to play videos with integrated GPS information.

Image: Demonstrating the built-in GPS for route tracking and Wi-Fi for mobile connectivity.
5. Maintenance
To ensure optimal performance and longevity of your EACHPAI K200 dashcam, regular maintenance is recommended:
- Memory Card Formatting: Periodically format the memory card (e.g., monthly) within the dashcam's settings to prevent data corruption and ensure smooth recording. Back up any important footage before formatting.
- Lens Cleaning: Gently clean the front and rear camera lenses with a soft, lint-free cloth to remove dust or smudges that may affect video clarity. Avoid using abrasive cleaners.
- Device Cleaning: Wipe the exterior of the dashcam with a dry or slightly damp cloth. Do not use harsh chemicals or immerse the device in water.
6. Troubleshooting
If you encounter issues with your EACHPAI K200, refer to the following common problems and solutions:
- Dashcam frequently switches on/off: Check if the power cord is securely connected to both the dashcam and the car charger. Verify that the car charger's output voltage meets the 5V requirement for the dashcam. A loose connection or insufficient power supply can cause intermittent operation.
- Screen goes dark suddenly: The dashcam has a screensaver function, which is set to 2 minutes by default. This is normal operation. To confirm it is still recording, check if the red recording indicator light in the bottom left corner of the screen is flashing. You can disable the screensaver function in the settings if preferred.
- Recording issues (e.g., freezing, errors): Ensure you are using a Class 10 or higher speed memory card. Format the memory card regularly. If issues persist, try a different compatible memory card.
- GPS not tracking or inaccurate: Ensure the GPS suction mount is correctly installed and has a clear view of the sky. Avoid placing it under metallic tints or other obstructions that might block the GPS signal.
- Wi-Fi connection problems: Ensure the Wi-Fi function is enabled on the dashcam. Check your smartphone's Wi-Fi settings and ensure you are within close proximity to the dashcam.
7. Specifications
Detailed technical specifications for the EACHPAI K200 Dual Lens Car Camera:
| Feature | Specification |
|---|---|
| Model Name | K200 |
| Brand | EACHPAI |
| Front Camera Sensor | IMX307 CMOS (2.0MP Sony Exmor) |
| Rear Camera Sensor | IMX323 CMOS (2.0MP Sony Exmor) |
| Video Capture Resolution | 1080p (Front: 1080P@60FPS/30FPS; Dual: 1080P@30fps + 1080P@30fps) |
| Screen Size | 3-inch IPS Display |
| Field of View | 170 Degrees (Front), 140 Degrees (Real Angle of View) |
| Maximum Aperture | F1.8 |
| Connectivity Technology | Wi-Fi |
| Mounting Type | Suction (with Built-in GPS) |
| Flash Memory Type | SD Card (supports up to 128 GB) |
| Power Source | Super-Capacitor (no internal battery for storage) |
| Supported Standards | MP4 |
| Special Features | Built-in GPS, Wi-Fi, Parking Monitor, Motion Detection, Time-Lapse, Loop Record, WDR, G-Sensor |

Image: Details of the front and rear camera lenses and their respective Sony Exmor CMOS sensors.
8. Support
For any further questions or assistance not covered in this manual, please utilize the "Customer questions & answers" section on the product page or contact EACHPAI customer support via email. We are committed to providing support to resolve any issues you may encounter.