
ANCHEER RM-5768
ANCHEER Hydraulic Rowing Machine RM-5768 User Manual
Model: RM-5768
Introduction
Thank you for choosing the ANCHEER Hydraulic Rowing Machine RM-5768. This manual provides essential information for the safe assembly, operation, and maintenance of your rowing machine. Please read this manual thoroughly before use and retain it for future reference.
Important Safety Information
- Consult a physician before starting any exercise program.
- Keep children and pets away from the machine during operation.
- Place the rowing machine on a flat, stable surface. Ensure adequate space around the machine.
- Inspect the machine for loose or damaged parts before each use. Do not use if damaged.
- Wear appropriate exercise clothing and footwear.
- Do not exceed the maximum user weight of 250 kg (550 lbs).
- Stop exercising immediately if you feel pain, dizziness, or shortness of breath.
Product Overview
The ANCHEER Hydraulic Rowing Machine RM-5768 is designed for a full-body cardio workout. It features a unique full-motion arm system and adjustable hydraulic resistance.
Key Components
- Hydraulic Cylinders: Provide resistance for rowing motion.
- Full-Motion Arms: Allow for a 360-degree rotation, simulating realistic rowing.
- Adjustable Foot Pedals: Non-slip design with adjustable straps for secure foot placement.
- Ergonomic Padded Seat: Designed for comfort during extended workouts.
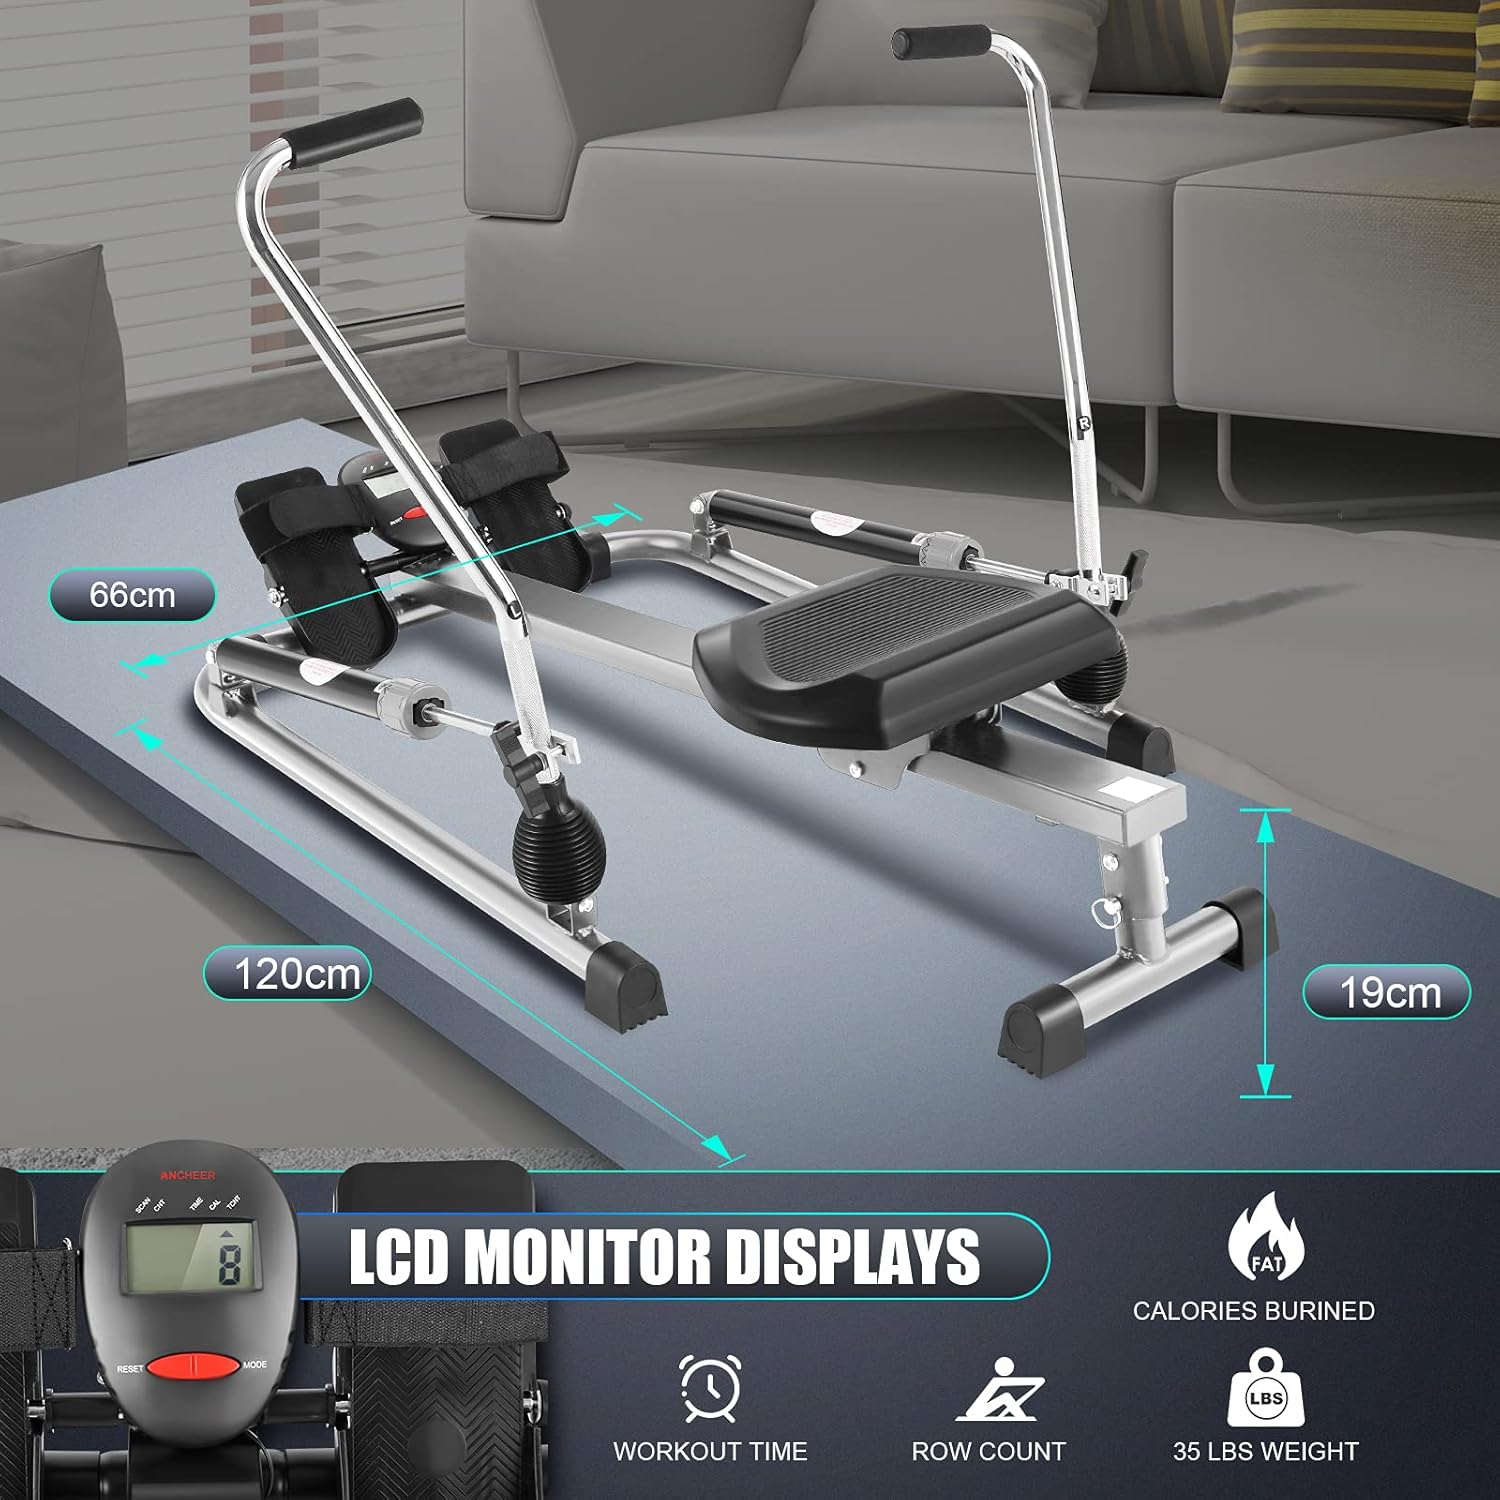
- LCD Monitor: Displays workout data such as time, count, calories, and distance.
- Aluminum Rail: Ensures smooth and quiet seat movement.

Setup and Assembly
Before assembly, ensure all parts are present and undamaged. Refer to the included hardware pack and assembly diagram.
Assembly Steps:
- Unpack Components: Carefully remove all parts from the packaging and lay them out on a clean, flat surface.
- Attach Stabilizers: Secure the front and rear stabilizers to the main frame using the provided bolts and washers.
- Install Seat: Slide the ergonomic seat onto the aluminum rail. Ensure it moves smoothly.
- Mount Rowing Arms: Attach the full-motion rowing arms to the main frame. Connect the hydraulic cylinders to the arms and the frame.
- Attach Foot Pedals: Secure the foot pedals to the designated points on the frame.
- Install LCD Monitor: Mount the LCD monitor onto its bracket. Insert 2 AAA batteries (not included) into the monitor.
- Final Check: Verify all bolts are tightened and all components are securely in place.

Operating Instructions
Adjusting Resistance
The rowing machine features 12 levels of adjustable hydraulic resistance. To adjust the resistance:
- Locate the adjustment knob on the hydraulic cylinders.
- Turn the knob clockwise to increase resistance (levels 9-12 for higher intensity).
- Turn the knob counter-clockwise to decrease resistance (levels 1-4 for lower intensity).
- Ensure both hydraulic cylinders are set to the same resistance level for balanced operation.

Using the LCD Monitor
The LCD monitor tracks your workout progress. It displays:
- TIME: Duration of your workout.
- COUNT: Number of rowing strokes.
- CALORIES: Estimated calories burned.
- DISTANCE: Estimated distance rowed.
Buttons:
- MODE: Press to cycle through display functions or hold to reset values.
- RESET: Press to reset current values.
Proper Rowing Technique
For an effective and safe workout, follow these steps:
- Starting Position: Sit on the seat with knees bent, feet securely strapped into the pedals. Lean slightly forward from the hips, keeping your back straight. Grasp the handles with an overhand grip.
- The Drive: Push off with your legs, extending them fully. As your legs extend, pull the handles towards your abdomen, engaging your core and back muscles. The full-motion arms allow for a natural, wide rowing arc.
- The Finish: Your legs should be fully extended, and the handles should be near your abdomen. Your body should be leaning slightly back.
- The Recovery: Extend your arms forward, then bend your knees, allowing the seat to slide forward. Return to the starting position in a controlled manner.

Maintenance
Regular maintenance ensures the longevity and safe operation of your rowing machine.
- Cleaning: Wipe down the machine with a damp cloth after each use to remove sweat and dust. Avoid abrasive cleaners.
- Lubrication: Periodically check the moving parts, especially the seat rollers and rail, for smooth operation. Apply a silicone-based lubricant if necessary.
- Tighten Fasteners: Regularly inspect all bolts, nuts, and screws. Tighten any loose fasteners to prevent instability and wear.
- Storage: Store the rowing machine in a cool, dry place away from direct sunlight and extreme temperatures.
- Battery Replacement: Replace the AAA batteries in the LCD monitor when the display becomes dim or unresponsive.

Troubleshooting
| Problem | Possible Cause | Solution |
|---|---|---|
| No display on LCD monitor | Batteries are dead or incorrectly installed. | Replace AAA batteries or ensure correct polarity. |
| Resistance feels uneven or too weak/strong | Hydraulic cylinders not set to the same level; cylinder malfunction. | Adjust both cylinders to the same resistance level. If issue persists, contact customer support. |
| Squeaking or grinding noise | Loose fasteners; dry moving parts (seat rollers, rail). | Tighten all bolts and screws. Lubricate the seat rail and rollers with silicone spray. |
| Seat does not slide smoothly | Debris on the rail; dry rail; damaged rollers. | Clean the aluminum rail. Apply silicone lubricant. Inspect rollers for damage. |
Specifications
| Feature | Detail |
|---|---|
| Model Name | RM-5768 |
| Brand | ANCHEER |
| Resistance Mechanism | Hydraulic |
| Resistance Levels | 12 (Adjustable) |
| Frame Material | Alloy Steel |
| Rail Material | Aluminum |
| Display Type | LCD |
| Monitor Functions | Time, Count, Calories, Distance |
| Product Dimensions (L x W x H) | 120 x 66 x 19 cm (47.2 x 26 x 7.5 inches) |
| Product Weight | 18.12 kg (39.9 lbs) |
| Maximum User Weight | 250 kg (550 lbs) |
| Batteries Required | 2 x AAA (not included) |
| Special Features | Digital display, Adjustable resistance, Compact, Contoured seat, Lightweight, Full-motion arms |
Warranty and Support
ANCHEER products are manufactured to high-quality standards. For warranty information, please refer to the warranty card included with your purchase or contact ANCHEER customer support directly.
If you have any questions, require assistance with assembly, operation, or maintenance, or need to report a missing or damaged part, please contact ANCHEER customer service. Contact details can typically be found on the product packaging or the official ANCHEER website.
Ask a question about this manual
Ask about setup, troubleshooting, compatibility, parts, safety, or missing instructions. Manuals+ will review the question and use this page’s manual context to help answer it.