
Introduction
This manual provides essential information and instructions for installing and maintaining your new SCREENARAMA FHD 1920x1080 IPS Matte LCD LED screen replacement for the Acer Aspire A315-34 laptop. Please read all instructions carefully before beginning the installation process to ensure proper function and to prevent damage.
Product Features
- Resolution: Full HD (FHD) 1920x1080 pixels, providing clear and sharp visuals.
- Panel Type: IPS (In-Plane Switching) technology for wide viewing angles and accurate color reproduction.
- Surface: Matte finish to reduce glare and reflections, enhancing visibility in various lighting conditions.
- Connector: 30-pin video connector, specifically designed for compatible laptop models.
- Touchscreen: Non-touch display, suitable for laptops without touchscreen functionality.
- Size: 15.6-inch diagonal display.
- Tools: Includes a set of tools for DIY installation.

This comparison highlights the benefits of an IPS (In-Plane Switching) screen, which offers wider viewing angles and more vivid colors compared to a TN (Twisted Nematic) screen, ensuring consistent image quality from various perspectives.
Compatibility Verification
Before installation, it is critical to verify that this replacement screen is compatible with your specific laptop model and original screen specifications. Incorrect screen selection can lead to damage or non-functionality.
- Laptop Model: Ensure your laptop is an Acer Aspire A315-34.
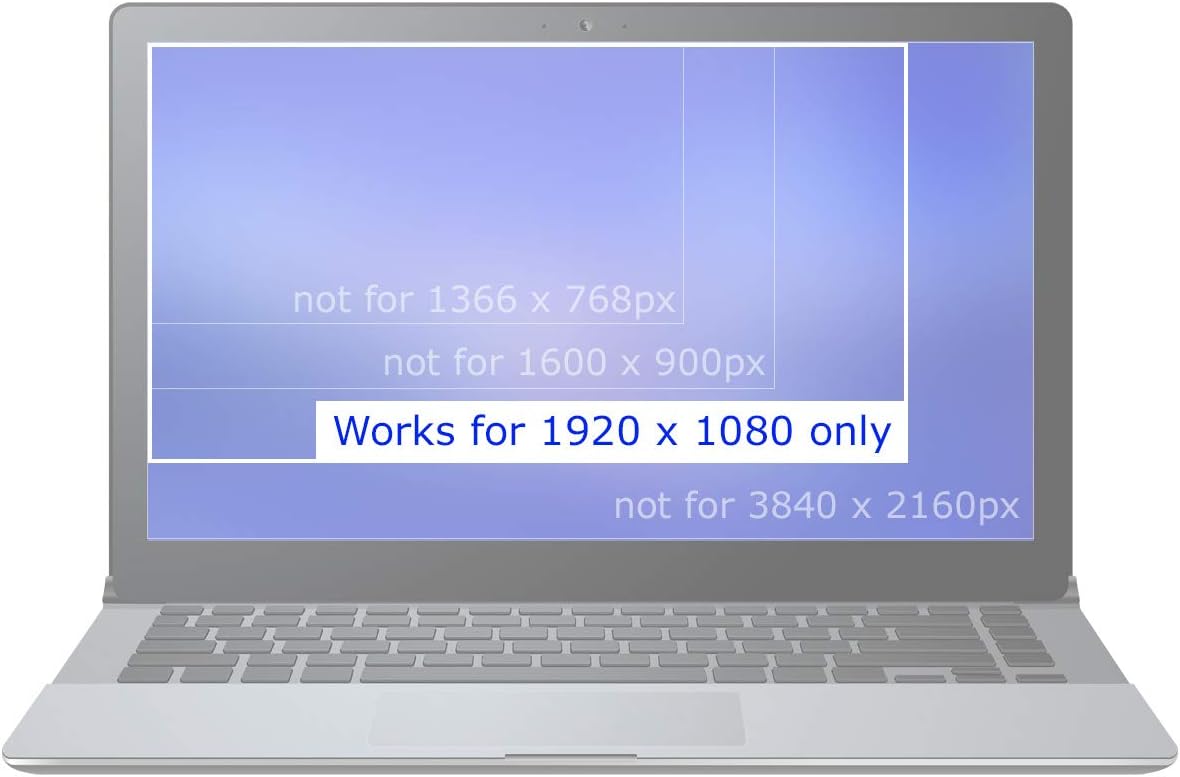
- Resolution: Your original screen must be 1920x1080 (FHD). This screen is not compatible with 1366x768, 1600x900, or 3840x2160 resolutions.
- Video Connector: The original screen must have a 30-pin video connector. This screen is not compatible with 40-pin connectors.
- Touchscreen: Your original screen must be non-touch. This replacement does not support touch functionality.

This diagram provides guidance on selecting the correct replacement screen. It emphasizes matching the video connector type (30-pin vs 40-pin), resolution (HD, FHD, UHD), touchscreen functionality (or lack thereof), and refresh rate (e.g., 60Hz, 144Hz, 240Hz) with your original screen's specifications.

This graphic clarifies that the replacement screen is specifically designed for 1920x1080 (Full HD) resolution. It is not compatible with other resolutions such as 1366x768, 1600x900, or 3840x2160.

This image indicates that the product is an LCD screen only and does not include touchscreen functionality. It is crucial to verify that your original laptop screen is also non-touch before purchasing.

This image shows the rear view of the 15.6-inch Full HD screen, highlighting the crucial 30-pin video connector located at the bottom center. This connector type is essential for compatibility.

This image illustrates the difference between a 30-pin video connector (correct for this screen) and a 40-pin video connector (incorrect). Ensure your laptop's original screen uses a 30-pin connector for proper fit and function.
Package Contents
Your SCREENARAMA screen replacement package includes the following items:
- 1x SCREENARAMA FHD 1920x1080 IPS Matte LCD LED Display
- 1x Set of DIY Installation Tools (e.g., screwdrivers, spudgers, tweezers)
The included tool kit contains various instruments designed to assist with the DIY screen replacement process, such as screwdrivers, plastic spudgers for prying, and precision tweezers.
Installation Instructions
Replacing a laptop screen requires careful handling and attention to detail. If you are not comfortable performing this procedure, it is recommended to seek professional assistance. Always ensure the laptop is powered off and the battery is disconnected before starting.
- Preparation: Power off your laptop completely and disconnect the AC adapter. Remove the laptop battery if it is external. For internal batteries, consult your laptop's service manual for instructions on how to safely disconnect it.
- Remove Bezel: Carefully pry off the plastic bezel surrounding the screen. Use the included plastic spudgers to avoid scratching the laptop casing.
- Unscrew Old Screen: Locate and remove the small screws holding the old screen in place. These are typically found on the sides of the screen assembly.
- Disconnect Video Cable: Gently lay the old screen face down on the keyboard. Carefully peel back any tape securing the video cable connector on the back of the screen. Unlock the connector latch and slide out the 30-pin video cable.
- Install New Screen: Connect the 30-pin video cable to the new SCREENARAMA display, ensuring it is fully seated and the latch is secured. Reapply any tape if necessary.
- Secure New Screen: Position the new screen in the laptop lid and secure it with the screws removed earlier.
- Reattach Bezel: Carefully snap the plastic bezel back into place around the new screen.
- Test: Reconnect the battery and AC adapter. Power on the laptop to test the new screen.
For a visual guide on the screen's features and connector, please refer to the video below:
This video provides a visual overview of the SCREENARAMA replacement screen, confirming its 15.6-inch Full HD resolution, 30-pin connector, non-touch functionality, and matte finish.
Troubleshooting
If you encounter issues after installing your new screen, refer to the following troubleshooting steps:

This image provides a list of troubleshooting steps to diagnose common screen issues, such as a blank image or dim display, and suggests actions like checking external monitors, verifying pin counts, and reconnecting cables.
- Blank Image: If the screen remains blank, connect an external monitor to confirm the laptop is operational. Reconnect the video cable from both the screen and motherboard sides, ensuring it is secure and not damaged.
- Dim Image: If the image is dim, try connecting the old LCD screen. If both screens do not light up, check the backlight fuse on the motherboard, usually located near the video connector.
- No Display: Verify that the number of pins on the original LCD's connector matches the new screen's 30-pin connector.
- Persistent Issue: If the problem persists and is identical to the issue with the old LCD, the problem likely lies with another component of the laptop, not the screen itself.
Specifications
| Specification | Detail |
|---|---|
| Screen Size | 15.6 inches |
| Resolution | FHD (Full High Definition) 1920x1080 |
| Panel Type | IPS (In-Plane Switching) |
| Surface Finish | Matte |
| Video Connector | 30-pin |
| Touchscreen | No (Non-Touch) |
| Refresh Rate | 60Hz (typical for this model) |
Warranty and Support
This SCREENARAMA replacement screen comes with a 2-Year Warranty. For any questions, technical assistance, or warranty claims, please contact SCREENARAMA customer support.
Please retain your proof of purchase for warranty validation.