
INSE E6

INSE E6 Robotic Vacuum Cleaner User Manual
Model: E6
Important Safety Instructions
Please read this manual carefully before using the INSE E6 Robotic Vacuum Cleaner and keep it for future reference. Follow all safety precautions to prevent injury or damage.
- Do not operate the robot in wet environments or near water.
- Keep loose clothing, hair, and body parts away from moving parts.
- Do not pick up large objects, sharp objects, or liquids.
- Ensure the charging dock is placed against a wall on a level surface.
- Supervise children and pets when the robot is operating.
- Only use the original power adapter and charging dock.
- Do not use the robot to clean burning or smoking materials.
Product Overview
The INSE E6 Robotic Vacuum Cleaner is designed for efficient and automatic cleaning of various floor types, including low-pile carpets, tiles, laminate, and hardwood floors. It features powerful suction, intelligent navigation, and multiple cleaning modes.

Image: The INSE E6 Robotic Vacuum Cleaner, a circular black device, is shown alongside its remote control. The robot has a sleek design with an 'AUTO' button and 'inse' branding on top. The remote control features directional buttons, mode selection, and a display.
Setup
1. Unpacking and Initial Charge
Carefully remove all components from the packaging. Ensure all protective films and packing materials are removed from the robot and charging dock.
- Place the charging dock against a wall in an open area, ensuring there are no obstacles within 1 meter (3 feet) to the front and 0.5 meters (1.5 feet) to the sides.
- Connect the power adapter to the charging dock and plug it into a wall outlet.
- Place the robot onto the charging dock. Ensure the charging contacts on the robot align with those on the dock. The indicator light on the robot will show charging status.
- Allow the robot to fully charge before its first use. A full charge typically takes several hours.

Image: The INSE E6 Robotic Vacuum Cleaner is depicted automatically returning to its charging dock. Blue arrows illustrate the path the robot takes to dock, and a battery icon indicates a low charge state, prompting the return.
2. Preparing the Cleaning Area
Before operating the robot, prepare your home environment to ensure optimal cleaning performance and prevent entanglement.
- Remove any loose cables, small rugs, or objects that could entangle the robot's brushes.
- Clear any obstacles that might prevent the robot from accessing certain areas.
- For best results, ensure doors to rooms you wish to clean are open.
Operating Instructions
1. Starting and Stopping Cleaning
- To Start: Press the "AUTO" button on the robot or the Start/Pause button on the remote control. The robot will begin cleaning in Auto mode.
- To Pause: Press the Start/Pause button on the remote control or the "AUTO" button on the robot during operation.
- To Stop and Return to Dock: Press the "Home" button on the remote control. The robot will return to its charging dock.
2. Cleaning Modes
The INSE E6 offers four distinct cleaning modes, selectable via the remote control:
- Auto Mode: The robot intelligently navigates and cleans in a systematic pattern, adjusting to different floor types and obstacles. This is the default mode for general cleaning.
- Parallel Mode: The robot cleans in straight lines, covering the area systematically.
- Spot Mode: The robot focuses on a specific dirty area, cleaning in a spiral pattern for intensive spot cleaning.
- Edge Mode: The robot cleans along walls and furniture edges to ensure thorough coverage of corners and perimeters.

Image: A diagram illustrating the four cleaning modes of the INSE E6 robot vacuum. Icons represent Auto (A), Parallel, Spot (spiral), and Edge cleaning patterns, showing how the robot navigates for each mode.
3. Scheduling Cleaning
You can set a daily cleaning schedule using the remote control. Refer to the remote control section of this manual for detailed instructions on setting the time and schedule.
4. Navigation and Sensors
The INSE E6 is equipped with intelligent infrared sensors to prevent falls from stairs and reduce collisions with furniture. Its large wheels allow it to easily cross thresholds between rooms.
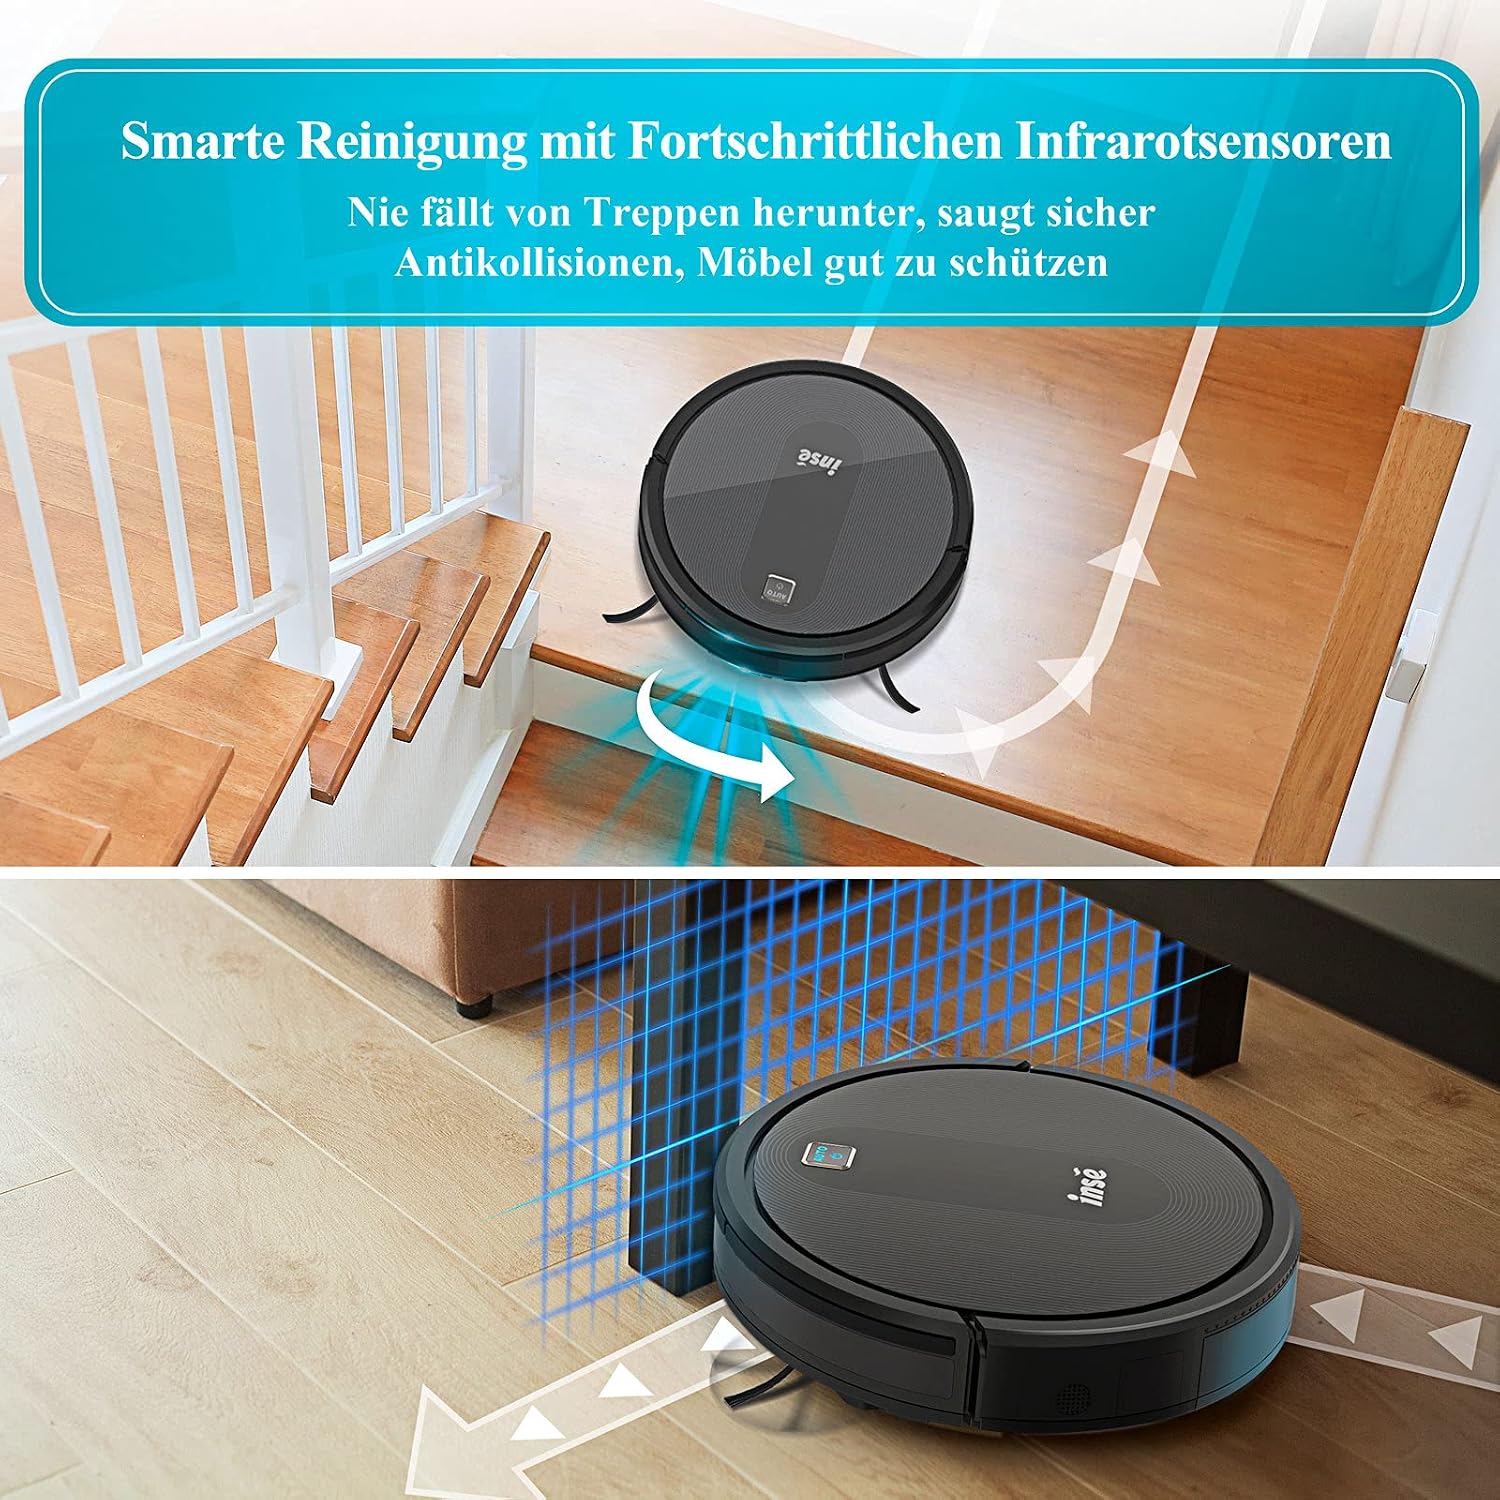
Image: The INSE E6 Robotic Vacuum Cleaner is shown in two scenarios: at the top of a staircase, illustrating its anti-drop sensors preventing it from falling, and at the bottom, navigating under furniture, with blue lines indicating its intelligent path planning.

Image: The INSE E6 Robotic Vacuum Cleaner is shown transitioning from a hard wooden floor to a low-pile carpet, demonstrating its ability to move between different floor surfaces. A measurement of 1.52 cm highlights its climbing capability.

Image: The INSE E6 Robotic Vacuum Cleaner is shown on a tiled floor, effectively cleaning up scattered debris and pet hair, with a cat observing nearby. Text overlays highlight its 2200Pa strong suction and advanced brushless motor for picking up dirt, pet hair, crumbs, and food.
Maintenance
Regular maintenance ensures your INSE E6 operates efficiently and extends its lifespan. Always turn off the robot before performing any maintenance.
1. Emptying the Dustbin
- The 400ml dustbin should be emptied after each cleaning cycle or when full.
- Locate the dustbin release button, typically on the top or side of the robot.
- Remove the dustbin and dispose of the collected debris.
2. Cleaning the Filter
- The cartridge filter should be cleaned regularly. Tap it gently to remove dust.
- Filters are replaceable and should be replaced every 1-3 months depending on usage.
- Do not wash the filter with water unless specified in future product updates.
3. Cleaning the Roller Brush and Side Brushes
Hair and debris can get tangled in the roller brush and side brushes. Clean them regularly using the provided cleaning tool.

Image: A detailed view of the INSE E6's roller brush mechanism and the multi-purpose cleaning tool. The image highlights how the tool can be used to cut and remove tangled hair from the roller brush, ensuring efficient cleaning and preventing scratches with its soft bristles and rubber strips.
- Remove the roller brush cover and lift out the roller brush.
- Use the cutting edge of the cleaning tool to remove tangled hair.
- Gently pull out any hair or debris from the side brushes.
- Reinstall the brushes securely.
4. Cleaning Sensors and Charging Contacts
- Wipe the infrared sensors (located around the robot's bumper and underside) and charging contacts (on the robot and dock) with a clean, dry cloth.
- Keep these areas free of dust and debris to ensure proper navigation and charging.
Troubleshooting
If your INSE E6 Robotic Vacuum Cleaner encounters an issue, refer to the following common problems and solutions:
| Problem | Possible Cause | Solution |
|---|---|---|
| Robot does not turn on. | Low battery; Power switch off. | Charge the robot; Ensure the main power switch is ON. |
| Robot does not charge. | Charging contacts dirty; Charging dock not powered. | Clean charging contacts on robot and dock; Ensure power adapter is plugged in securely. |
| Robot gets stuck frequently. | Obstacles (cables, small rugs); Dirty sensors. | Clear the cleaning area; Clean all sensors. |
| Poor cleaning performance. | Full dustbin; Clogged filter; Tangled brushes. | Empty dustbin; Clean/replace filter; Clean roller and side brushes. |
| Robot does not return to charging dock. | Charging dock obstructed; Robot too far from dock. | Ensure clear path to dock; Manually place robot closer to dock. |
If the problem persists, please contact INSE customer support.
Specifications
| Feature | Detail |
|---|---|
| Brand | INSE |
| Model Number | E6 |
| Color | Black |
| Suction Power | Up to 2000Pa |
| Noise Level | 65 dB |
| Dustbin Capacity | 400 ml |
| Battery Type | Lithium-ion |
| Runtime | Approx. 120 minutes (up to 300 m²) |
| Control Type | Remote Control |
| Filter Type | Cartridge |
| Item Weight | 3.9 Kilograms |
| Product Dimensions | (Approximate) Diameter: ~32cm, Height: ~7.5cm |
Warranty and Support
INSE is committed to providing quality products and customer satisfaction. For warranty information and technical support, please refer to the contact details provided with your product packaging or visit the official INSE website.
Please note that spare parts availability information was not provided at the time of this manual's creation. For inquiries regarding spare parts, please contact INSE customer support directly.
For the latest information and support, please visit: INSE Brand Store on Amazon
Related documentsE6


Ask a question about this manual
Ask about setup, troubleshooting, compatibility, parts, safety, or missing instructions. Manuals+ will review the question and use this page’s manual context to help answer it.