1. Introduction
This manual provides detailed instructions for the safe and efficient operation, setup, and maintenance of your sloHEXtted Industrial Wireless Overhead Crane Remote Control Kit. This kit is designed for reliable control of electric chain hoists, lift winches, and cranes in industrial environments.
Key features include:
- Extended Control Range: Achieve a control distance of up to 100 meters with 360-degree barrier-free remote control and strong signal penetration.
- Advanced Processing: Utilizes an advanced processor with multi-bit Hamming code for fast, highly secure, precise, and 100% error-free coding and decoding.
- Durable Construction: Features silicone switch buttons, a high-quality circuit board, and a dust-proof structure with high-performance metal contact buttons for enhanced durability.
- Emergency Stop: Equipped with an EU standard Emergency Stop Switch for immediate system shutdown.
- IP65 Rated: Both the transmitter and receiver comply with IP65/NEMA4 international specifications, ensuring excellent performance in harsh environments with high oil pollution, humidity, and dust.
- Reinforced Shell: The lightweight transmitter and receiver are made of PA65 reinforced flame retardant material, offering strong anti-pressure ability, waterproofing, anti-corrosion, and insulation.
- Easy Pairing: The receiver automatically searches for the transmitter channel, allowing for automatic wireless pairing and transmitter replacement without professional equipment.
2. Product Components
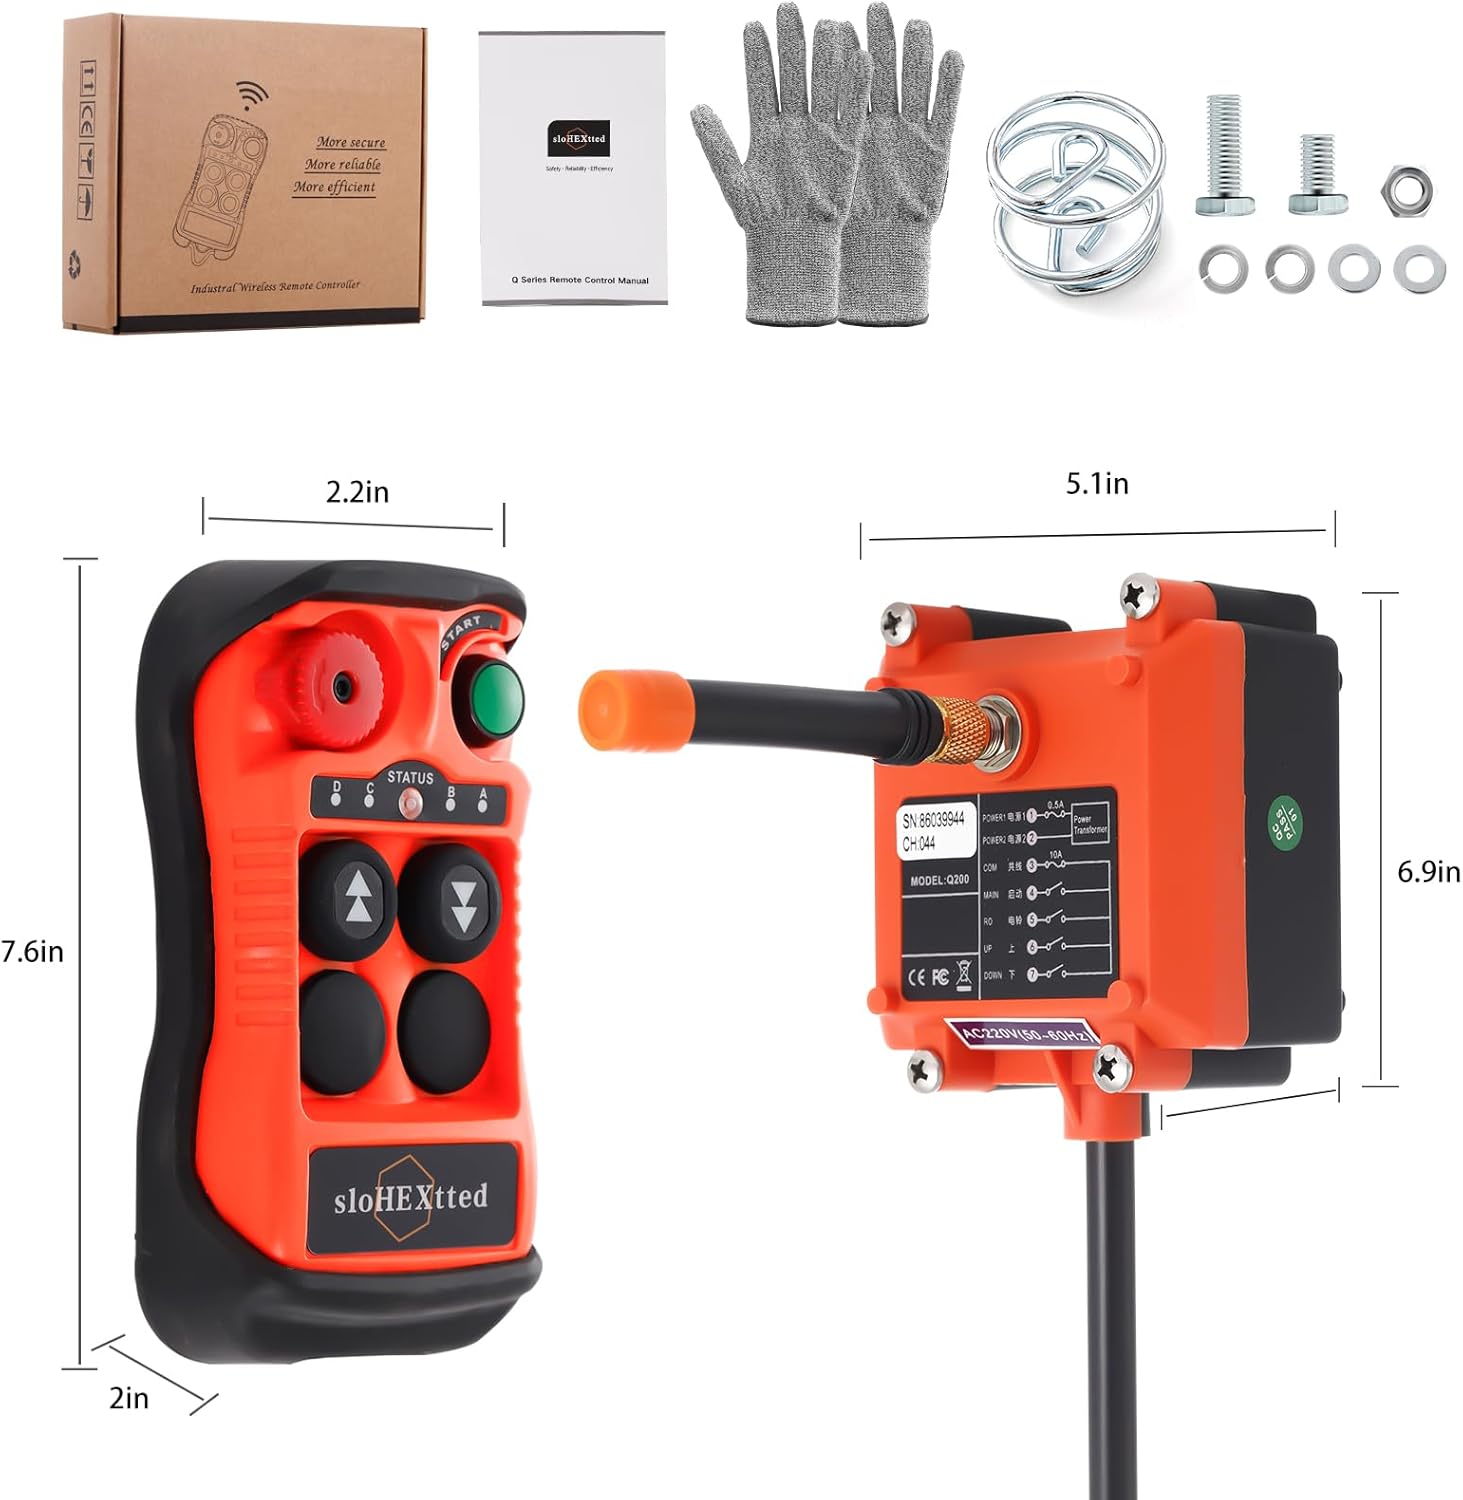
The sloHEXtted Industrial Wireless Overhead Crane Remote Control Kit typically includes the following components:
- 1 x Wireless Transmitter
- 1 x Receiver
- Necessary installation hardware (screws, wiring)
- User Manual


3. Specifications
| Attribute | Value |
|---|---|
| Manufacturer | sloHEXtted |
| Part Number | Q200 |
| Item Weight | 2.04 pounds |
| Product Dimensions | 9.13 x 7.8 x 2.99 inches |
| Country of Origin | China |
| Item Model Number | Q200 2 Button 12-24V |
| Size | AC/DC 12-24V |
| Color | 1 Transmitter + 1 Receiver |
| Style | 12-24V AC/DC |
| Material | nylon reinforced fiberglass |
| Power Source | AC/DC |
| Voltage | 12 Volts (AC/DC 12-24V compatible) |
| Maximum Power | 0.8 Kilowatts |
| Included Components | receiver, transmitter |
| Batteries Included? | No |
| Batteries Required? | Yes (2 AA batteries for transmitter) |
4. Setup
4.1. Battery Installation (Transmitter)
The transmitter requires 2 AA batteries (not included). To install:
- Locate the battery compartment on the back of the transmitter.
- Open the compartment cover.
- Insert 2 AA batteries, ensuring correct polarity (+/-).
- Close the battery compartment cover securely.
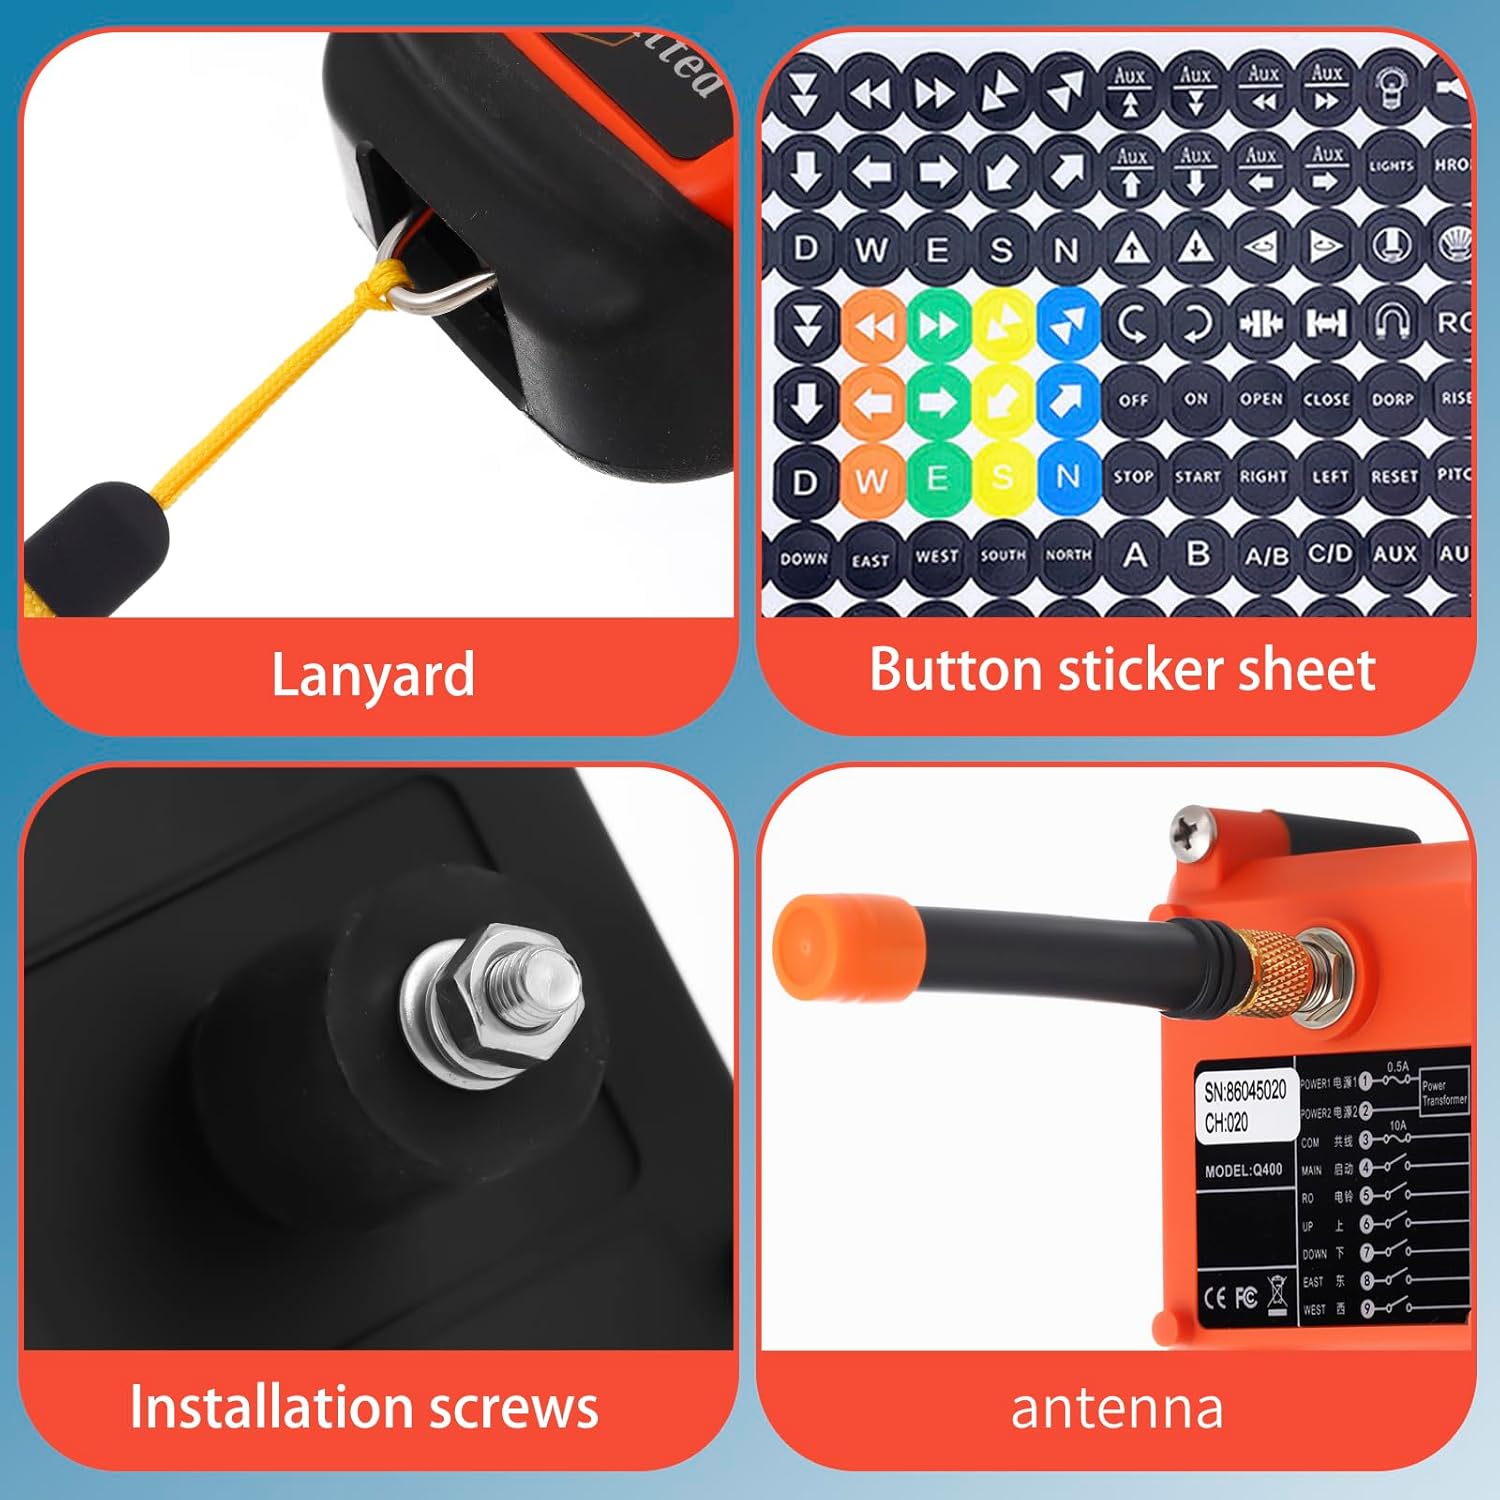
4.2. Receiver Wiring
The receiver must be wired to your crane or hoist system. Refer to the wiring diagram provided on the receiver unit and in the included manual for specific connections. Ensure the power supply matches the receiver's voltage requirements (AC/DC 12-24V for this model). Professional installation is recommended if you are unfamiliar with electrical wiring.
4.3. Pairing (Automatic)
This remote control kit features automatic wireless pairing. Typically, the receiver will automatically search for and pair with the transmitter upon power-up. No manual pairing steps or specialized equipment are usually required for initial setup or when replacing a transmitter.
5. Operating Instructions
Once the receiver is correctly wired and powered, and the transmitter has batteries, the system is ready for operation.
5.1. Basic Operation
- Power On: Ensure the emergency stop button on the transmitter is disengaged (rotated to release).
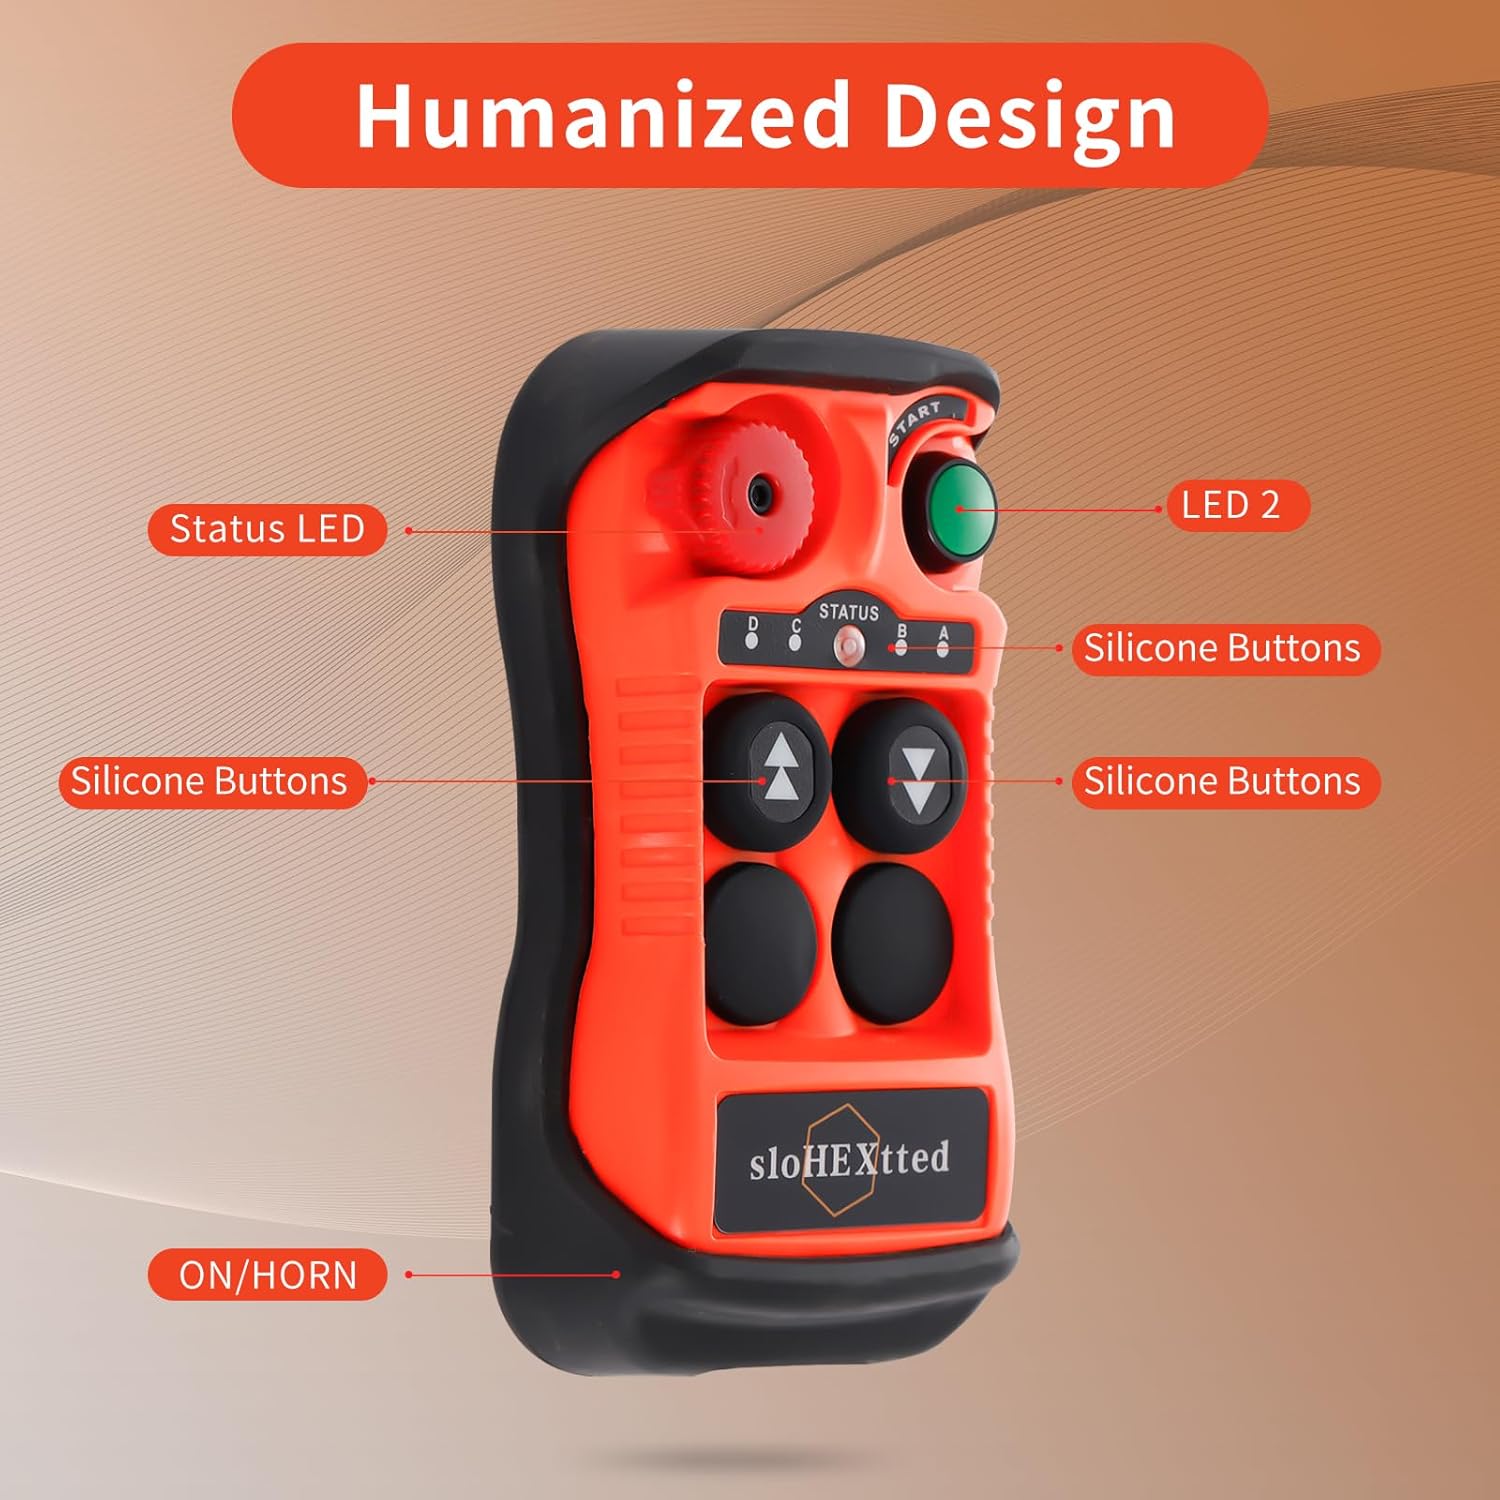
- Control Buttons: Use the designated silicone buttons for UP/DOWN or other directional controls as per your hoist/crane configuration. This model features 2 channels with single-speed buttons.
- Momentary System: Buttons are momentary, meaning the function is active only while the button is pressed.
- Status LED: Observe the Status LED on the transmitter for operational feedback.
5.2. Emergency Stop
The red emergency stop button is a critical safety feature. In case of an emergency or unexpected movement, press this button firmly to immediately cut power to the controlled equipment. To resume operation, twist the button to release it.
6. Maintenance
Regular maintenance ensures the longevity and reliable performance of your remote control kit.
- Cleaning: Wipe down the transmitter and receiver with a damp cloth. Avoid harsh chemicals or abrasive cleaners. Due to its IP65 rating, the unit is resistant to dust and water jets, but avoid submerging it.
- Battery Replacement: Replace the AA batteries in the transmitter when the Status LED indicates low power or when control becomes intermittent.
- Inspection: Periodically inspect the unit for any signs of physical damage, especially the reinforced fiberglass shell and rubber protector, which are designed to withstand impacts. Check the antenna for secure connection.
- Storage: Store the unit in a dry, clean environment when not in use.
7. Troubleshooting
If you encounter issues with your remote control kit, refer to the following common problems and solutions:
| Problem | Possible Cause | Solution |
|---|---|---|
| Unit receives power but no functions work. | Incorrect wiring, emergency stop engaged, transmitter batteries low/dead, pairing issue. | Verify all wiring connections are secure and correct according to the diagram. Ensure the emergency stop button is disengaged. Replace transmitter batteries. Power cycle both transmitter and receiver to re-establish pairing. |
| Remote control range is reduced or intermittent. | Low transmitter batteries, signal interference, physical obstructions. | Replace transmitter batteries. Minimize sources of electromagnetic interference. Ensure a clear line of sight between transmitter and receiver if possible, though the unit is designed for 360-degree operation. |
| Transmitter buttons are unresponsive. | Dead batteries, internal fault. | Replace batteries. If the issue persists, contact customer support. |
| Receiver not powering on. | No power supply, incorrect voltage, faulty wiring. | Check power source and ensure it provides AC/DC 12-24V. Verify all power wiring connections. |
If troubleshooting steps do not resolve the issue, please contact sloHEXtted customer support for further assistance.
8. Safety Information
Always prioritize safety when operating industrial equipment. Read and understand all instructions before use.
- Ensure all personnel are clear of the load and equipment before operation.
- Never operate the remote control if you are impaired or distracted.
- Regularly inspect the remote control and the controlled equipment for damage or malfunction.
- Use the emergency stop button immediately in any unsafe situation.
- Do not modify the remote control unit. Unauthorized modifications can lead to malfunction and void the warranty.
- Keep the transmitter dry and clean. Despite its IP65 rating, extreme conditions or prolonged submersion should be avoided.
9. Official Product Videos
Watch these official videos for additional guidance and demonstrations of the sloHEXtted Industrial Wireless Overhead Crane Remote Control Kit.
10. Warranty and Support
For warranty information, please refer to the documentation included with your product at the time of purchase. Warranty terms and conditions are typically provided by the manufacturer or seller.
For technical support, troubleshooting assistance, or inquiries regarding your sloHEXtted remote control kit, please contact the seller, HoneyBay, or the manufacturer directly. Contact information can usually be found on the product packaging or the seller's storefront.


