
Introduction
Thank you for purchasing the XREXS Extra Large Digital Wall Clock. This clock is designed to provide clear, easy-to-read time, date, and temperature information, along with convenient alarm and timer functions. Its large display and versatile placement options make it suitable for various environments, including living rooms, offices, and classrooms. Please read this manual carefully to ensure proper setup and operation.
Safety Information
- Keep the device away from water and high humidity environments.
- Do not expose the clock to direct sunlight or extreme temperatures.
- Use only the specified battery types (4 x AA and 2 x AAA batteries).
- Do not mix old and new batteries, or different types of batteries.
- Dispose of used batteries responsibly according to local regulations.
- Do not attempt to disassemble or repair the clock yourself. Contact qualified personnel for service.
Package Contents
- 1 x XREXS Extra Large Digital Wall Clock
- 4 x AA Batteries
- 2 x AAA Batteries
- 1 x User Manual
Product Overview
Familiarize yourself with the main components of your XREXS Digital Wall Clock:

Figure 1: Front view of the XREXS Extra Large Digital Wall Clock. This image displays the large digital time, day of the week, date, and month, providing a clear overview of the clock's primary display.

Figure 2: Back view of the clock, illustrating the battery compartments for 4 AA and 2 AAA batteries, the two keyhole mounting slots for wall hanging, and the integrated fold-out stand for desk placement. This image helps identify the physical features for setup.
- Large LCD Display: Shows time, date, day, and temperature.
- Control Buttons: Located on the back for setting time, alarm, timer, and display modes.
- Battery Compartments: For 4 AA batteries (main power) and 2 AAA batteries (for memory backup).
- Wall Mounting Holes: Two keyhole slots for easy wall installation.
- Fold-out Stand: For stable placement on a desk or table.
Setup
1. Battery Installation
- Open the battery compartments on the back of the clock.
- Insert 4 AA batteries into the main compartment, ensuring correct polarity (+/-).
- Insert 2 AAA batteries into the smaller compartment, ensuring correct polarity (+/-). These batteries provide memory backup for settings during main battery changes.
- Close the battery compartments securely.
2. Placement Options
Figure 3: Illustration of the clock's versatility, showing it mounted on a wall above a television and standing on a desk. This highlights the two primary placement methods: using the keyhole slots for wall hanging or the fold-out stand for tabletop use.
- Wall Mounting: Use the two keyhole slots on the back of the clock to hang it on screws or nails securely fastened to a wall. Ensure the mounting surface is stable.
- Desk/Table Placement: Extend the fold-out stand located on the back of the clock to place it upright on any flat surface.
Operating Instructions
1. Setting Time and Date
- Press the SET button to enter setting mode. The first digit will flash.
- Use the UP or DOWN buttons to adjust the value.
- Press SET again to confirm and move to the next setting (Hour → Minute → Year → Month → Day).
- After setting the day, press SET to exit setting mode.
2. 12/24 Hour Format

Figure 4: This image demonstrates the difference between the 12-hour (AM/PM) and 24-hour time formats on the clock's display, showing how the time presentation changes based on user selection.
In time display mode, press the UP button to switch between 12-hour (with AM/PM indicator) and 24-hour formats.
3. Temperature Display (℃/℉)
In time display mode, press the DOWN button to switch between Celsius (℃) and Fahrenheit (℉) temperature units.
4. Display Modes

Figure 5: This graphic illustrates the three available display modes: Day+Date, Date+Temperature with automatic 5-second switching, and Day+Temperature. It visually explains how the clock can show different combinations of information.
The clock supports three display modes:
- DP-1 (Default): Time, Day, and Date are displayed.
- DP-2: Time and Day are displayed, with Date and Temperature automatically switching every 5 seconds.
- DP-3: Time, Day, and Temperature are displayed.
To cycle through display modes, press the MODE button.
5. Alarm Function
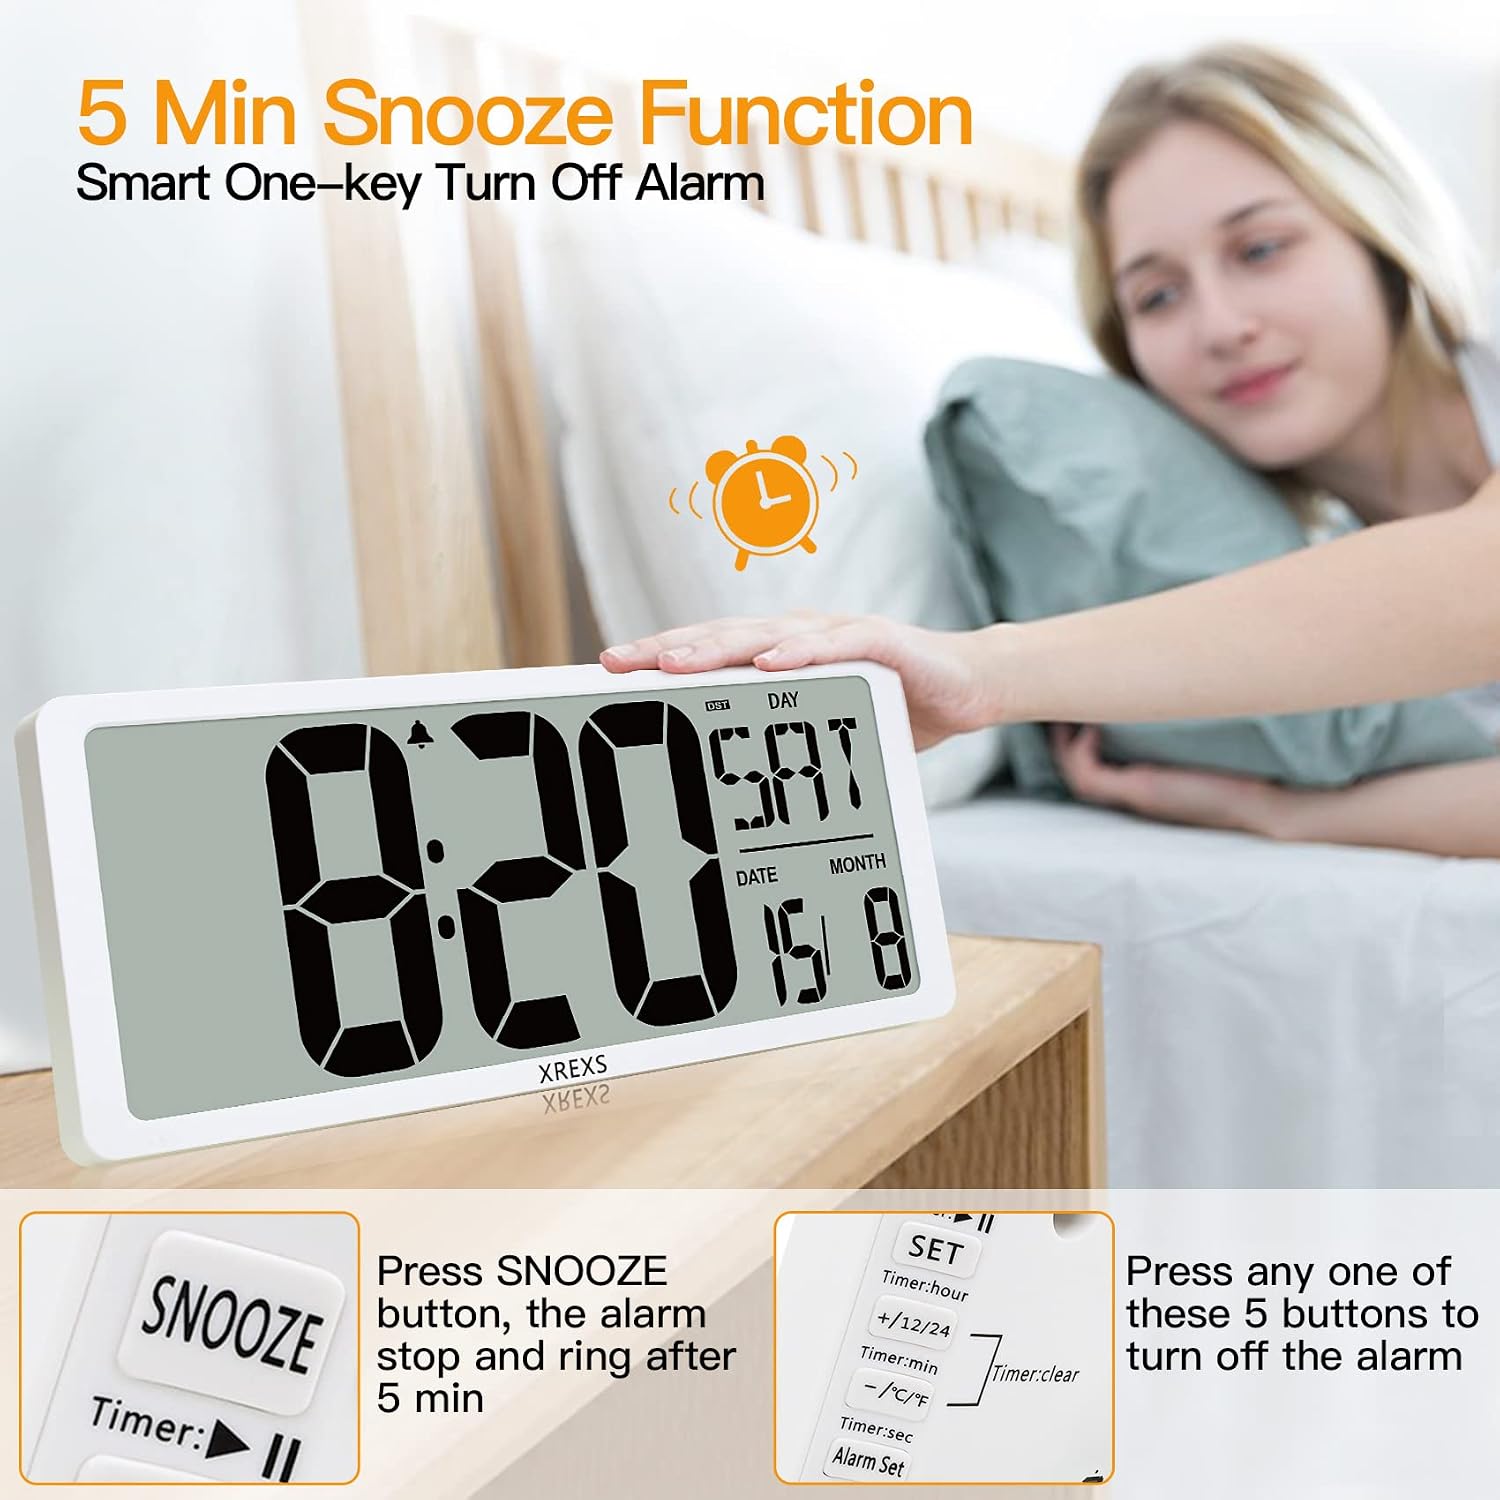
Figure 6: This image highlights the 5-minute snooze function, activated by pressing the SNOOZE button, and also indicates that pressing any other button will turn off the alarm. It provides clear instructions for managing the alarm sound.

Figure 7: This graphic illustrates the three distinct alarm modes: 'Every Day Alarm', 'Monday to Friday Alarm', and 'Weekend Alarm'. It helps users understand how to set the alarm to ring on specific days of the week.
- Press the ALARM SET button to enter alarm setting mode.
- Use UP or DOWN to set the alarm hour and minute.
- Press ALARM SET to confirm.
- Cycle through alarm modes: Every Day Alarm, Monday to Friday Alarm, Weekend Alarm. Select your desired mode.
- To activate/deactivate the alarm, press the ALARM ON/OFF button. An alarm icon will appear/disappear on the display.
- When the alarm sounds, press the SNOOZE button for a 5-minute snooze. Press any other button to turn off the alarm.
6. Count Up/Down Timer

Figure 8: This image showcases the clock's multifunctionality by displaying its Timer, standard Clock, and Alarm Clock modes. It visually confirms the presence of these three distinct operational states.
- Press the TIMER button to enter timer mode.
- Setting Countdown: Use UP or DOWN to set the desired hours, minutes, and seconds. Press TIMER to move between fields.
- Press START/STOP to begin the countdown. Press again to pause/resume.
- When the countdown ends, the clock will sound an alarm for 90 seconds.
- Count-up: From the timer display, press START/STOP without setting a time to begin counting up from zero.
- Press CLEAR to reset the timer to zero.
7. Backlight Function

Figure 9: This image illustrates the clock's auto backlight feature, showing how the display brightness adjusts between two levels in dark conditions. It emphasizes the high contrast digits and the absence of glare for undisturbed sleep.
The clock features a smart backlight with two adjustable brightness modes:
- Automatic Adjustment: The backlight brightness will automatically adjust based on ambient light conditions.
- Constant Brightness: You can set the backlight to a constant brightness level.
Refer to the specific button on the back of the clock labeled BACKLIGHT or similar to cycle through these settings.
Maintenance
- Cleaning: Wipe the clock surface with a soft, dry cloth. Do not use abrasive cleaners or solvents.
- Battery Replacement: When the display dims or functions become erratic, replace all batteries (both AA and AAA) with new ones. The AAA batteries will preserve your settings during the main battery change.
- Storage: If storing the clock for an extended period, remove all batteries to prevent leakage.
Troubleshooting
| Problem | Possible Cause | Solution |
|---|---|---|
| Display is blank or dim. | Low or dead batteries; incorrect battery polarity. | Replace all batteries with new ones, ensuring correct polarity. |
| Time/Date is incorrect. | Not set correctly; power interruption. | Re-set the time and date following the operating instructions. Ensure AAA memory batteries are functional. |
| Alarm does not sound. | Alarm is not activated; alarm volume too low (if adjustable). | Ensure the alarm icon is displayed. Check alarm settings and mode (Every Day, M-F, Weekend). |
| Temperature reading is inaccurate. | Clock placed near heat source/vent; sensor obstruction. | Move the clock to a location with stable ambient temperature. Ensure nothing is blocking the sensor area. |
| Buttons are unresponsive. | Temporary software glitch; very low batteries. | Remove and reinsert batteries to reset the device. If issue persists, replace batteries. |
Specifications
| Feature | Detail |
|---|---|
| Brand | XREXS |
| Model Number | 3039 |
| Colour | White |
| Product Dimensions | 42.93 x 19.05 x 1.98 cm (16.9 x 7.5 x 0.78 inches) |
| Item Weight | 1.2 kg |
| Display Type | Digital LCD |
| Digit Height | 5.9 inches (time digits) |
| Power Source | Battery Powered (4 x AA, 2 x AAA for memory) |
| Special Features | Temperature Display, Alarm, Count Up/Down Timer, Backlight |
Warranty and Support
XREXS products are manufactured to high quality standards. For any questions, technical support, or warranty claims, please refer to the contact information provided with your purchase or visit the official XREXS website. Please retain your proof of purchase for warranty purposes.