
Grandstream GRP2603(P)
Grandstream GRP2603P IP Phone User Manual
Model: GRP2603P
1. Introduction
This user manual provides comprehensive instructions for the Grandstream GRP2603P IP Phone. The GRP2603P is a professional 3-line IP phone designed for mass deployment. It features a 2.7-inch LCD display, supports 6 SIP accounts, and offers 5-way voice conferencing for enhanced productivity. With integrated Power-over-Ethernet (PoE) and dual-port Gigabit Ethernet, it ensures reliable network connectivity. This phone is supported by Grandstream’s Device Management System (GDMS) for centralized provisioning and management.
2. Package Contents
Please check the package carefully for the following items:
- GRP2603P IP Phone Unit
- Handset with Cord
- Ethernet Cable
- Phone Stand
- Quick Installation Guide (This manual serves as the full guide)
- Note: Power adapter is not included as the phone supports Power-over-Ethernet (PoE).
3. Physical Overview
Familiarize yourself with the various components and ports of your GRP2603P IP Phone.
3.1 Front View

Figure 1: Front view of the GRP2603P IP Phone. This image displays the phone's main interface, including the 2.7-inch LCD screen, the numeric keypad, navigation keys, and dedicated function buttons for features like message, headset, mute, hold, transfer, and speakerphone. The HD handset is visible on the left.
3.2 Side View with Stand
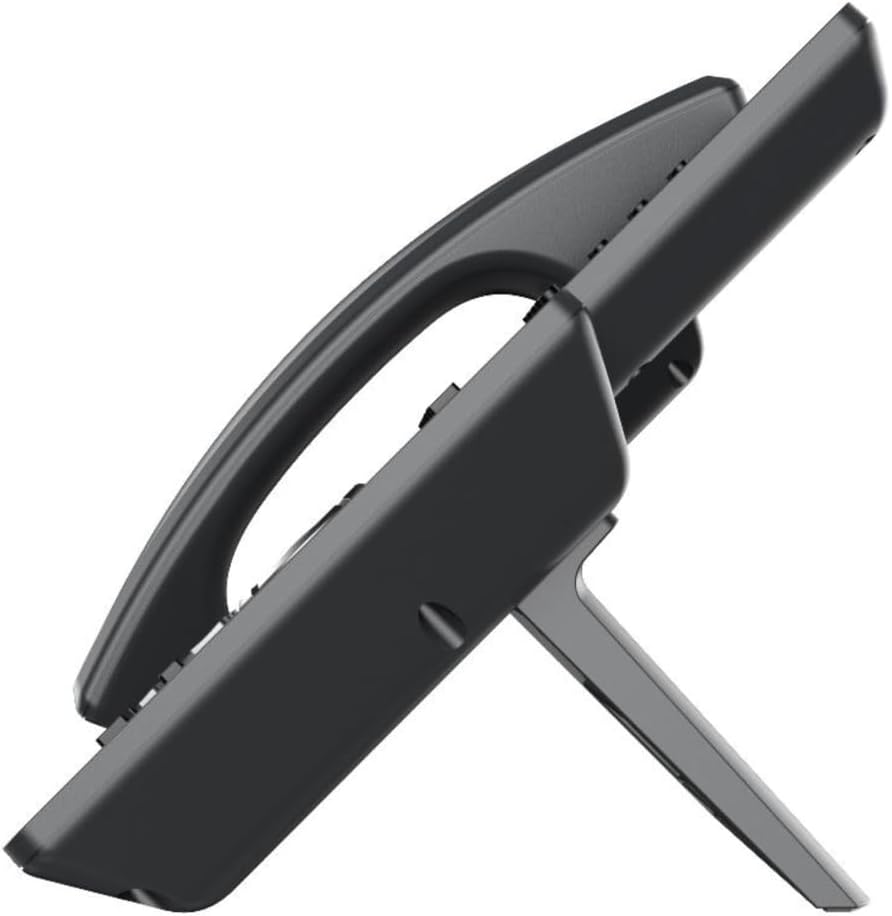
Figure 2: Side view of the GRP2603P IP Phone with its adjustable stand. This perspective highlights the ergonomic design and how the stand positions the phone for optimal viewing and use on a desk.
4. Setup and Installation
4.1 Attaching the Phone Stand
- Locate the two slots on the back of the phone unit.
- Align the tabs on the phone stand with these slots.
- Gently push the stand into the slots until it clicks securely into place.
4.2 Connecting the Handset and Headset
- Handset: Connect the coiled handset cord to the handset port on the phone unit and the other end to the handset.
- Headset (Optional): If using a headset, connect it to the dedicated headset port on the phone.
4.3 Network Connection (PoE)
The GRP2603P supports Power-over-Ethernet (PoE), eliminating the need for a separate power adapter if your network switch provides PoE.
- Connect one end of the Ethernet cable to the LAN port on the back of the phone.
- Connect the other end of the Ethernet cable to a PoE-enabled port on your network switch or router.
- The phone will power on automatically.
- If PoE is not available, a separate 5V DC power adapter (not included) can be used. Connect it to the power port on the phone.
4.4 Initial Configuration
Upon first boot-up, the phone will attempt to obtain network settings via DHCP. For advanced configuration, including SIP account setup, the phone can be managed via its web interface or through Grandstream's Device Management System (GDMS).
- Web Interface: Obtain the phone's IP address from the LCD screen (Menu > Status > Network Status). Enter this IP address into a web browser on a computer connected to the same network.
- GDMS: For large deployments, GDMS provides a centralized platform for provisioning, managing, and monitoring Grandstream products. Refer to the GDMS documentation for detailed instructions.
5. Operating the Phone
5.1 Making Calls
- Off-hook Dialing: Pick up the handset, press the Speaker button, or press the Headset button. Enter the phone number and press the "Send" soft key or wait for a few seconds.
- On-hook Dialing: Enter the phone number first, then pick up the handset, press the Speaker button, or press the Headset button.
- Redial: Press the Redial button to call the last dialed number.
5.2 Receiving Calls
- When the phone rings, pick up the handset, press the Speaker button, or press the Headset button to answer.
- Alternatively, press the "Answer" soft key on the display.
5.3 Call Features
- Hold: During an active call, press the Hold button. The call will be put on hold. Press Hold again or the corresponding line key to resume.
- Transfer: During an active call, press the Transfer button. Dial the number to transfer to, then press the Transfer button again (blind transfer) or wait for the party to answer and then press Transfer (attended transfer).
- 5-Way Conference: During an active call, press the Conference button. Dial the number of the next participant and press "Send". Once connected, press the Conference button again to add them to the conference. Repeat for up to 5 participants.
- Mute: Press the Mute button to mute your microphone during a call. Press again to unmute.
5.4 Voicemail
When you have new voicemail messages, the Message Waiting Indicator (MWI) will blink.
- Press the Message button to access your voicemail.
- Follow the voice prompts to listen to, save, or delete messages.
5.5 Phonebook/Directory
The phonebook allows you to store frequently used contacts.
- Press the Directory soft key or navigate through the menu to access the phonebook.
- You can add, edit, or delete contacts.
- Use the navigation keys to scroll through contacts and press "Dial" to call.
6. Maintenance and Care
- Cleaning: Use a soft, dry cloth to clean the phone's surface. Avoid using abrasive cleaners or solvents.
- Storage: If storing the phone for an extended period, disconnect it from power and network, and store it in a cool, dry place.
- Environmental Conditions: Operate the phone within recommended temperature and humidity ranges to ensure optimal performance and longevity.
7. Troubleshooting
7.1 No Dial Tone / Cannot Make Calls
- Ensure the Ethernet cable is securely connected to both the phone's LAN port and the network switch/router.
- Verify that your network switch provides PoE, or that the optional power adapter is correctly connected and powered.
- Check the network status on the phone's LCD screen (Menu > Status > Network Status) to ensure it has an IP address.
- Confirm that your SIP account is registered. Look for a green indicator light or a "Registered" status on the display.
- Contact your VoIP service provider or IT administrator if the issue persists.
7.2 Poor Audio Quality
- Check the handset/headset connection.
- Ensure there is no interference from other electronic devices.
- Verify network bandwidth and stability. A poor internet connection can affect call quality.
- Adjust the volume using the volume buttons on the phone.
7.3 Phone Not Powering On
- If using PoE, ensure the network cable is connected to a PoE-enabled port and the PoE source is active.
- If using a power adapter (not included), ensure it is properly connected to a working power outlet and the phone.
8. Specifications
| Feature | Description |
|---|---|
| Product Dimensions | 8.43 x 8.11 x 2.68 inches |
| Item Weight | 1.1 pounds (500 Grams) |
| ASIN | B08SYZF4WJ |
| Item Model Number | GRP2603(P) |
| Brand | Grandstream |
| Color | Black |
| Telephone Type | Corded |
| Material | Plastic |
| Power Source | Corded Electric (PoE supported) |
| Dialer Type | Single Keypad |
| Answering System Type | Digital |
| Compatible Devices | Grandstream's Device Management System (GDMS), VoIP services |
| Display | 2.7-Inch LCD |
| SIP Accounts | 6 |
| Lines | 3 |
| Voice Conferencing | 5-way |
| Ethernet Ports | Dual-Port Gigabit Ethernet |
| Integrated PoE | Yes |
9. Warranty and Support
The Grandstream GRP2603P IP Phone comes with a standard manufacturer's warranty. For specific warranty terms and conditions, please refer to the warranty card included with your product or visit the official Grandstream website.
For technical support, frequently asked questions, and additional resources, please visit the Grandstream support portal or contact their customer service.
- Grandstream Official Website: www.grandstream.com
- Support Portal: Refer to the website for the most current support contact information and resources.
Related documentsGRP2603(P)


Ask a question about this manual
Ask about setup, troubleshooting, compatibility, parts, safety, or missing instructions. Manuals+ will review the question and use this page’s manual context to help answer it.