
1. Introduction
This manual provides detailed instructions for the setup, operation, and maintenance of your VSDISPLAY 15.0-inch 1024x768 LCD Screen and VS-TY2660H-V1 LCD Controller Board kit. Please read this manual thoroughly before installation and use to ensure proper functionality and longevity of the product.
2. Product Overview
The VSDISPLAY kit includes a high-brightness 15.0-inch LCD panel and a versatile controller board designed for various display applications. Key components are listed below:
2.1. Package Contents
- 1 × LCD Controller Board VS-TY2660H-V1
- 1 × 15.0-inch 1024x768 1000nit LCD Screen
- 1 × LVDS Cable
- 1 × Backlight Cable
- 1 × Keyboard With Cable

Figure 2.1: Overview of the VSDISPLAY 15.0-inch LCD kit components, including the LCD screen, controller board, LVDS cable, backlight cable, and control keyboard.
2.2. Key Features
- LCD Screen: 15.0-inch, 1024x768 resolution, 1000 cd/m² brightness (Typ.), 700:1 contrast ratio (Typ.), TN display mode (Normally White, Transmissive).
- Controller Board: VS-TY2660H-V1, compatible with LVDS interface LCD screens.
- Input Power: Requires 12Vdc, more than 2A power adapter (not included).
- Video Input: Supports various video inputs (specific types not detailed in source, but implied by OSD).
- OSD Menu: On-Screen Display for brightness, contrast, auto-adjustment, language selection (English, French, German, Spanish, Italian, etc.).
- Standby Mode: Low power consumption (<1W) when no signal is input.
3. Technical Specifications
3.1. LCD Controller Board (VS-TY2660H-V1)
| Feature | Specification |
|---|---|
| Model | VS-TY2660H-V1 |
| Compatibility | LVDS Interface LCD Screens |
| Input Power | 12Vdc, >2A (Power adapter not included) |
| Standby Power | <1W |
| Board Dimensions | 74mm x 53mm x 12mm |
| OSD Languages | English, French, German, Spanish, Italian, etc. |

Figure 3.1: The VS-TY2660H-V1 LCD Controller Board, showing various ports including power supply, HDMI, keyboard, speaker, 30P LVDS interface, inverter, and firmware refresh.
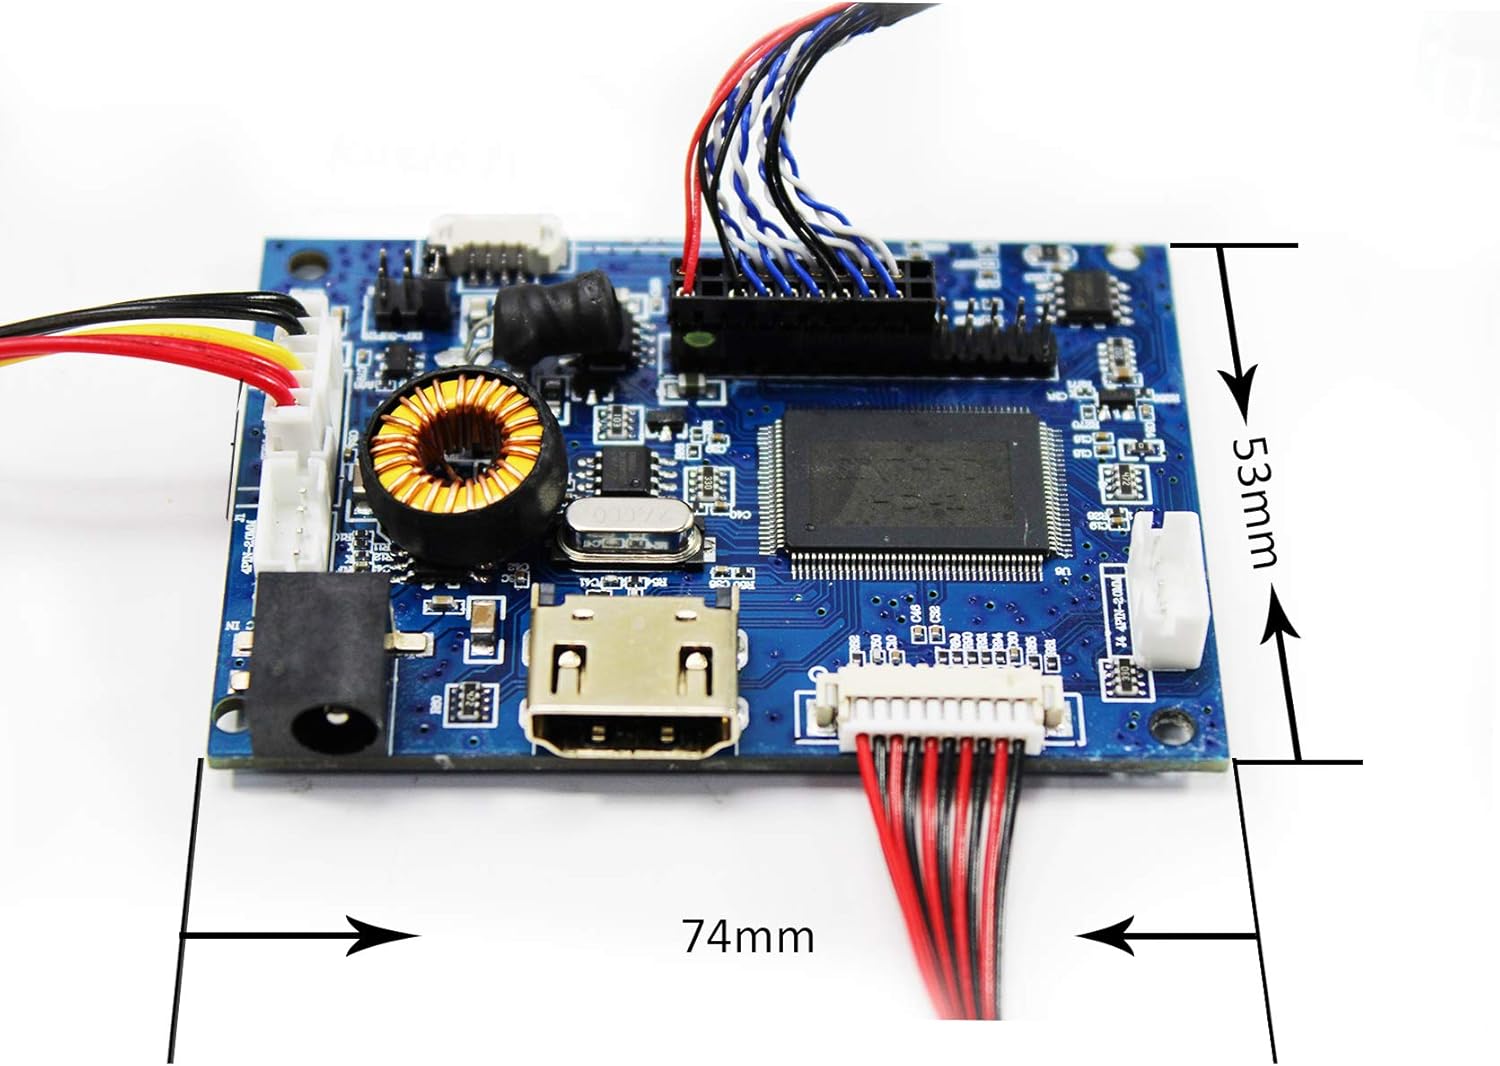
Figure 3.2: Dimensions of the VS-TY2660H-V1 LCD Controller Board, measuring 74mm in length and 53mm in width.
3.2. 15.0-inch LCD Screen
| Feature | Specification |
|---|---|
| Screen Size | 15.0 inches |
| Resolution | 1024x768 (XGA) |
| Display Mode | TN, Normally White, Transmissive |
| Outline Size | 326.5 × 253.5 × 12 mm (W×H×D) |
| Display Area | 304.128 × 228.096 mm (W×H) |
| Brightness | 1000 cd/m² (Typ.) |
| Contrast Ratio | 700:1 (Typ.) |
| Viewing Angle | 80/80/70/70 (Typ.) [Left / Right / Up / Down] |
| Signal Interface | LVDS (1 ch, 6/8-bit), 20 pins, Connector |
| Backlight | WLED |
| Input Voltage | 3.3V (Typ.) |

Figure 3.3: The 15.0-inch LCD screen displaying an image, connected to the controller board and other components.

Figure 3.4: Rear view of the 15.0-inch LCD screen, showing the connections to the controller board, backlight inverter, and control keyboard.
4. Setup and Installation
Follow these steps carefully to assemble and connect your LCD screen and controller board. Ensure all power is disconnected before making any connections.
4.1. Connection Diagram
Refer to the following diagram for a visual guide to connecting the components:
Figure 4.1: An assembled VSDISPLAY LCD kit, illustrating the connections between the 15-inch LCD panel, the VS-TY2660H-V1 controller board, and the associated cables (LVDS, backlight, keyboard).
4.2. Step-by-Step Assembly
- Connect the LVDS Cable: Carefully connect one end of the LVDS cable to the 30-pin LVDS interface on the LCD Controller Board (refer to Figure 3.1). Connect the other end to the corresponding LVDS input on the 15.0-inch LCD Screen. Ensure correct orientation and a secure connection.
- Connect the Backlight Cable: Attach the backlight cable to the backlight connector on the LCD Controller Board and to the backlight input on the LCD Screen.
- Connect the Keyboard Cable: Plug the keyboard cable into the designated port on the LCD Controller Board. This keyboard is used for OSD menu navigation.
- Connect the Power Adapter: Connect a 12Vdc, >2A power adapter (not included) to the power input port on the LCD Controller Board. Important: Ensure the power adapter meets the specified voltage and current requirements. Using an incorrect power adapter can damage the device.
- Connect Video Source: Connect your video source (e.g., computer, media player) to the appropriate input port on the LCD Controller Board (e.g., HDMI).
Once all connections are made, you can proceed to power on the system.
5. Operating Instructions
5.1. Powering On/Off
- Power On: After connecting the power adapter, the system should power on automatically or can be activated via the keyboard.
- Standby Mode: The controller board will enter standby mode if no video signal is detected, consuming less than 1W of power.
5.2. OSD Menu Navigation
Use the provided keyboard with cable to access and navigate the On-Screen Display (OSD) menu. The OSD allows you to adjust various display settings:
- Brightness: Adjust the overall luminance of the screen.
- Contrast: Modify the difference between the lightest and darkest areas of the image.
- Auto Adjustment: Automatically optimizes display settings for the input signal.
- Language: Select your preferred OSD language (e.g., English, French, German, Spanish, Italian).
- Other settings may include color temperature, aspect ratio, and input source selection.
6. Troubleshooting
If you encounter issues, refer to the following common problems and solutions:
| Problem | Possible Cause / Solution |
|---|---|
| No Display / Black Screen |
|
| Incorrect Resolution / Distorted Image |
|
| OSD Menu Not Appearing |
|
| Screen Flickering |
|
7. Maintenance
Proper care and maintenance will extend the lifespan of your VSDISPLAY LCD kit.
- Cleaning the Screen: Use a soft, lint-free cloth slightly dampened with water or a specialized screen cleaner. Avoid harsh chemicals or abrasive materials.
- Cleaning the Controller Board: Keep the controller board free from dust. Use compressed air or a soft brush to gently remove dust. Ensure the board is powered off and disconnected before cleaning.
- Environmental Conditions: Operate the device in a clean, dry environment. Avoid extreme temperatures, high humidity, and direct sunlight.
- Handling: Handle the LCD screen and controller board with care to prevent physical damage. Avoid applying pressure to the screen surface.
8. Warranty and Support
For warranty information or technical support, please refer to the seller's policies or contact VSDISPLAY customer service through their official channels. Keep your purchase receipt for warranty claims.
You can visit the VSDISPLAY Store on Amazon for more product information and support resources.


