
1. Introduction
This manual provides essential information for the safe and effective use of your Estry replacement battery, model CS-CNS890VX. This battery is designed for compatibility with CECOTEC Conga Slim 890 series robotic vacuum cleaners. Please read these instructions carefully before installation and use.
Compatible Models:
- CONGA Slim 890 Wet
- CONGA Slim Wet
- CONGA Slim 890
- CONGA 890 Slim
- CONGA Wet
- CONGA Slim
Compatible Battery Part Number: CONG0001
2. Safety Information
Always follow these safety guidelines to prevent injury or damage to the battery and device.
- Do not attempt to disassemble, open, or service the battery pack.
- Replace only with the battery pack designated for this product.
- Do not crush, puncture, short external contacts, or dispose of in fire or water.
- Do not store above 60°C (140°F).
- Keep the battery away from children.
- Dispose of used batteries according to local regulations.
- The battery features overcharge, over-discharge, over-voltage, and short-circuit protection for enhanced safety.
3. Setup and Installation
Follow these steps to safely install the replacement battery into your CECOTEC Conga Slim 890 series robotic vacuum.
- Power Off Device: Ensure your robotic vacuum cleaner is completely powered off and disconnected from its charging base or power adapter.
- Locate Battery Compartment: Refer to your robotic vacuum's original user manual to locate and open the battery compartment. This is typically on the underside of the device.
- Remove Old Battery: Carefully disconnect the old battery's connector from the vacuum's port. Remove the old battery.
- Insert New Battery: Place the new Estry battery into the compartment, ensuring it fits correctly.
- Connect Battery: Align the connector of the new battery with the port in the vacuum and gently push until it clicks into place. Ensure a secure connection.
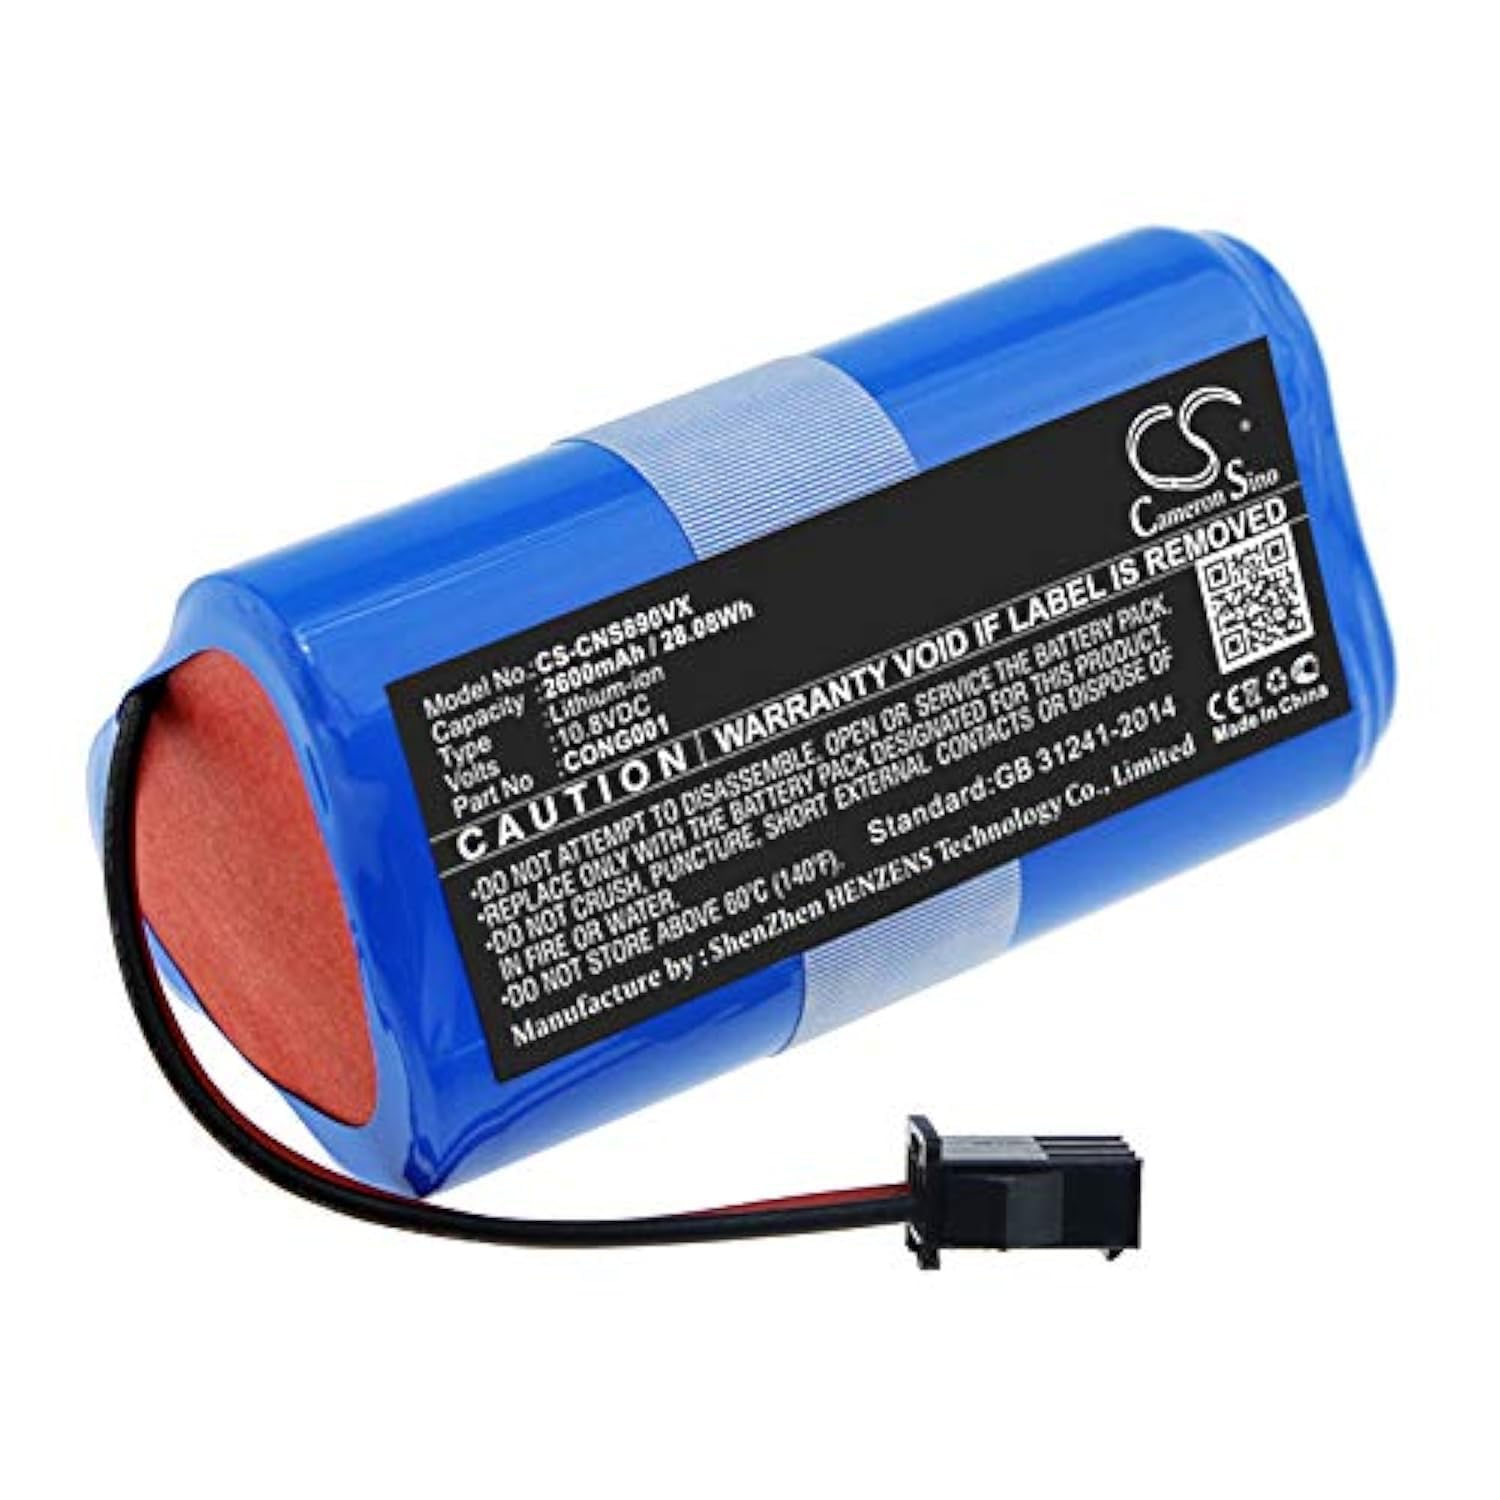
Image 1: Estry replacement battery (Model CS-CNS890VX) with connector. This image shows the overall appearance of the battery, including its label with specifications and the attached wiring harness with a black plastic connector.
- Close Compartment: Securely close the battery compartment cover.
- Initial Charge: Place the robotic vacuum on its charging base or connect it to its power adapter. Allow the battery to fully charge before its first use. This may take several hours.

Image 2: Close-up view of the battery's connector. This image highlights the specific design of the two-pin connector, crucial for proper installation into the robotic vacuum.
4. Operating Instructions
After successful installation and initial charging, the battery operates in conjunction with your robotic vacuum's existing system.
- First Use: For optimal performance, fully charge the battery before its first use.
- Regular Charging: Always return the robotic vacuum to its charging base after each cleaning cycle to ensure the battery remains charged and ready for use.
- Battery Indicator: Monitor the battery level indicator on your robotic vacuum (refer to your vacuum's manual) to understand its charge status.
5. Maintenance
Proper maintenance can extend the lifespan of your battery.
- Avoid Extreme Temperatures: Do not expose the battery to extreme heat or cold. Store and operate within recommended temperature ranges (typically 0°C to 40°C or 32°F to 104°F).
- Regular Use: Lithium-ion batteries benefit from regular use. Avoid leaving the battery fully discharged for extended periods.
- Long-Term Storage: If storing the battery for an extended period (e.g., several months), charge it to approximately 50-60% capacity and store it in a cool, dry place. Recharge every 3-6 months to prevent deep discharge.
- Cleaning: Keep the battery and its contacts clean and dry. Use a soft, dry cloth if cleaning is necessary.
6. Troubleshooting
If you encounter issues with your replacement battery, consider the following:
- Battery Not Charging:
- Ensure the battery is correctly installed and its connector is securely seated.
- Verify that the charging base or power adapter for your robotic vacuum is functioning correctly.
- Check for any debris on the charging contacts of both the vacuum and the charging base.
- Short Operating Time:
- Ensure the battery has been fully charged.
- Operating time can be affected by the vacuum's cleaning mode, floor type, and age of the battery.
- If the issue persists after several charge/discharge cycles, the battery may be nearing the end of its lifespan.
- Device Not Powering On:
- Confirm the battery is fully charged and properly installed.
- Check the power button and other functions of the robotic vacuum itself (refer to its original manual).
If troubleshooting steps do not resolve the issue, please contact customer support.
7. Specifications
| Model Number | CS-CNS890VX |
| Battery Type | Lithium-ion (Li-ion) |
| Voltage | 10.8V |
| Capacity | 2600mAh (28.08Wh) |
| Dimensions | 70.3 x 35.0 x 35.0 mm (2.77 x 1.38 x 1.38 inches) |
| Weight | 250 g (8.8 ounces) |
| Certifications | ISO9001, RoHS, CE, UN38.3, MSDS |
| Manufacturer | Estry |
8. Warranty and Support
This Estry replacement battery is manufactured to high-quality standards and comes with various certifications ensuring its safety and performance.
- Quality Assurance: Certified with ISO9001, RoHS, CE, UN38.3, and MSDS.
- Warranty: Refer to your purchase documentation for specific warranty terms and conditions. The battery label indicates a warranty void if the label is removed.
- Support: For technical assistance or inquiries, please contact the seller or manufacturer directly. You may also find additional information on the manufacturer's website: www.cameronsino.com.