
Brio CLNLPOU520SCF2
Brio 520 Series Water Cooler Instruction Manual
Model: CLNLPOU520SCF2
Brand: Brio
Introduction
This manual provides detailed instructions for the safe and efficient operation, installation, and maintenance of your Brio 520 Series No Line Bottom-Loading Water-Cooler with Built-in 2 Stage Water-Filter. Please read this manual thoroughly before use and retain it for future reference.

Image: Brio 520 Series Water Cooler, illustrating its bottom-loading design with a water bottle visible inside.
Safety Information
Always follow basic safety precautions when using electrical appliances to reduce the risk of fire, electric shock, and injury to persons.
- Ensure the unit is placed on a flat, stable surface.
- Do not operate the dispenser with a damaged cord or plug.
- Keep the dispenser away from direct sunlight and heat sources.
- Unplug the unit before cleaning or performing any maintenance.
- The hot water button features a child safety switch to prevent accidental dispensing of hot water. Always engage this lock when not in use, especially in households with children.
What's in the Box
Your Brio 520 Series Water Cooler package includes the following components:
- Brio 520 Series No-Line Bottom Load 2-Stage Water Cooler Dispenser
- 2 Water Filters (Sediment and Activated Carbon)
- Installation Kit (includes drain tube, funnel, bottle adapter)

Image: Contents of the Brio 520 Series Water Cooler package, including the dispenser, filters, and installation accessories.
Setup Instructions
Follow these steps for the initial setup of your water cooler:
- Unpacking and Placement: Carefully remove the dispenser from its packaging. Place the unit on a level, sturdy surface, ensuring adequate ventilation around the back and sides.
- Filter Installation:

Image: Step-by-step guide for installing filters, filling the water bottle, and preparing the dispenser for use.
Locate the filter compartment, typically behind the bottom door. Twist in both the Sediment filter (Stage 1) and the Activated Carbon filter (Stage 2) into their designated slots until secure. These filters are designed to remove sediment, chlorine taste, and other contaminants.

Image: Detailed view of the two-stage filtration system, highlighting the sediment and activated carbon filters and their purification capabilities.
- Prepare Water Bottle: Fill a standard 3 or 5-gallon water bottle with tap water. Use the provided funnel if necessary to prevent spills.
- Install Bottle Adapter: Insert the bottle adapter into the filled water bottle.
- Load Water Bottle: Open the bottom compartment of the dispenser. Slide the prepared water bottle into the cabinet. The bottom-loading design eliminates the need for heavy lifting.
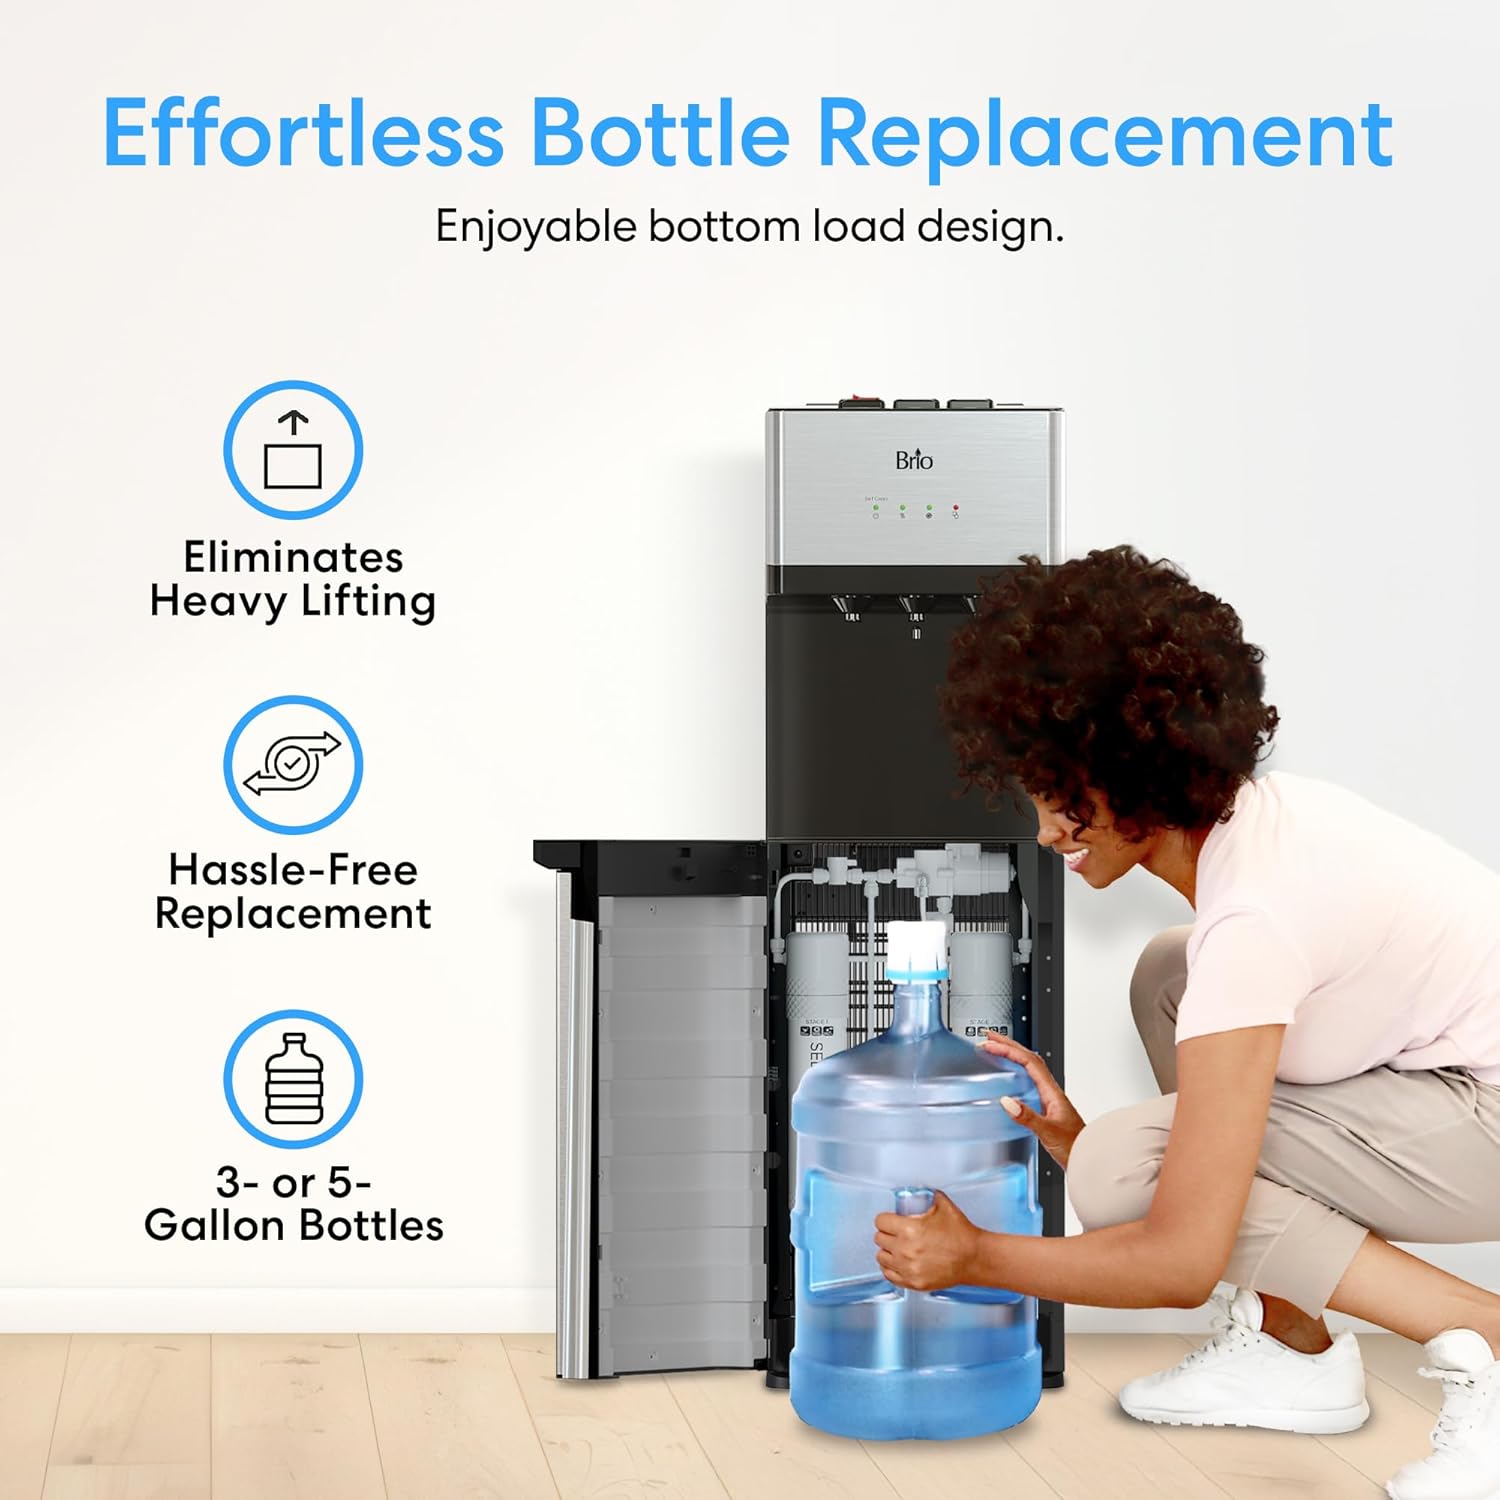
Image: Demonstrating the ease of replacing water bottles with the bottom-loading feature of the dispenser.
- Flush Filters: Before first use, flush the filters by dispensing several cups of water from both the cold and hot spouts until the water runs clear and tastes normal. This removes any carbon fines or air from the system.
- Plug In: Once the bottle is loaded and filters are flushed, plug the dispenser into a grounded electrical outlet. Allow approximately 15-30 minutes for the water to reach desired temperatures.
Operating Instructions
Your Brio 520 Series Water Cooler offers three temperature options and convenient indicators.
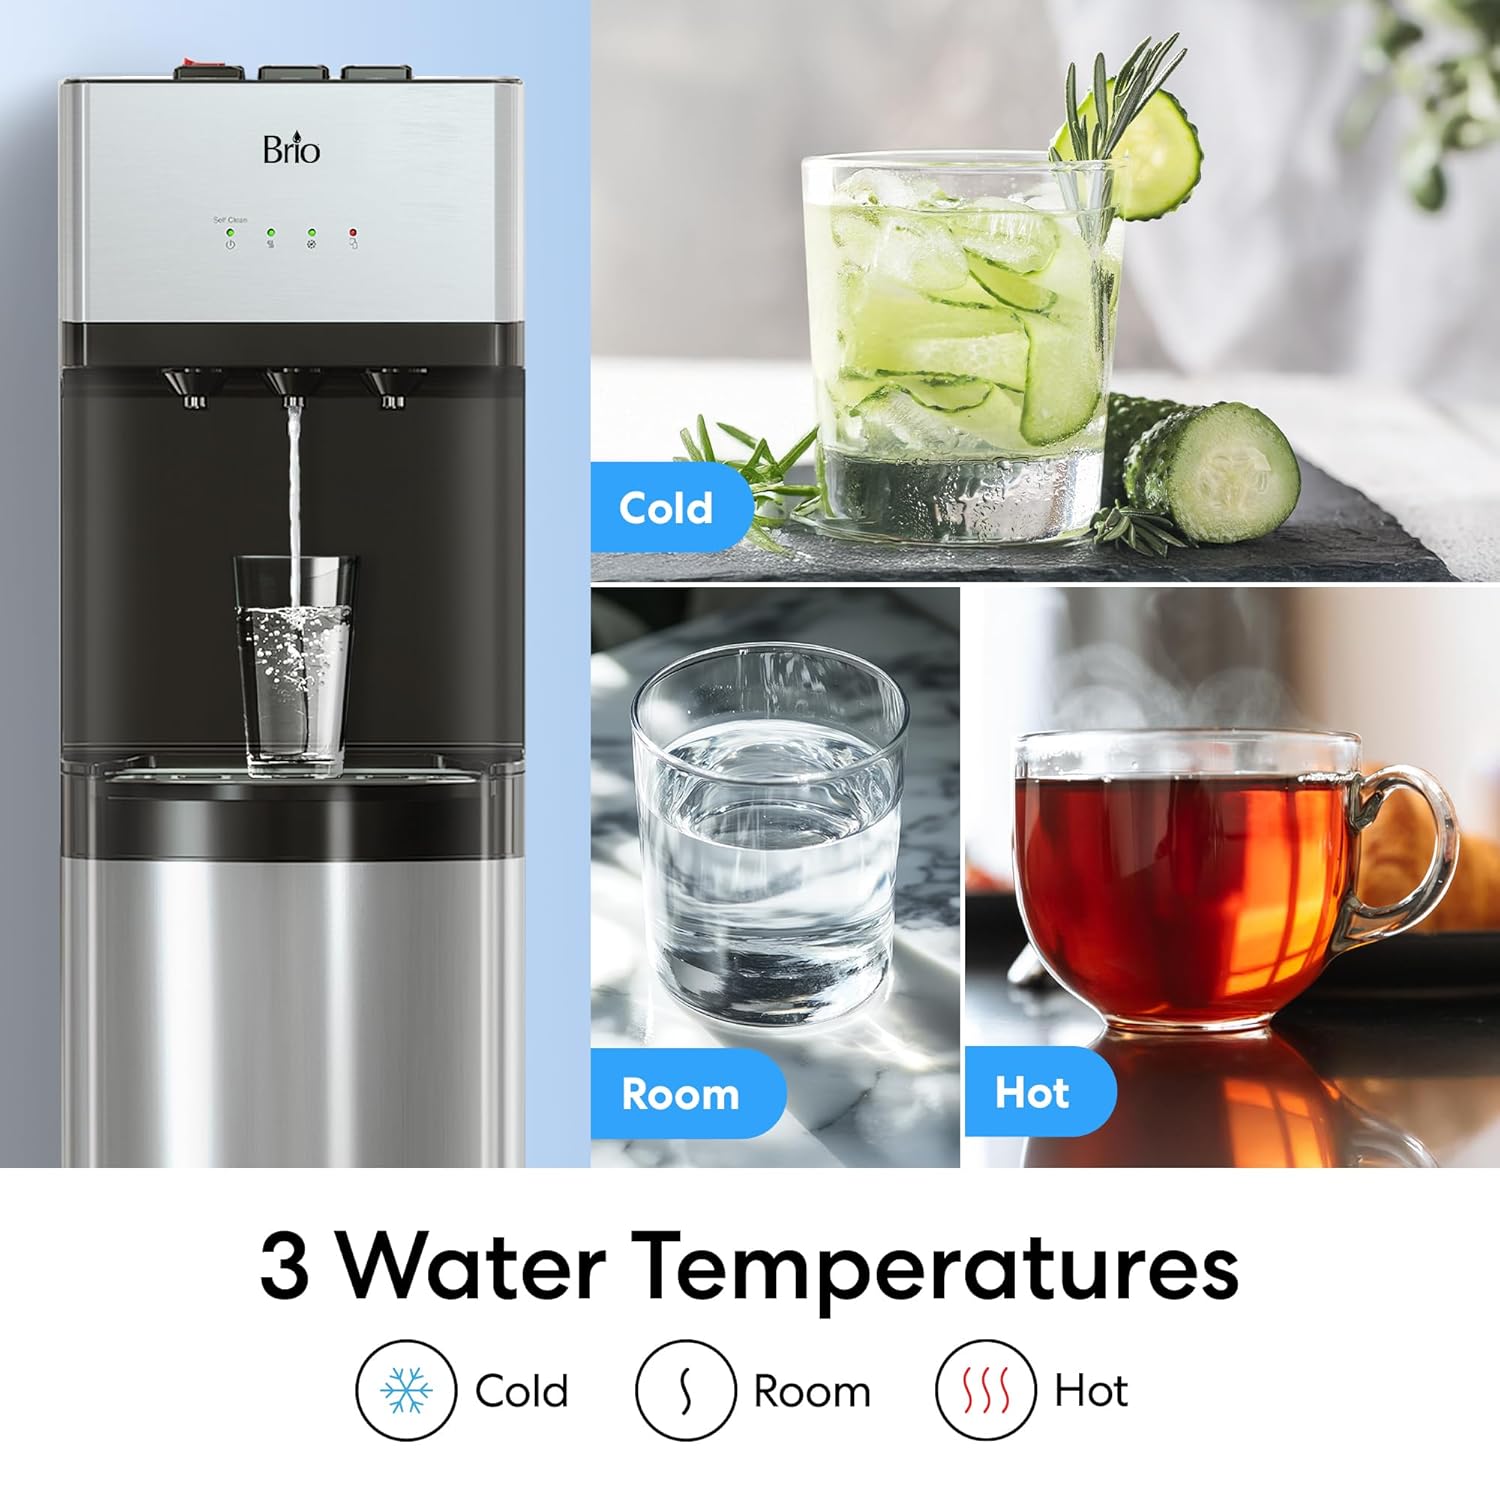
Image: Visual representation of the three water temperature options: cold, room temperature, and hot.
- Dispensing Water:
- Cold Water: Press the cold water button/lever.
- Room Temperature Water: Press the room temperature water button/lever.
- Hot Water: To dispense hot water, first engage the child safety lock (usually a red switch or button) and then press the hot water button/lever. This two-step process prevents accidental burns.
- Indicator Lights: The control panel features LED indicators to show the status of the dispenser.
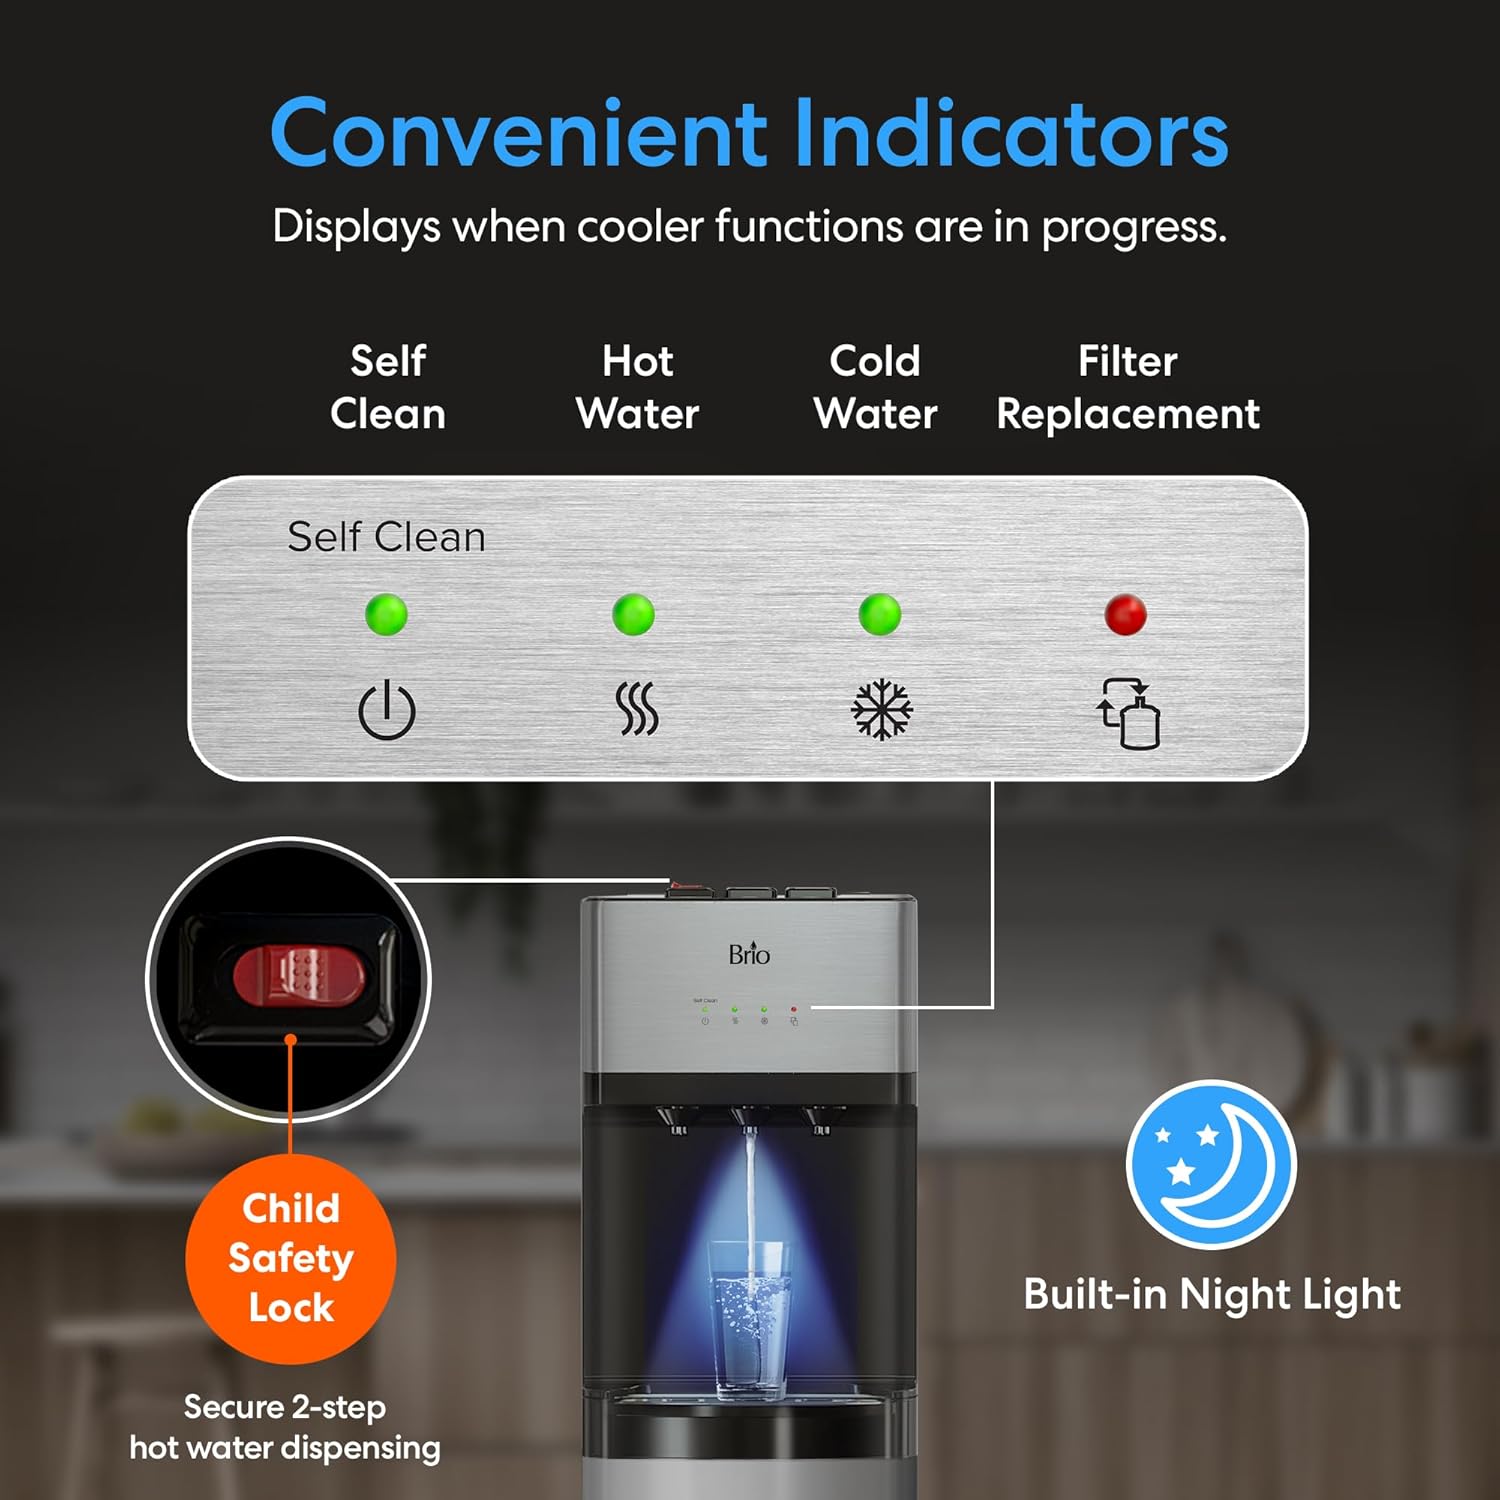
Image: Overview of the dispenser's control panel, highlighting the various indicator lights and safety features.
- Self Clean: Indicates when the self-cleaning cycle is active.
- Hot Water: Illuminates when the hot water is heating or at optimal temperature.
- Cold Water: Illuminates when the cold water is cooling or at optimal temperature.
- Filter Replacement: A red light indicates that the filters need to be replaced.
- Bottle Refill: An indicator will light up when the water bottle needs to be refilled.
- Built-in Night Light: The dispenser includes a built-in night light for convenience in low-light conditions. This feature can typically be toggled on/off via a switch on the back of the unit.
Maintenance
Regular maintenance ensures optimal performance and water quality.
- Filter Replacement:
The filter replacement indicator light will turn red when it's time to change the filters. For replacement filters, search for "Brio MIB200PKF" 2-Stage Filter Replacement Kit. Refer to the "Setup Instructions" for filter installation steps.
- Self-Cleaning Function:
The dispenser features an effortless ozone self-cleaning process. To activate, press the designated self-clean button. The self-clean indicator light will illuminate during the cycle. This process sanitizes the entire unit.
- Exterior Cleaning:
Wipe the exterior of the dispenser with a soft, damp cloth. Avoid abrasive cleaners or solvents that could damage the finish.
- Draining the Reservoir:
Periodically, or before moving the unit, drain the internal reservoirs using the drain plug located at the back of the unit. Use the provided drain tube to direct water into a bucket.
Troubleshooting
If you encounter issues with your Brio 520 Series Water Cooler, refer to the following common problems and solutions:
| Problem | Possible Cause | Solution |
|---|---|---|
| No water dispensing | Empty water bottle; airlock in system; clogged filters. | Replace water bottle; dispense water until flow is consistent; replace filters. |
| Water not cold/hot enough | Unit recently plugged in; temperature settings not active; insufficient time for cooling/heating. | Allow 15-30 minutes for temperatures to stabilize; ensure unit is plugged in and power is on. |
| Filter replacement light is on | Filters are at end of life. | Replace both sediment and activated carbon filters. |
| Unusual noise | Compressor cycling; unit not level; air in system. | Normal operation; ensure unit is on a level surface; dispense water to remove air. |
Specifications
| Feature | Detail |
|---|---|
| Model Number | CLNLPOU520SCF2 |
| Product Dimensions (D x W x H) | 14.3" x 12.2" x 40.5" |
| Weight | 45 Pounds |
| Material | Plastic, Stainless Steel |
| Capacity | 5 Gallons (compatible with 3 or 5-gallon bottles) |
| Filtration System | 2-Stage (Sediment, Activated Carbon) |
| Water Temperatures | Hot, Cold, Room Temperature |
| Safety Features | Child Safety Lock for Hot Water |
| Additional Features | Self-Cleaning Ozone Feature, Built-in Night Light, Bottom-Loading |
Warranty and Support
For warranty information, product support, or to purchase replacement parts and filters, please visit the official Brio store or contact customer service.
Official Brio Store: Visit Brio Store on Amazon
Replacement Filters: Search for "Brio MIB200PKF" 2-Stage Filter Replacement Kit.
Related documentsCLNLPOU520SCF2


Ask a question about this manual
Ask about setup, troubleshooting, compatibility, parts, safety, or missing instructions. Manuals+ will review the question and use this page’s manual context to help answer it.