1. Introduction
This manual provides comprehensive instructions for the setup, operation, and maintenance of the Adafruit LPS25HB Pressure Sensor. The LPS25HB is an absolute pressure sensor designed for precise atmospheric pressure measurements, which can be utilized for weather monitoring or altitude determination. It features STEMMA QT/Qwiic compatibility for easy integration into various projects.
2. Product Overview
The Adafruit LPS25HB is a compact, high-resolution absolute pressure sensor. It measures atmospheric pressure in hectopascals (hPa) and can be used to infer altitude, as air pressure decreases with increasing elevation. The sensor communicates via the I2C protocol, making it compatible with microcontrollers using the STEMMA QT or Qwiic connection standards.
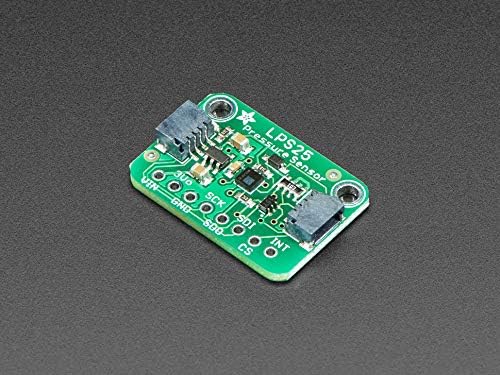
Figure 2.1: Top view of the LPS25HB Pressure Sensor board, showing the main chip and connection pads.
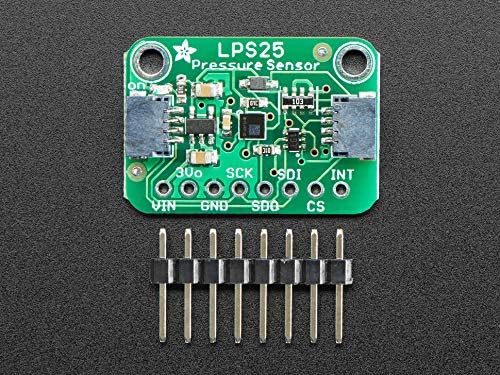
Figure 2.2: The LPS25HB Pressure Sensor board shown with the included male header pins, ready for soldering or breadboard use.
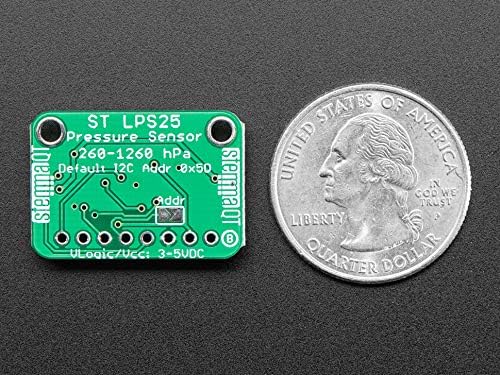
Figure 2.3: Bottom view of the LPS25HB Pressure Sensor board, displaying the I2C address configuration pads and power input, alongside a US quarter for scale.
3. Setup
To begin using your LPS25HB Pressure Sensor, follow these connection steps:
- Power Connection: Connect the VIN pin to a 3V to 5V DC power source. Connect the GND pin to the ground of your power supply and microcontroller.
- I2C Communication:
- Connect the SCL pin to your microcontroller's I2C clock line.
- Connect the SDA pin to your microcontroller's I2C data line.
- Optional Connections:
- The CS (Chip Select) pin is typically used for SPI communication. For I2C, it should be pulled high (connected to VIN) or left unconnected if the board handles it internally.
- The INT (Interrupt) pin can be used for interrupt-driven data ready signals. Refer to the LPS25HB datasheet for advanced usage.

Figure 3.1: Example setup showing the LPS25HB sensor connected via I2C to a microcontroller, which then displays pressure and temperature readings on an OLED screen.
The default I2C address for the LPS25HB is 0x5C. This can be modified by soldering the address jumper on the board if multiple I2C devices with conflicting addresses are used.
4. Operating Instructions
Once connected, the LPS25HB sensor can be read using an I2C library compatible with your chosen microcontroller. Most microcontroller platforms (e.g., Arduino, CircuitPython, Raspberry Pi) have libraries available for I2C communication and specifically for the LPS25HB sensor.
4.1 Reading Pressure Data
The sensor provides pressure readings in hectopascals (hPa). To obtain accurate readings:
- Initialize the I2C communication on your microcontroller.
- Address the sensor at its I2C address (default 0x5C).
- Send commands to configure the sensor (e.g., set output data rate, enable pressure measurement).
- Read the pressure data registers. The data will typically be a raw value that needs to be converted to hPa using the sensor's specified conversion factor.
4.2 Altitude Calculation
Altitude can be estimated from pressure readings using the barometric formula. This requires a known reference pressure (e.g., sea-level pressure). The formula is:
Altitude (m) = 44330 * [1 - (Current Pressure / Sea-Level Pressure)1/5.255]
Where "Current Pressure" is the reading from the LPS25HB in hPa, and "Sea-Level Pressure" is the local sea-level pressure (approximately 1013.25 hPa, but can vary with weather conditions).
5. Maintenance
The LPS25HB Pressure Sensor is a robust electronic component designed for long-term operation with minimal maintenance. To ensure optimal performance and longevity:
- Environmental Protection: Keep the sensor dry and away from excessive dust, moisture, and corrosive substances.
- Cleaning: If necessary, gently clean the board with a soft, dry brush or compressed air. Avoid using liquids or abrasive materials.
- Handling: Handle the sensor by its edges to avoid damaging components or introducing static discharge.
- Storage: Store the sensor in an anti-static bag in a cool, dry environment when not in use.
6. Troubleshooting
If you encounter issues with your LPS25HB Pressure Sensor, consider the following:
- No Readings or I2C Errors:
- Verify all power and I2C connections (VIN, GND, SDA, SCL) are secure and correctly wired.
- Ensure the sensor is receiving adequate power (3V-5V).
- Check the I2C address in your code matches the sensor's default (0x5C) or configured address.
- Confirm that pull-up resistors are present on the SDA and SCL lines (many development boards include these, but external ones may be needed for custom setups).
- Incorrect or Unstable Readings:
- Ensure the sensor is not exposed to direct airflow, extreme temperatures, or rapid pressure changes that could cause fluctuations.
- Check your code for correct unit conversion and calibration if applicable.
- Compare readings with a known good pressure source if possible.
- Sensor Not Detected:
- Use an I2C scanner sketch/program to confirm the sensor is visible on the I2C bus at its expected address.
- Inspect the board for any physical damage or poor solder joints.
7. Specifications
| Feature | Specification |
|---|---|
| Sensor Type | Absolute Pressure Sensor |
| Model | LPS25HB |
| Pressure Range | 260 to 1260 hPa |
| Interface | I2C (STEMMA QT/Qwiic compatible) |
| Supply Voltage (VIN) | 3V - 5V DC |
| Default I2C Address | 0x5C |
| Adafruit Product ID | 4530 |
| Item Weight | 5 g |
8. Warranty and Support
For warranty information and technical support, please refer to the retailer or manufacturer from whom you purchased the Adafruit LPS25HB Pressure Sensor. Adafruit provides extensive documentation, tutorials, and community forums on their official website (www.adafruit.com) which can be a valuable resource for project development and troubleshooting.
Always ensure you are using the latest libraries and example code provided by Adafruit for optimal performance and compatibility.


