1. Introduction
This manual provides detailed instructions for the installation, operation, and maintenance of your PARKVISION PJ-120N3 Universal Backup/Front View Camera. Please read this manual thoroughly before installation and use to ensure proper function and longevity of the product.

Image 1: PARKVISION PJ-120N3 Camera. This image shows the compact design of the camera unit with its lens and threaded mounting shaft.
2. Product Features
- Universal Fitting: Designed for versatile installation as a front or rear view camera on various vehicles including cars, pickup trucks, SUVs, RVs, and vans.
- High-Definition Imaging: Equipped with an upgraded light sensor and 1/3 inch color CMOS image sensor for clear, high-resolution images during both day and night.
- Weather-Resistant Design: Features a strong metal housing and advanced sealing technology, ensuring IP68 waterproof and shockproof performance. Resistant to fog and mist.
- Durable Operation: Low-consumption power adapter and high-durability components support continuous working without overheating or image blur.
- Image Customization: Supports mirroring, vertical flipping, and guideline display adjustments via cutting specific wire loops.
- Adjustable Angle: Offers a 5-10 degree adjustable mounting angle for flexible positioning.

Image 2: Key features of the PARKVISION camera, including DC 12V compatibility, HD image, NTSC system, guideline on/off, IP68 waterproof rating, and vertical image flip.
3. Package Contents
The following items are included in your PARKVISION PJ-120N3 camera package:
- 1x PARKVISION PJ-120N3 Camera
- 1x Adapter Cable
- 1x RCA Video Extension Cable
- 1x Power Cable
- Accessories (e.g., mounting hardware, gaskets)
4. Installation Guide
Proper installation is crucial for optimal performance. It is recommended to have this camera installed by a qualified professional if you are unfamiliar with vehicle electrical systems.
4.1. Mounting the Camera
The camera can be mounted in various locations, such as the rear top, above the license plate, on the rear bumper, or on the front grille. The compact size and adjustable angle (5-10 degrees) allow for flexible positioning.
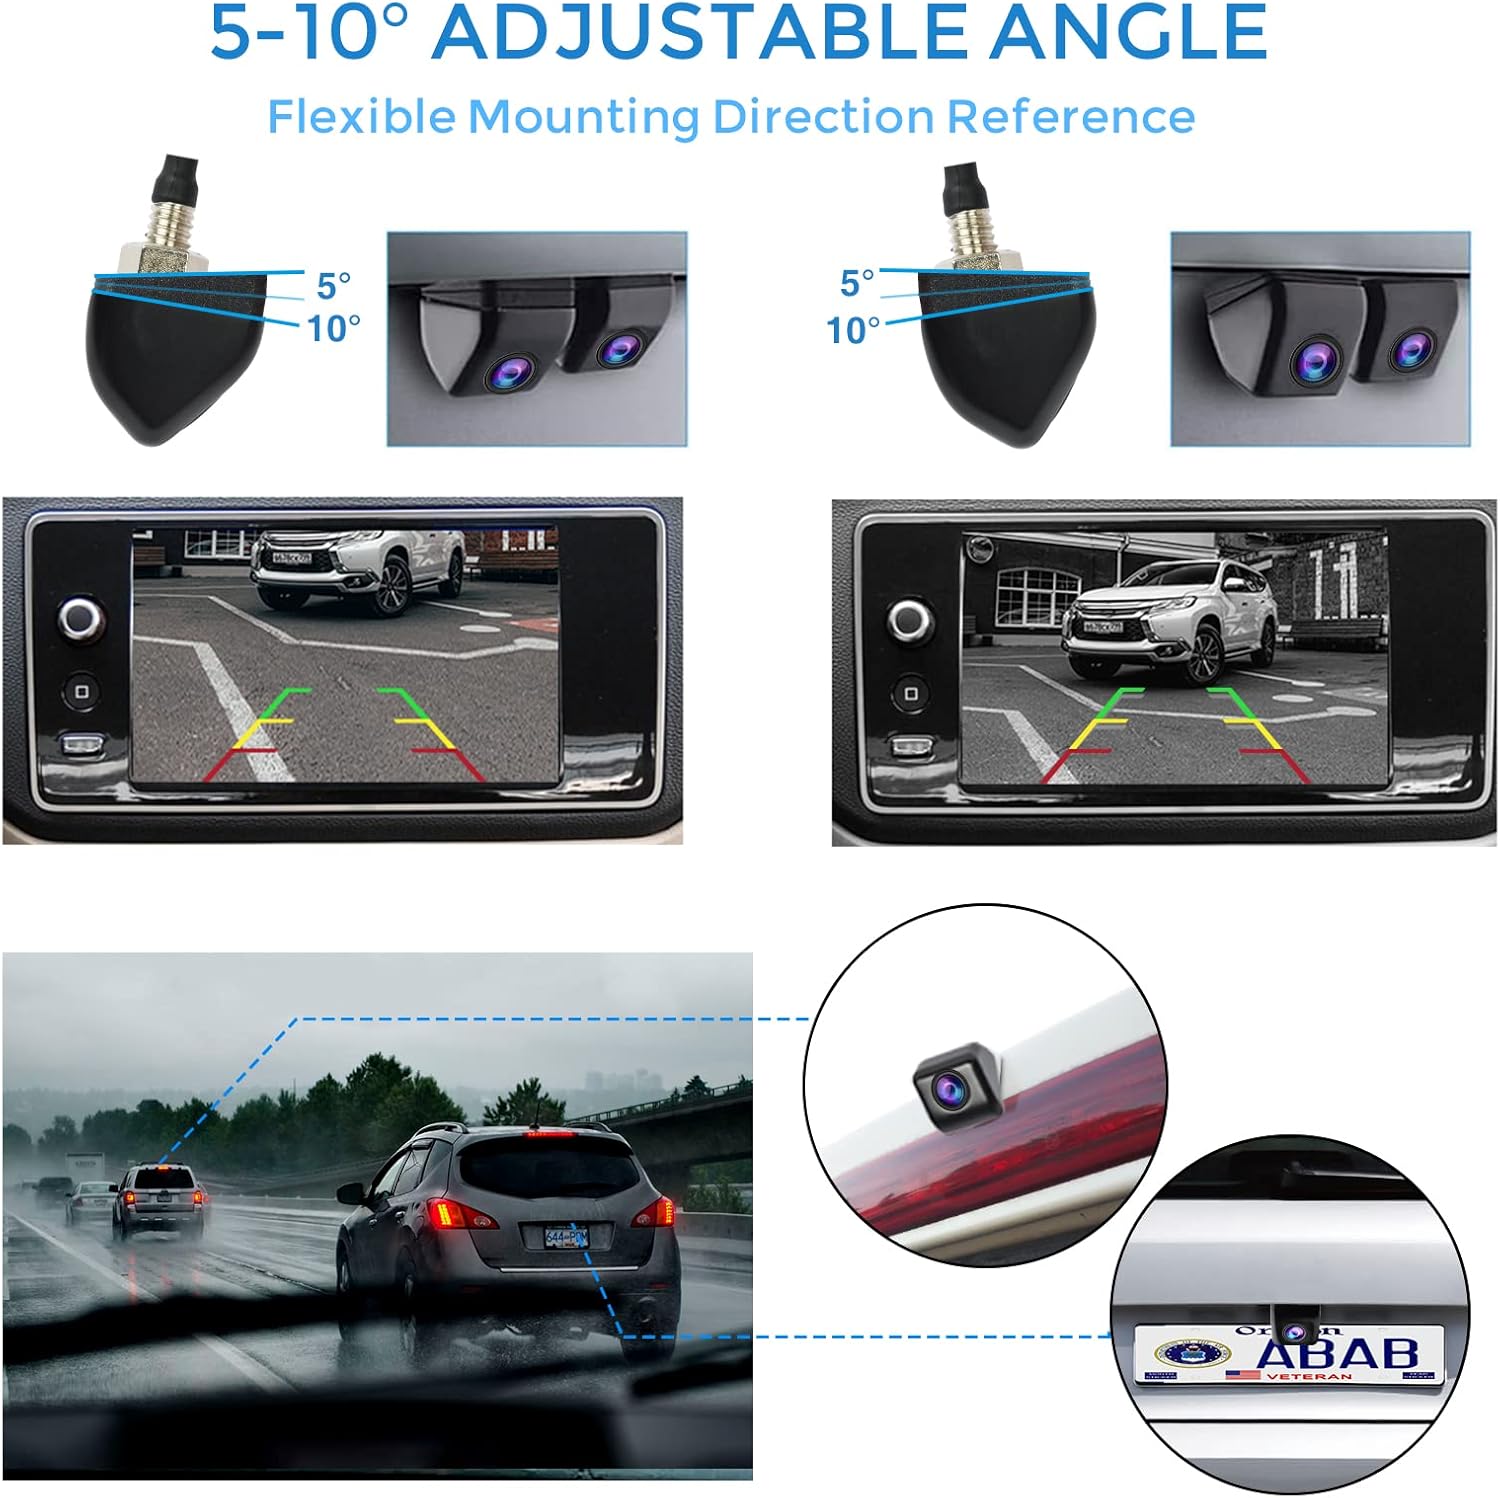
Image 3: Examples of camera mounting locations and the 5-10 degree adjustable angle feature. Shows the camera mounted on a vehicle's rear and front, with corresponding screen views.
Use the provided accessories, including gaskets, to secure the camera firmly and ensure a waterproof seal.
4.2. Wiring Diagram
Follow the wiring diagram carefully to connect the camera to your vehicle's power supply and monitor. The camera requires a DC 12V power source.
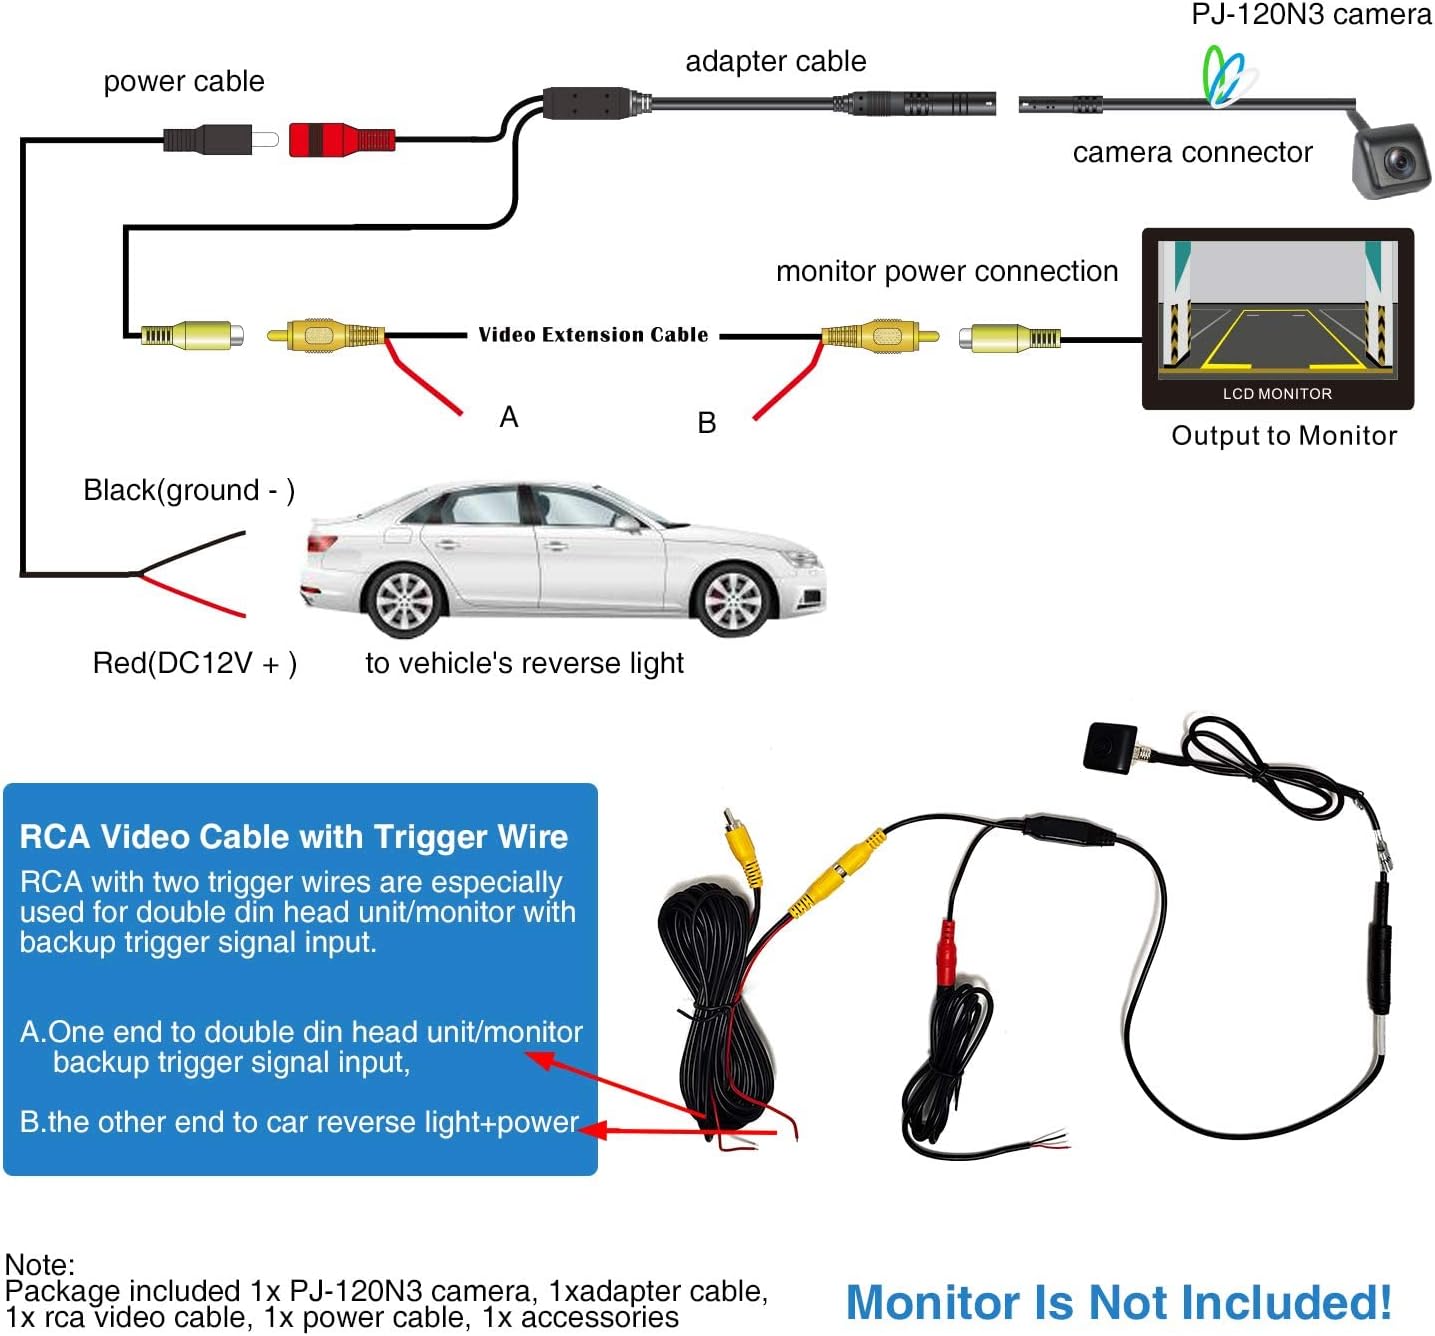
Image 4: Detailed wiring diagram for the PJ-120N3 camera. It illustrates connecting the camera to an adapter cable, video extension cable, power cable, and then to a monitor and the vehicle's reverse light (for trigger) and ground.
- Connect the camera connector to the adapter cable.
- Connect the adapter cable to the RCA Video Extension Cable.
- Connect the yellow RCA plug of the Video Extension Cable to the video input of your monitor.
- Connect the red wire (DC12V +) of the power cable to the vehicle's reverse light power for backup camera functionality, or to an ACC power source for continuous front view.
- Connect the black wire (ground -) of the power cable to a suitable vehicle ground point.
- If your head unit/monitor has a backup trigger signal input, connect the trigger wire from the RCA video cable to this input.
Note: The monitor is not included with the camera.
4.3. Image Customization Wires
The camera features small wire loops that can be cut to adjust image settings:

Image 5: Illustration of the customizable wire loops. Shows how cutting the white wire disables parking guidelines, cutting the green wire flips the image vertically, and cutting the blue wire changes the image from mirrored (default for rear view) to non-mirrored (for front view).
- White Wire: Cut to switch parking guidelines OFF (default is ON).
- Green Wire: Cut to support up-down flip image (vertical flip).
- Blue Wire: Cut to change from mirrored image (default for rear view) to non-mirrored image (for front view).
Caution: Ensure the vehicle's power is off before cutting any wires. Once cut, these changes are permanent.
5. Operating Instructions
Once installed, the camera operates automatically based on its power connection. If connected to the reverse light, it will activate when the vehicle is put into reverse. If connected to an ACC power source, it will operate continuously when the vehicle is on.
5.1. Viewing the Camera Feed
The camera feed will be displayed on your connected monitor. Ensure your monitor is set to the correct video input channel.

Image 6: A vehicle's dashboard monitor displaying the camera feed, showing a clear view behind the vehicle.
5.2. Day and Night Vision
The camera provides clear images in various lighting conditions due to its advanced light sensor and CMOS image sensor.
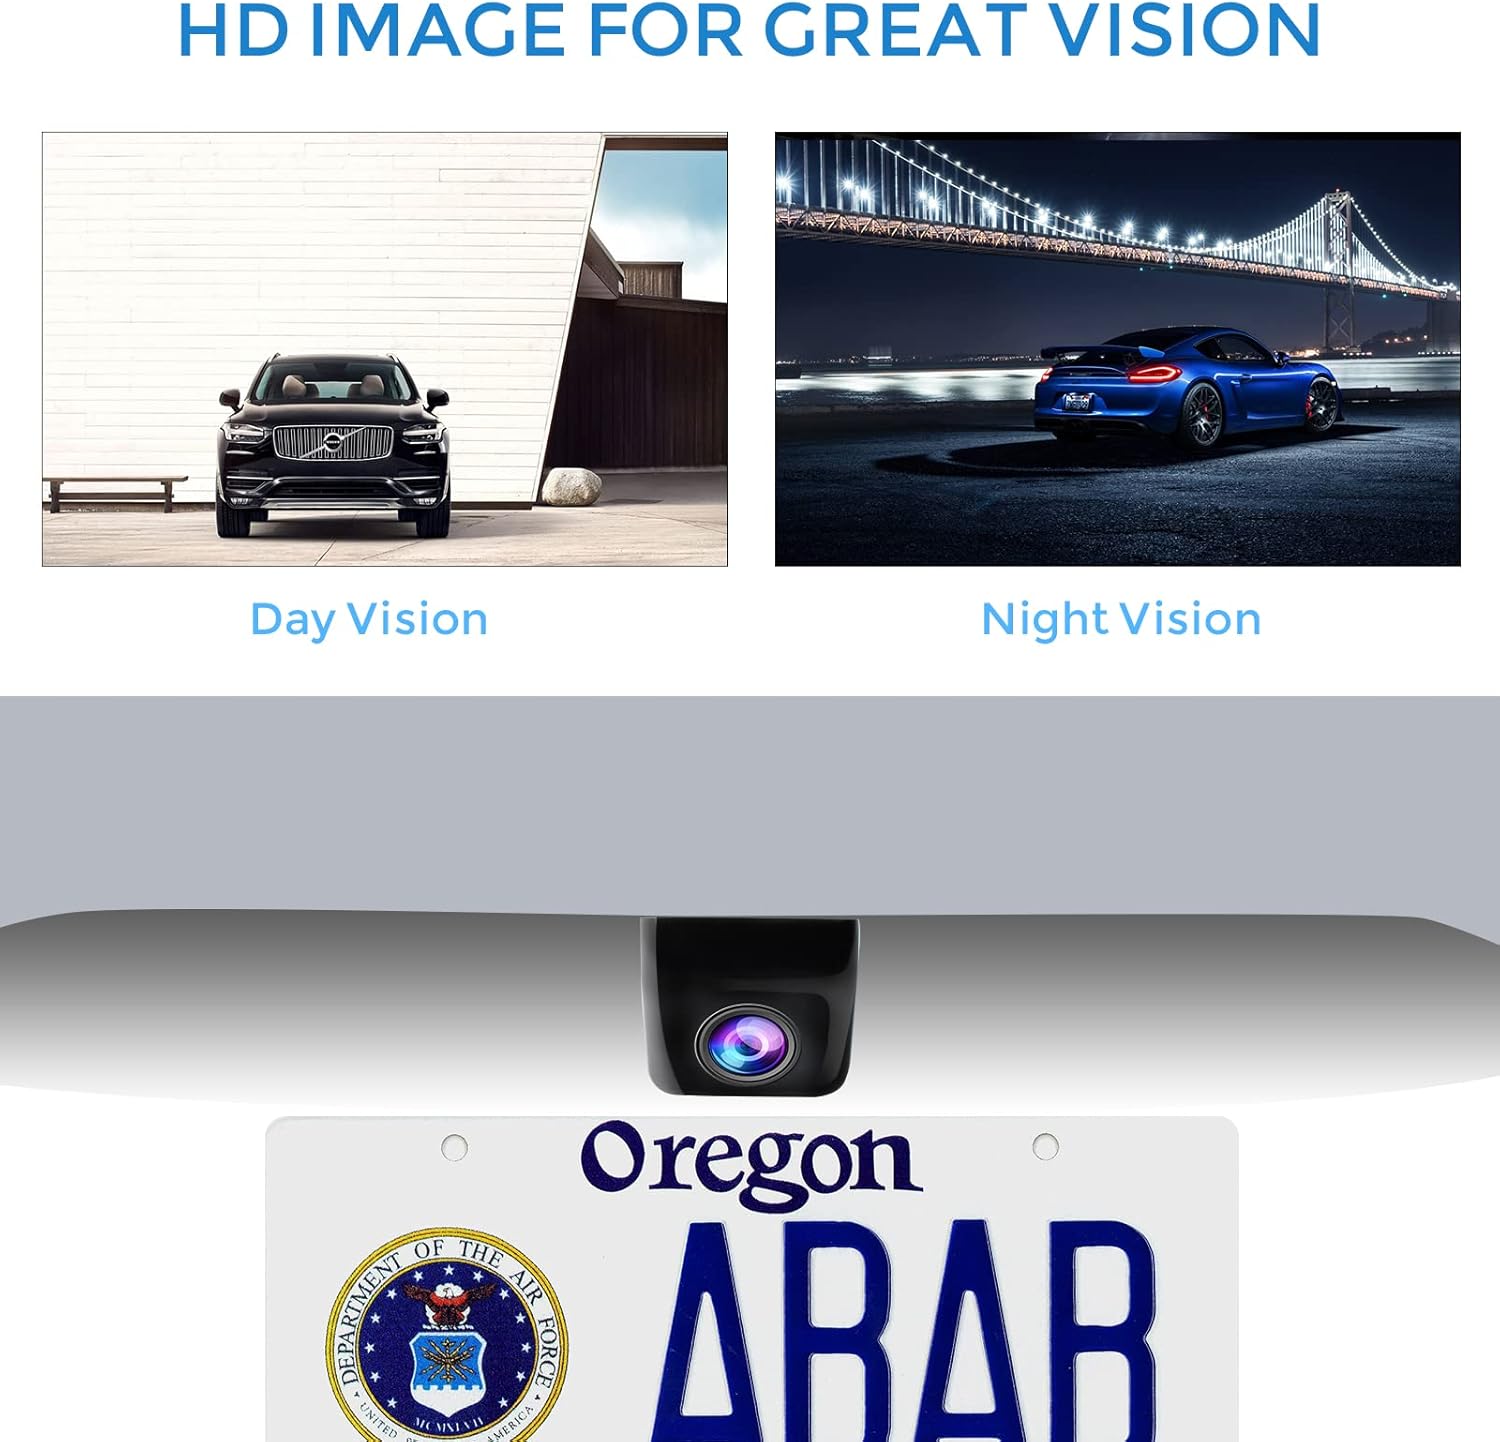
Image 7: Comparison of day vision and night vision capabilities of the camera, demonstrating clear image quality in both bright and low-light environments.
6. Maintenance
The PARKVISION PJ-120N3 camera is designed for durability and minimal maintenance.
- Cleaning: Periodically clean the camera lens with a soft, damp cloth to ensure a clear view. Avoid abrasive cleaners.
- Weather Resistance: The IP68 waterproof rating ensures protection against water and dust. The camera is designed to withstand various weather conditions, including rain, snow, and extreme temperatures (-20°C to 75°C).
- Durability: The metal housing provides shockproof protection. Avoid direct impacts to the camera.
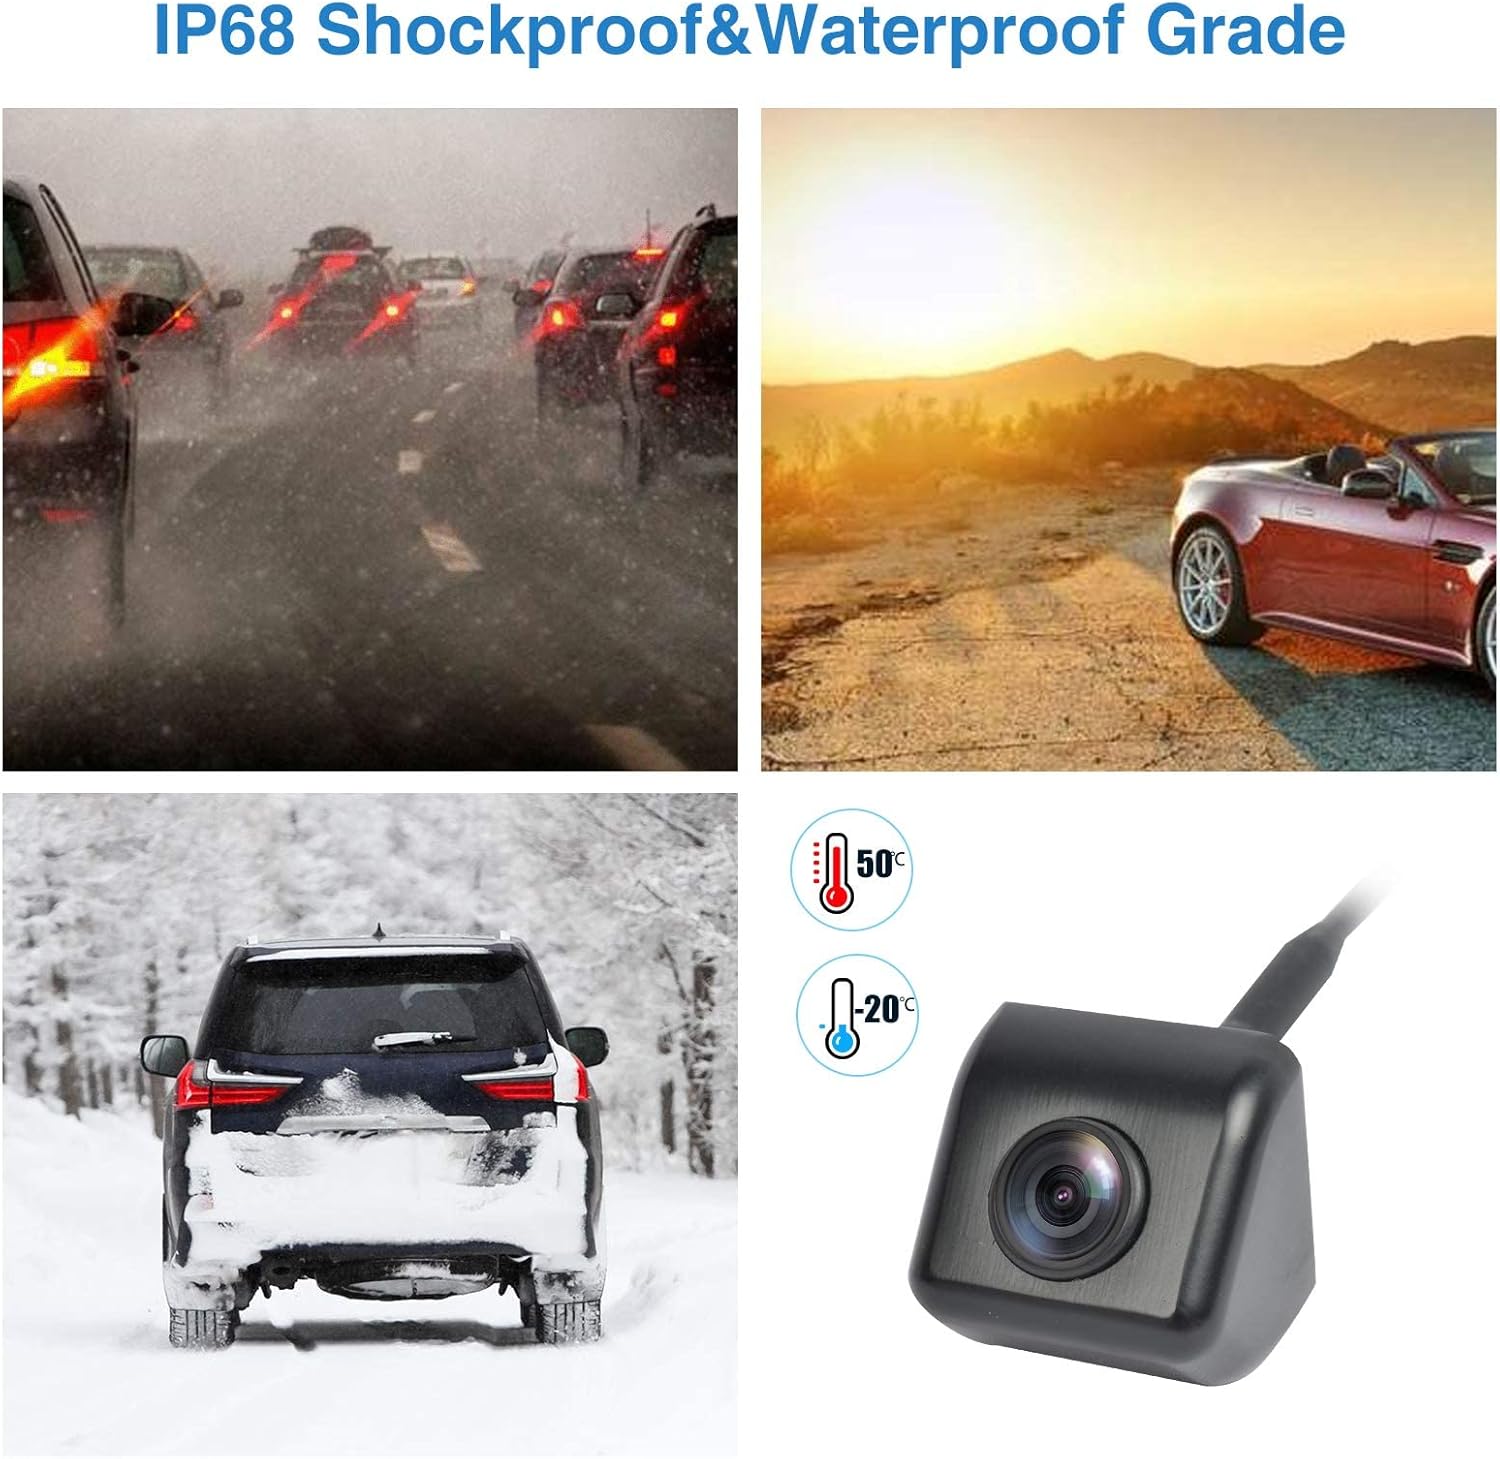
Image 8: Icons representing IP68 waterproof rating and temperature resistance from -20°C to 75°C, indicating the camera's ability to perform in diverse weather conditions.
7. Troubleshooting
If you encounter issues with your camera, refer to the following common problems and solutions:
| Problem | Possible Cause | Solution |
|---|---|---|
| No image on monitor |
|
|
| Fuzzy or distorted image |
|
|
| Image is upside down or mirrored incorrectly |
|
|
| Parking guidelines are missing or always present |
|
|
If the problem persists after attempting these solutions, please contact PARKVISION customer support.
8. Specifications
| Feature | Detail |
|---|---|
| Model Number | PJ-120N3 |
| Brand | PARKVISION |
| Product Dimensions | 1 x 1 x 1 inches (Camera unit dimensions: 25mm x 25mm / 0.98in x 0.98in, mounting base: 27mm / 1.06in) |
| Item Weight | 11.6 ounces |
| Color | Black |
| Compatible Devices | DC12V Vehicles (Applicable voltage range: 9V~16V) |
| Installation Type | Surface Mount |
| Optical Sensor Technology | CMOS (1/3 inch color CMOS image sensor) |
| Real Angle of View | 170 Degrees |
| Waterproof Rating | IP68 |
| Operating Temperature | -20°C to 75°C |
| UPC | 768253675825 |

Image 9: Detailed dimensions of the camera unit and its zinc alloy metal housing, shown next to a US dollar coin for scale.

Image 10: Illustrates the applicable voltage range (9V-16V) and high compatibility with various DC 9V-16V vehicles, including pickups, SUVs, vans, and mini RVs.
9. Warranty and Support
PARKVISION provides a 1-year warranty for this product. For any assistance or inquiries, please contact PARKVISION customer service.
You can find more information and support on the official PARKVISION store page: PARKVISION Store


