1. Introduction and Overview
The TP-Link RE230 AC750 WiFi Extender is designed to expand your existing Wi-Fi coverage, eliminating dead zones and providing a stronger, more reliable wireless connection throughout your home or office. This dual-band extender supports both 2.4GHz and 5GHz Wi-Fi networks, offering versatile connectivity for a wide range of devices. It can also function as a wireless adapter for wired devices or as an access point.
2. Package Contents
Please verify that all items are present in your package:
- TP-Link RE230 AC750 WiFi Extender Unit
- Quick Installation Guide
3. Product Features
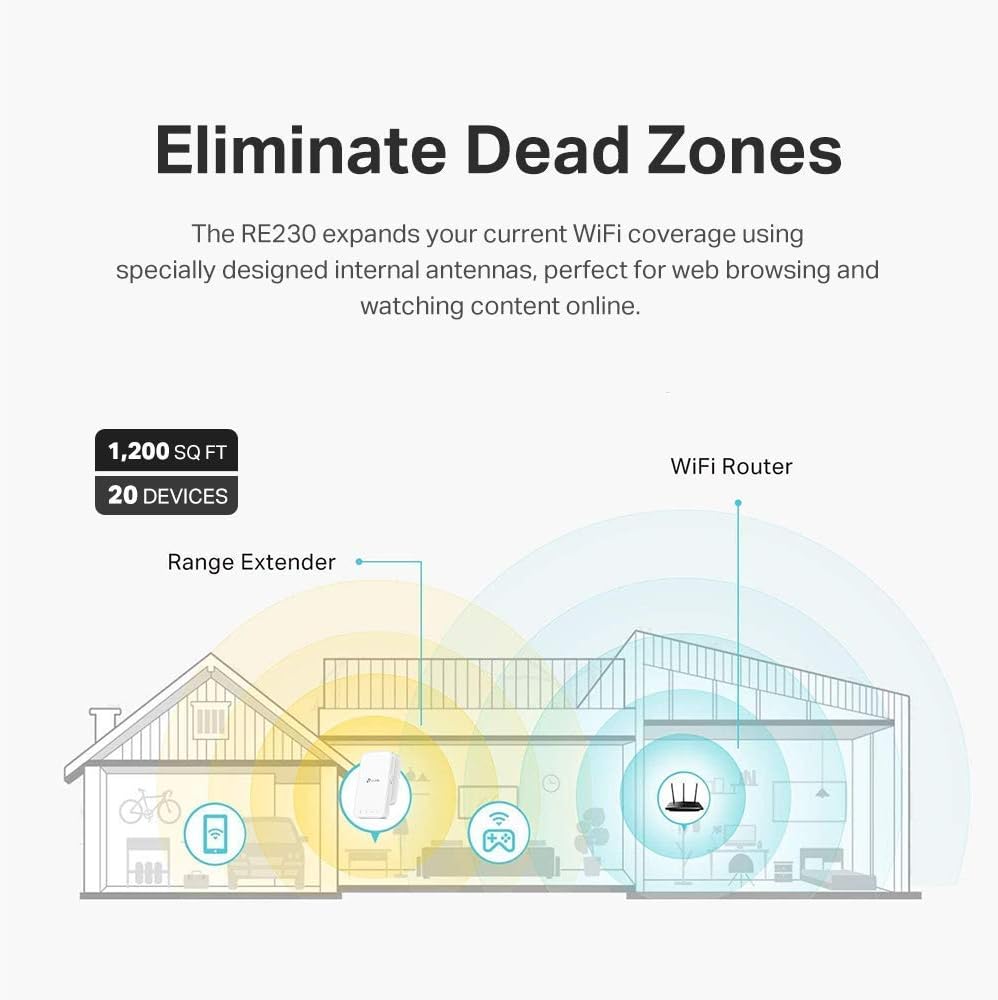
- Extended Wi-Fi Coverage: Boosts Internet Wi-Fi coverage up to 1200 square feet and connects up to 20 devices.
- Dual Band Wi-Fi: Supports 2.4GHz (300Mbps) and 5GHz (433Mbps) for flexible and high-speed connections.
- Fast Ethernet Port: Allows wired devices like smart TVs, gaming consoles, or Blu-ray players to connect to your Wi-Fi network.
- Access Point Mode: Converts your wired Internet connection into a wireless access point.
- Easy Setup: Set up and manage your Wi-Fi in minutes using the TP-Link Tether app (Android, iOS) or via WPS button.
- Intelligent Signal Indicator: Helps find the optimal location for the best Wi-Fi connection.
- Universal Compatibility: Compatible with all Wi-Fi-enabled devices, routers, and access points.
4. Setup and Installation
There are multiple ways to set up your TP-Link RE230 Wi-Fi Extender. Choose the method that best suits your needs.
4.1. Method 1: Via WPS Button (Recommended for quick setup)
- Plug the extender into a power outlet next to your router.
- Wait for the Power LED on the extender to turn solid on (this may take about 1 minute).
- Press the WPS button on your router.
- Within 2 minutes, press the WPS button on the extender. The Signal LED should turn solid blue, indicating a successful connection.

4.2. Method 2: Via TP-Link Tether App
- Download the TP-Link Tether app from the App Store (iOS) or Google Play (Android).
- Plug the extender into a power outlet next to your router and wait for the Power LED to turn solid on.
- Launch the Tether app, create a TP-Link ID (if you don't have one), and log in.
- Tap the '+' button in the app and select 'Range Extender'. Follow the in-app instructions to complete the setup.
4.3. Method 3: Via Web Browser
- Plug the extender into a power outlet next to your router and wait for the Power LED to turn solid on.
- Connect your computer or smartphone to the extender's Wi-Fi network (e.g., 'TP-Link_Extender').
- Open a web browser and enter http://tplinkrepeater.net or http://192.168.0.254 in the address bar.
- Create a password to log in and follow the on-screen instructions to complete the setup.
5. Operating Modes
5.1. Range Extender Mode
In Range Extender Mode, the RE230 connects wirelessly to your existing router's Wi-Fi network and rebroadcasts it, extending coverage to areas with weak or no signal. This mode is ideal for eliminating Wi-Fi dead zones.
5.2. Access Point Mode
In Access Point Mode, the RE230 connects to your router via an Ethernet cable and transforms your wired network into a new Wi-Fi hotspot. This is useful for adding wireless capability to a wired-only network or creating a separate Wi-Fi network.


6. Optimal Placement and Relocation
After initial setup, you can relocate the extender to an optimal position. Plug the extender into a power outlet halfway between your router and the Wi-Fi dead zone. The location you choose must be within the range of your router. The intelligent signal indicator on the extender will help you find the best spot: a solid blue light indicates a good connection, while a red light indicates the extender is too far from the router.
7. Specifications
| Feature | Detail |
|---|---|
| Product Dimensions | 4.89 x 2.74 x 13.8 inches |
| Item Weight | 7.8 ounces |
| Wireless Communication Standard | 802.11a, 802.11ac, 802.11b, 802.11g, 802.11n |
| Data Transfer Rate | 433 Megabits Per Second |
| Frequency Band Class | Dual-Band |
| Special Feature | High-Speed Mode |
8. Troubleshooting
If you experience issues with your RE230 Wi-Fi Extender, consider the following:
- No Signal/Weak Signal: Ensure the extender is placed within the range of your main router. Relocate it closer if the Signal LED is red.
- Setup Issues: If using the Tether app, ensure your phone is connected to the extender's temporary Wi-Fi network during setup. If using WPS, ensure you press the WPS button on both the router and extender within the specified time frame.
- Slow Speed: While extenders improve coverage, they do not directly increase internet speed. Ensure optimal placement for the best signal reliability, which can affect overall throughput.
- Compatibility: The RE230 is universally compatible, but issues may arise with routers or gateways with altered, open-source, non-standard, or outdated firmware.
- Reset: If problems persist, try performing a factory reset on the extender. Refer to the Quick Installation Guide for instructions on how to reset the device.
9. Warranty and Support
TP-Link offers a 2-year warranty and free 24/7 technical support for the RE230 AC750 Wi-Fi Extender. If you experience any trouble during or after setup, please contact TP-Link support for assistance.
10. Important Information and Legal Disclaimer
1. Maximum wireless signal rates are the physical rates derived from IEEE Standard 802.11 specifications. Actual wireless data throughput and wireless coverage are not guaranteed and will vary as a result of network conditions, client limitations, and environmental factors, including building materials, obstacles, volume and density of traffic, and client location.
2. The product may not be compatible with routers or gateways with firmware that has been altered, is based on open source programs, or is non-standard or outdated.


