
1. Product Overview
The OxyLED A58-1 is an 80 LED rechargeable motion sensor cabinet light designed for versatile illumination in various indoor spaces. It features 3 adjustable color temperatures, stepless dimming, and 4 operating modes to suit different needs. Its easy magnetic installation makes it ideal for kitchens, wardrobes, stairs, and more.
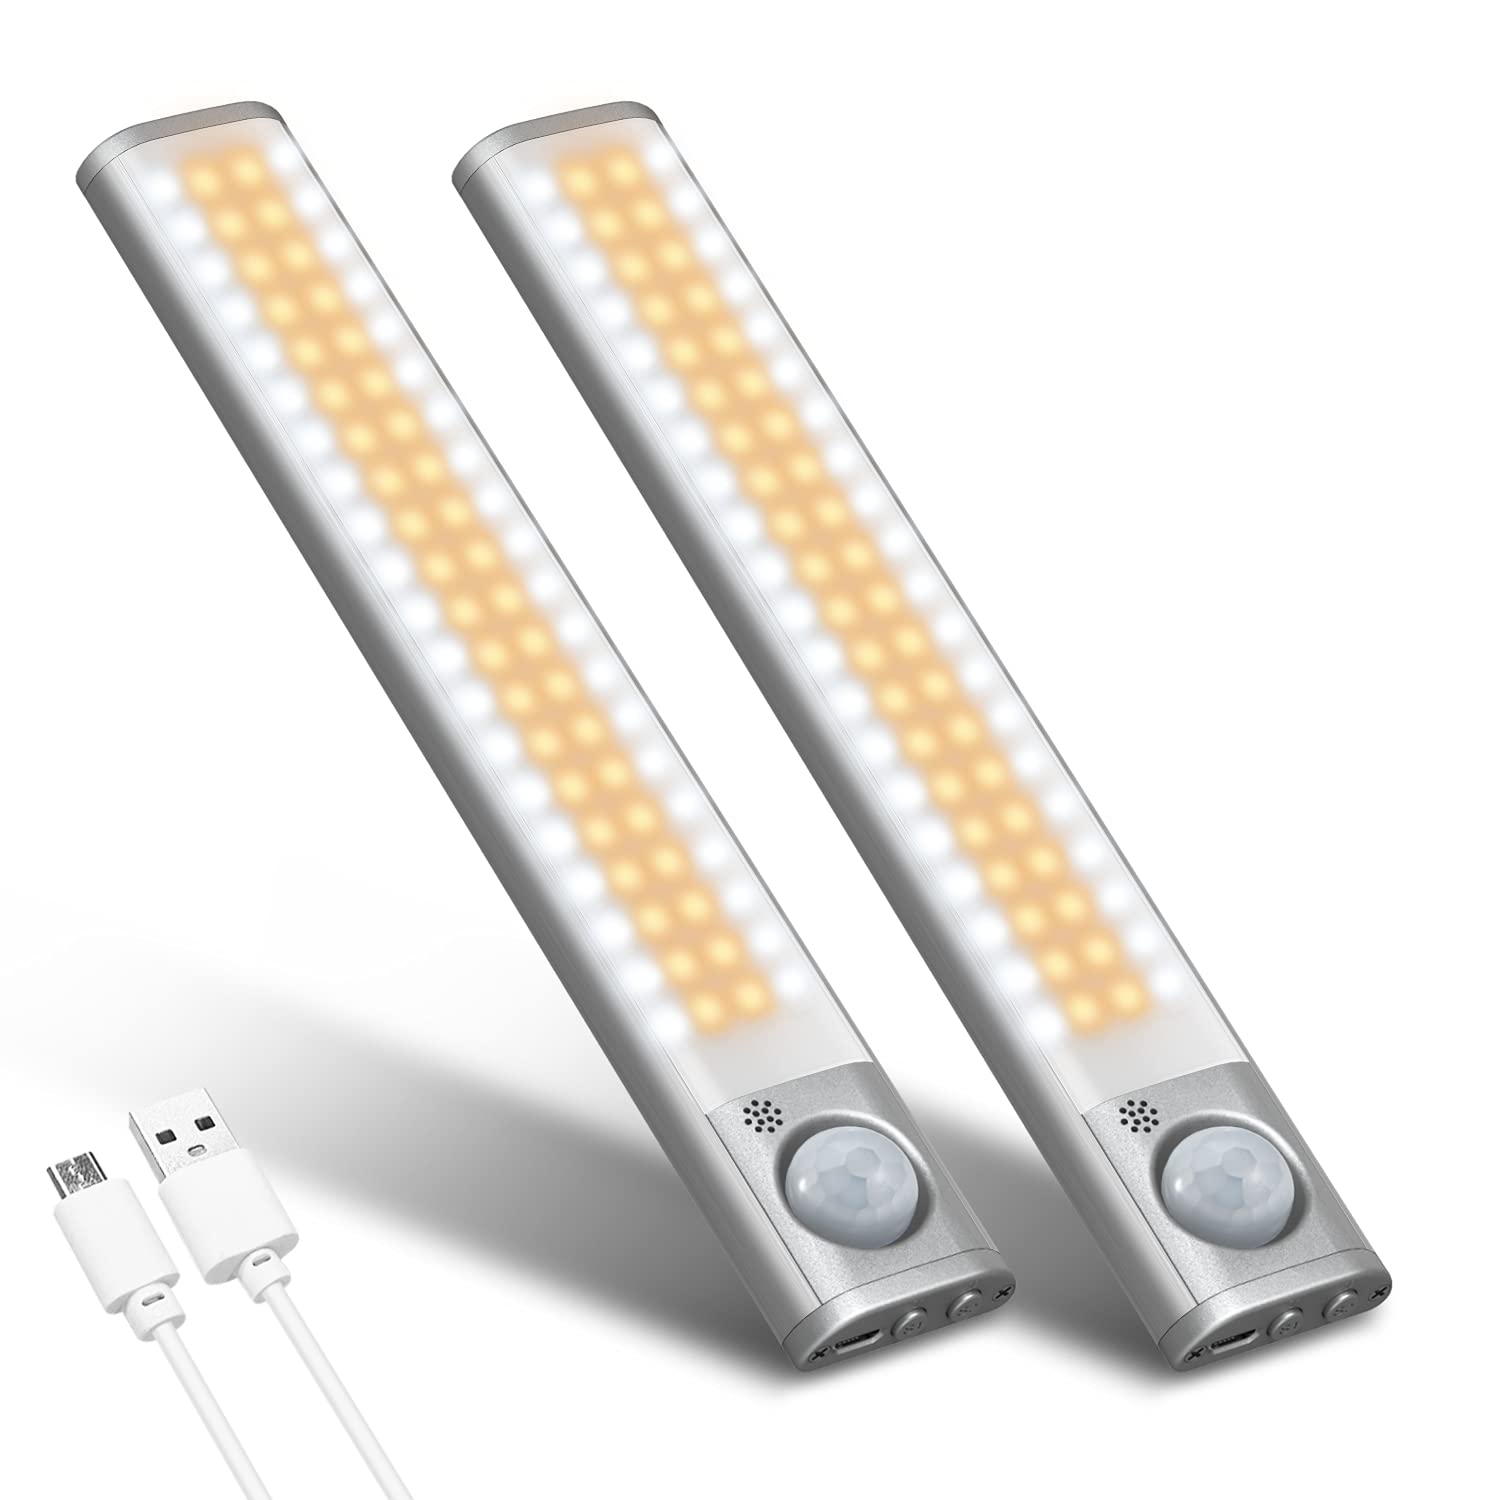
Image: The OxyLED A58-1 cabinet light showing its components and dimensions. Key parts include the USB Port, Infrared Ball (motion sensor), S1 and S2 buttons, LED Light Board, Plastic Cover, Magnetic Strip with Double-sided Tape, and Aluminum Alloy Material. Dimensions are approximately 8.6 inches long, 1.4 inches wide, and 0.6 inches thick.
2. Package Contents
- OxyLED A58-1 80 LED Cabinet Light (quantity as per package)
- USB Charging Cable
- Magnetic Strip with 3M Adhesive
- User Manual
3. Specifications
| Feature | Specification |
|---|---|
| Brand | OxyLED |
| Model Number | A58-1 |
| Material | Acrylic, Aluminum |
| Light Source | 80 LEDs (40 White, 40 Yellow) |
| Color Temperatures | 6000K (Cool White), 5500K (Natural White), 2699K (Warm Yellow) |
| Brightness | 180lm - 280lm (Stepless Dimming) |
| Battery Capacity | 1800mAh Rechargeable |
| Power Source | Battery Powered, USB Charging |
| Control Type | Button (S1, S2) |
| Motion Sensor | Yes |
| Detection Range | 3-5 meters (10-16.4 feet), 120° |
| Dimensions | Approx. 8.6 x 1.4 x 0.6 inches |
4. Setup and Installation
The OxyLED A58-1 light offers two convenient installation methods:
- Direct Magnetic Adsorption: The light has a built-in magnet on its back. It can be directly adsorbed onto any ironwork surface, such as a refrigerator or metal cabinet.
- Adhesive Magnetic Strip Installation: For non-metallic surfaces, use the provided magnetic strip with 3M adhesive.
- Clean the desired installation surface thoroughly to ensure it is dry and free of dust.
- Peel off the protective film from one side of the 3M adhesive on the magnetic strip.
- Firmly press the adhesive side of the magnetic strip onto the cleaned surface.
- Attach the OxyLED light to the magnetic strip. The light will securely hold in place.
Important: Keep the light away from hot and humid areas to ensure optimal performance and longevity.

Image: Installation methods for the OxyLED light. It can be installed under a cabinet using its built-in magnet or attached to a refrigerator with the included 3M adhesive magnetic strip.

Image: Examples of where the OxyLED light can be used, such as in a tent, hallway, next to a bed, inside a wardrobe, or for outdoor camping.
5. Operating Instructions
The OxyLED A58-1 light features two control buttons, S1 and S2, for managing modes, color temperature, and brightness.
5.1 Power On/Off and Mode Selection (S2 Button)
The S2 button controls the power and cycles through the operating modes:
- Long Press S2: Press and hold the S2 button to turn the light ON or OFF.
- Short Press S2: Click the S2 button to cycle through the 4 available modes:
- Always On Mode: The light remains continuously on.
- All-Day Sensor Mode: The light detects motion and turns on both during the day and night. The red indicator light flashes 6 times when this mode is activated.
- Night Sensor Mode: The light detects motion and turns on only in dark conditions. The green indicator light flashes 6 times when this mode is activated.
- OFF Mode: The light is turned off.
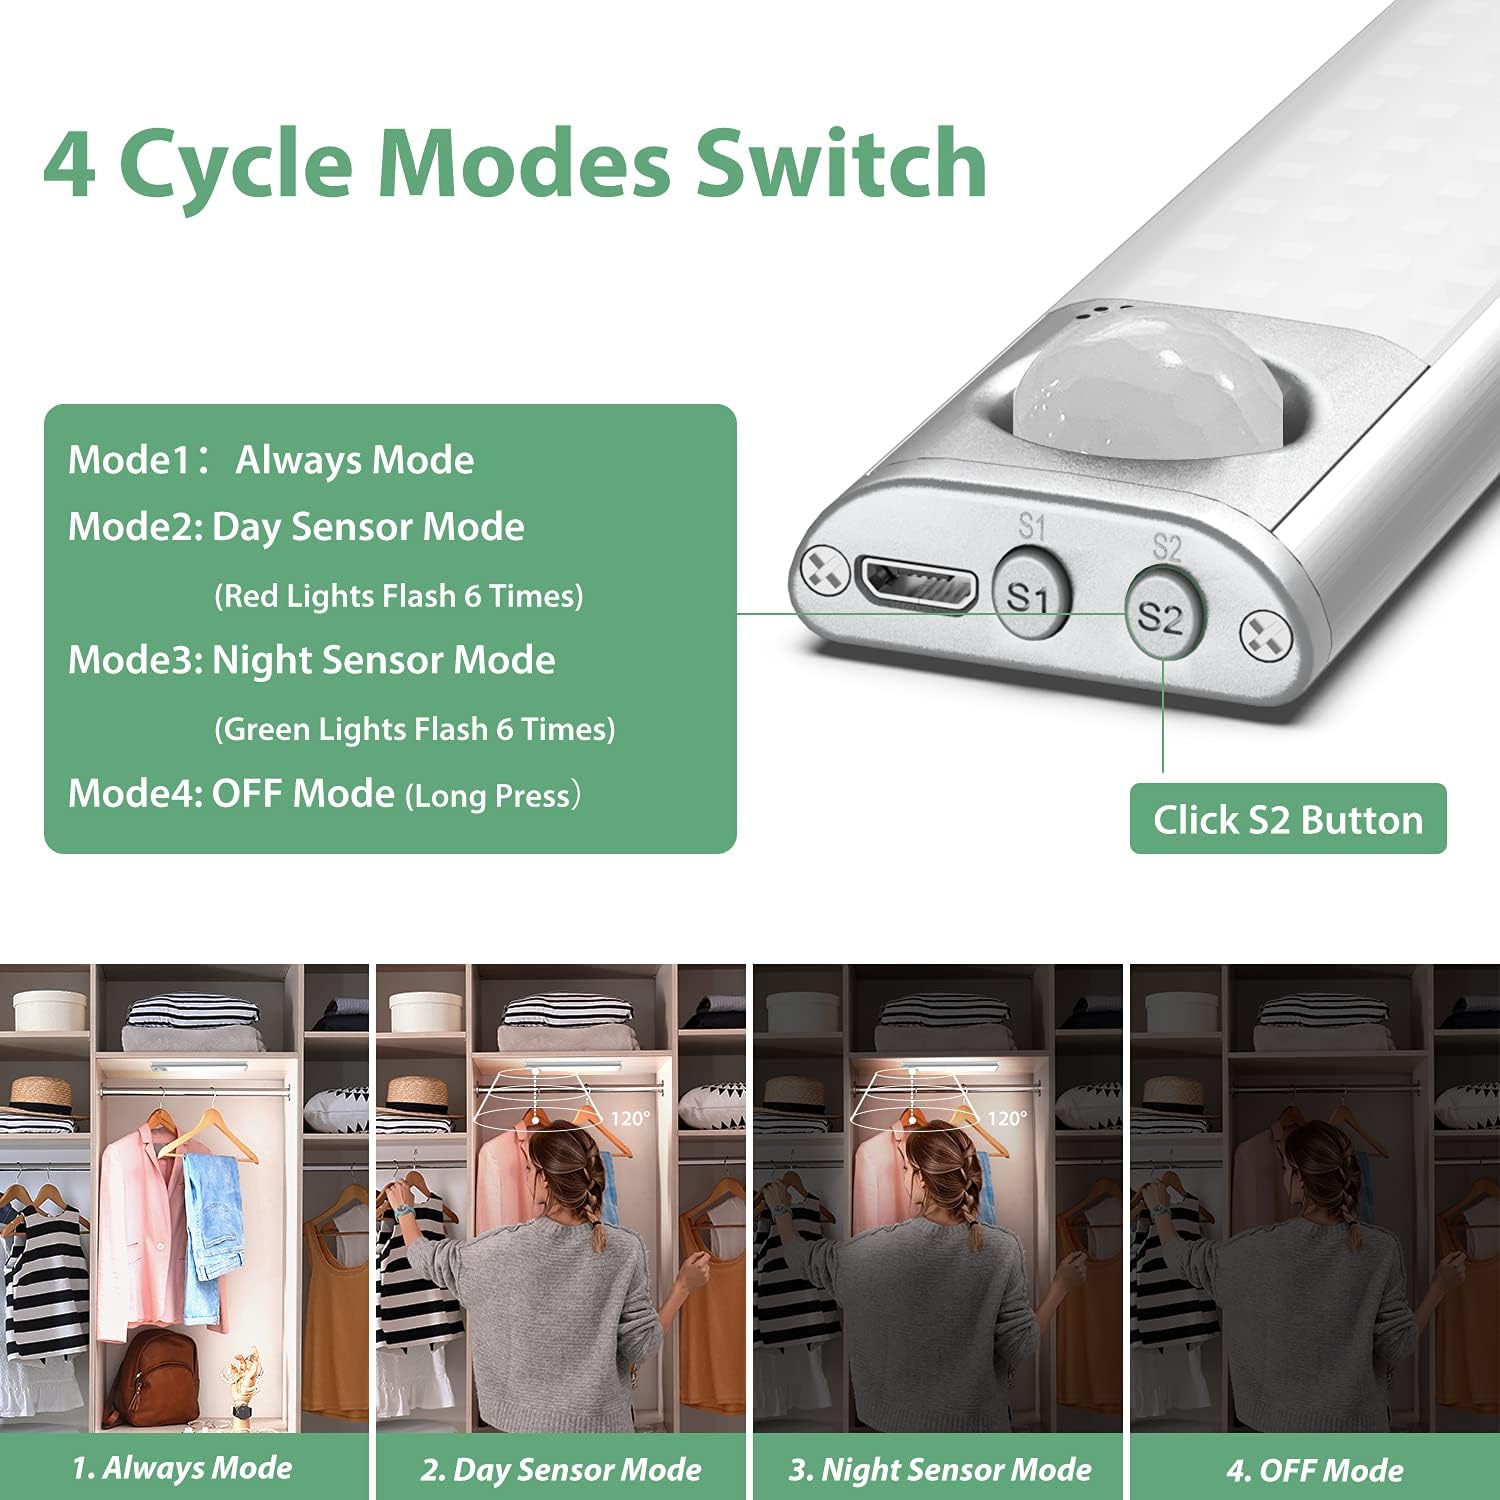
Image: A visual guide to the 4 cycle modes (Always Mode, Day Sensor Mode, Night Sensor Mode, OFF Mode) controlled by clicking the S2 button. Examples show the light's behavior in a wardrobe.
5.2 Color Temperature and Brightness Adjustment (S1 Button)
The S1 button allows you to adjust the light's color temperature and brightness:
- Short Press S1: Click the S1 button to cycle through the 3 available color temperatures:
- Cool White (6000K)
- Natural White (5500K)
- Warm Yellow (2699K)
- Long Press S1: Press and hold the S1 button to adjust the brightness. The light will dim or brighten steplessly between 180 lumens (lm) and 280 lumens (lm). Release the button when the desired brightness is reached.

Image: This image illustrates the three color temperatures (Cool White 6000K, Natural White 5500K, Warm White 2669K) and the stepless dimming function from 180LM to 280LM, all controlled via the S1 button.
6. Charging the Light
The OxyLED A58-1 light is equipped with a high-capacity 1800mAh rechargeable battery for extended use.
- Connect the provided USB charging cable to the USB port on the light.
- Plug the other end of the USB cable into a standard USB power adapter (e.g., phone charger, computer USB port, power bank).
- During charging, a red indicator light will illuminate.
- Once fully charged, the indicator light will turn green.
Ensure the light is fully charged before its first use to maximize battery life.

Image: The light connected to a USB power source, illustrating the red light indicating charging and the green light indicating a full charge.
7. Maintenance
- Cleaning: Wipe the light gently with a soft, dry cloth. Do not use abrasive cleaners or solvents, as they may damage the surface or electronic components.
- Battery Care: To prolong battery life, avoid completely draining the battery frequently. Recharge the light when the brightness noticeably decreases. If storing for a long period, charge the battery every 3-6 months.
- Storage: Store the light in a cool, dry place away from direct sunlight and extreme temperatures.
8. Troubleshooting
| Problem | Possible Cause | Solution |
|---|---|---|
| Light does not turn on. | Battery is depleted. Light is in OFF mode. | Charge the light using the USB cable. Long press S2 to turn on, or short press S2 to cycle through modes. |
| Motion sensor is not working. | Incorrect mode selected. Ambient light is too bright (for Night Sensor Mode). Sensor is obstructed. | Short press S2 to select All-Day Sensor Mode or Night Sensor Mode. Ensure the environment is dark enough for Night Sensor Mode. Clear any obstructions from the sensor. |
| Light is dim or flickers. | Low battery. | Recharge the light. |
| Light falls off the surface. | Adhesive strip not properly applied or surface is dirty. Surface is not magnetic. | Ensure the surface is clean and dry before applying the adhesive magnetic strip. Apply firm pressure. Use the adhesive magnetic strip for non-magnetic surfaces. |
9. Safety Information
- Do not disassemble, repair, or modify the product. This may cause electric shock, fire, or damage to the product.
- Keep the product away from water, moisture, and high temperatures.
- Do not expose the product to direct sunlight for prolonged periods.
- Use only the provided USB cable for charging.
- Keep out of reach of children.
10. Warranty and Support
OxyLED products are designed for reliability and performance. For any questions, technical support, or warranty claims, please contact OxyLED customer service through the retailer where the product was purchased or visit the official OxyLED website for contact information.
Please retain your proof of purchase for warranty purposes.