Introduction
This manual provides comprehensive instructions for the Eogifee Fan-9T Ceiling Fan Remote Control. It covers compatibility, setup, operation, and troubleshooting to ensure proper use and functionality of your remote control.
Compatibility Check
Before proceeding with installation or setup, it is crucial to verify compatibility. This remote control is designed as a replacement for specific ceiling fan remotes. Please ensure the following:
- Original Remote FCC ID: Your original remote control must have the FCC ID: FAN-9T printed on its back. If your original remote's FCC ID is different, this replacement remote may not be compatible.
- Receiver Functionality: Confirm that your ceiling fan's original receiver unit is functioning properly. This remote replaces the handheld unit, not the fan's internal receiver.

Image: Back of the Eogifee Fan-9T remote control, illustrating the battery compartment and the location of the dip switches for frequency setting.
Setup Instructions
Follow these steps to set up your Eogifee Fan-9T remote control:
1. Battery Installation
- Locate the battery compartment on the back of the remote control.
- Slide open the battery cover.
- Insert four (4) AAA 1.5V batteries, ensuring correct polarity (+/-). Batteries are not included.
- Replace the battery cover.
Image: The back of the remote control with the battery cover removed, showing the slots for four AAA batteries and the dip switches.
2. Setting the Frequency (Dip Switches)
The remote control uses dip switches to match the frequency of your ceiling fan's receiver. This unit has 16 possible code combinations.
- On the Remote:
- With the battery cover removed, locate the dip switches inside the battery compartment.
- Using a small screwdriver or a ballpoint pen, slide the switches to your desired "up" or "down" positions. The factory setting is typically all "up".
- On the Receiver:
- Access your ceiling fan's receiver unit (usually located in the fan's canopy).
- Locate the dip switches on the receiver.
- Crucially, set the receiver's dip switches to the exact same "up" or "down" positions as you set on the remote control.
NOTE: When setting up, ensure your fan is operated in "HIGH SPEED" and the light is in the "ON" condition at the wall switch or pull chain before attempting to pair the remote.
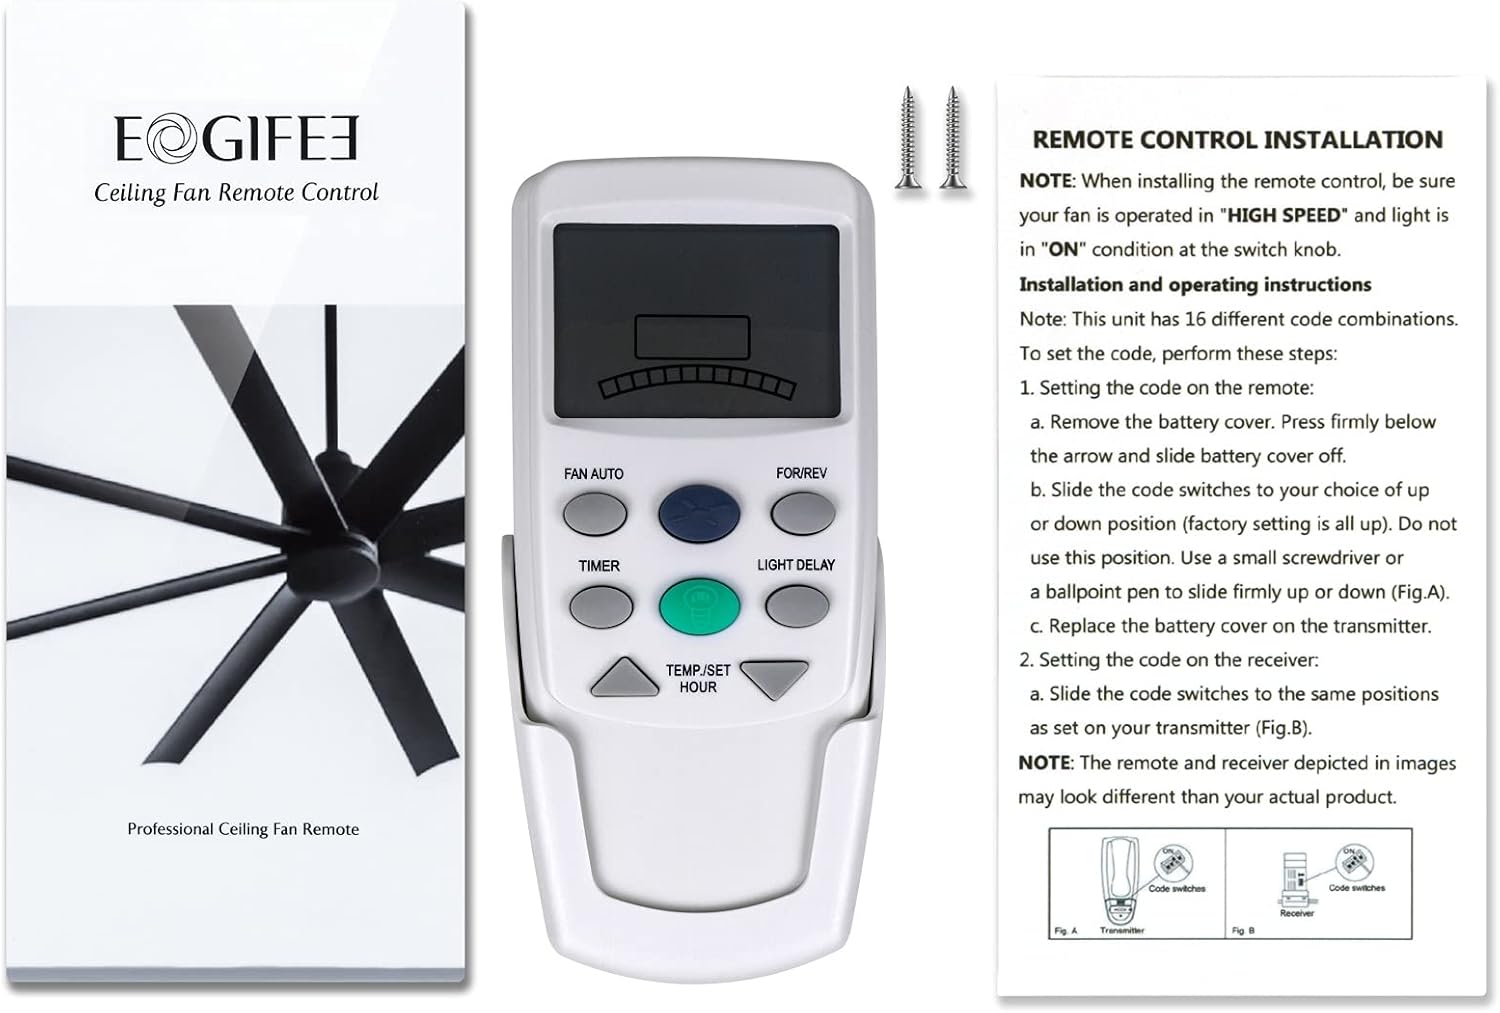
Image: The Eogifee Fan-9T remote control alongside its packaging and an instruction sheet detailing the dip switch setting process for both the remote and the receiver.
Operating Instructions
The Eogifee Fan-9T remote control provides various functions for your ceiling fan and light. Refer to the image below for button identification.

Image: Close-up view of the Eogifee Fan-9T remote control, highlighting the LCD screen and all control buttons.
- FAN AUTO: This mode automatically adjusts the fan speed based on the temperature setting you select. The current setting will be displayed on the LCD screen.
- FOR/REV (Forward/Reverse): Press this button to change the direction of the fan blades, allowing for downdraft (cooling) or updraft (air circulation) operation.
- TIMER: Use this button to set a sleep timer for the fan, ranging from 0.5 to 24 hours in one-hour increments.
- LIGHT DELAY: This button controls the light delay function.
- TEMP/SET HOUR (Up/Down Arrows): These arrow buttons are used to adjust the temperature setting in FAN AUTO mode or to set the hours for the TIMER function.
- Blue Button (Fan Speed): Adjusts and changes the fan speeds from High to Low, and turns the fan Off.
- Yellow Button (Light Control): Controls the ON/OFF function of the light. This remote does not support light dimming.

Image: A hand holding the Eogifee Fan-9T remote control, demonstrating its use to operate a ceiling fan in a living room setting.
Maintenance
The primary maintenance for your remote control involves battery replacement.
Battery Replacement
When the remote's display becomes dim or its responsiveness decreases, it's time to replace the batteries. Follow the "Battery Installation" steps in the Setup section. Always use four new AAA 1.5V batteries. Do not mix old and new batteries, or different types of batteries.
Troubleshooting
If you encounter issues with your Eogifee Fan-9T remote control, try the following troubleshooting steps:
- Remote Not Responding:
- Check battery orientation and ensure they are fresh. Replace if necessary.
- Verify that the dip switches on both the remote and the fan's receiver are set to the exact same code.
- Ensure the fan's power is on at the wall switch and that the fan is set to "HIGH SPEED" and the light to "ON" before attempting to pair or operate.
- Fan Not Changing Speed/Direction:
- Confirm the remote's batteries are good.
- Re-check dip switch settings on both remote and receiver.
- Ensure there are no obstructions between the remote and the fan's receiver.
- Light Not Turning On/Off:
- Verify the light bulb is functional and properly installed.
- Ensure the wall switch controlling the fan's light is in the "ON" position.
- Note that this remote control does not support light dimming.
- Intermittent Operation:
- Weak batteries can cause intermittent issues. Replace them.
- Interference from other electronic devices might occur. Try operating the remote from a different angle or distance.
Specifications
| Model Number | fan9t |
| Product Dimensions | 5.51 x 1.89 x 0.52 inches |
| Item Weight | 5 ounces |
| Power Source | 4 x AAA 1.5V Batteries (not included) |
| Compatible Devices | Ceiling Fans with FAN-9T FCC ID receiver |
| Special Feature | Ergonomic design |
| Color | White |
Additional Information
This remote control features a wall mount for convenient storage. The package includes the remote control, wall mount, and screws for installation.

Image: The Eogifee Fan-9T remote control shown next to its accompanying wall mount cradle.


