1. Product Overview
This manual provides detailed instructions for the installation, operation, and maintenance of your AmeriLite Crystal Projector Chrome Replacement Headlights. These headlights are designed for specific Mercedes-Benz E-Class W210 models.
1.1. Compatibility
These headlights are compatible with:
- 2000-2002 Mercedes-Benz E-Class W210 (USA Models ONLY)
- Important: Does NOT fit Xenon HID Headlight Models.
1.2. Package Contents
The complete set includes:
- One (1) Left (Driver Side) Headlight Assembly
- One (1) Right (Passenger Side) Headlight Assembly
- Low Beam H7 Bulbs (Pre-installed or included)
- High Beam H7 Bulbs (Pre-installed or included)
- Turn Signal 1157 Amber Bulbs (Pre-installed or included)

Image 1.1: The AmeriLite replacement headlight assemblies, indicating that bulbs for low beam, high beam, and turn signal are included.
2. Safety Information
Always prioritize safety during installation.
- Disconnect the vehicle's battery before beginning any electrical work.
- Wear appropriate personal protective equipment, such as gloves and eye protection.
- Ensure the vehicle is parked on a level surface with the parking brake engaged.
- If you are unsure about any step, consult a qualified automotive technician.
3. Installation Instructions
Professional installation is highly recommended. No specific installation instructions are provided by the manufacturer, but the following general steps apply to most headlight replacements.
3.1. Preparation
- Park the vehicle on a flat, stable surface.
- Turn off the engine and remove the key from the ignition.
- Open the hood and disconnect the negative terminal of the vehicle's battery.
- Gather necessary tools (e.g., screwdrivers, wrenches, trim removal tools).
3.2. Removing Existing Headlights
- Locate and remove any clips, screws, or bolts securing the bumper or grille that may obstruct access to the headlights.
- Carefully pull back or remove the bumper/grille as needed to expose the headlight mounting points.
- Disconnect the electrical connectors from the back of the existing headlight assembly.
- Remove the mounting bolts or screws that hold the headlight assembly in place.
- Carefully remove the old headlight assembly from the vehicle.

Image 3.1: The AmeriLite replacement headlight assemblies, shown in front of a Mercedes-Benz E-Class W210.
3.3. Installing New Headlights
- Position the new AmeriLite headlight assembly into the opening. Ensure it aligns correctly with the mounting points.
- Secure the headlight assembly with the mounting bolts or screws removed earlier. Do not overtighten.
- Connect the electrical connectors to the corresponding ports on the back of the new headlight. Ensure a secure connection.
- Reinstall any bumper or grille components that were removed, securing them with their original clips, screws, or bolts.
- Reconnect the negative terminal of the vehicle's battery.

Image 3.2: Rear view of the headlight assembly, illustrating the connection points for the low beam, turn signal, and high beam bulbs.
3.4. Post-Installation Check
- Turn on the vehicle's ignition and test all headlight functions: low beams, high beams, turn signals, and parking lights.
- Verify that all lights illuminate correctly and that turn signals flash at the proper rate.
- Adjust headlight aim if necessary. Refer to your vehicle's service manual for proper headlight aiming procedures.
4. Operation
The AmeriLite Crystal Projector Headlights operate in conjunction with your vehicle's existing lighting controls.
- Low Beams: Provide standard illumination for general driving conditions.
- High Beams: Offer increased illumination for dark roads when no oncoming traffic is present.
- Turn Signals: Indicate your intended direction of travel.
- Parking Lights: Provide visibility when parked.

Image 4.1: Front view of the headlight assembly, highlighting the crystal clear lens, chrome housing, and the positions of the low beam, high beam, and turn signal components.
5. Maintenance
Proper maintenance ensures the longevity and performance of your headlights.
5.1. Cleaning
- Clean the headlight lenses regularly with a soft cloth and mild automotive soap or glass cleaner.
- Avoid abrasive cleaners or harsh chemicals, as these can damage the lens coating.
- Rinse thoroughly with water and dry to prevent water spots.
5.2. Bulb Replacement
If a bulb needs replacement, ensure the vehicle is off and the battery is disconnected. Access the rear of the headlight assembly (refer to Image 3.2) and carefully twist or unclip the bulb socket. Replace with the correct bulb type (H7 for low/high beam, 1157 Amber for turn signal).
5.3. UV Protection
The headlights feature a UV and abrasive coating. To further protect against harmful sunlight and maintain clarity, consider applying a UV protectant specifically designed for automotive plastics periodically.
6. Troubleshooting
If you encounter issues with your headlights, refer to the following common problems and solutions:
| Problem | Possible Cause | Solution |
|---|---|---|
| Headlight not illuminating |
|
|
| Dim or flickering light |
|
|
| Moisture inside headlight |
|
|
7. Specifications
| Brand | AmeriLite |
| Model | E-Class W210 (02-AZ-MBZE99-PCC-AR) |
| Compatibility | 2000-2002 Mercedes-Benz E-Class W210 (USA Models ONLY, Non-Xenon/HID) |
| Lens Material | Plastic |
| Lens Color | Clear |
| Housing Color | Chrome |
| Special Features | Waterproof, UV and Abrasive Coating |
| Safety Rating | DOT & SAE Compliant |
| Bulb Type (Included) | Low Beam: H7, High Beam: H7, Turn Signal: 1157 Amber |
| Item Weight | Approximately 25 pounds (pair) |
7.1. Quality Assurance
AmeriLite products are manufactured to meet or exceed strict OEM requirements. They are DOT/SAE compliant and undergo various tests to ensure durability and performance.
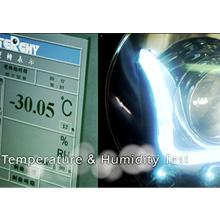
Image 7.1: Headlight undergoing a temperature and humidity test.
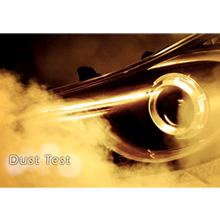
Image 7.2: Headlight undergoing a dust test.
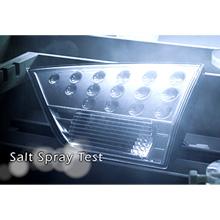
Image 7.3: Headlight undergoing a salt spray test.

Image 7.4: Headlight undergoing a moisture test.

Image 7.5: Statement confirming DOT/SAE compliance and adherence to quality standards.
8. Warranty and Support
AmeriLite offers a 30-day money-back guarantee and a 90-day limited warranty on these headlights. For warranty claims or technical support, please contact AmeriLite customer service through the retailer where the product was purchased.
Note: The warranty typically covers manufacturing defects and does not cover damage due to improper installation, misuse, or accidents.


