1. Introduction
Thank you for choosing the ANYCUBIC Photon Mono X 3D Printer. This manual provides essential information for setting up, operating, and maintaining your new resin 3D printer. Please read this manual thoroughly before use to ensure proper operation and to achieve the best printing results. The Photon Mono X features an 8.9-inch 4K monochrome LCD screen and a Matrix UV LED light source, enabling fast and precise resin 3D printing.
2. Safety Information
Your safety is paramount. Please observe the following precautions:
- Ventilation: Always operate the printer in a well-ventilated area. Resin fumes can be irritating.
- Personal Protective Equipment (PPE): Wear gloves and safety glasses when handling resin. Avoid direct skin contact and eye exposure.
- Resin Handling: Keep resin away from direct sunlight and heat sources. Store in a cool, dark place. Do not ingest resin.
- Disposal: Dispose of uncured resin and contaminated materials according to local regulations. Cured resin can be treated as regular plastic waste.
- Electrical Safety: Ensure the power supply is correctly connected and matches your local voltage. Do not operate with damaged cables.
- Children and Pets: Keep the printer and resin out of reach of children and pets.
3. Package Contents
Please verify that all items are present in your package:
- ANYCUBIC Photon Mono X 3D Printer
- Platform (Build Plate)
- Resin Vat
- Spatula (2 Pcs)
- Tool Kit
- Gloves (3 pairs)
- Funnel (5 pcs)
- Mask
- User Manual (this document)
- USB Drive
- Power Adapter / Power Cord
- WiFi Antenna

Figure 3.1: Included Parts List
4. Product Overview
The ANYCUBIC Photon Mono X is a high-speed resin 3D printer designed for detailed and efficient printing. Key components include:
- UV-blocking Cover: Yellow transparent cover to protect resin from ambient UV light.
- Build Plate: The platform where prints are formed.
- Resin Vat: Contains the liquid resin during printing.
- 8.9" 4K Monochrome LCD Screen: Cures resin layer by layer with high resolution.
- Matrix UV LED Light Source: Provides uniform UV light for precise curing.
- Z-axis Linear Rail: Ensures stable and accurate vertical movement.
- Touchscreen Interface: For controlling printer functions and monitoring prints.

Figure 4.1: ANYCUBIC Photon Mono X 3D Printer
5. Setup
5.1 Unpacking and Placement
- Carefully remove all components from the packaging.
- Place the printer on a stable, level surface away from direct sunlight and heat sources. Ensure adequate ventilation.
- Connect the power adapter and WiFi antenna.
5.2 Leveling the Build Plate
Accurate leveling is crucial for successful prints. Follow these steps:
- Loosen the screws on the build plate.
- Place a piece of A4 paper on the LCD screen.
- Lower the build plate until it presses firmly against the paper.
- Tighten the screws on the build plate.
- Raise the build plate and remove the paper.
5.3 Adding Resin
Before adding resin, ensure the resin vat is clean and securely placed. Pour the resin into the vat, making sure not to exceed the maximum fill line.
6. Operation
6.1 Preparing 3D Models
Use a slicing software, such as Chitu Box, to prepare your 3D models. This software converts your 3D model into printable layers (slices) and generates the necessary support structures. Save the sliced file to the provided USB drive.
6.2 Starting a Print
- Insert the USB drive into the printer's USB port.
- On the touchscreen, navigate to the 'Print' menu.
- Select your desired print file from the list.
- Press 'Print' to begin the printing process.

Figure 6.1: Faster Printing with Photon Mono X
6.3 Monitoring Print Progress
The printer's touchscreen displays real-time print progress, including current layer, total layers, and estimated time remaining. The transparent yellow cover allows for visual monitoring of the print without exposing the resin to harmful UV light.
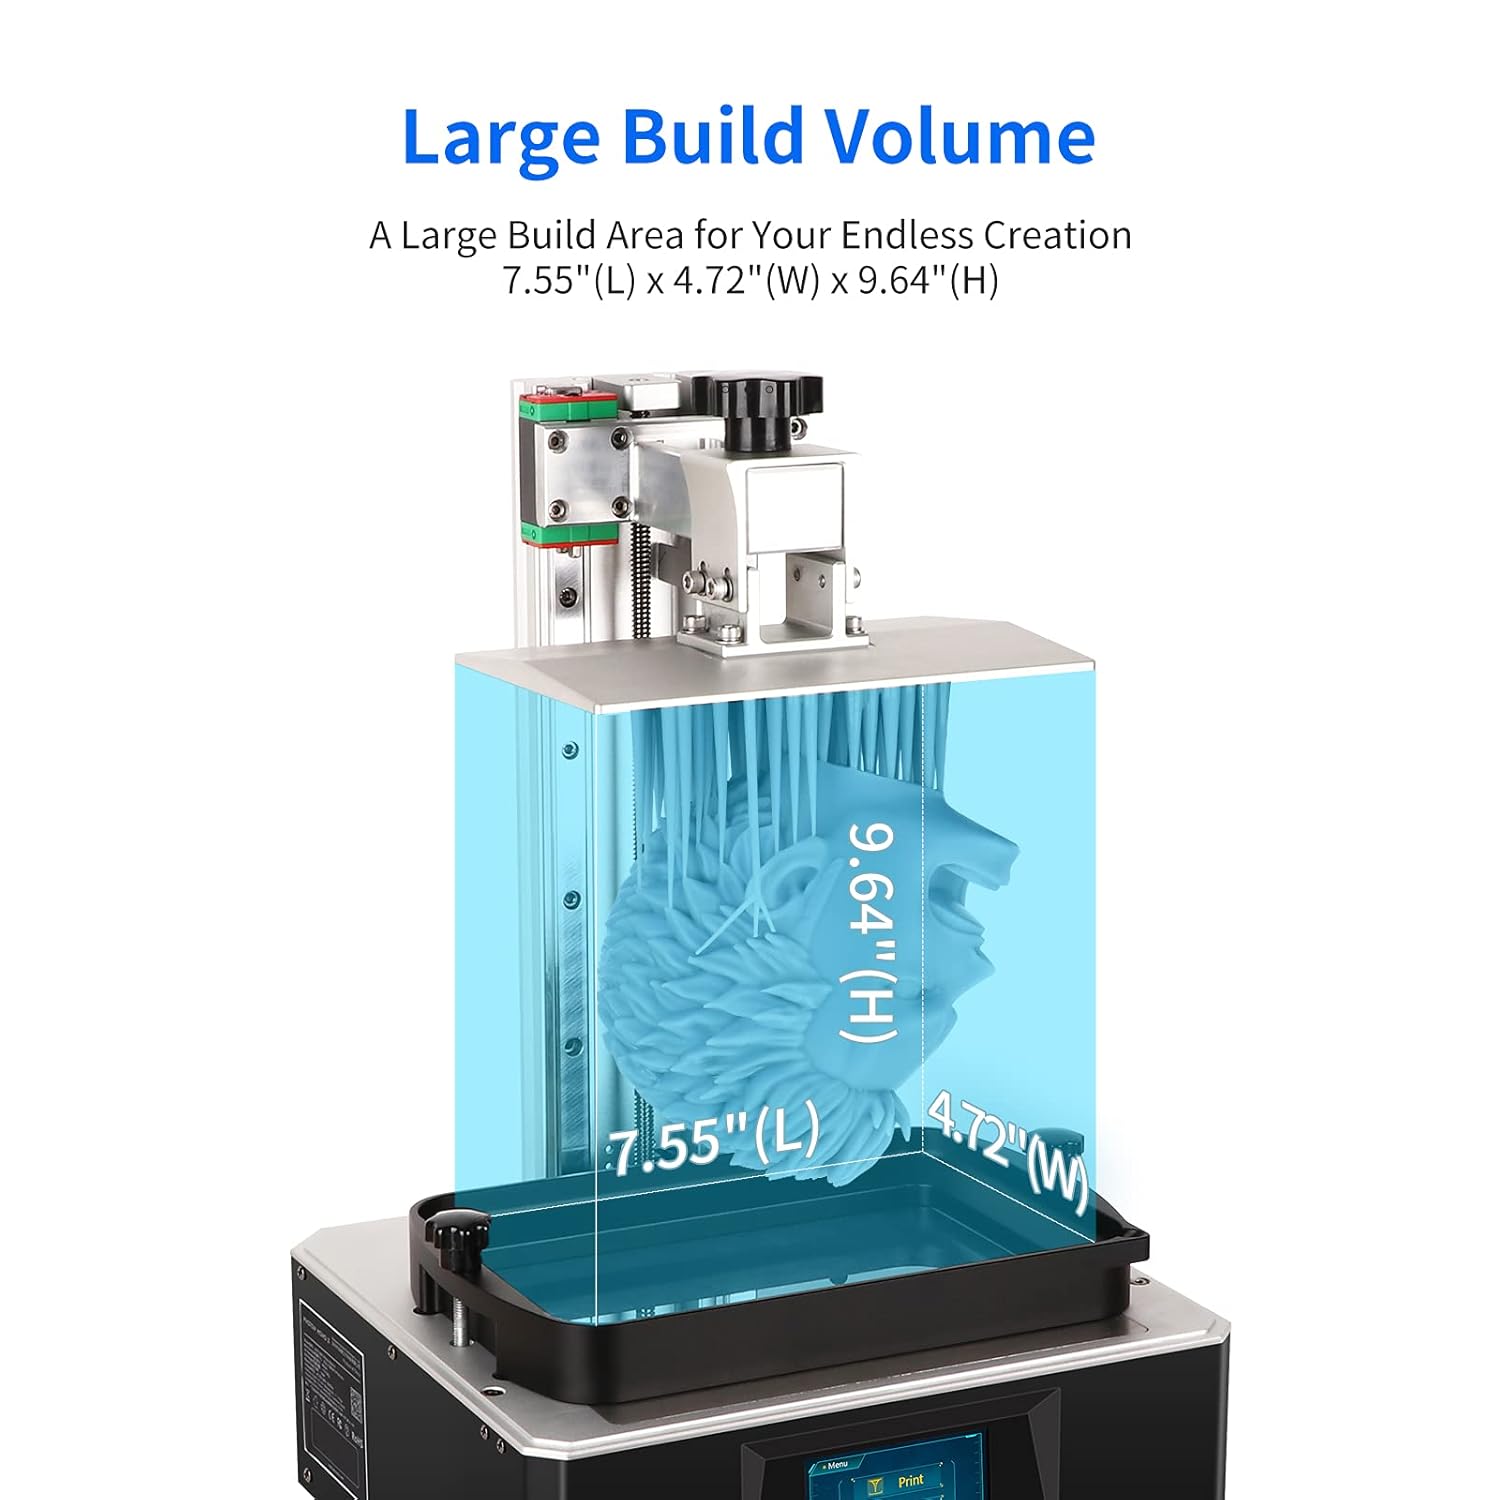
Figure 6.2: Large Build Volume for Diverse Creations

Figure 6.3: Upgraded Matrix UV Light Source for High Accuracy
7. Maintenance
Regular maintenance ensures the longevity and performance of your printer.
7.1 Cleaning the Resin Vat and Build Plate
After each print, or if changing resin types, clean the resin vat and build plate using isopropyl alcohol (IPA). Ensure no cured resin bits remain in the vat or on the FEP film.
7.2 FEP Film Care
The FEP (Fluorinated Ethylene Propylene) film at the bottom of the resin vat is a consumable part. Inspect it regularly for damage or cloudiness. Replace the FEP film if it shows signs of wear to prevent print failures and damage to the LCD screen.
7.3 LCD Screen Care
Keep the LCD screen clean and free of resin spills. Use a soft, lint-free cloth and IPA to gently clean the screen. Never use abrasive materials or sharp objects on the screen.
7.4 Printer Exterior
Wipe down the exterior of the printer with a soft cloth to remove dust and resin residue. Avoid getting liquids into the internal components.
8. Troubleshooting
This section addresses common issues you might encounter.
- Print Not Sticking to Build Plate: Ensure the build plate is properly leveled. Increase bottom exposure time in slicing software. Check resin temperature.
- Warped or Deformed Prints: Check for proper support placement in slicing software. Ensure resin is well-mixed. Verify ambient temperature is suitable.
- Partial Prints or Missing Layers: Inspect FEP film for damage. Check LCD screen for dead pixels. Ensure resin is not expired or contaminated.
- Printer Not Responding: Restart the printer. Check power connections. Ensure USB drive is properly inserted and file is not corrupted.
For more detailed troubleshooting, refer to the official ANYCUBIC support resources.
9. Specifications
| Feature | Specification |
|---|---|
| Product Dimensions | 30 x 25 x 25 inches (76.2 x 63.5 x 63.5 cm) |
| Item Model Number | Photon Mono X-1 |
| Printing Volume (L x W x H) | 192mm x 120mm x 245mm / 7.55" x 4.72" x 9.84" |
| LCD Screen | 8.9" 4K Monochrome LCD (3840 x 2400 resolution) |
| Light Source | Matrix UV LED Light Source |
| Max Print Speed | 60mm/h |
| Material | Metal |
| Item Weight | 11 Kilograms (24.25 Pounds) |
10. Warranty and Support
ANYCUBIC provides a one-month free return and exchange policy for this product. For any issues or inquiries not covered in this manual, please contact ANYCUBIC customer support or visit the official ANYCUBIC website for further assistance and resources.
Official ANYCUBIC Store: ANYCUBIC Amazon Store


