
1. Introduction
This manual provides detailed instructions for the installation, configuration, operation, and maintenance of your ANNKE 16CH 4K PoE Security Camera System. Please read this manual thoroughly before using the product to ensure proper setup and functionality. This system is designed to provide comprehensive surveillance for home and business environments, featuring 4K resolution, AI detection, and remote access capabilities.
2. What's in the Box
The ANNKE 16CH 4K PoE Security Camera System package includes the following components:
- 1 x 16CH 12MP PoE NVR with 4TB Hard Drive
- 8 x 8MP PoE Turret Cameras
- 4 x 30m/100 ft Network Cables
- 4 x 18m/60 ft Network Cables
- 1 x User Manual
- 1 x Power Adapter
- 1 x HDMI Cable
- 1 x USB Mouse
- 8 x Waterproof Lids
- 8 x Screws
- 1 x Wall Sticker


Unboxing Video
Video 2.1: This video demonstrates the unboxing process for the ANNKE 16CH 4K PoE Security Camera System, showing all included items.
3. Setup
Follow these steps to set up your ANNKE 16CH 4K PoE Security Camera System:
- Connect Power: Connect the power cable to the power adapter, then plug the power adapter into the NVR power port. Turn on the NVR power button.
- Connect Mouse: Connect the USB mouse to an available USB port on the NVR.
- Connect Monitor: Plug the HDMI cable into the HDMI port of the NVR and connect the other end to your monitor.
- Connect Cameras: Plug the network cables into the PoE ports on the NVR and connect the other end to your cameras. Use the appropriate cable length (18m or 30m) based on the distance between the camera and the NVR.

Connection Guide Video
Video 3.1: This video provides a visual guide on how to connect the ANNKE NVR System, including power, mouse, monitor, and cameras.
4. Configuration
4.1 NVR First-Time Setup
Upon initial power-on, the NVR will guide you through a setup wizard. Key steps include:
- Set Account Password: Create a strong password for the NVR device. It is recommended to fill in the password reminder to prevent forgetting the password. The device will not work without activation.
- Set Unlock Pattern (Optional): You can set a graphical unlock pattern for quick access.
- Time Zone and Date Format: Select the correct time zone for your region and set the preferred date format. Other time-related options are typically default and do not require specific adjustment.
- Network Configuration: The network settings are usually configured by default.
- Hard Disk Configuration: For first-time use, you need to format the hard disk to ensure its status shows 'Normal'. If your recorder does not have a hard disk, you can proceed without formatting.
- IP Channel Configuration: The system automatically recognizes new access cameras.
- Remote Access (ANNKE Vision): Enable the ANNKE Vision feature for remote access. If this feature is not enabled, remote access will not work. Agree to the Terms of Service in the pop-up window. Enable Stream Encryption and optionally name the verification code.
- Password Reset Options: Fill in your email and security question in case you forget your password to be able to quickly verify and reset it.
After completing these settings, right-click on the monitoring interface and select 'Menu' to enter the configuration menu. To log out, click the switch button at the upper right corner, select 'Logout', and confirm. You can then authenticate and log back into your account by unlocking the pattern or entering the password.
Video 4.1: This video demonstrates how to set the output resolution for your ANNKE NVR System, ensuring proper display on your monitor.
Video 4.2: This video explains how to configure camera display settings, including camera name, watermark, day/night switching, and other image parameters.
4.2 Adding Third-Party Cameras
To add a third-party brand PoE camera:
- Navigate to the IP Channel settings.
- Select the channel that shows 'IP camera does not exist' from the added device list.
- Click 'Edit' and change the adding method to 'Manual'.
- Enter the IP address of the IP camera you wish to add.
- Change the protocol to ONVIF.
- Input the ONVIF port (this depends on the specific IP camera).
- Input the username and password for the ONVIF protocol of the IP camera.
- Click 'OK'. The status of the IP camera will show 'online' if the parameters are correct.
Video 4.3: This video demonstrates the process of adding a third-party brand PoE camera to your ANNKE NVR system.
5. Operating the System
5.1 4K UHD Video Quality
The system features 8MP cameras providing Ultra High Definition (3840x2160) video. This ensures clear and detailed footage. The 120dB WDR (Wide Dynamic Range) technology helps deliver clear images in scenes with challenging lighting conditions, such as strong backlighting.


5.2 AI Motion Detection
The system incorporates AI Motion Detection 2.0, which accurately identifies human and vehicle movements, reducing false alerts. Real-time alerts are pushed to your phone via the ANNKE Vision app when motion is detected.

5.3 Audio Recording
Each camera includes a built-in microphone for one-way audio recording, allowing you to capture sound along with video. The audio recording feature can be enabled or disabled in the system settings.

5.4 Night Vision Modes
The cameras offer multiple night vision modes:
- Motion Activated: Lights activate upon motion detection.
- Black & White (IR Night Vision): Standard infrared night vision.
- Color Night Vision: Provides vivid color images in low-light conditions using integrated spotlights.

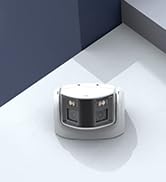
5.5 24/7 Recording & Remote Access
The NVR comes with a pre-installed 4TB hard drive, supporting continuous 24/7 recording. It has 2 SATA interfaces and can support up to 16TB of storage. Remote access is available anytime, anywhere using the ANNKE Vision App on your smartphone or tablet.


5.6 Smart Playback
The ANNKE Vision App supports smart playback, allowing you to quickly locate specific events, persons, or vehicles within recorded footage.

6. Maintenance
6.1 Hard Drive Management
The system includes a 4TB surveillance-grade hard drive designed for 24/7 operation. The NVR supports up to two hard drives, with a maximum capacity of 16TB. Ensure the hard drive is formatted correctly during initial setup. Regularly check the hard drive status to ensure continuous recording.

6.2 Data Security
Local storage and bank-level encryption are implemented to ensure the security of your recorded data.

6.3 Firmware Updates
Periodically check for firmware updates for your NVR and cameras to ensure optimal performance, security, and access to new features. Updates are typically available through the ANNKE Vision app or the official ANNKE website.
7. Troubleshooting
If you encounter issues with your ANNKE Security Camera System, consider the following general troubleshooting steps:
- No Video Display: Ensure all power and HDMI/VGA cables are securely connected. Verify the monitor's input source is correctly selected. Check the NVR's output resolution settings as described in the configuration section.
- Cameras Not Connecting: Verify that network cables are properly connected to both the NVR's PoE ports and the cameras. Ensure the NVR's PoE ports are enabled. If using third-party cameras, double-check the IP address, protocol (ONVIF), port, username, and password.
- Remote Access Issues: Confirm that the NVR is connected to the internet and the ANNKE Vision feature is enabled in the NVR settings. Check your network connection on both the NVR and your mobile device. Ensure the verification code is correctly entered in the app.
- Poor Image Quality: Ensure camera lenses are clean and free from obstructions. Check camera settings for brightness, contrast, and exposure. Verify that the camera is set to the desired resolution.
- Hard Drive Not Recording: Ensure the hard drive is correctly installed and formatted. Check the recording schedule in the NVR settings.
- Forgotten Password/Pattern: Utilize the email or security question recovery options configured during the initial setup.
For more specific issues or persistent problems, please refer to the detailed troubleshooting section in the full user manual or contact ANNKE customer support.
8. Specifications
| Feature | Specification |
|---|---|
| Brand | ANNKE |
| Connectivity Technology | Wired |
| Video Capture Resolution | 4K UHD 2160p |
| Special Features | Audio Recording, Automatic Overwrite, Night Vision, Privacy Masking, Smart Playback |
| Number of Channels | 16 |
| Memory Storage Capacity | 4 TB (expandable up to 16 TB) |
| Color | H800 Turret Camera system |
| Power Source | Corded Electric |
| Recommended Uses | Home and Business |
| Compatible Devices | Cameras, Laptops, Personal Computers, Smartphones, Tablets |
| Other Camera Features | 4mm lens, IP67 Waterproof |
| Low Light Technology | Night Vision |
| Focal Length | 2.8 mm |
| Night Vision Range | 100 Feet |
| Frame Rate | 30fps |
| Recording Mode | Continuous, Motion Detection |
| Hardware Interface | Ethernet |
| Lens Type | Wide Angle |
| Video Input | RJ45 |
| Viewing Angle | 83 Degrees |
| Item Weight | 29.6 pounds |
| Item Model Number | AU-N46PCK4-V4-98DM-P |
| Date First Available | December 24, 2020 |

9. Warranty and Support
ANNKE provides comprehensive customer support and warranty services for its products. For detailed warranty information, including coverage periods and terms, please refer to the warranty card included with your product or visit the official ANNKE website. For technical assistance, troubleshooting, or any product-related inquiries, you can contact ANNKE customer support through their website or the contact information provided in your user manual.
