
TP-Link ER605
TP-Link ER605 V2 Wired Gigabit VPN Router Instruction Manual
Model: ER605 | Brand: TP-Link
1. Introduction
The TP-Link ER605 V2 is a Multi-WAN Gigabit VPN Router designed for robust and secure network solutions. It integrates seamlessly with the Omada Software Defined Networking (SDN) platform, offering centralized management and cloud capabilities for enhanced control and efficiency.
Key features include:
- Five Gigabit Ports: Features 1 Gigabit WAN Port, 2 Gigabit WAN/LAN Ports, and 2 Gigabit LAN Ports, allowing up to 3 WAN ports for optimized bandwidth usage.
- One USB WAN Port: Supports mobile broadband via 4G/3G modems for WAN backup, connecting through the USB port.
- Abundant Security Features: Includes advanced firewall policies, DoS defense, IP/MAC/URL filtering, and a speed test function to protect your network and data.
- Highly Secure VPN: Supports up to 20 LAN-to-LAN IPsec, 16 OpenVPN, 16 L2TP, and 16 PPTP VPN connections.
- Omada SDN Integration: Part of the Omada SDN ecosystem for centralized management of network devices.
2. Package Contents
Verify that all items are present in your package:
- Gigabit VPN Router ER605
- Power Adapter
- RJ45 Ethernet Cable
- Quick Installation Guide

Image: The TP-Link ER605 V2 router along with its power adapter, Ethernet cable, and quick installation guide.
This image shows the main components included in the ER605 V2 package, providing a visual confirmation of the router and its essential accessories for setup.
3. Hardware Overview
3.1 Front Panel
Image: Front panel of the ER605 V2 router with labeled ports and LED indicators.
This image displays the front panel of the ER605 V2 router, highlighting its five Gigabit Ethernet ports (1 WAN, 2 WAN/LAN, 2 LAN) and a USB WAN port. Status LEDs for Power (PWR), System (SYS), and USB are visible on the left, while Link/Activity (Link/Act) LEDs are above each Ethernet port. A reset button is located on the far right.
LED Indicators:
- PWR: Power indicator. On when powered.
- SYS: System status indicator. Blinks during normal operation.
- USB: USB port status. On when a USB device is connected and active.
- Link/Act (1-5): Indicates connection status and activity for each Ethernet port.
Ports:
- WAN (Port 1): Dedicated Gigabit WAN port for internet connection.
- WAN/LAN (Ports 2-3): Configurable Gigabit ports that can function as either WAN or LAN ports.
- LAN (Ports 4-5): Dedicated Gigabit LAN ports for connecting local network devices.
- USB: USB 2.0 port for connecting a 4G/3G modem for WAN backup.
Buttons:
- Reset: Press and hold for several seconds to restore factory default settings.
3.2 Physical Dimensions

Image: Diagram illustrating the compact dimensions of the TP-Link ER605 V2 router.
This diagram illustrates the compact design of the ER605 V2 router, with its dimensions clearly marked as 158 mm (length), 101 mm (width), and 25 mm (height). This highlights its suitability for desktop placement and integration into various network setups.
4. Setup Guide
4.1 Basic Hardware Connection
- Power Off: Ensure your modem and computer are powered off.
- Connect WAN Port: Connect your modem's Ethernet cable to the ER605's WAN port (Port 1).
- Connect LAN Port: Connect your computer to one of the ER605's LAN ports (Port 4 or 5) using an Ethernet cable.
- Power On: Power on your modem, then the ER605 router, and finally your computer.
4.2 Initial Configuration (Web UI)
- Access Web Browser: Open a web browser on your connected computer.
- Enter IP Address: Type the default IP address (usually
192.168.0.1or192.168.1.1) into the address bar and press Enter. Refer to the Quick Installation Guide for the exact default IP. - Login: Enter the default username and password (typically
adminfor both). You will be prompted to change these for security. - Follow Setup Wizard: The router's web interface will guide you through the initial setup, including WAN connection type (Dynamic IP, Static IP, PPPoE), time zone, and network settings.
For detailed setup instructions, including advanced configurations and specific ISP requirements, please refer to the comprehensive User Manual PDF available on the TP-Link website or via the provided link in the support section.
5. Operating the Router
5.1 Multi-WAN and Load Balancing
The ER605 supports multiple WAN connections, allowing you to utilize up to three internet connections simultaneously for increased bandwidth and reliability. This is achieved through:
- Load Balancing: Distributes internet traffic across multiple WAN connections to optimize bandwidth usage and improve overall network performance.
- WAN Backup/Failover: Provides redundancy by automatically switching to a secondary WAN connection if the primary one fails, ensuring continuous internet access.
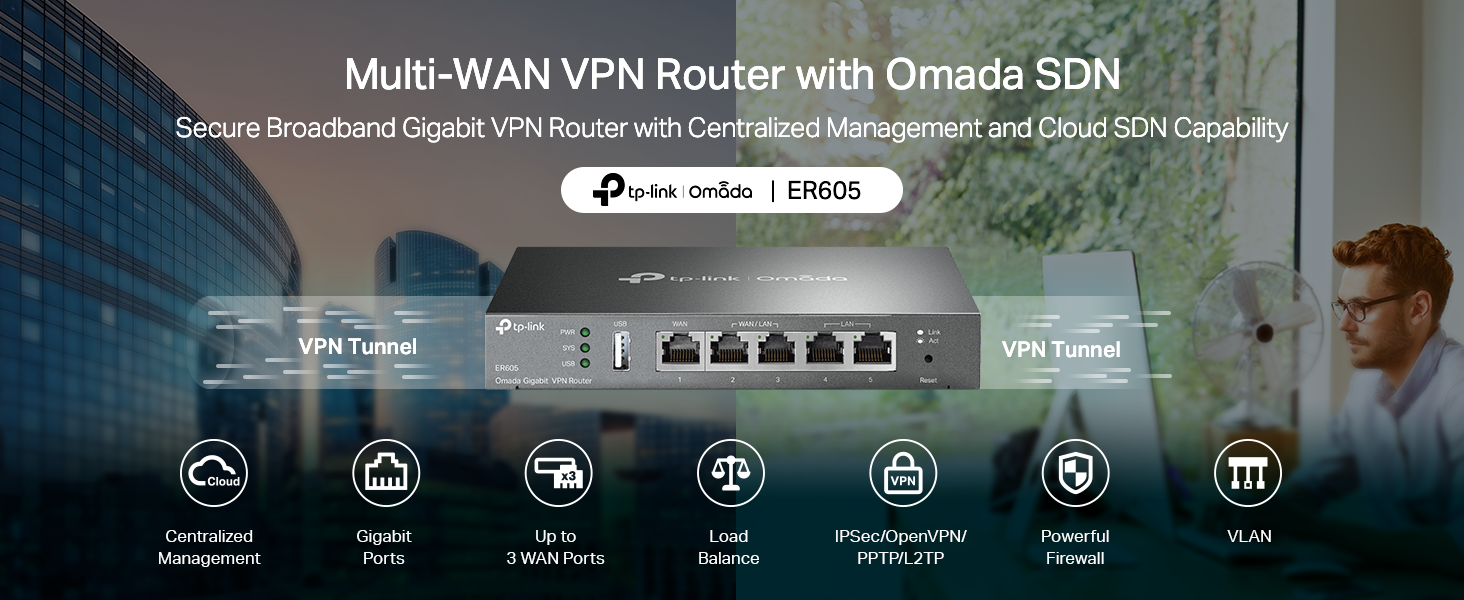
Image: Overview of the ER605's Multi-WAN VPN capabilities and Omada SDN integration.
This image provides an overview of the ER605's capabilities, including its Multi-WAN VPN functionality and integration with Omada SDN. Key features highlighted are centralized management, Gigabit ports, support for up to 3 WAN ports, load balancing, various VPN protocols (IPsec/OpenVPN/PPTP/L2TP), a powerful firewall, and VLAN support.
Video: ER605 V2 - Omada Gigabit VPN Router (Official TP-Link Video)
This official video from TP-Link provides a concise overview of the ER605 V2 Omada Gigabit VPN Router, showcasing its key features and benefits, including its role within the Omada SDN ecosystem.
5.2 VPN Configuration
The ER605 offers robust VPN capabilities for secure remote access and site-to-site connectivity:
- IPsec VPN: Securely connects two private networks over a public network.
- OpenVPN: An open-source VPN protocol offering strong encryption and flexibility.
- L2TP/PPTP VPN: Common VPN protocols for client-to-site connections.

Image: Diagram showing the highly secure VPN capabilities of the TP-Link ER605 router.
This diagram illustrates the ER605's highly secure VPN functionality, specifically an IPsec VPN tunnel connecting a headquarters network to a subsidiary. The setup is managed through an Omada Controller, demonstrating secure remote access and site-to-site connectivity.
5.3 Security Features
The router is equipped with various security features to protect your network:
- SPI Firewall: Stateful Packet Inspection firewall for advanced network protection.
- DoS Defense: Protects against Denial of Service attacks.
- IP/MAC/URL Filtering: Allows you to control network access based on IP addresses, MAC addresses, or website URLs.
- VLAN Support: Enables network segmentation for improved security and management.

Image: Diagram highlighting the abundant security features of the TP-Link ER605 router.
This image details the comprehensive security features of the ER605 router. It includes a powerful firewall, IP/MAC/URL filtering, IP-MAC binding, One-Click ALG Activation for various protocols, DoS Defense, a built-in Speed Test, and convenient VLAN support for enhanced network management.
5.4 Omada SDN Integration
The ER605 is part of TP-Link's Omada Software Defined Networking (SDN) solution, which provides centralized management of your entire network infrastructure. This allows for:
- Unified Management: Manage routers, switches, and access points from a single interface.
- Cloud Access: Remotely manage your network from anywhere, anytime, via the cloud.
- Scalability: Easily expand your network with additional Omada devices.

Image: Diagram illustrating Omada SDN and flexible management options.
This diagram illustrates the Omada SDN platform's integration capabilities, showing how the ER605 works with other Omada devices like access points and JetStream switches. It highlights flexible management options through both hardware and software controllers, providing a unified interface for network administration.

Image: Visual representation of the ER605 as part of a smarter cloud solution for business networking.
This image showcases the ER605's role in a cloud-based business networking solution. It depicts how the router seamlessly integrates into the Omada SDN platform, enabling remote and centralized management of various network components, including different types of access points and PoE switches, accessible via a unified interface on desktop or mobile devices.
6. Maintenance
6.1 Firmware Updates
Regularly check for and install firmware updates to ensure optimal performance, security, and access to new features. Firmware can be downloaded from the official TP-Link website.
6.2 Configuration Backup and Restore
It is recommended to back up your router's configuration settings periodically. This allows you to quickly restore your settings in case of a factory reset or unexpected issues.
6.3 Physical Care
Keep the router in a well-ventilated area, away from direct sunlight, heat sources, and moisture. Ensure cables are securely connected and not under strain.
7. Troubleshooting
7.1 No Internet Access
- Check Cable Connections: Ensure all Ethernet cables are securely plugged into the correct ports on the router, modem, and computer.
- Check LED Indicators: Verify that the PWR, SYS, and WAN Link/Act LEDs are on or blinking as expected.
- Reboot Devices: Power off your modem, then the router, and then your computer. Wait a few minutes, then power them on in the same order.
- ISP Connection: Confirm that your Internet Service Provider (ISP) connection is active and working.
7.2 Cannot Access Web Management Page
- Verify IP Address: Ensure your computer is set to obtain an IP address automatically (DHCP) or has a static IP within the router's subnet.
- Correct URL/IP: Double-check that you are entering the correct default IP address (e.g.,
192.168.0.1) ortplinkwifi.net. - Clear Browser Cache: Try clearing your web browser's cache or using a different browser.
- Firewall/Antivirus: Temporarily disable any firewall or antivirus software on your computer that might be blocking access.
7.3 Forgotten Login Password
If you forget your login password, you can perform a factory reset on the router. Locate the Reset button on the front panel, press and hold it for approximately 5-10 seconds until the SYS LED blinks rapidly. The router will then revert to its factory default settings, including the default username and password (admin/admin).
For more advanced troubleshooting steps and specific error messages, please consult the full User Manual PDF or contact TP-Link Technical Support.
8. Specifications
| Feature | Detail |
|---|---|
| Brand | TP-Link |
| Model Name | ER605 |
| Item Model Number | ER605 |
| Product Dimensions | 6.22 x 3.94 x 1 inches (158 x 101 x 25 mm) |
| Item Weight | 12.6 ounces |
| Color | Black, Silver |
| Ports | 1 Gigabit WAN, 2 Gigabit WAN/LAN, 2 Gigabit LAN, 1 USB 2.0 |
| Voltage | 100-240V (Multi-voltage compatible) |
| Operating System | Windows (Management via web UI) |
| Connectivity Technology | Ethernet |
| Security Features | SPI Firewall, VPN Pass-through, FTP/H.323/PPTP/SIP/IPsec ALG, DoS Defense, IP/MAC/URL Filtering |
| VPN Support | IPsec, OpenVPN, L2TP, PPTP |
| Omada SDN | Integrated for centralized management |
| Lightning Protection | 4kv |
9. Warranty and Support
TP-Link products come with a limited warranty. For specific warranty terms and conditions applicable to your region, please visit the official TP-Link website.
9.1 Technical Support
For technical assistance, troubleshooting, or product inquiries, please contact TP-Link Technical Support through their official website. You can find contact information, FAQs, and additional resources there.
9.2 User Manual (PDF)
A detailed User Manual in PDF format is available for download, providing comprehensive information on advanced configurations and features.
Related documentsER605


Ask a question about this manual
Ask about setup, troubleshooting, compatibility, parts, safety, or missing instructions. Manuals+ will review the question and use this page’s manual context to help answer it.