1. Introduction
Welcome to the world of miniature craftsmanship with the ROBOTIME Sunshine Town Book Nook. This DIY craft kit allows you to assemble a charming, detailed miniature town scene that doubles as a stylish bookend and features luminous decor. Immerse yourself in the creation of this intricate model, bringing a piece of a serene town into your home.

Figure 1.1: Fully assembled Sunshine Town Book Nook, illuminated.
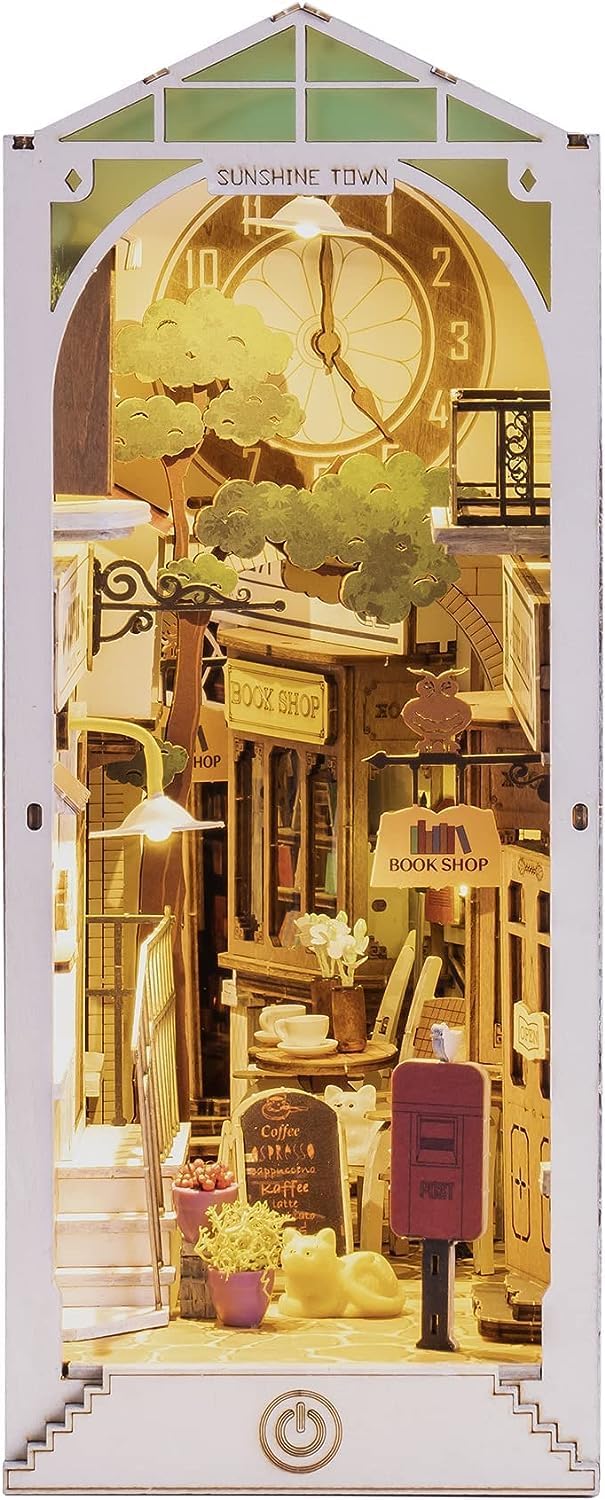
Figure 1.2: Front view of the Sunshine Town Book Nook.
2. Safety Information
This product contains small parts and is not suitable for children under 3 years of age due to choking hazards. Adult supervision is recommended during assembly. Please keep all packaging materials away from children. Ensure proper ventilation when using any adhesives or paints included in the kit.

Figure 2.1: Product packaging highlighting safety warnings.
3. What's in the Box
Your ROBOTIME Sunshine Town Book Nook kit includes all necessary components for assembly, except for batteries. Please prepare 2 pieces of AAA batteries for the LED lights.
- 1pc (Complete DIY Kit with pre-cut wooden pieces, paper, fabric, plastic, LED lights, and accessories)

Figure 3.1: Package display showing all included components.
4. Setup and Assembly
The Sunshine Town Book Nook is a DIY craft project designed for engaging assembly. Follow the detailed instructions provided in the included manual to construct your miniature world. The assembly process typically takes approximately 6 hours.
4.1 Assembly Steps
- Prepare Components: Carefully detach all pre-cut wooden pieces and other materials from their sheets. Organize them according to the assembly manual.
- Assemble Structures: Begin by assembling the main structural components of the book nook, such as walls, floors, and roofs, following the numbered steps in the manual. Use appropriate adhesive if required.
- Detailing and Decoration: Attach smaller decorative elements like furniture, plants, signs, and other miniature items. Pay close attention to the placement and orientation of each piece.
- Electrical Wiring: Install the LED lights according to the wiring diagram. Ensure all connections are secure and correctly aligned to illuminate the scene.
- Final Assembly: Combine all assembled sections to form the complete book nook. Insert the required AAA batteries into the battery box to power the lights.

Figure 4.1: Assembling miniature components.

Figure 4.2: Detailed assembly of small elements.
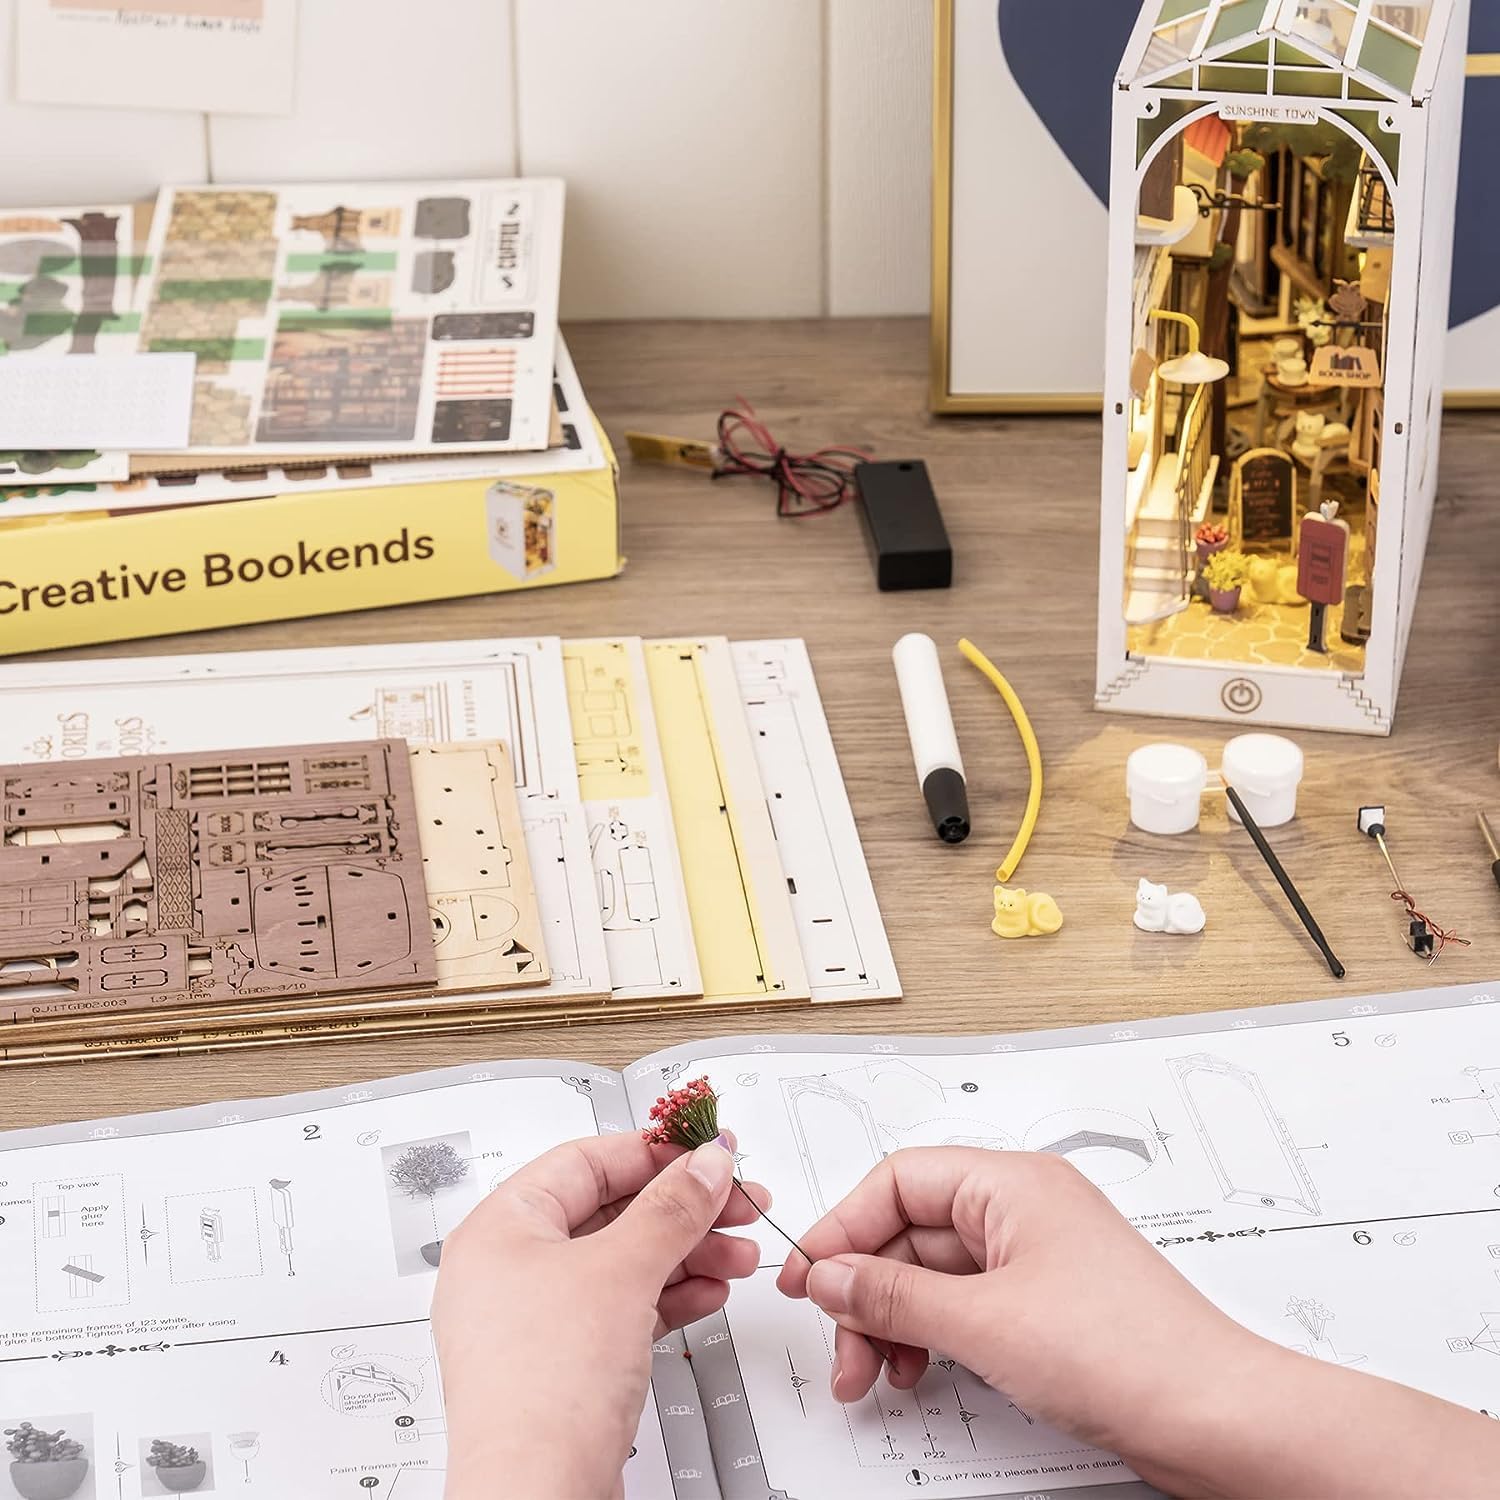
Figure 4.3: Adding miniature foliage.
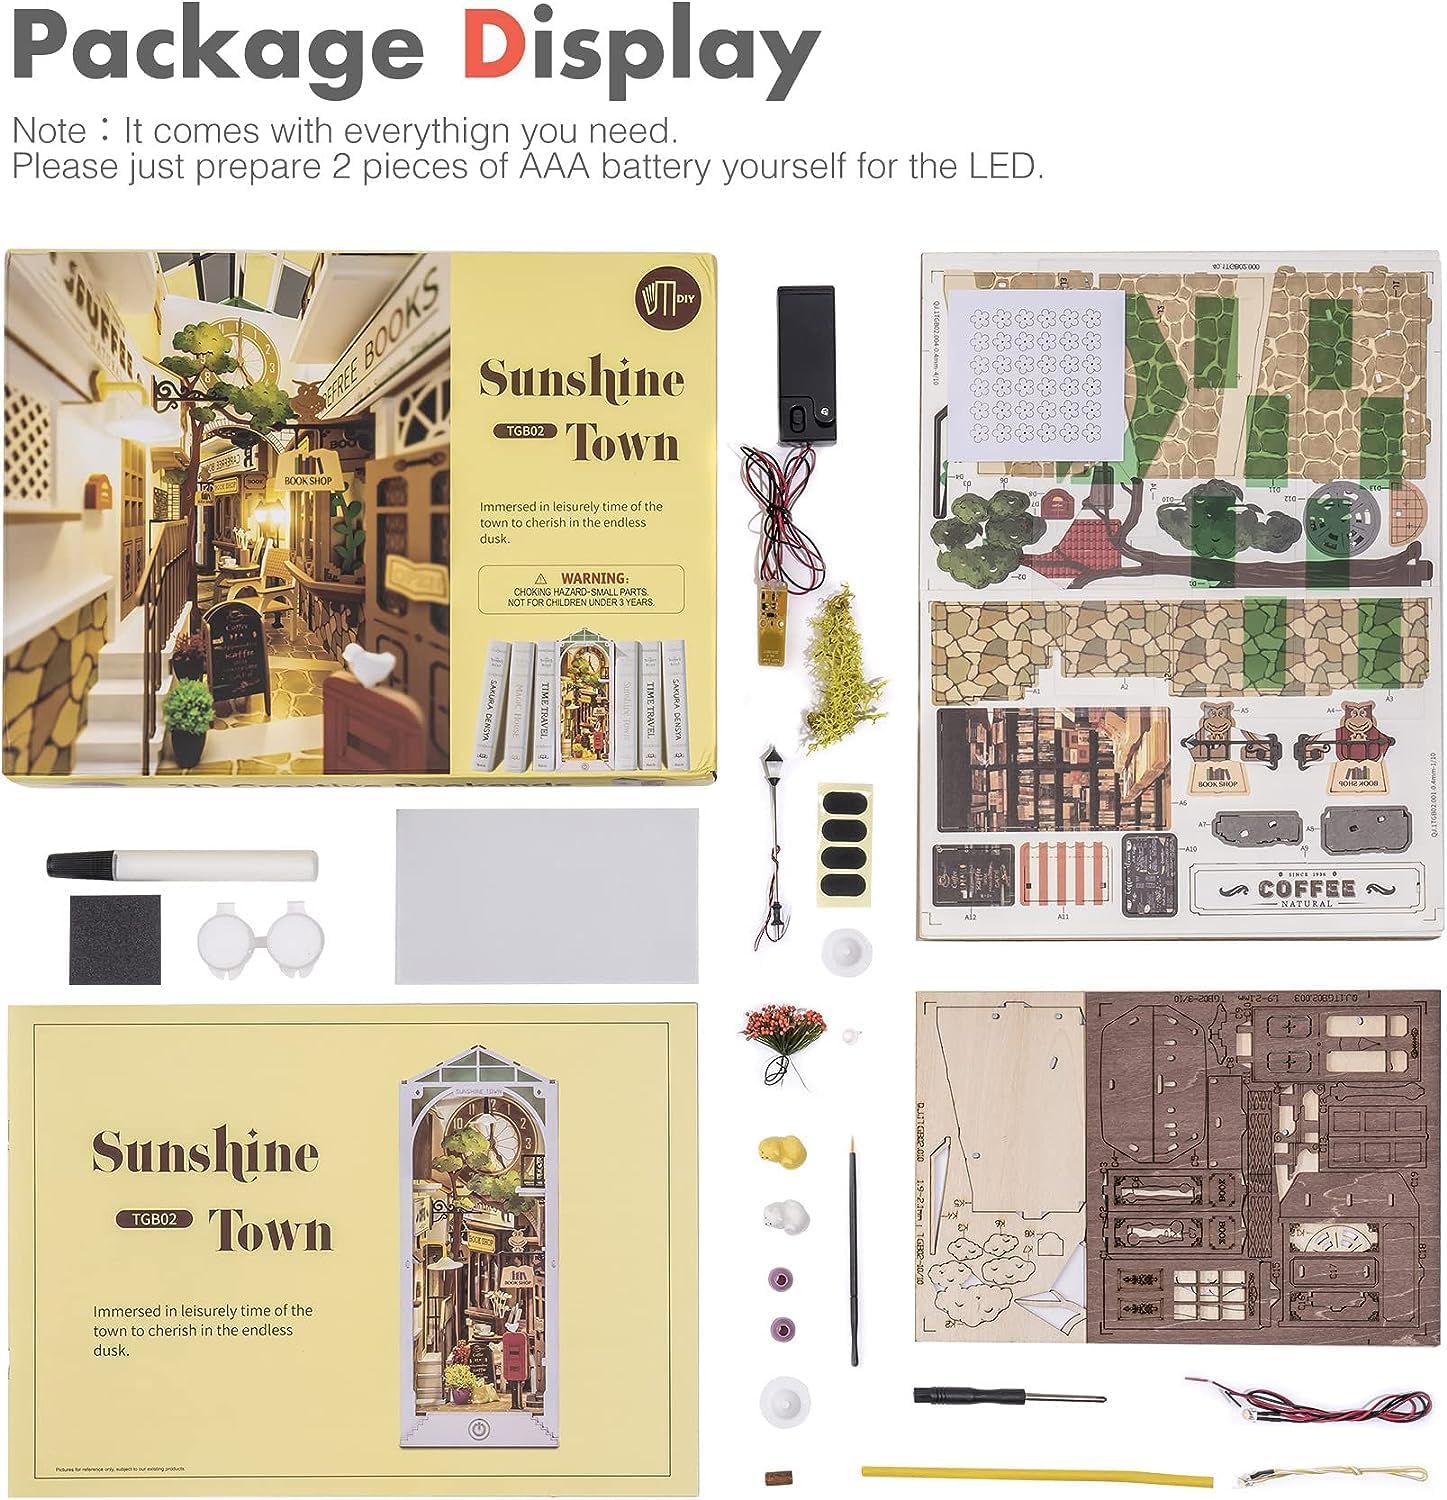
Figure 4.4: Constructing miniature trees.

Figure 4.5: Overview of the assembly process with parts and manual.
4.2 Product Dimensions
Once assembled, the Sunshine Town Book Nook has the following approximate dimensions:
- Length: 7.48 inches (190 mm)
- Width: 9.06 inches (230 mm)
- Height: 7.48 inches (190 mm)

Figure 4.6: Assembled product with approximate dimensions.
5. Operation
After successful assembly and battery installation, the LED lights in your Sunshine Town Book Nook can be turned on and off using the power button located at the front base of the model. Press the button once to turn the lights on, and press it again to turn them off.
6. Maintenance
To ensure the longevity and appearance of your Sunshine Town Book Nook, follow these maintenance guidelines:
- Cleaning: Gently dust the model with a soft, dry cloth or a soft brush. Avoid using liquid cleaners or abrasive materials, as they may damage the delicate components or paint.
- Storage: Store the book nook in a dry environment, away from direct sunlight and extreme temperatures, to prevent warping or fading of materials.
- Battery Replacement: If the lights dim or stop working, replace the AAA batteries. Ensure correct polarity when inserting new batteries.
7. Troubleshooting
If you encounter any issues with your Sunshine Town Book Nook, please refer to the following common problems and solutions:
- Lights Not Working:
- Check if the AAA batteries are inserted correctly with the correct polarity.
- Ensure the batteries are new and fully charged.
- Verify all wire connections are secure and not loose or damaged.
- Confirm the power switch is in the 'ON' position.
- Parts Not Fitting:
- Double-check the assembly manual to ensure you are using the correct parts for the current step.
- Ensure parts are oriented correctly before attempting to fit them.
- Do not force parts; if a part does not fit, re-examine the instructions and the part itself for any obstructions or incorrect alignment.
- Missing or Damaged Parts:
- Carefully check all packaging materials to ensure no small parts were overlooked.
- If a part is genuinely missing or damaged upon arrival, please contact ROBOTIME customer support for assistance.
8. Specifications
| Feature | Detail |
|---|---|
| Brand | ROBOTIME |
| Model Name | TGB02 |
| Product Dimensions (L x W x H) | 7.48 x 9.06 x 7.48 inches |
| Item Weight | 1.76 pounds (0.8 Kilograms) |
| Number of Pieces | 246 |
| Material | Wood, Paper, Fabric, Plastic, LED components |
| Recommended Age | 3 years and up |
| Included Components | 1pc (Complete DIY Kit) |
| Power Source | 2 x AAA Batteries (not included) |
9. Warranty and Support
Specific warranty information for the ROBOTIME Sunshine Town Book Nook (Model TGB02) is not provided in this manual. For any product inquiries, technical support, or assistance with missing/damaged parts, please contact ROBOTIME customer service directly or visit the official ROBOTIME store on Amazon:


