1. Introduction and Overview
The LiTime 10 Amp Lithium Battery Charger is designed for 12V (12.8V) LiFePO4 batteries, delivering stable charging through CC/CV modes. It supports 0V activation to revive batteries under BMS protection. This charger is equipped with a built-in cooling fan for efficient operation in various temperature conditions (-4°F to 104°F) and features multiple safety protections. It is suitable for RVs, trucks, cars, and solar systems.

Figure 1: LiTime 10 Amp Lithium Battery Charger.

Figure 2: Multi-level protection features of the charger.
Video 1: Overview of LiTime Automotive Grade LiFePO4 Lithium Battery and Charger capabilities.
Video 2: Demonstrating the use of LiTime products in a camper van power system.
Video 3: Overview of LiTime battery accessories, including chargers.
2. Setup and Connection
Before connecting, ensure the battery voltage matches the charger's output voltage (14.6V for 12V LiFePO4 batteries). The charger comes with an AC input cable and a DC output cable with an Anderson connector. An M8 terminal adapter is also included for direct battery post connection.
Connection Steps:
- Ensure the charger's power switch is in the OFF position.
- Connect the DC output cable (with Anderson connector or M8 terminals) to your LiFePO4 battery. Ensure connections are firm to prevent overheating.
- Connect the AC input cable to a standard 100V-240V AC power outlet.
- Turn the charger's power switch to the ON position. The charger will begin charging, indicated by the LED status.
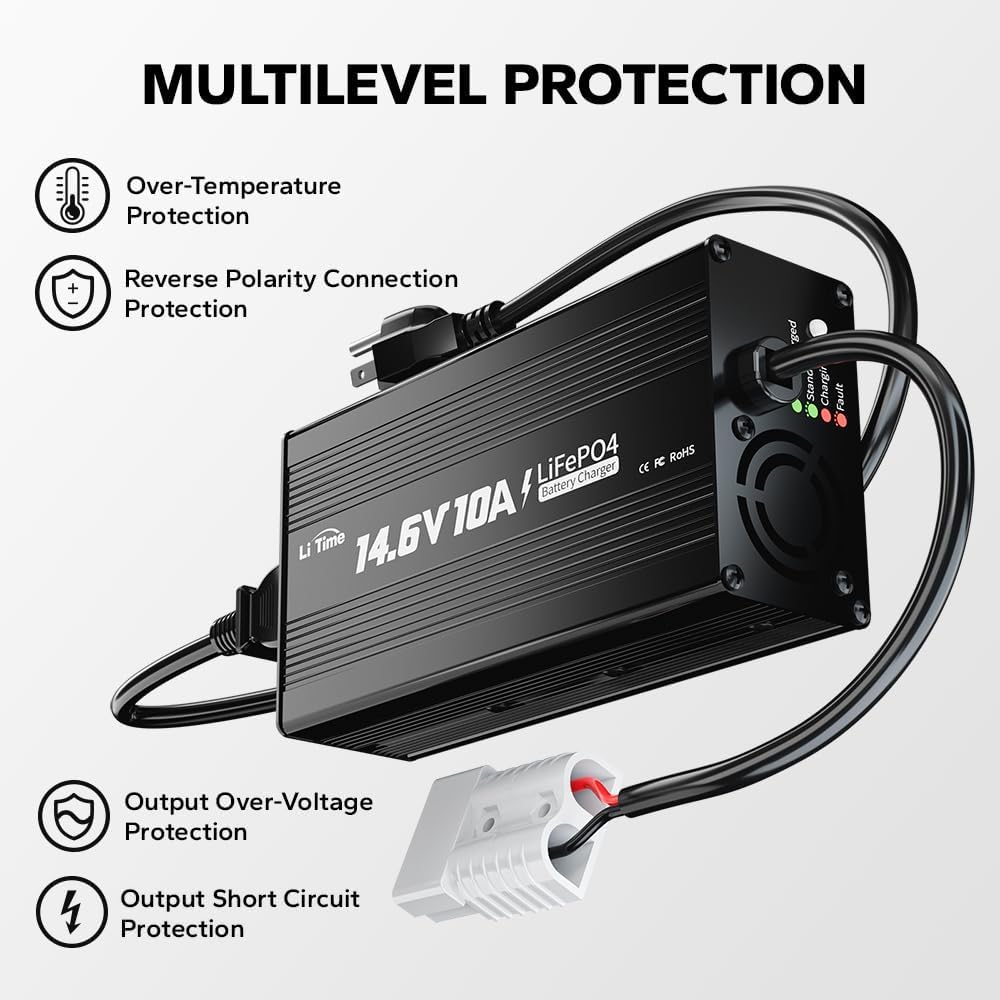
Figure 3: Charger connections including Anderson connector and M8 terminals.

Figure 4: Visual guide for connecting the charger to the battery and power source.

Figure 5: Contents of the product package, including charger, cables, and manual.
3. Operating Instructions
LED Indicator Status:
- LED Always on Red: Battery is charging.
- LED Always on Green: Battery is fully charged.
- LED Flashes Green: Charger is on standby.
- LED Flashes Red: Charger fault or under protection (e.g., over-temperature, reverse polarity, output short-circuit, output over-voltage).

Figure 6: Explanation of LED indicator lights for charging status.
3-Stage Charging Mode:
The charger utilizes a 3-stage charging process for optimal battery health and efficiency:
- Pre-Charge Stage (T1 - Activating): If the battery voltage is low, the charger will apply a limited current to activate it. This stage also supports 0V activation to revive batteries under BMS protection.
- Constant Current Charging Stage (T2 - 10A Current Charging): When the battery is in the main charging time, the charger will charge the battery with a 10A current. The battery voltage rises above the set value, and the charger automatically switches to the next stage.
- Constant Voltage Charging Stage (T3 - Current Reducing & Charging Completed): The charger switches to constant voltage charging. The charging current gradually decreases. When the charging voltage or current reaches the set value, the charger automatically turns off the output voltage and the battery charging is completed.

Figure 7: Diagram illustrating the 3-stage charging process.

Figure 8: The charger's ability to activate 0V batteries after BMS protection.
Efficient Cooling System:
The charger is equipped with a built-in cooling fan to maintain stable charging efficiency and prevent overheating, extending the life of the charger and battery.

Figure 9: Internal cooling fan for temperature regulation during charging.
Video 4: Detailed explanation of the internal workings of a LiFePO4 charger from 0% to 100% charge.
4. Safety Precautions
Always prioritize safety when operating the charger. This charger is designed with multilevel protections to prevent over-temperature, reverse polarity connection, output short-circuit, and output over-voltage.
- Check the battery specifications carefully before charging to ensure that the LiFePO4 battery matches the charger's technical data.
- Make sure the charger is properly connected to the battery. Avoid a short circuit.
- Unplug the input/output cable of the charger immediately once the charger or battery is found to be abnormal or damaged during charging.
- Do not use other input cables or extend the output connection cable personally, or please contact LiTime customer service.
- Do not open, dismantle, or modify the charger.
- Never use it in a thunderstorm.
- Please keep the charger and battery away from water, heat sources, sparks, flames, flammable gas, and hazardous chemicals.
- Do not place rods or other metal objects in vents or other openings.
- Place the charger in a well-ventilated area with sufficient heat dissipation to prevent overheating and damage.
- Do not puncture, drop, crush, burn, penetrate, shake, strike, or throw it with force.
- This 12 volt 10 amp lithium battery charger is not waterproof - not suitable for Marine environments such as boats, ships, yachts, trolling motors, etc.

Figure 10: Visual guide for important safety precautions.
5. Troubleshooting
Common Issues and Solutions:
| Problem | Possible Cause | Solution |
|---|---|---|
| Charging indicator flashes red when charging. | Under Over Temperature Protection | Cool down the charger to normal temperature. |
| Charging indicator flashes red after connected. | Under Reverse Polarity Connection / Output Short Circuit Protection / Output Over-Voltage Protection | Connect the charger to the battery correctly. |
| The charger does not charge and the LED is off after being connected to grid power. | Poor connection / Charger Internal Damage | Make sure all connections are correct and tight. Contact us at service@litime.com for further solutions. |

Figure 11: Troubleshooting table for common charger issues.
Charger Won't Start?
If your inverter is plugged in, it may be blocking the charger's initial "wake-up" pulse. Follow these steps:
- Unplug the inverter from the battery.
- Let the charger activate the battery.
- Reconnect the inverter after charging is complete.

Figure 12: Steps to resolve charger not starting due to inverter interference.
Video 5: Guide on what to do if the battery is not working or charging.
6. Product Specifications
| Specification | Value |
|---|---|
| Input Voltage | 100V to 240V AC, 50Hz to 60Hz |
| Output Voltage | 14.6 Volts (DC) |
| Output Current | 10 Amps |
| Operating Temperature | -4°F to 104°F (-20°C to 40°C) |
| Storage Temperature | -40°F to 158°F (-40°C to 70°C) |
| Product Dimensions | 10.43 x 2.17 x 3.15 inches (7.09"D x 3.58"W x 2.03"H) |
| Item Weight | 2.07 pounds |
| Model Number | L12V10A |
| Certifications | FCC, CE, RoHS, PSE |
7. Warranty & Support
LiTime Battery Charger comes with a 2-year quality warranty. For technical support and customer service, you can reach out via phone or online services. Quick feedback is typically provided within 24 hours.
Contact: service@litime.com


