
1. Introduction
This manual provides detailed instructions for the setup, operation, and maintenance of your CYCPLUS M1 GPS Bike Computer. The M1 is designed to track various cycling data, offering precise GPS positioning and compatibility with ANT+ and Bluetooth sensors for a comprehensive riding experience.
2. Package Contents
Verify that all items are present in your package:
- 1 x CYCPLUS M1 GPS Bike Computer
- 1 x Front Mount (134x55mm, suitable for 31.8mm handlebars)
- 1 x Speed or Cadence Sensor (depending on package variant)
- 1 x Micro USB Charging Cable
- 1 x User Manual (this document)
- 1 x Rubber Mat
- 3 x Elastic Bands

Image 2.1: CYCPLUS M1 GPS Bike Computer, included speed/cadence sensor, and front mount.
3. Product Overview
The CYCPLUS M1 features a 2.9-inch FSTN LCD screen for clear visibility in various lighting conditions, including direct sunlight. Its slim design ensures it integrates seamlessly with your bicycle setup. The device is equipped with advanced GPS capabilities and supports ANT+ and Bluetooth connectivity for external sensors.

Image 3.1: The CYCPLUS M1 mounted on bicycle handlebars, highlighting its 2.9-inch display and slim profile (20mm thickness).
4. Setup
4.1 Mount Installation
- Attach the front mount to your bicycle's handlebars. The mount is designed for 31.8mm handlebars.
- Use the provided key to tighten the screw securely.
- Place the M1 bike computer onto the mount and twist to lock it into position.
4.2 Power On/Off
- To power on: Press and hold the power button until the screen illuminates.
- To power off: Press and hold the power button until the device shuts down.
4.3 Initial Configuration
Upon first power-on, follow the on-screen prompts to set basic parameters such as time zone, units (metric/imperial), and language.
4.4 Sensor Pairing (ANT+ & Bluetooth)
The M1 supports external sensors via ANT+ and Bluetooth for enhanced data collection.
- Ensure your external sensors (e.g., heart rate monitor, cadence sensor, power meter) are active and within range.
- Navigate to the sensor pairing menu on the M1 device.
- Select 'Search for Sensors'. The M1 will display available ANT+ and Bluetooth devices.
- Select the desired sensor from the list to pair.

Image 4.1: The CYCPLUS M1 demonstrating compatibility with various ANT+ sensors, including heart rate monitors, cadence sensors, and power meters.
5. Operating Instructions
5.1 GPS Positioning
The M1 utilizes a dynamic GPS chip for fast and accurate positioning, supporting multiple satellite systems including GPS, Glonass, Galileo, and BeiDou. Positioning typically takes approximately 30 seconds.

Image 5.1: The CYCPLUS M1 displaying its multi-satellite GPS positioning capabilities, including GPS, Glonass, Galileo, and BeiDou.
5.2 Display Functions
The 2.9-inch FSTN screen provides clear visibility of various data points. You can customize the display to show:
- Current Speed, Average Speed, Max Speed
- Distance (Trip Dist, ODO Meter)
- Time (Clock, Trip Time)
- Altitude, Ascent, Gradient
- Temperature
- Cadence, Heart Rate, Power (requires paired external sensors)
- Lap data

Image 5.2: An overview of the data fields available on the CYCPLUS M1 display, including speed, time, distance, and sensor-derived metrics.
5.3 Automatic Backlight and Awakening
The M1 features an anti-glare LCD screen for clear viewing in direct sunlight. It also includes an automatic backlight function that activates between 18:00 and 9:00. The device will automatically awaken from hibernation if movement is detected after 10 minutes of inactivity.

Image 5.3: Illustration of the M1's automatic backlight feature, providing clear visibility during both day and night rides.
5.4 Data Recording and App Synchronization
The M1 records your ride data, which can be synchronized with the CYCPLUS Fit App via Bluetooth 4.0. The app allows for data analysis and firmware updates. You can also sync your activity data to Strava for further tracking and sharing.
- Download the "CYCPLUS Fit" app from the App Store or Google Play.
- Connect your M1 to the app via Bluetooth.
- Use the app to view sports data, analyze performance, and update firmware.
- The app supports syncing activity data to Strava. The M1 can store up to 150 hours of riding data.

Image 5.4: The CYCPLUS Fit App interface on a smartphone, demonstrating features like data analysis, sports data viewing, and firmware updates.
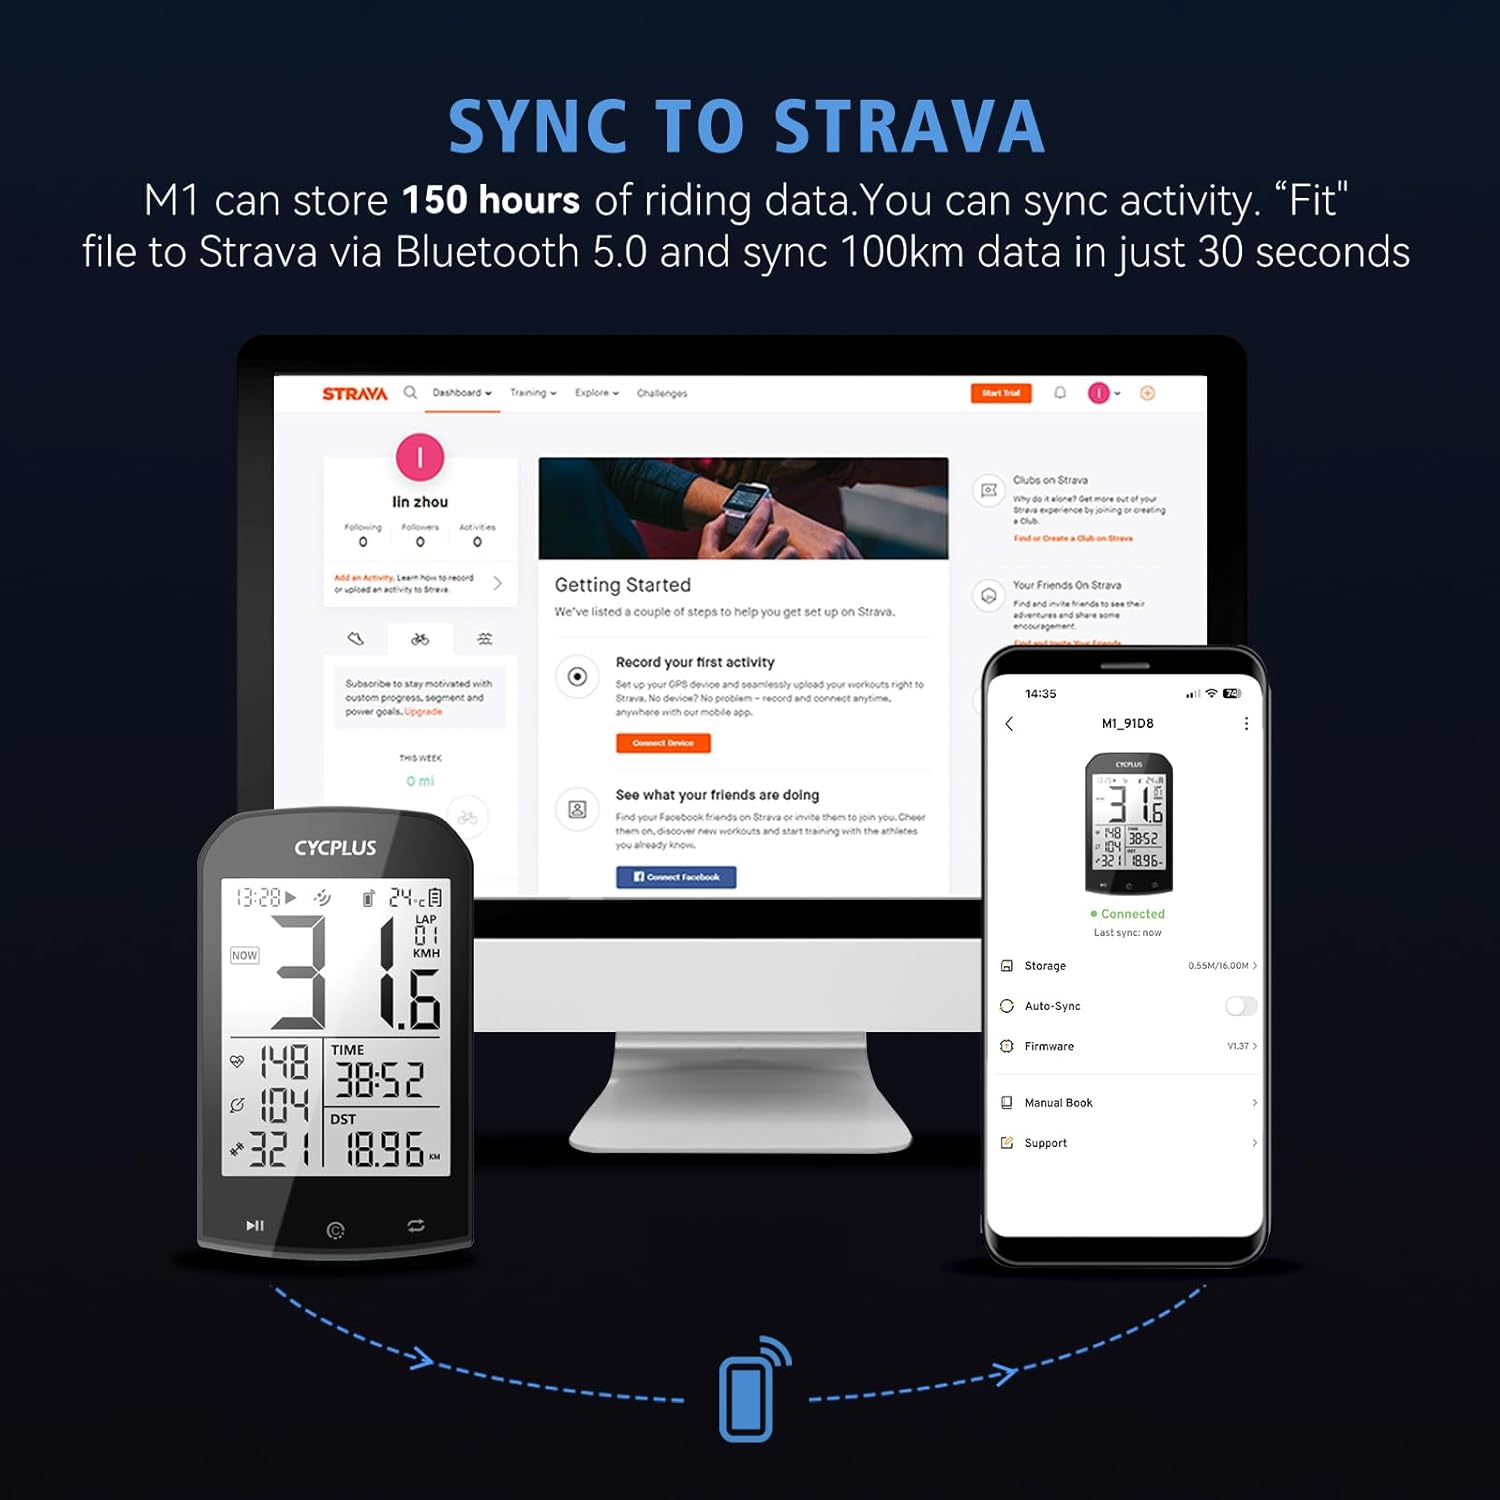
Image 5.5: The process of syncing ride data from the CYCPLUS M1 to Strava, facilitated by the smartphone app.
6. Battery Management
The M1 is equipped with an 1100mAh super-capacity battery, providing over 30 hours of operation on a full charge. A full charge typically takes 3 hours using the provided Micro USB cable.
- Connect the Micro USB charging cable to the M1's charging port.
- Connect the other end of the cable to a standard USB power adapter (not included) or a computer USB port.
- The charging indicator will show the charging status.

Image 6.1: The CYCPLUS M1 connected for charging via its Micro USB port, illustrating its 60-hour battery endurance after a 3-hour charge.
7. Maintenance
- Cleaning: Wipe the device with a soft, damp cloth. Avoid using harsh chemicals or abrasive cleaners.
- Water Resistance: The M1 has an IPX6 waterproof rating, meaning it is protected against high-pressure water jets from any direction. It can be used in the rain but should not be submerged in water.
- Storage: Store the device in a cool, dry place when not in use. Avoid extreme temperatures.
8. Troubleshooting
8.1 GPS Signal Acquisition Issues
- Ensure you are in an open outdoor area with a clear view of the sky.
- Wait for a few minutes for the device to acquire a stable signal.
- Restart the device if the issue persists.
8.2 Sensor Not Connecting
- Ensure the sensor is active and has sufficient battery power.
- Check that the sensor is within range of the M1.
- Re-attempt the pairing process from the M1's sensor menu.
- Verify that the sensor is compatible with ANT+ or Bluetooth.
8.3 Display Not Turning On
- Ensure the device is charged. Connect it to a power source using the Micro USB cable.
- Press and hold the power button for several seconds to attempt a forced restart.
8.4 Data Synchronization Problems
- Ensure Bluetooth is enabled on your smartphone and the M1.
- Verify that the CYCPLUS Fit App is installed and updated to the latest version.
- Restart both the M1 and your smartphone, then try syncing again.
- Check your internet connection if syncing to Strava via the app.
9. Specifications
| Feature | Specification |
|---|---|
| Model Number | M1 |
| Brand | CYCPLUS |
| Display Size | 2.9 Inches |
| Display Type | LCD (FSTN) |
| Main Material | ABS |
| Connectivity Technology | ANT+, Bluetooth |
| Sensor Type | GPS Sensor |
| Battery Composition | Lithium-polymer |
| Battery Life | Over 30 hours (up to 60 hours advertised) |
| Charging Time | Approx. 3 hours |
| International Protection Rating | IPX6 |
| Weight | 77.39 grams (2.73 Ounces) |
| Dimensions (Package) | 21.21 x 17.5 x 6.2 cm |
10. Warranty and Support
For warranty information and technical support, please refer to the official CYCPLUS website or contact your retailer. Keep your proof of purchase for any warranty claims.