1. Introduction
This manual provides essential information for the safe and efficient operation of your Maltec Gas Patio Heater, model 590192422910. This outdoor heater is designed to extend the usability of outdoor spaces such as patios, terraces, home gardens, cafes, and restaurants by providing comfortable warmth. It uses liquid gas (propane-butane) to emit infrared radiation, creating a pleasant ambient temperature.

Image: Maltec Gas Patio Heater providing warmth on a patio. The heater features a visible flame tube and a black base, with a reflective top.

Image: The Maltec Gas Patio Heater positioned in a greenhouse, providing warmth for a family. The heater's elegant design complements various outdoor settings.
2. Safety Warnings
READ ALL INSTRUCTIONS CAREFULLY BEFORE ASSEMBLY AND USE. Failure to follow these instructions may result in fire, explosion, or carbon monoxide poisoning, which could cause property damage, personal injury, or death.
- Assembly and storage, including the gas cylinder, must be performed according to local regulations.
- The appliance must be assembled by a person with appropriate knowledge of heating appliances.
- FOR OUTDOOR USE ONLY IN WELL-VENTILATED AREAS. This means at least 25% of the area must be open (e.g., with one wall open).
- DO NOT USE IN ENCLOSED SPACES. Using the gas heater indoors is dangerous and prohibited.
- Do not use this appliance for heating residential premises.
- The appliance must only be used at ground level. Do not use in basements or on upper floors.
- This appliance does not have a weather sensor; therefore, it must only be used in well-ventilated areas.
- Use only gas cylinders recommended by the manufacturer.
- Do not place objects on or near the appliance.
- It is forbidden to store flammable or explosive materials, as well as aerosols, near the appliance.
- NEVER USE OR STORE THE HEATER IN A FLAMMABLE ATMOSPHERE, i.e., where flammable materials such as gasoline or other flammable liquids are present.
- Ensure the gas cylinder is placed vertically on a dry, clean surface and protected from shocks or tipping. The heater's internal compartment is designed for this purpose.
- The ambient temperature of the gas cylinder must not exceed 35 °C (95 °F).
- The supplied hose and regulator comply with safety standards, ensuring adequate gas flow.
3. Package Contents
Verify that all components are present and undamaged before assembly.
- FL185 Heater Unit
- Hose with clamps
- Gas pressure regulator
- Transport wheels
- Instruction Manual
4. Specifications
| Brand | MalTec |
| Model Number | 590192422910 |
| Color | Black |
| Dimensions (L x W x H) | 80 x 80 x 220 cm (31.5 x 31.5 x 86.6 inches) |
| Weight | 26 kg (57.3 lbs) |
| Heating Power | 5 - 14 kW (5000 Watts) |
| Gas Consumption | 450-870 g/h |
| Gas Pressure | 28-30/37 mbar |
| Operating Time (1 cylinder) | 12 - 24 hours |
| Heating Radius | 5 meters (16.4 feet) |
| Gas Type | Propane-Butane (LPG) |
| Material | Powder-coated metal |
| Safety Features | Overheat system, Anti-tilt safety switch, Anti-leak fuses |

Image: Technical diagram illustrating the dimensions (height 218cm, cap diameter 80cm, base width 44cm) and a 5-meter heating radius of the Maltec Gas Patio Heater.
5. Setup Instructions
- Unpack Components: Carefully remove all parts from the packaging. Inspect for any damage.
- Assemble Wheels: Attach the transport wheels to the base of the heater as per the included assembly diagram (if applicable).
- Place Gas Cylinder: Open the access door to the gas cylinder compartment at the base of the heater. Place the liquid gas cylinder (propane-butane) vertically inside the compartment. Ensure it is stable and protected from tipping. The compartment is designed to secure the cylinder.
- Connect Regulator and Hose: Connect the gas pressure regulator to the gas cylinder valve. Then, connect the hose from the regulator to the heater's gas inlet. Ensure all connections are tight and secure using the provided clamps. Perform a leak test (e.g., with soapy water) on all gas connections before first use.
- Position Heater: Place the heater on a firm, level surface in a well-ventilated outdoor area, away from any flammable materials, overhead obstructions, or walls. Maintain a safe distance from people and objects.

Image: The open base compartment of the heater, designed to securely house the gas cylinder. Note the strap for securing the cylinder.

Image: A hand demonstrating access to the gas cylinder compartment, highlighting the ease of placing or replacing the gas bottle.
6. Operating Instructions
- Open Gas Supply: Slowly open the valve on the gas cylinder to allow gas to flow to the heater.
- Ignition:
- Turn the control knob to the "Pilot" position.
- Press and hold the control knob down.
- While holding the knob, press the red electric igniter button repeatedly until the pilot flame ignites. You should see a small flame through the viewing window.
- Continue to hold the control knob down for about 10-15 seconds after ignition to allow the thermocouple to heat up and engage the safety valve.
- Release the control knob. If the pilot flame extinguishes, repeat the ignition process.
- Adjust Heat: Once the pilot flame is stable, turn the control knob counter-clockwise to the desired heat setting (Low to High). The main burner will ignite, and you will see the flame within the glass tube.
- Shut Down: To turn off the heater, turn the control knob clockwise to the "Off" position. Close the valve on the gas cylinder. Allow the heater to cool completely before moving or storing.
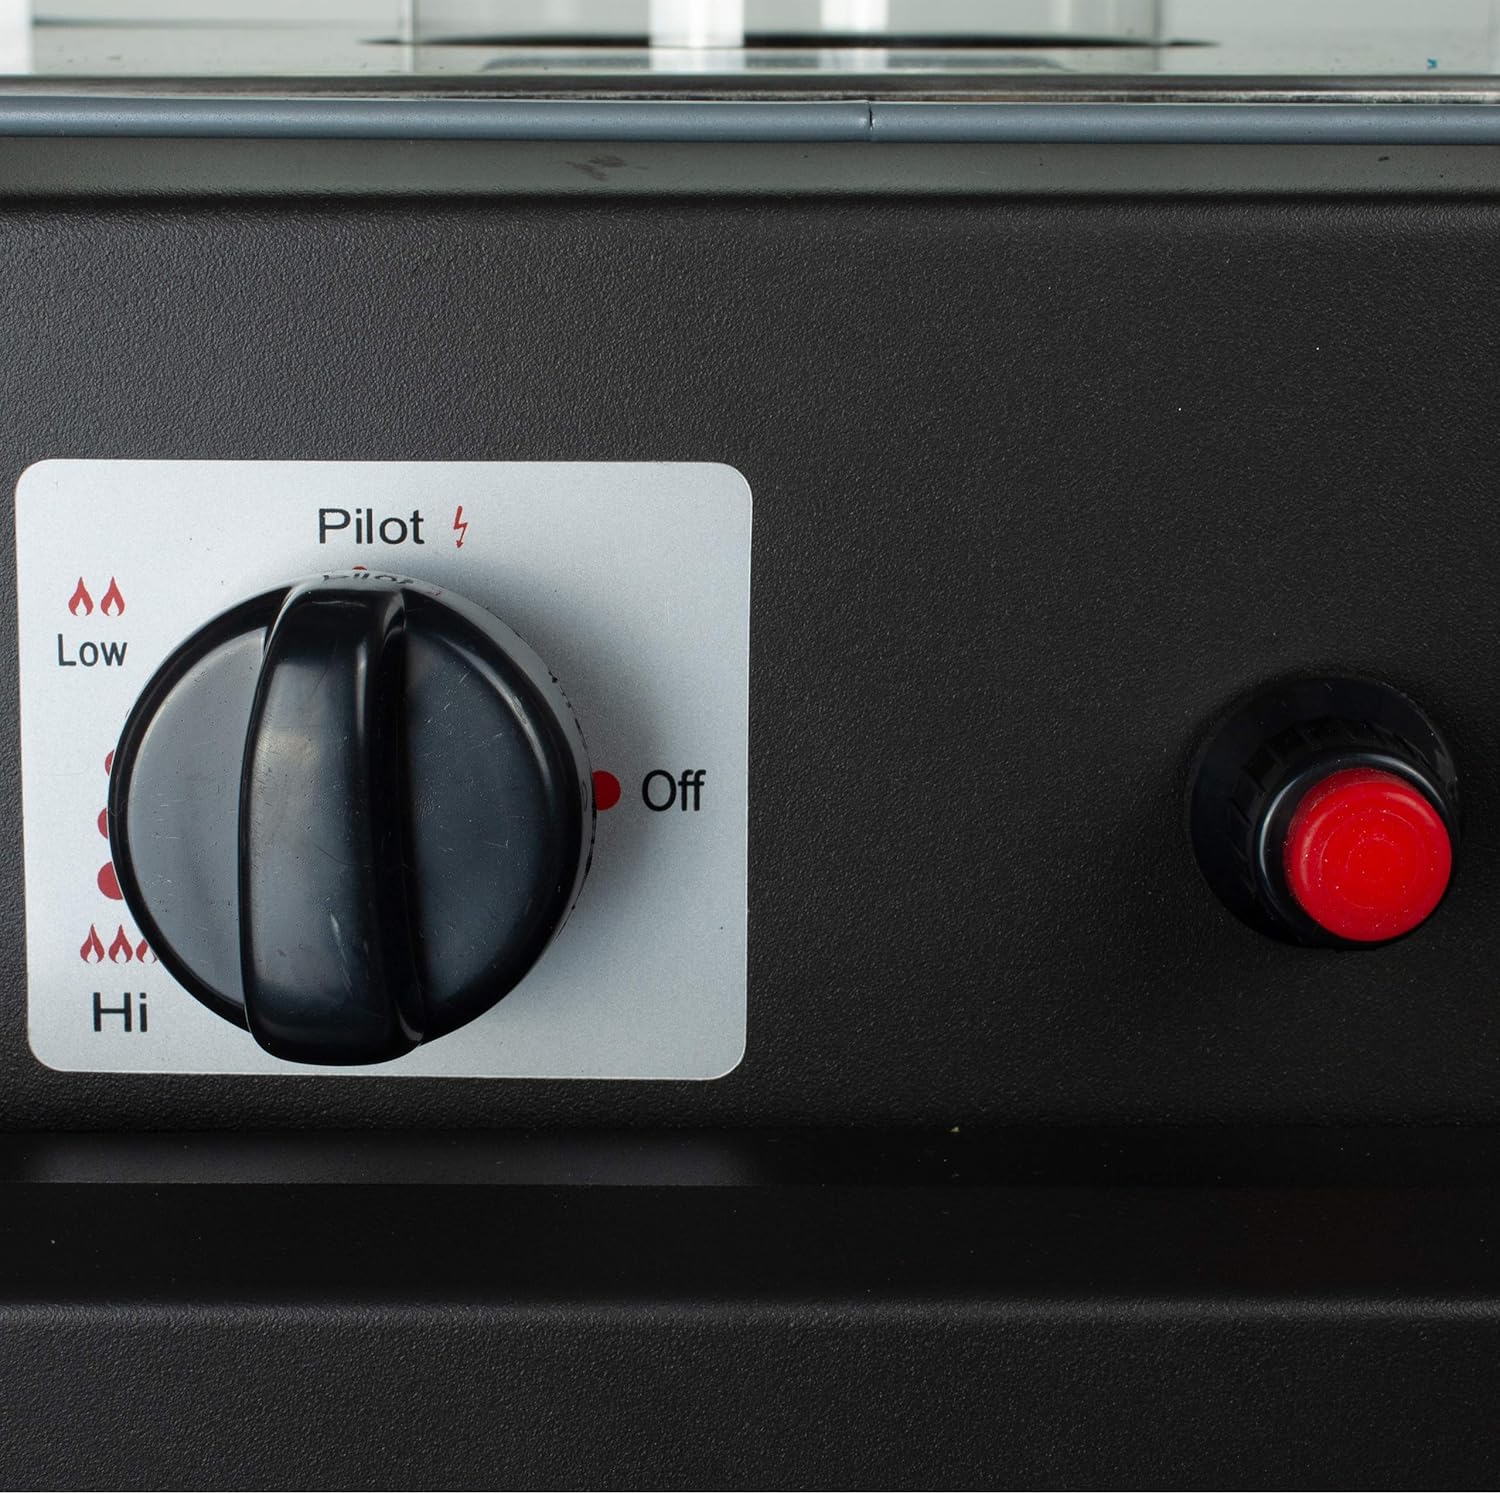
Image: The control panel with the rotary knob for heat adjustment (Low to Hi) and the red electric igniter button. The "Pilot" setting is clearly visible.

Image: A closer look at the control knob, showing the range from "Low" to "Hi" for adjusting the heat output, along with the "Pilot" and "Off" positions.

Image: A detailed view of the captivating flame effect within the reinforced glass tube, protected by a metal grid.
7. Maintenance
Regular maintenance ensures the longevity and safe operation of your patio heater.
- Cleaning: Ensure the heater is completely cool and the gas supply is off before cleaning. Wipe exterior surfaces with a soft, damp cloth. Do not use abrasive cleaners or solvents. Keep the burner area and air vents clear of dust and debris.
- Gas Connections: Periodically check the hose and all gas connections for signs of wear, cracks, or leaks. Replace any damaged components immediately. Perform a leak test annually or after replacing any gas components.
- Storage: When not in use for extended periods, disconnect the gas cylinder and store it in a well-ventilated area away from direct sunlight and heat sources. Store the heater in a dry, protected location.
8. Troubleshooting
If your heater is not operating correctly, consult the following common issues before contacting support.
- Heater does not ignite:
- Check if the gas cylinder valve is fully open.
- Ensure there is gas in the cylinder.
- Verify that the control knob is held down long enough during pilot ignition.
- Check for any obstructions in the pilot light or burner.
- Ensure the igniter button is producing a spark.
- Pilot flame does not stay lit:
- Ensure the control knob is held down for 10-15 seconds after ignition to allow the thermocouple to heat up.
- Check that the thermocouple is clean and properly positioned in the pilot flame.
- Low heat output:
- Check the gas level in the cylinder.
- Ensure the control knob is set to a higher heat setting.
- Verify that the gas regulator is functioning correctly.
- Gas odor:
- IMMEDIATELY SHUT OFF THE GAS SUPPLY AT THE CYLINDER.
- Evacuate the area.
- Do not attempt to ignite the heater or any other appliance.
- Check all gas connections for leaks using soapy water. Bubbles indicate a leak.
- If the odor persists or you cannot locate the leak, contact a qualified gas technician or your gas supplier.
9. Transportation
Despite its weight and size, the Maltec Gas Patio Heater is designed for easy relocation thanks to its integrated transport wheels.
- Ensure the heater is completely cool and the gas supply is turned off at the cylinder before attempting to move it.
- Use the transport wheels to carefully roll the heater to its new location. Avoid dragging or lifting the heater unnecessarily.
- Always ensure the gas cylinder is securely fastened within its compartment during transport to prevent movement or damage.

Image: A close-up view of one of the robust transport wheels, facilitating easy movement of the heater.
10. Warranty and Support
Information regarding specific warranty terms and spare parts availability is not provided in the product description. For warranty claims, technical support, or spare parts inquiries, please contact MalTec customer service directly or refer to the official MalTec website.
Always ensure to have your model number (590192422910) and purchase date available when contacting support.


