Introduction
The Seagate FireCuda 530 SSD delivers high performance, leveraging the full power of PCIe Gen4. It offers transfer rates significantly faster than previous generations, designed for demanding applications and gaming. This manual provides essential information for the installation, operation, and maintenance of your FireCuda 530 SSD.
Product Overview
The Seagate FireCuda 530 is a 1TB M.2 NVMe Solid State Drive. It is engineered for speed and durability, featuring a Seagate-validated E18 controller and 3D TLC NAND technology. This drive is compatible with various systems, including PlayStation 5 consoles, for storage expansion.
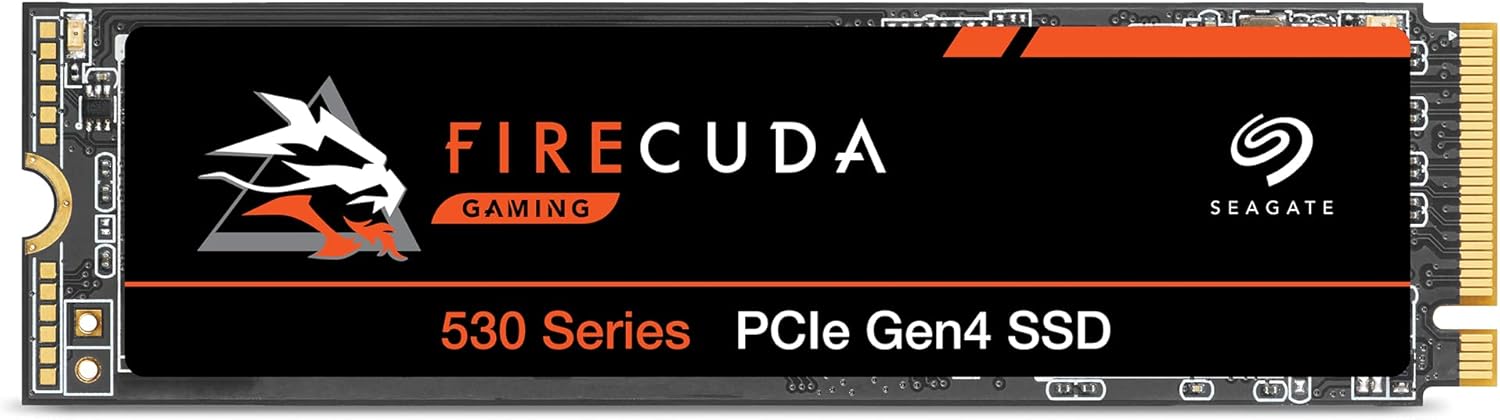
Image: The Seagate FireCuda 530 1TB M.2 NVMe SSD, a compact storage device.
Key Features
- High Performance: Up to 7300MB/s transfer speeds, leveraging PCIe Gen4 technology.
- Advanced Components: Built with a Seagate-validated E18 controller and the latest 3D TLC NAND for speed and durability.
- PS5 Compatible: Suitable for expanding storage on PlayStation 5 consoles.
- Exceptional Endurance: Designed for sustained use with a high Total Bytes Written (TBW) rating.
- Data Recovery Services: Includes a three-year Rescue Data Recovery Services plan for peace of mind.
- Warranty: Covered by a five-year limited warranty.
What's in the Box
The package for the Seagate FireCuda 530 1TB SSD typically includes:
- FireCuda® 530 SSD 1TB PCIE

Image: The retail packaging for the FireCuda 530 SSD, showing the drive and its box.
Setup and Installation
Before beginning installation, ensure your system is powered off and unplugged. It is recommended to wear an anti-static wrist strap to prevent electrostatic discharge (ESD) damage.
PC Installation
- Open PC Case: Carefully open your computer's side panel to access the motherboard.
- Locate M.2 Slot: Identify an available M.2 slot on your motherboard. These are typically labeled and may be covered by a heatsink.
- Remove Heatsink (if applicable): If your M.2 slot has a heatsink, remove it according to your motherboard's instructions.
- Insert SSD: Gently insert the FireCuda 530 SSD into the M.2 slot at a slight angle. Push it down until it clicks into place.
- Secure SSD: Secure the SSD with the provided screw or retention clip from your motherboard. If using a heatsink, reattach it.
- Close PC Case: Reattach the side panel and reconnect all cables.
- Initial Setup: Power on your PC. You may need to initialize and format the drive in Disk Management (Windows) or Disk Utility (macOS) before use. Refer to your operating system's documentation for detailed steps.

Image: The FireCuda 530 SSD installed in an M.2 slot on a PC motherboard, highlighting its compact form factor.
PlayStation 5 (PS5) Installation
The FireCuda 530 SSD is compatible with PS5 consoles. For optimal performance and to meet Sony's requirements, it is highly recommended to use an M.2 SSD with an attached heatsink. This model (ZP1000GM3A013) does not include a heatsink, so you will need to purchase and install one separately before installing it in your PS5.
- Power Off PS5: Turn off your PS5 console completely and unplug all cables.
- Remove Base and Cover: Place the PS5 on a soft cloth. Remove the base, then carefully slide off the console cover.
- Locate Expansion Slot: Identify the M.2 SSD expansion slot, usually covered by a metal plate.
- Remove Slot Cover: Unscrew and remove the expansion slot cover.
- Install Heatsink (if not pre-attached): If your FireCuda 530 does not have a pre-attached heatsink, install one onto the SSD according to the heatsink manufacturer's instructions.
- Insert SSD: Insert the FireCuda 530 SSD (with heatsink) into the expansion slot at an angle, then push it down and secure it with the screw.
- Replace Covers: Reattach the expansion slot cover, then the console cover and base.
- Format Drive: Power on your PS5. The console will prompt you to format the new M.2 SSD. Follow the on-screen instructions.

Image: The FireCuda 530 SSD and tools laid out next to a disassembled PlayStation 5, illustrating the installation process.
Operating the SSD
Once installed and formatted, the FireCuda 530 SSD operates like any other storage drive in your system. For optimal performance, ensure your operating system and motherboard drivers are up to date. The drive's high sequential read/write speeds (up to 7300MB/s) will significantly reduce load times for games and applications, and improve overall system responsiveness.

Image: A person using a PC for gaming, demonstrating the intended use of the high-performance SSD.
Maintenance
Solid State Drives generally require less maintenance than traditional Hard Disk Drives. However, a few practices can help ensure longevity and optimal performance:
- Firmware Updates: Periodically check the Seagate website for any available firmware updates for your FireCuda 530 SSD. Firmware updates can improve performance, stability, and compatibility.
- Operating System Updates: Keep your operating system updated to ensure it has the latest drivers and optimizations for NVMe SSDs.
- Temperature Monitoring: While the FireCuda 530 is designed for performance, excessive heat can impact its lifespan. Ensure adequate airflow in your PC case or PS5. If using in a PS5, a heatsink is crucial.
- Avoid Filling to Capacity: Try to keep some free space on the SSD (e.g., 10-15%) to allow for optimal wear leveling and performance.
- TRIM Command: Ensure your operating system has TRIM enabled. This command helps the SSD manage its stored data more efficiently, maintaining performance over time. Most modern operating systems enable TRIM by default.
Troubleshooting
If you encounter issues with your FireCuda 530 SSD, consider the following troubleshooting steps:
- SSD Not Detected:
- Ensure the SSD is correctly seated in the M.2 slot.
- Check your system's BIOS/UEFI settings to confirm the M.2 slot is enabled and configured correctly (e.g., PCIe mode).
- For new installations, ensure the drive is initialized and formatted in your operating system's Disk Management utility.
- Try the SSD in a different M.2 slot or another compatible system if available, to rule out a motherboard issue.
- Slow Performance:
- Verify that your motherboard's M.2 slot supports PCIe Gen4 speeds. If it's a Gen3 slot, the drive will operate at Gen3 speeds.
- Ensure your operating system and drivers are up to date.
- Check the SSD's temperature. Overheating can cause performance throttling. Ensure proper cooling, especially if no heatsink is used (or if the heatsink is insufficient).
- Confirm TRIM is enabled.
- Avoid running the drive at near-full capacity.
- System Instability/Crashes:
- Ensure the SSD firmware is up to date.
- Check for any conflicting drivers or software.
- Run a diagnostic tool (e.g., Seagate SeaTools) to check the health of the SSD.
If these steps do not resolve the issue, please contact Seagate Support for further assistance.
Specifications
| Feature | Detail |
|---|---|
| Model Number | ZP1000GM3A013 |
| Capacity | 1 TB |
| Interface | PCIe Gen4 x4 NVMe 1.4 |
| Sequential Read Speed | Up to 7300 MB/s |
| Sequential Write Speed | Up to 6000 MB/s (for 1TB model) |
| Total Bytes Written (TBW) | 1275 TBW (for 1TB model) |
| Form Factor | M.2 2280 |
| Dimensions (LxWxH) | 3.15 x 0.87 x 0.08 inches (80.15 x 22.15 x 2.23 mm) |
| Item Weight | 0.282 ounces (8 grams) |
| Controller | Seagate-validated E18 controller |
| NAND Flash | 3D TLC NAND |
| Compatible Devices | PC, PlayStation 5 (with heatsink) |
Warranty and Support
The Seagate FireCuda 530 SSD comes with a comprehensive warranty and support package:
- Limited Warranty: A five-year limited warranty covers manufacturing defects and failures under normal use.
- Rescue Data Recovery Services: Includes three years of Rescue Data Recovery Services. This service provides professional data recovery assistance in case of accidental data loss or drive failure.

Image: The logo for Seagate's Rescue Data Recovery Services, indicating included data protection.
For detailed warranty terms, to register your product, or to access support resources, please visit the official Seagate support website: www.seagate.com/support
Official Product Video
Video: An official Seagate video showcasing the FireCuda series, highlighting its features and benefits for gamers and content creators.


