
Introduction
This manual provides essential information for the safe and efficient use of your new Whirlpool FWDD 1071682 WBV EU N washer-dryer. Please read these instructions carefully before installation, operation, and maintenance. Keep this manual for future reference.

Figure 1: Front view of the Whirlpool FWDD 1071682 WBV EU N Washer-Dryer with the door closed.
Safety Information
Always follow basic safety precautions when using electrical appliances to reduce the risk of fire, electric shock, or injury to persons. This appliance is intended for household use only.
- Ensure the appliance is properly grounded.
- Do not allow children to play on or in the appliance.
- Keep packaging materials out of reach of children.
- Do not operate the appliance if it is damaged or malfunctioning.
- Always unplug the appliance before cleaning or performing maintenance.
Setup and Installation
1. Unpacking
Remove all packaging materials, including the polystyrene base and any protective film. Check the appliance for any transport damage. Report any damage immediately to your retailer.
2. Removing Transit Bolts
Before using the appliance, it is essential to remove the transit bolts located at the rear of the machine. Failure to do so can cause severe damage during operation.
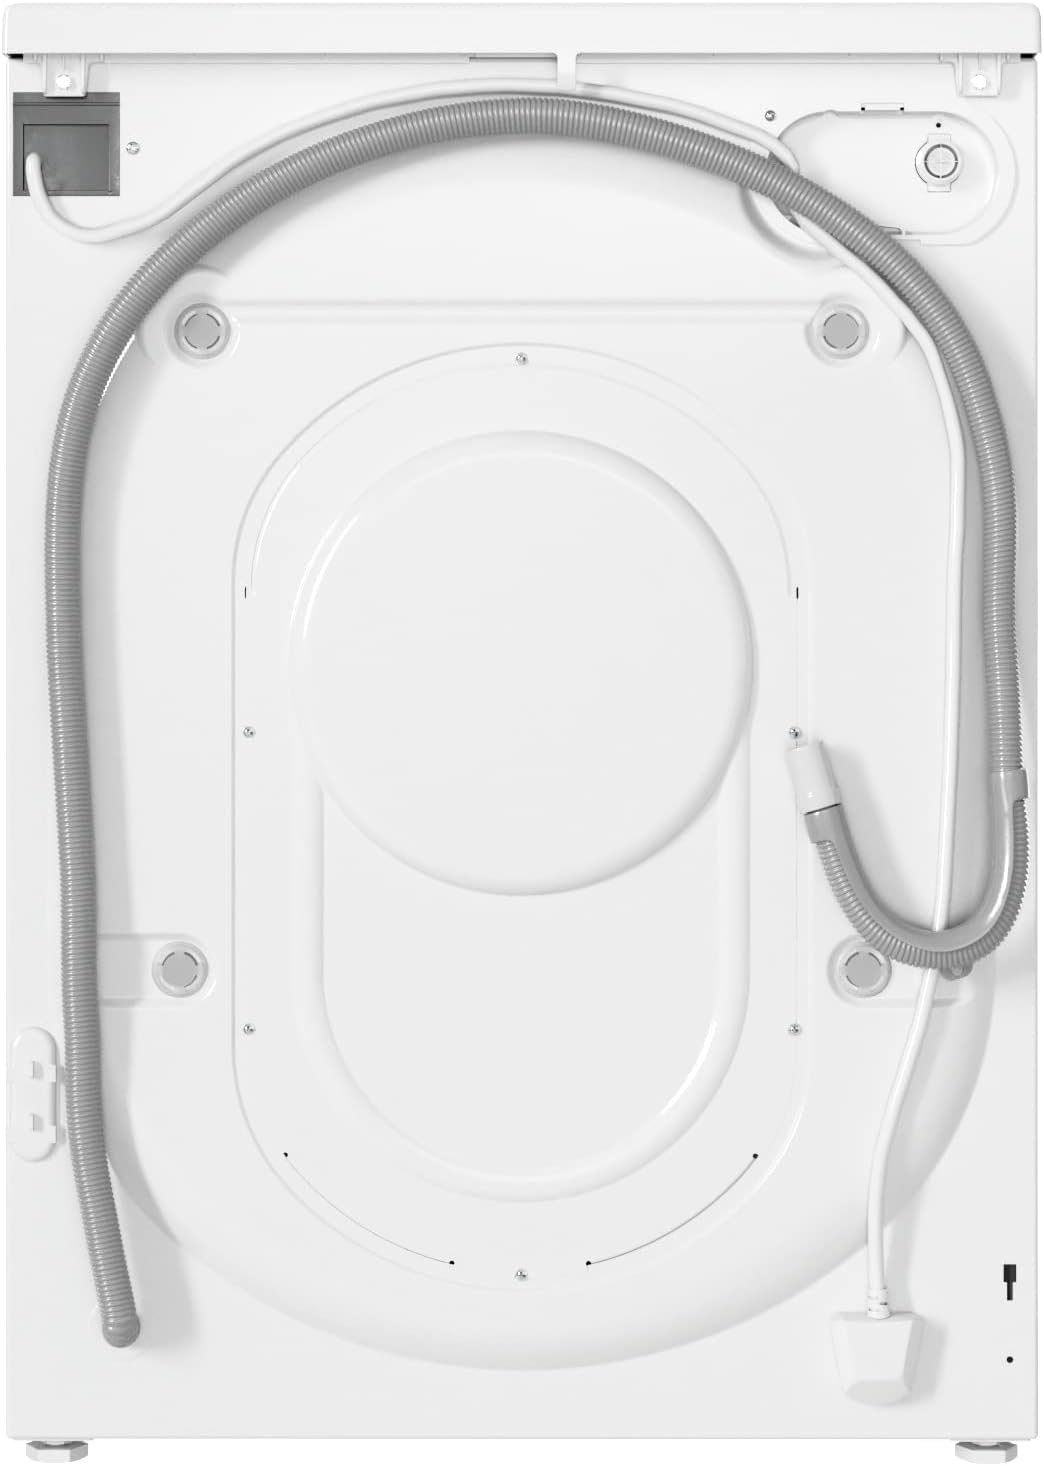
Figure 2: Rear view of the appliance, indicating hose connections and transit bolt positions.
3. Positioning
Place the washer-dryer on a flat, stable floor. Ensure there is adequate space around the appliance for ventilation and maintenance. The dimensions are approximately 59.5 cm (width) x 60.5 cm (depth) x 85 cm (height).
4. Leveling
Adjust the feet of the appliance to ensure it is perfectly level. A level appliance reduces vibration and noise during operation.
5. Water Connection
Connect the water inlet hose to a cold water tap with a 3/4" thread. Ensure all connections are tight to prevent leaks. Position the drain hose into a standpipe or over the edge of a sink, ensuring it is securely fixed and not kinked.
6. Electrical Connection
Plug the power cord into a grounded electrical outlet (220 Volt). Do not use extension cords or adapters. Ensure the electrical system is compatible with the appliance's power requirements.
Operating Instructions
1. Control Panel Overview
The control panel features a program selector knob, a digital display, and various function buttons for customizing your wash and dry cycles.

Figure 3: Detailed view of the control panel.
2. Loading Laundry
Open the door and load your laundry into the drum. Do not overload the machine. The maximum wash capacity is 10 kg, and the maximum dry capacity is 7 kg.

Figure 4: The appliance with the door open, ready for loading.
3. Adding Detergent and Additives
Pull out the detergent dispenser drawer. Add the appropriate amount of detergent to the main wash compartment and fabric softener to its designated compartment. Refer to detergent packaging for dosage recommendations.

Figure 5: Open detergent dispenser drawer.
4. Selecting a Program
Turn the program selector knob to choose one of the 16 available wash cycles or 30 optional cycles. The display will show the default settings for the selected program.
5. Special Features
- STEAM CARE: Refreshes and softens garments, preventing creases with the natural power of steam.
- SOFT MOVE: The drum performs specific movements to ensure special care for all garments, even delicate ones.
- FRESH CARE PLUS: Keeps clothes fresh for up to 6 hours after the wash cycle ends, inhibiting odor proliferation.
- 6th SENSE Technology: Intelligent sensors adapt resources based on load size and type, optimizing time, energy, and water.
- Intensive Rinse: Designed for effective removal of stubborn stains.
6. Starting a Cycle
Press the Start/Pause button to begin the selected program. The indicator light will illuminate.
7. End of Cycle
At the end of the cycle, the display will show 'End' or a similar indication. The door can be opened after a short delay. Remove laundry promptly to prevent creasing.
Maintenance and Cleaning
Regular maintenance ensures optimal performance and extends the lifespan of your appliance.
1. Cleaning the Detergent Dispenser
Periodically remove and clean the detergent dispenser drawer under running water to prevent residue buildup.
2. Cleaning the Drain Pump Filter
The drain pump filter should be cleaned regularly to remove lint, coins, or other small objects that may obstruct the drain. Follow these steps:
- Unplug the appliance from the power supply.
- Open the cover at the bottom front of the machine.
- Place a shallow container to collect any residual water.
- Slowly turn the filter counter-clockwise to open it.
- Remove the filter and clean it thoroughly.
- Reinsert the filter and close the cover securely.

Figure 6: Location of the drain pump filter.
3. Cleaning the Drum
Run a maintenance wash cycle (e.g., a hot wash with no laundry and a small amount of detergent or a specialized drum cleaner) periodically to clean the drum and remove any odors or residue.

Figure 7: Interior view of the stainless steel drum.
4. Cleaning the Exterior
Wipe the exterior surfaces with a soft, damp cloth. Do not use abrasive cleaners or solvents.
Troubleshooting
Before contacting customer service, refer to the following table for common issues and their solutions.
| Problem | Possible Cause | Solution |
|---|---|---|
| Appliance does not start | No power supply; Door not closed properly; Program not selected. | Check power plug and fuse; Ensure door is firmly closed; Select a program and press Start. |
| Excessive vibration/noise | Transit bolts not removed; Appliance not level; Uneven load. | Remove transit bolts; Adjust leveling feet; Redistribute laundry in the drum. |
| Water leaks | Hose connections loose; Drain hose blocked; Detergent dispenser overflowing. | Tighten hose connections; Clean drain pump filter; Do not overfill detergent dispenser. |
| Poor washing results | Overloading; Incorrect detergent dosage; Wrong program selection. | Reduce load size; Use correct detergent amount; Select appropriate program. |
| Drying not effective | Overloading; Lint filter blocked; Incorrect drying program. | Reduce load size for drying; Clean lint filter; Select appropriate drying program. |
Specifications
| Feature | Specification |
|---|---|
| Model Number | FWDD 1071682 WBV EU N |
| Brand | Whirlpool |
| Type | Front-load Washer-Dryer |
| Wash Capacity | 10 kg |
| Dry Capacity | 7 kg |
| Maximum Spin Speed | 1600 RPM |
| Dimensions (W x D x H) | 59.5 x 60.5 x 85 cm |
| Weight | 73.4 kg |
| Power Type | Electric |
| Voltage | 220 Volt |
| Drum Material | Stainless Steel |
| Number of Wash Cycles | 16 |
| Optional Cycles | 30 |
| Control Type | Knob |
| Energy Class (Wash/Dry) | E |
| Special Features | Steam Care, Soft Move, Fresh Care Plus, 6th Sense Technology, Intensive Rinse |
| Included Components | Power cord, Drain hose |

Figure 8: Energy Label for the appliance. For more details, visit the EPREL database.
Warranty Information
This Whirlpool appliance comes with a standard manufacturer's warranty of 24 months from the date of purchase. Please retain your proof of purchase for any warranty claims. The warranty covers manufacturing defects and malfunctions under normal household use. For specific terms and conditions, please refer to the warranty card included with your product or visit the official Whirlpool website.
Customer Support
If you encounter any issues that cannot be resolved using the troubleshooting guide, or if you require technical assistance, please contact Whirlpool customer service. Have your model number (FWDD 1071682 WBV EU N) and serial number ready when you call.
Official Product Videos
Video 1: Product Overview (0:56)
This video provides a general overview of the Whirlpool washer-dryer, highlighting its design and key features.
Video 2: Feature Demonstration (0:15)
A short demonstration of one of the appliance's specific functions or technologies.
Video 3: Detailed Look (1:19)
This video offers a more detailed examination of the washer-dryer's components and functionalities.
Video 4: Usage Tips (0:46)
Helpful tips and tricks for optimizing the use of your Whirlpool washer-dryer.
Video 5: Quick Guide (0:44)
A concise guide to getting started with your appliance.
Video 6: Advanced Features (0:35)
This video explores some of the more advanced features and settings of the washer-dryer.
Video 7: Operational Walkthrough (1:02)
A step-by-step walkthrough of the appliance's operation from start to finish.
Video 8: Maintenance Guide (0:34)
This video provides guidance on how to perform routine maintenance tasks for your washer-dryer.


