1. Introduction
Thank you for purchasing the Omars Portable Power Bank. This manual provides essential information for the safe and efficient use of your device. Please read it thoroughly before operation and retain it for future reference.
2. Product Overview
2.1 Key Features
- High Capacity: 24000mAh / 88Wh for extended power.
- Versatile Outputs: Includes 90W AC output, USB-C PD 18W, and two USB-A ports.
- Fast Charging: USB-C PD 18W for rapid device charging and power bank recharging.
- Compact Design: Slim and portable for travel and daily use.
- Advanced Safety: Equipped with multiple protection systems for safe operation.
- Airline Friendly: Conforms to TSA standards for carry-on luggage.
2.2 Components and Indicators
Familiarize yourself with the various ports and indicators on your power bank:

Image: Diagram illustrating the various ports and indicators on the Omars Portable Power Bank, including the AC output port, LED power status indicators, Type-C PD 18W input/output port, USB output ports, and power switch.
- AC Output Port: Provides 100V AC power for compatible devices up to 90W.
- LED Power Status Indicators: Four blue LEDs indicate the remaining battery level.
- Type-C PD 18W Port: Supports both input (for recharging the power bank) and output (for charging devices) with Power Delivery up to 18W.
- USB-A Output Ports (x2): Standard USB ports for charging various devices.
- Power Switch: Turns the power bank on or off.
- AC Output Button with LED Indicator: Activates or deactivates the AC output. The LED illuminates when AC output is active.
3. Setup
3.1 Initial Charging of the Power Bank
Before first use, fully charge your Omars Portable Power Bank. Use a compatible USB-C PD charger (not included) for optimal charging speed.

Image: The Omars Portable Power Bank being recharged via its USB-C PD port, indicating charging times for 18W USB-C PD (6 hours) and 5V/2A PD (11 hours).
- Connect a USB-C PD charger to the Type-C port on the power bank.
- The LED indicators will illuminate to show the charging progress. All four LEDs will be solid when fully charged.
- Charging time: Approximately 6 hours with an 18W USB-C PD charger, or 11 hours with a standard 5V/2A charger.
4. Operating Instructions
4.1 Powering On/Off
- To Power On: Press the Power Switch button once. The LED indicators will light up.
- To Power Off: Press and hold the Power Switch button for a few seconds until the LEDs turn off. The device will automatically power off after a period of inactivity.
4.2 Charging Devices via USB Ports
Connect your device's USB charging cable to one of the USB-A or USB-C output ports on the power bank. The power bank will automatically begin charging your device.

Image: The Omars Portable Power Bank connected to and charging various devices, including a tablet, laptop, and multiple smartphones, demonstrating its multi-device charging capability and estimated charge cycles.
4.3 Using the AC Output
The AC output allows you to power or charge devices that require a standard wall outlet, such as laptops or small appliances (under 90W).

Image: The Omars Portable Power Bank providing power to a laptop via its AC output, highlighting its compatibility with devices under 90W.
- Press the AC Output Button once to activate the AC output. The corresponding LED indicator will light up.
- Plug your device's power adapter into the AC outlet on the power bank.
- To turn off the AC output, press the AC Output Button again. The LED indicator will turn off.
4.4 Trickle Charging Mode (for low-power devices)
For very low-power devices like wireless earbuds or smartwatches, activate trickle charging mode to ensure safe and efficient charging.
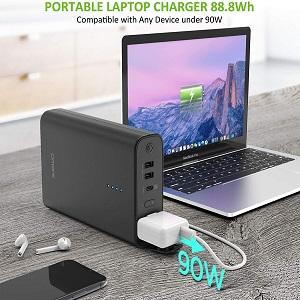
Image: Instructions for activating trickle charging mode for low-power devices like AirPods or TWS earbuds, showing a long press of the power button to initiate.
- Long press the Power Switch button for approximately 5 seconds to enter trickle charging mode.
- Connect your low-power device. The power bank will provide a trickle output (typically <100mA).
- To exit trickle charging mode, press the Power Switch button again.
5. Safety Precautions
To ensure safe operation and prolong the lifespan of your power bank, please observe the following:
5.1 General Safety Guidelines
- Do not expose the power bank to extreme temperatures, direct sunlight, or high humidity.
- Avoid dropping, puncturing, or disassembling the device.
- Keep out of reach of children.
- Use only original or certified compatible charging cables and adapters.
- Do not operate if the device is damaged or shows signs of malfunction.
5.2 Integrated Safety Features
Your Omars Portable Power Bank is equipped with multiple safety protection systems:
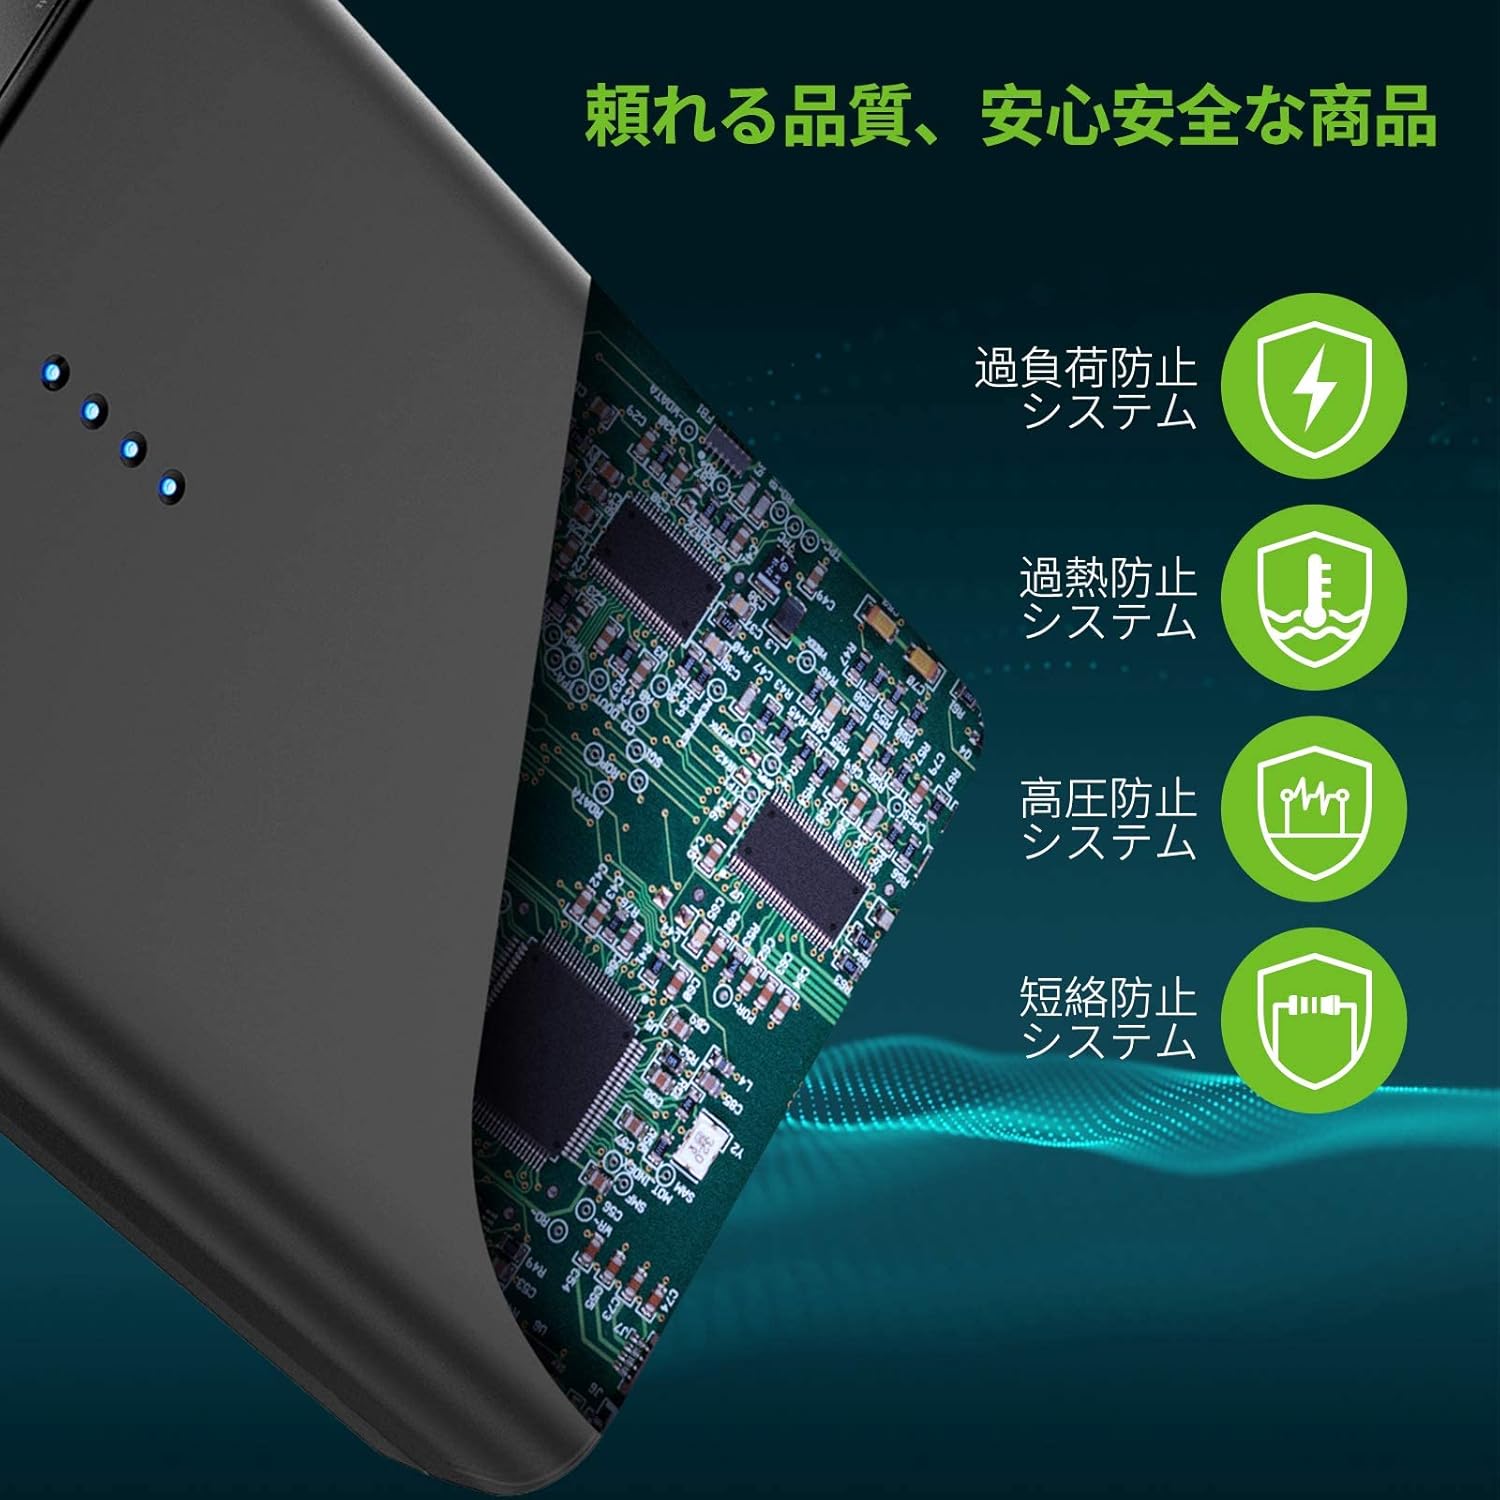
Image: Diagram illustrating the multiple safety protection systems integrated into the Omars Portable Power Bank, including overcurrent, overtemperature, overvoltage, and short circuit protection.
- Overcurrent Protection: Prevents damage from excessive current flow.
- Overtemperature Protection: Monitors and regulates internal temperature to prevent overheating.
- Overvoltage Protection: Safeguards against voltage spikes.
- Short Circuit Protection: Automatically shuts down in case of a short circuit.
5.3 AC Output Limitations
The AC output is designed for devices requiring up to 90W. Do not attempt to power devices exceeding this limit, as it may damage the power bank or the connected device.

Image: Visual guide showing various high-power appliances (CPAP, toaster, heater, hairdryer, electric drill, electric kettle, induction cooker, rice cooker, blender) that should not be charged with the power bank due to exceeding its 90W limit.
5.4 Airline Travel
The Omars Portable Power Bank (88Wh) conforms to TSA standards for carry-on luggage. It can be taken on board flights. However, always confirm with your airline's specific regulations before traveling.
6. Maintenance
- Cleaning: Use a soft, dry cloth to clean the exterior of the power bank. Do not use liquid cleaners or abrasive materials.
- Storage: Store the power bank in a cool, dry place away from direct sunlight and extreme temperatures. For long-term storage, charge the device to approximately 50-75% every three months to maintain battery health.
- Battery Life: Like all rechargeable batteries, the capacity will decrease over time with regular use.
7. Troubleshooting
- Power bank not turning on: Ensure the power bank is charged. Recharge it if the LED indicators do not light up.
- Device not charging from power bank:
- Ensure the power bank is turned on.
- Check if the charging cable is securely connected to both the power bank and your device.
- Verify that your device is compatible with the output port being used (e.g., AC output for AC-powered devices).
- For AC output, ensure the AC output button is pressed and its LED is illuminated.
- If charging a low-power device, ensure trickle charging mode is activated.
- Slow charging: Ensure you are using a compatible fast-charging cable and adapter for your device and the power bank. Some devices may not support fast charging.
- AC output not working: Ensure the connected device does not exceed the 90W limit. The power bank may automatically shut off AC output if overloaded.
8. Specifications
| Feature | Specification |
|---|---|
| Model Number | OMESS2U1ABKPD-JP |
| Battery Capacity | 24000mAh / 88Wh |
| AC Output | 100V, 60Hz, 90W Max |
| USB-C PD Input/Output | 18W Max |
| USB-A Output (x2) | Standard USB Output |
| Dimensions | 18.8 x 12.5 x 4.4 cm |
| Weight | 940 g |
| Compatible Devices | Camera, Smartphone, Tablet, Desktop PC, Drone, Laptop, Projector |
| Charging Time (Power Bank) | Approx. 6 hours (with 18W USB-C PD charger) Approx. 11 hours (with 5V/2A charger) |
9. Warranty and Support
Omars products are designed for reliability and performance. For any questions, technical support, or warranty inquiries, please refer to the contact information provided with your purchase or visit the official Omars website. Please retain your proof of purchase for warranty claims.


