
1. Introduction
This manual provides detailed instructions for the installation, operation, and maintenance of your LEONLITE Premium Series 4-Inch 2W LED Hardscape Lights. These low-voltage fixtures are designed for outdoor use, specifically for integration into retaining walls, steps, and other hardscape elements. Please read this manual thoroughly before installation and retain it for future reference.
2. Product Features
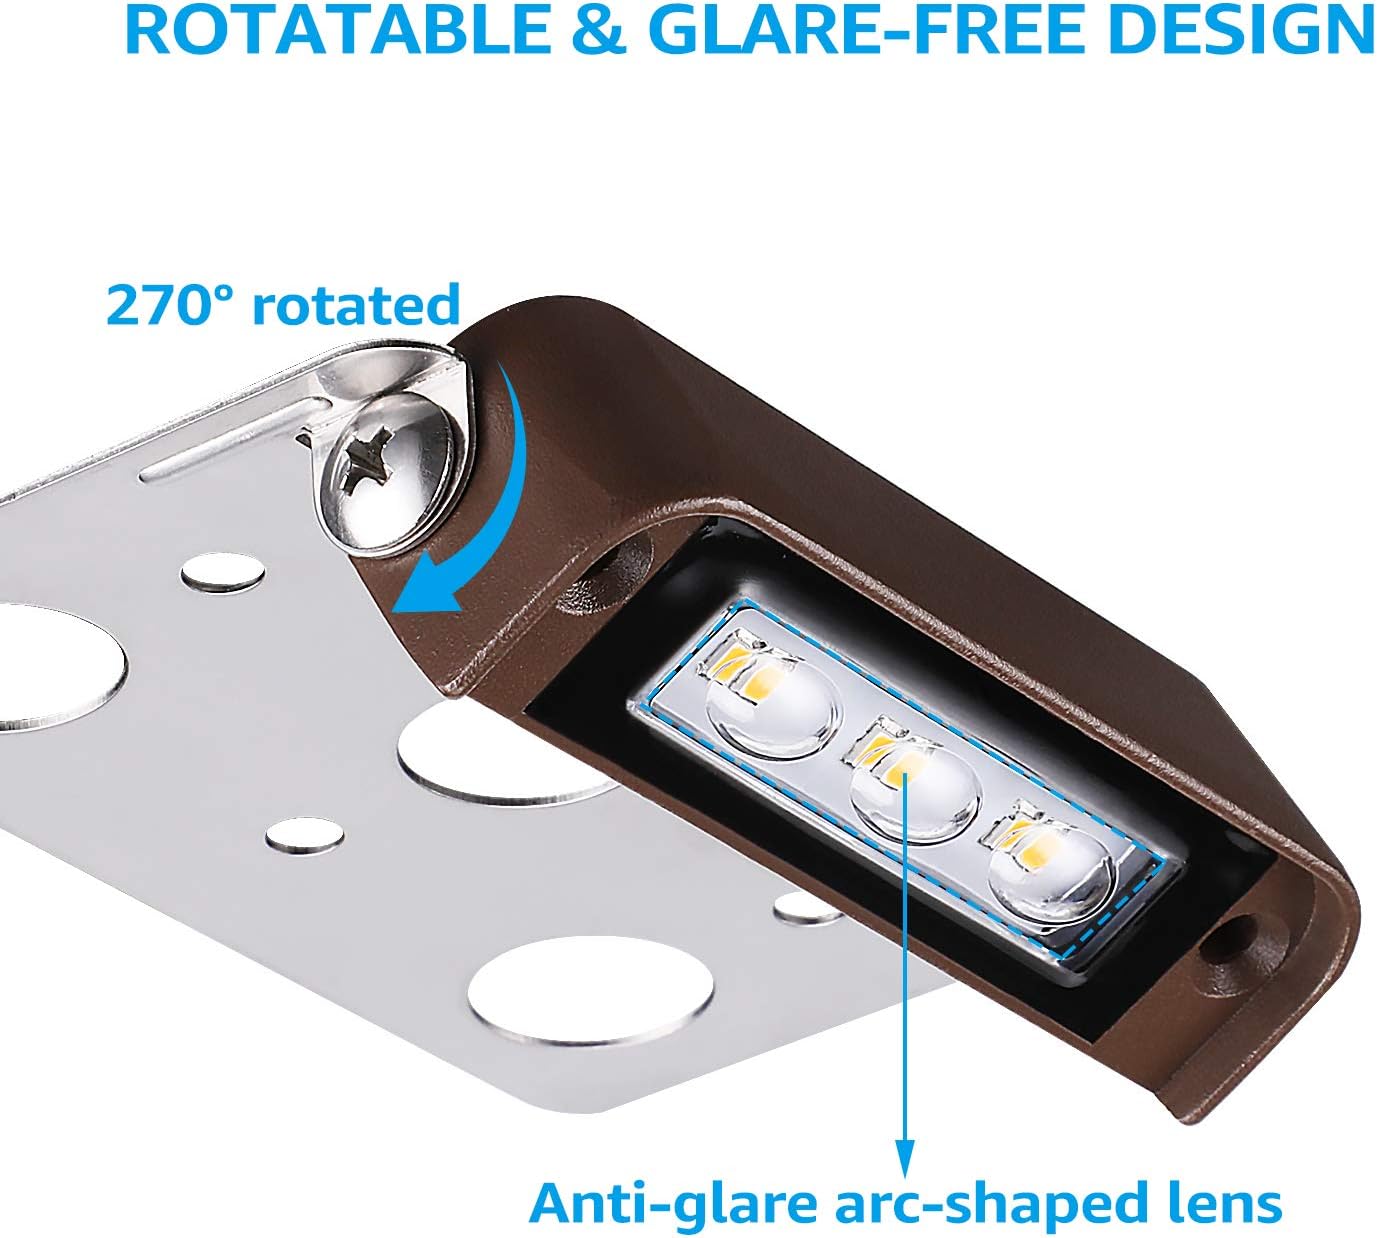
- Directable Design: The light fixture features a 270° up and down rotation capability, allowing for precise light direction to suit various applications.
- Extended Lifespan: Constructed with a die-casted aluminum shell for enhanced corrosion resistance and heat dissipation, contributing to a lifespan of approximately 40,000 hours.
- Glare-Free Illumination: Operates on 12V AC/DC low voltage, delivering 150 lumens of 5000K daylight. A unique raised lens design minimizes glare.
- Simplified Installation: Designed for easy installation with all necessary accessories included.
- Durable and Reliable: Features an IP65 waterproof rating and UL listed cable, ensuring safe outdoor use in various weather conditions.
3. Package Contents
- LEONLITE 4-Inch 2W LED Hardscape Lights (Quantity as per pack)
- Mounting Hardware (screws, wire connectors)
4. Specifications
| Parameter | Value |
|---|---|
| Model Number | 51795 |
| Wattage | 2W |
| Voltage | 12V AC/DC |
| Luminous Flux | 150lm |
| Color Rendering Index (CRI) | >90 |
| Lifespan | 40,000 hours |
| Beam Angle | 95° |
| Color Temperature (CCT) | 5000K Daylight |
| Waterproof Rating | IP65 |
| Working Temperature | -4°F to 104°F (-20°C to 40°C) |
| Material | Die-casted Aluminum |
| Product Dimensions | 7.91 x 5.63 x 4.06 inches |
| Item Weight | 2.02 pounds |
5. Safety Information
- Always disconnect power before installation or servicing.
- This product is designed for 12V AC/DC low voltage systems. Do not connect directly to 120V AC household power.
- Ensure all wiring connections are secure and properly insulated to prevent electrical hazards.
- Consult a qualified electrician if you are unsure about any part of the installation process.
- Do not attempt to modify the fixture. Any modifications may void the warranty and create safety risks.
- Keep children away from the installation area.
6. Setup and Installation
These hardscape lights are designed for integration into retaining walls, steps, and other masonry structures. They require a compatible 12V AC/DC low voltage landscape lighting transformer (not included).
Installation Steps:
- Prepare the Location: Identify the desired mounting location within your hardscape. Ensure there is adequate space for the fixture and wiring.
- Route Wiring: Run low-voltage landscape wiring from your transformer to the installation point. Ensure the wiring is protected and buried according to local electrical codes.
- Mount the Fixture: Use the included mounting hardware (screws) to securely attach the light fixture's base plate to the desired surface. The fixture is designed to be mounted between hardscape elements.
- Connect Wiring: Connect the fixture's wires to your main low-voltage landscape wiring using the included waterproof wire connectors. Ensure polarity is correct if specified by your transformer or other components.
- Adjust Light Direction: Once mounted, the light head can be rotated up to 270° to direct the illumination as needed.
- Test: Restore power to the transformer and test the lights.


7. Operating Instructions
Once properly installed and connected to a compatible 12V AC/DC low voltage landscape lighting transformer, the lights will operate according to the transformer's settings. This typically involves turning on and off with the transformer's power switch, timer, or photocell sensor.
- Ensure the transformer is powered on for the lights to function.
- Adjust the light direction by gently swiveling the fixture head to achieve the desired illumination angle.
8. Maintenance
Regular maintenance helps ensure the longevity and optimal performance of your hardscape lights.
- Cleaning: Periodically clean the lens and fixture housing with a soft, damp cloth to remove dirt, dust, and debris. Avoid abrasive cleaners that could damage the finish or lens.
- Inspect Wiring: Annually inspect all wiring and connections for any signs of damage, fraying, or corrosion. Repair or replace damaged components as necessary.
- Check Mounting: Ensure the fixtures remain securely mounted. Tighten any loose screws if found.
- Drainage: Ensure that the area around the lights has proper drainage to prevent water accumulation, despite the IP65 rating.
9. Troubleshooting
If your hardscape lights are not functioning correctly, refer to the following troubleshooting guide:
| Problem | Possible Cause | Solution |
|---|---|---|
| Lights do not turn on. | No power to the transformer. Loose or incorrect wiring connection. Faulty transformer. | Check power outlet and transformer switch. Verify all wire connections are secure. Test transformer output voltage. Replace if faulty. |
| Lights are dim or flickering. | Voltage drop due to long wire runs or too many fixtures. Loose connection. Damaged fixture. | Ensure wire gauge is appropriate for total wattage and distance. Check and tighten all connections. Inspect fixture for physical damage. |
| Only some lights are working. | Faulty connection to specific lights. Damaged individual fixture. | Check wiring connections for non-working lights. Isolate and test individual fixtures. |
10. Warranty and Support
This product comes with a 2-year warranty from the date of purchase, covering defects in materials and workmanship. For warranty claims or technical support, please contact LEONLITE customer service. Keep your purchase receipt as proof of purchase.
For further assistance, please visit the official LEONLITE website or contact their customer support channels.