Introduction
This manual provides detailed instructions for the operation and maintenance of your ORCC 10-in-1 Nostalgic Record Player. This versatile audio system combines a turntable, CD player, cassette player, AM/FM radio, Bluetooth receiver, USB, and SD card playback capabilities. Please read this manual thoroughly before use to ensure proper function and longevity of your device.
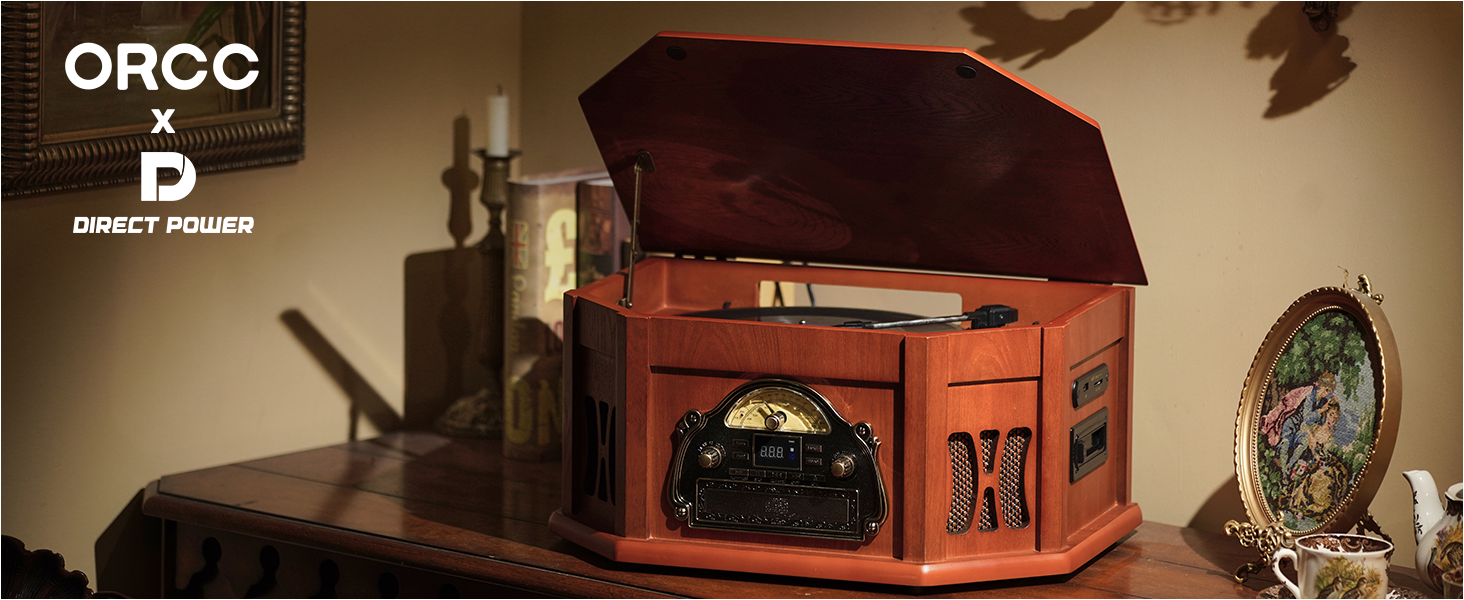
Figure 1: The ORCC 10-in-1 Nostalgic Record Player, highlighting its multi-functional capabilities including Vinyl, CD, Bluetooth, Cassette, Headphone, SD/MMC, USB, FM/AM, and RCA out/Aux in.
Safety Information
To reduce the risk of electric shock, do not remove the cover (or back). No user-serviceable parts inside. Refer servicing to qualified service personnel. Do not expose this appliance to rain or moisture. Do not place objects filled with liquids, such as vases, on the apparatus. Do not block any ventilation openings. Install in accordance with the manufacturer's instructions. Protect the power cord from being walked on or pinched, particularly at plugs, convenience receptacles, and the point where they exit from the apparatus. Only use attachments/accessories specified by the manufacturer.
Setup
1. Unpacking
Carefully remove the unit from its packaging. Retain the packaging materials for future transport or storage. Ensure all components are present: main unit, remote control, extra stylus, and 45 RPM adapter.
2. Placement
Place the record player on a stable, level surface away from direct sunlight, heat sources, and excessive dust or moisture. Ensure adequate ventilation around the unit.
3. Power Connection
Connect the power cord to the AC inlet on the back of the unit, then plug it into a standard wall outlet (AC 120V~60Hz). The unit is now ready for operation.
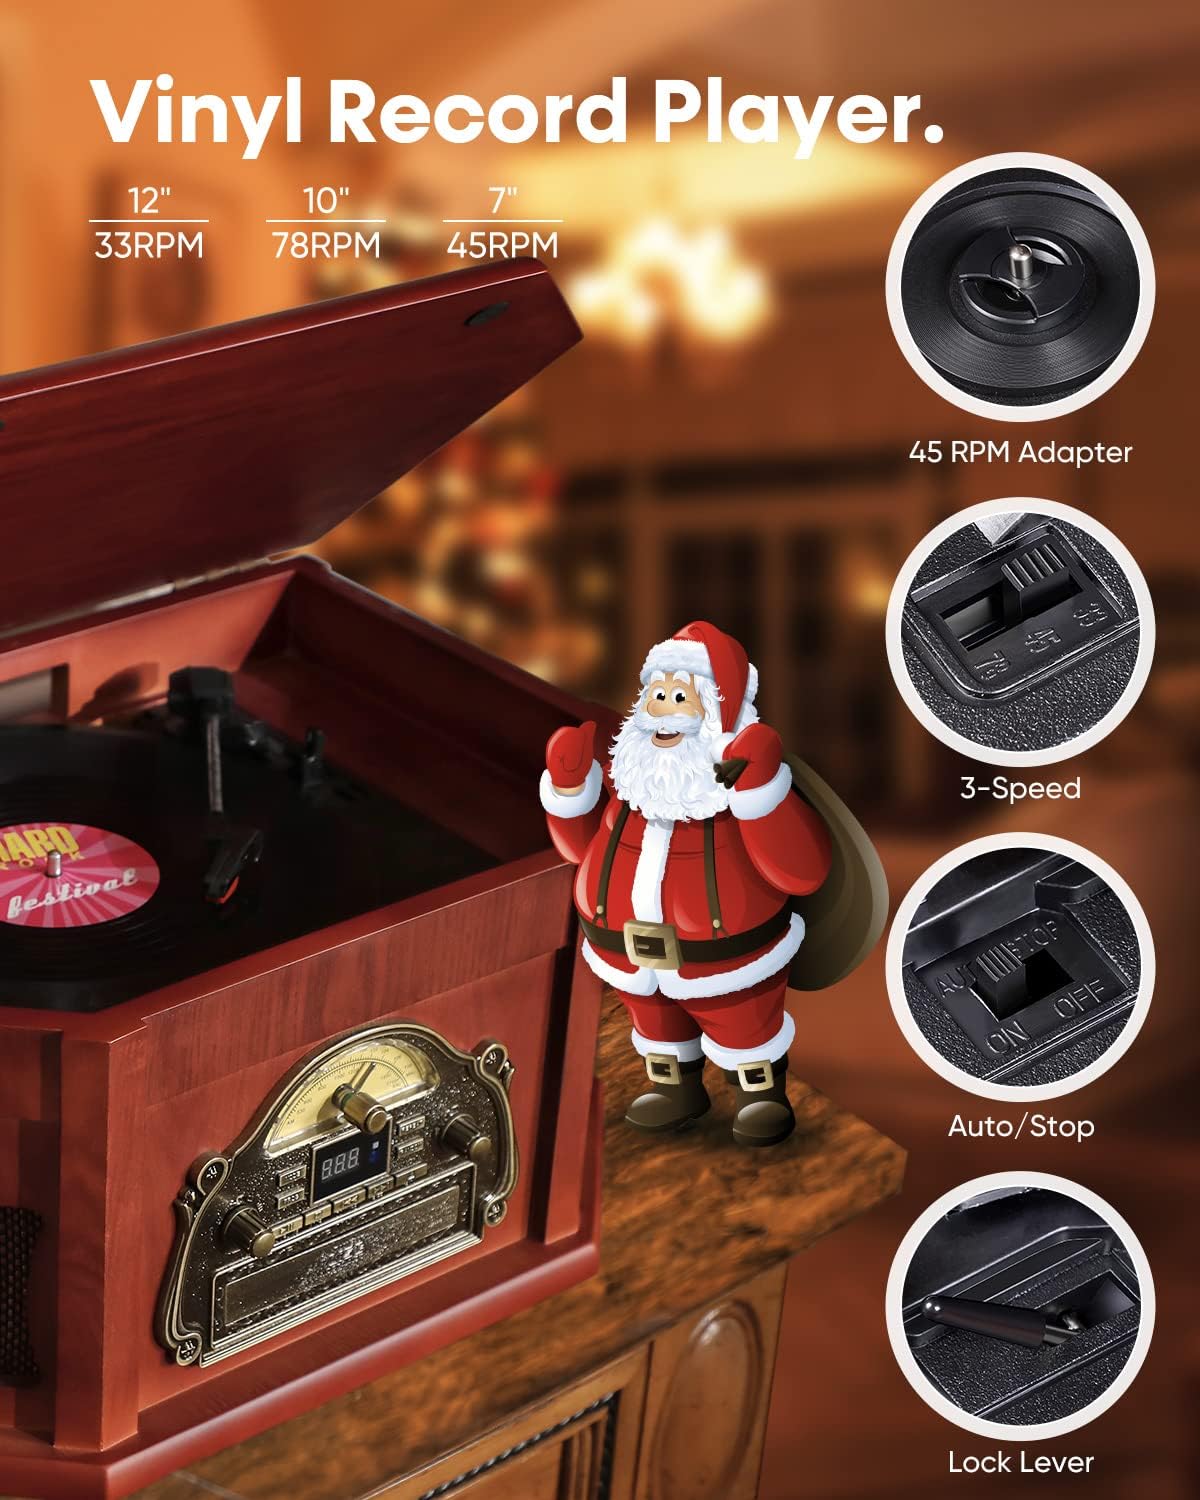
Figure 2: The ORCC record player with its lid open, revealing the turntable and the vintage-style control panel.
Operating Instructions
1. Turntable Operation
Open the top lid. Place a vinyl record on the turntable platter. Select the appropriate speed (33, 45, or 78 RPM) using the speed selector switch. For 45 RPM records, place the included adapter on the center spindle. Lift the tonearm using the cue lever and position the stylus over the desired track. Lower the tonearm gently onto the record. The turntable will automatically stop when the record finishes playing.

Figure 3: Detailed view of the turntable, illustrating the 45 RPM adapter, 3-speed selector, auto/stop switch, and tonearm lock lever.
Video 1: Demonstration of the ORCC 10-in-1 Wood Classic Record Player in operation, showing how to place a record and start playback.
2. CD Player Operation
Press the 'MODE' button to select CD mode. Insert a CD into the front-loading CD slot. The unit will automatically detect and begin playing the CD. Use the playback control buttons (Play/Pause, Stop, Skip/Search) on the front panel or remote control to manage playback.

Figure 4: The ORCC record player displaying the integrated CD and cassette player on its side panel.
3. Cassette Player Operation
Press the 'MODE' button to select TAPE mode. Insert a cassette tape into the side-mounted cassette slot. Use the cassette control buttons (Play, Fast Forward, Rewind, Stop) to operate the cassette player.
4. AM/FM Radio Operation
Press the 'MODE' button to select RADIO mode. Extend the FM antenna for better reception. Use the tuning knob to select your desired AM or FM station. The frequency will be displayed on the analog dial.
5. Bluetooth Connectivity
Press the 'MODE' button to select BLUETOOTH mode. The unit will enter pairing mode, indicated by a flashing 'BT' on the display. On your Bluetooth-enabled device, search for 'Direct Power-168' or 'ORCC' and select it to pair. Once paired, you can stream audio wirelessly to the record player from up to 33 feet away.

Figure 5: The ORCC record player in Bluetooth mode, with a smartphone displaying its Bluetooth settings, ready for pairing.
Video 2: A demonstration of the ORCC 10-in-1 Bluetooth Record Player, showcasing its Bluetooth connectivity feature with a smartphone.
6. USB/SD Card Playback
Insert a USB flash drive or SD/MMC card into the respective slot on the side panel. Press the 'MODE' button to select USB or SD mode. The unit will automatically detect and play compatible audio files (MP3/WMA). Use the playback control buttons to navigate tracks.
7. Aux-in/RCA Line-out
Use the 3.5mm Aux-in jack to connect external audio devices (e.g., smartphones, MP3 players) that do not have Bluetooth. Use the RCA Line-out ports to connect the record player to external speakers or an amplifier for enhanced audio output.
8. Headphone Jack
Plug your headphones into the headphone jack on the front panel for private listening.
9. Remote Control
The included remote control allows for convenient operation of CD, USB, and SD/MMC playback functions from a distance.
Maintenance
1. Cleaning the Unit
Wipe the exterior of the unit with a soft, dry cloth. Do not use abrasive cleaners or solvents. For the turntable platter and tonearm, use a soft, lint-free cloth. Keep the lid closed when not in use to prevent dust accumulation.
2. Stylus Care
Gently clean the stylus regularly with a soft brush designed for stylus cleaning, brushing from back to front. A worn or dirty stylus can damage your records and degrade sound quality. Replace the stylus when necessary (an extra stylus is included).
3. General Care
Avoid placing heavy objects on the unit. Do not expose the unit to extreme temperatures or humidity. Ensure proper ventilation to prevent overheating.
Troubleshooting
| Problem | Possible Cause | Solution |
|---|---|---|
| No power | Power cord not securely connected. | Check power cord connection to the unit and wall outlet. |
| No sound | Volume too low; incorrect mode selected; headphones connected. | Increase volume; select correct input mode; disconnect headphones if using speakers. |
| Turntable not spinning | Power off; belt dislodged. | Ensure unit is powered on; contact customer support if belt is dislodged. |
| Bluetooth not pairing | Unit not in pairing mode; device too far; device already paired. | Ensure unit is in Bluetooth mode; move device closer; unpair from other devices. |
Specifications
- Product Dimensions: 196.85 x 133.86 x 94.49 inches
- Item Weight: 21.7 pounds
- Item Model Number: 168
- Brand: ORCC
- Maximum Rotational Speed: 78 RPM
- Included Components: Built-in speaker, AM/FM Radio, Remote Control, Extra Stylus, 45 RPM adapter
- Special Feature: Built-In Bluetooth Receiver
- Material: Wood
- Style: Vintage
- Compatible Devices: Headphone, Speaker
- Motor Type: AC Motor
Warranty and Support
ORCC products are designed for reliability and performance. This product comes with a standard manufacturer's warranty. For specific warranty details, including coverage and duration, please refer to the warranty card included in your product packaging or visit the official ORCC website. For technical support, troubleshooting assistance, or to inquire about replacement parts, please contact ORCC customer service through the contact information provided on the warranty card or the official ORCC brand store on Amazon.
Online Support: Visit the ORCC Store on Amazon