
Introduction
This manual provides essential instructions for the safe and efficient operation, installation, and maintenance of your Candy Smart Inverter CBDO485TWME/1-S integrated front-load washer dryer. Please read all instructions carefully before using the appliance and retain this manual for future reference.

Figure 1: Front view of the Candy Smart Inverter CBDO485TWME/1-S integrated washer dryer. This image displays the appliance's overall design, including the control panel, detergent drawer, and main door.
Safety Information
Always follow basic safety precautions when using electrical appliances to reduce the risk of fire, electric shock, and injury to persons.
- Ensure the appliance is properly grounded.
- Do not operate the appliance if it is damaged.
- Keep children and pets away from the appliance during operation.
- Do not touch the appliance with wet hands.
- Unplug the appliance before performing any maintenance or cleaning.
- Only use detergents and additives suitable for automatic washing machines.
Setup and Installation
1. Unpacking
Carefully remove all packaging materials. The appliance weighs approximately 66 kilograms, so it is recommended to have assistance during unpacking and positioning to prevent injury. Inspect the appliance for any damage incurred during transit.
2. Placement
This is an integrated front-load washer dryer designed to fit into cabinetry. Ensure the installation area is level, stable, and has adequate ventilation. Do not install the appliance in areas where the temperature may fall below freezing.

Figure 2: The washer dryer shown integrated within a kitchen or utility room cabinet. This illustrates the appliance's intended installation as a built-in unit.
3. Water and Drain Connections
- Connect the water inlet hose to a cold water tap. Ensure connections are tight to prevent leaks.
- Position the drain hose into a standpipe or secure it over a sink, ensuring it is not kinked.
4. Electrical Connection
Connect the power cord to a properly grounded 220 Volt electrical outlet. Do not use extension cords or adapters.
5. Initial Check-up
Before the first wash, it is recommended to run a short cycle without laundry and detergent to clean the drum and check for proper operation.
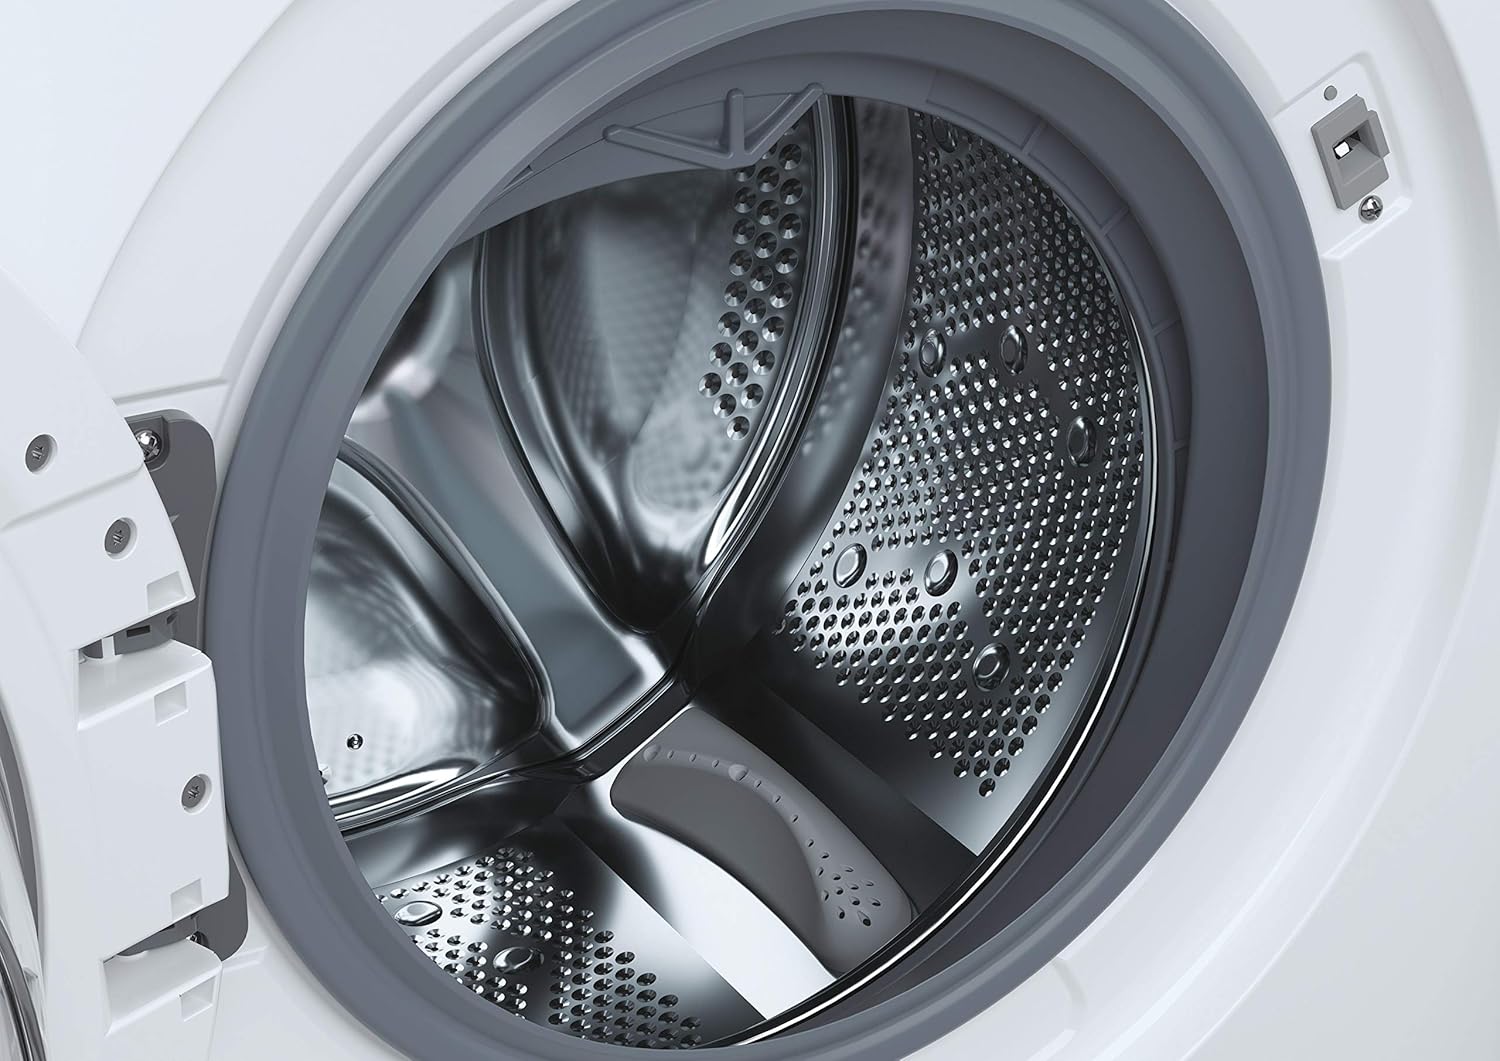
Figure 3: A detailed view of the stainless steel drum inside the washer dryer. This shows the internal structure where laundry is placed for washing and drying.
6. Smart Fi+ Connectivity
The Candy Smart Inverter CBDO485TWME/1-S features Smart Fi+ for remote control and monitoring via the Simply-Fi app. Download the app from your device's app store.
- For Android devices: Follow the in-app instructions for pairing.
- For iOS (iPhone) devices: During the setup process, if the washing machine's Wi-Fi network does not appear, ensure that AirDrop is enabled in your iPhone's Control Center. This is crucial for the app to detect and connect to the appliance's network. Once connected, you can complete the registration and use the Smart Fi features.
Operating Instructions
1. Control Panel Overview

Figure 4: A detailed view of the control panel, showing the program selection dial, digital display, and various option buttons. This panel allows users to select wash and dry cycles and customize settings.
The control panel consists of a program selection dial, a digital display, and several push buttons for additional options.
- Program Dial: Used to select the desired wash or dry program.
- Digital Display: Shows program duration, error codes, and selected options.
- Option Buttons: Allow customization of temperature, spin speed, delay start, and other functions.
2. Loading Laundry
Open the door and load laundry into the drum. Do not overload the machine; the maximum capacity for washing is 8 kilograms. For drying, refer to the specific program guidelines as drying capacity may differ.

Figure 5: The integrated washer dryer with its door open, revealing laundry inside the drum. This image demonstrates the loading process for the appliance.
3. Adding Detergent
Pull out the detergent drawer located on the top left of the control panel. Add appropriate amounts of detergent and fabric softener to the designated compartments.
4. Selecting a Program
Turn the program dial to select your desired wash or dry cycle. Available options include:
- Eco 40-60: Energy-efficient program for normally soiled cotton or mixed items.
- Quick Programs: Options like 14', 30', 44', 59' for lightly soiled items requiring a fast wash.
- Special Cycles: Specific programs for different fabric types (e.g., cotton, synthetics, delicates).
- Drying Programs: Includes Sensor Dry for automatic drying based on moisture levels, and Active Steam for refreshing clothes.
5. Customizing Settings
After selecting a program, use the option buttons to adjust settings such as wash temperature, spin speed (up to 1200 RPM), and delay start, if available for the chosen program.
6. Starting the Cycle
Press the Start/Pause button to begin the cycle. The display will show the remaining time.
Maintenance
1. Cleaning the Detergent Drawer
Regularly remove and clean the detergent drawer to prevent residue buildup. Rinse it under running water and ensure all compartments are clear before reinserting.
2. Cleaning the Drum
Run a maintenance wash cycle (e.g., a hot wash without laundry) periodically to clean the drum and remove any odors or residue.
3. Cleaning the Filter
The appliance has a filter located at the bottom front (visible in Figure 1). Regularly clean this filter to ensure proper drainage and prevent blockages. Refer to the detailed instructions in the full manual for safe removal and cleaning.
4. Exterior Cleaning
Wipe the exterior surfaces with a soft, damp cloth. Do not use abrasive cleaners or solvents.
Troubleshooting
If you encounter issues with your washer dryer, consult the following common problems and solutions before contacting service.
| Problem | Possible Cause | Solution |
|---|---|---|
| Appliance does not start | No power supply; door not closed properly; program not selected. | Check power connection; ensure door is securely latched; select a program and press Start. |
| Water not filling | Water tap closed; inlet hose kinked; water pressure too low. | Open water tap; straighten hose; check household water pressure. |
| Water not draining | Drain hose kinked or blocked; filter blocked. | Straighten/clear drain hose; clean the drain filter. |
| Error Code E13 | Indicates an electrical issue, potentially with the control board. | Unplug the appliance for a few minutes, then plug it back in. If the error persists, contact authorized service. |
| Excessive vibration/noise | Appliance not level; transport bolts not removed; unbalanced load. | Adjust leveling feet; ensure transport bolts are removed (if applicable); redistribute laundry inside the drum. |
Specifications
- Model: CBDO485TWME/1-S
- Brand: Candy
- Type: Integrated Front-Load Washer Dryer
- Washing Capacity: 8 Kilograms
- Color: White
- Special Feature: Inverter Motor
- Cycle Options: Eco, Sensor Dry, Active Steam, various quick wash programs
- Voltage: 220 Volts
- Control Type: Push button and Rotary Dial
- Item Weight: 66 Kilograms
- Components Included: 1 package (appliance)
Warranty and Support
Your Candy Smart Inverter CBDO485TWME/1-S washer dryer is covered by a manufacturer's warranty. The terms and duration of the warranty may vary by region. Please retain your proof of purchase for warranty claims.
For technical assistance, warranty service, or to locate an authorized service center, please contact Candy customer support. It is advisable to verify the availability of local service centers in your area before purchase or if you require assistance.
You can typically find contact information for Candy support on their official website: www.candy-group.com


