
1. Introduction
This manual provides comprehensive instructions for the setup, operation, and maintenance of your Acctim Karminski Digital Crescendo Alarm Clock. Please read this manual thoroughly before using the device to ensure proper function and longevity.
2. Product Features
- Luminous reflection display for reduced glare.
- Crescendo alarm with adjustable volume.
- Touch-activated snooze and backlight function.
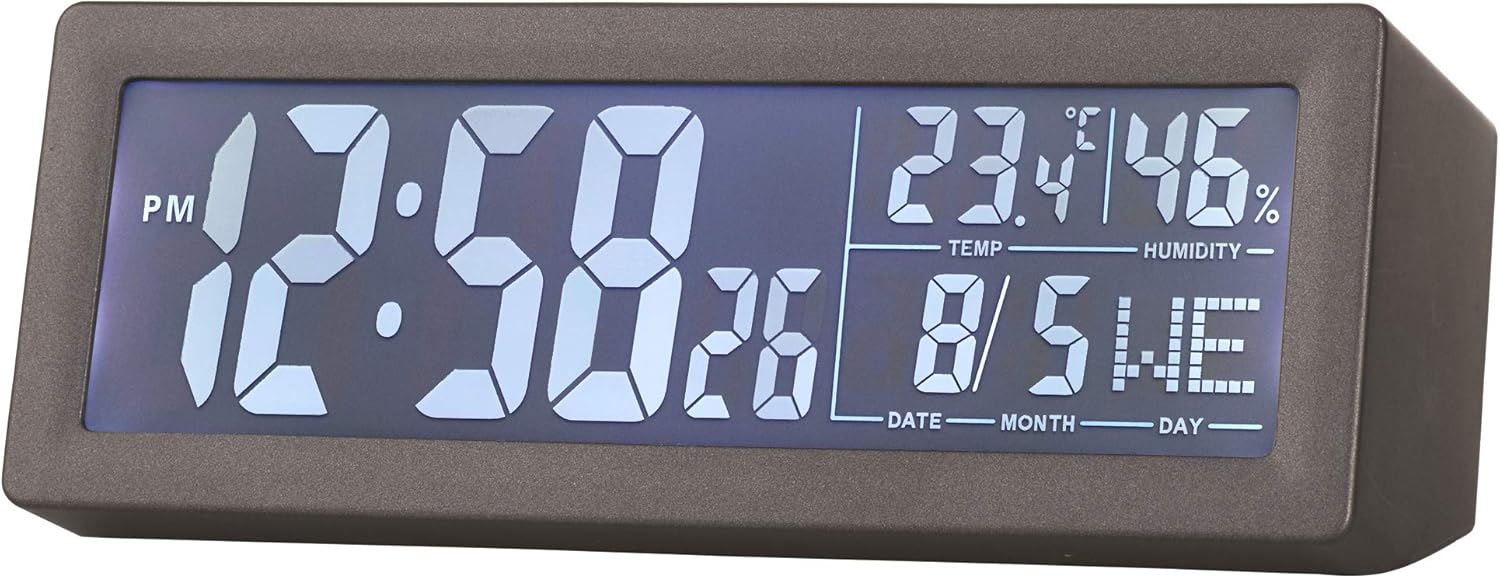
- LCD screen displaying time, date, day, temperature, and humidity.
- Compact and modern design.
3. Package Contents
- Acctim Karminski Digital Crescendo Alarm Clock (Model 16007)
- User Manual (this document)
Note: 2 x AA batteries are required for operation and are not included in the package.
4. Controls and Display
4.1 Front Display
The front LCD screen displays the current time, AM/PM indicator, seconds, temperature, humidity, date, and day of the week.

4.2 Rear Controls
The rear panel houses all control buttons and the battery compartment.

- SET Button: Used to enter and confirm settings for time, date, and alarm.
- Alarm Button (Bell Icon): Used to set and activate/deactivate the alarm.
- DOWN Button (V): Used to decrease values during setting.
- UP Button (^): Used to increase values during setting.
- SNZ Button: Snooze function, also activates the backlight.
- VOLUME Knob: Adjusts the alarm volume.
5. Battery Installation
- Locate the battery compartment cover on the rear of the clock.
- Slide the cover open.
- Insert 2 new AA batteries, ensuring correct polarity (+ and -) as indicated inside the compartment.
- Replace the battery compartment cover securely.
The clock will power on and display default settings or the last saved settings.
6. Initial Setup: Setting Time and Date
- Press and hold the SET button for approximately 3 seconds until the time display starts flashing.
- Use the UP (^) or DOWN (V) buttons to adjust the hour.
- Press the SET button to confirm the hour and move to minute setting.
- Use the UP (^) or DOWN (V) buttons to adjust the minutes.
- Press the SET button to confirm minutes and proceed to year setting.
- Repeat the process using UP (^) or DOWN (V) and SET to set the year, month, and day.
- After setting the day, press SET one last time to exit the setting mode.
7. Setting the Alarm
- Press and hold the Alarm Button (Bell Icon) for approximately 3 seconds until the alarm time display starts flashing.
- Use the UP (^) or DOWN (V) buttons to adjust the alarm hour.
- Press the Alarm Button to confirm the hour and move to minute setting.
- Use the UP (^) or DOWN (V) buttons to adjust the alarm minutes.
- Press the Alarm Button one last time to confirm the alarm time and exit the setting mode.
- To activate or deactivate the alarm, briefly press the Alarm Button. An alarm icon will appear on the display when the alarm is active.
8. Using the Alarm and Snooze Function
- When the alarm sounds, it will begin with a soft tone and gradually increase in volume (Crescendo alarm).
- To activate the snooze function, briefly touch the top of the clock or press the SNZ button. The alarm will pause for a few minutes and then sound again.
- To turn off the alarm completely, press any button other than the SNZ button. The alarm will reset for the next day.
9. Adjusting Alarm Volume
The alarm volume can be adjusted using the VOLUME knob located on the rear of the clock. Rotate the knob clockwise to increase volume and counter-clockwise to decrease volume.
10. Display Backlight
To temporarily illuminate the display, briefly touch the top of the clock or press the SNZ button. The blue backlight will activate for a few seconds.
11. Maintenance
- Cleaning: Wipe the clock with a soft, dry cloth. Do not use abrasive cleaners or solvents.
- Battery Replacement: Replace batteries when the display becomes dim or functions become erratic. Always replace both batteries at the same time with new AA batteries.
- Storage: If storing the clock for an extended period, remove the batteries to prevent leakage.
12. Troubleshooting
- Display is blank or dim: Check battery installation. Replace with new AA batteries.
- Alarm does not sound: Ensure the alarm is activated (alarm icon visible on display). Check alarm time setting. Adjust alarm volume.
- Incorrect time/date: Re-enter time and date settings as per Section 6.
- Inaccurate temperature/humidity: Ensure the clock is placed in a location with good air circulation, away from direct heat sources or extreme cold. Allow time for readings to stabilize after initial setup or relocation.
13. Specifications
| Brand | Acctim |
| Model Number | 16007 |
| Dimensions (L x W x H) | 14.7 x 3.81 x 5.5 cm |
| Weight | 500 g |
| Display Type | Digital LCD |
| Power Source | 2 x AA Batteries (not included) |
| Special Features | Crescendo Alarm, Snooze, Backlight, Date, Day, Temperature, Humidity |
14. Warranty and Support
Information regarding specific warranty terms and customer support contacts for the Acctim Karminski Digital Crescendo Alarm Clock is not provided in the product details. Please refer to the retailer or manufacturer's official website for warranty details and support options.


