
UTRAI JS MINI
UTRAI Jstar Mini Portable Car Battery Jump Starter User Manual
Model: JS MINI
1. Introduction
The UTRAI Jstar Mini is a portable car battery jump starter designed to provide emergency power for starting vehicles with a depleted battery. It also functions as a power bank for electronic devices and includes an LED flashlight. This manual provides instructions for safe and effective use of the device.
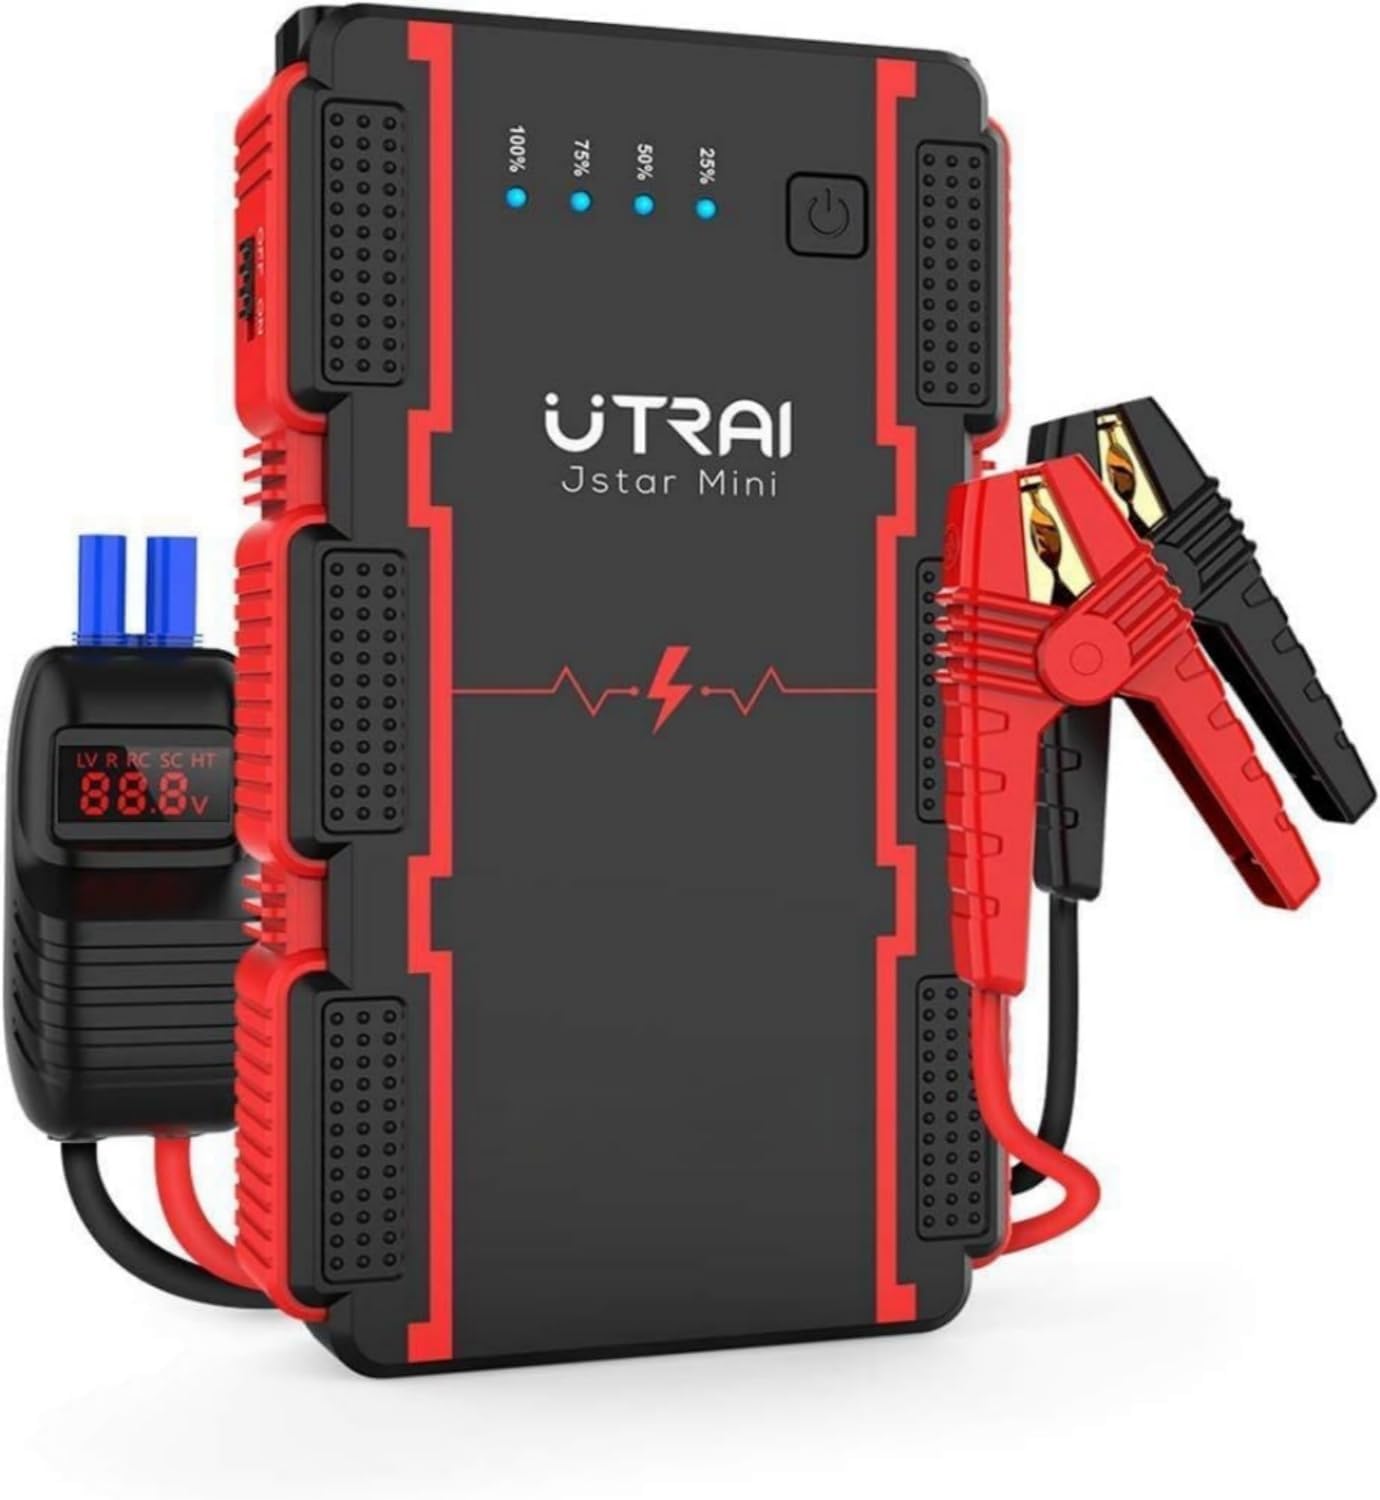
Figure 1: UTRAI Jstar Mini Jump Starter with Smart Clamps
The UTRAI Jstar Mini jump starter unit with its attached smart battery clamps.
2. Safety Information
Please read all safety warnings and instructions before using this product. Failure to follow these instructions may result in electric shock, fire, or serious injury.
- Do not immerse the product in water.
- Do not operate the product in explosive atmospheres, such as in the presence of flammable liquids, gases, or dust.
- Do not use the product if it is damaged or modified.
- Do not allow children to use the product.
- Ensure proper ventilation when operating the device.
- Connect the smart clamps correctly to the battery terminals (red to positive, black to negative).
- Avoid short-circuiting the smart clamps.
- The device incorporates multiple protection systems including short circuit, overheat, overvoltage, overload, deep discharge, overcurrent, and reverse polarity protection.
3. Package Contents
Verify that all items are present in the package:
- UTRAI Jstar Mini Jump Starter
- Smart Battery Clamps
- USB Charging Cable (Note: Charger not included; 5V/3A adapter or car charger recommended)
- User Manual

Figure 2: Package Contents and Dimensions
An image displaying the complete package contents: the UTRAI Jstar Mini jump starter, smart battery clamps, USB charging cable, and the user manual, along with the device's approximate dimensions (5.92in x 3.32in, 0.74LB).
4. Product Overview
Familiarize yourself with the components of your UTRAI Jstar Mini jump starter:

Figure 3: UTRAI Jstar Mini Component Diagram
A detailed diagram of the UTRAI Jstar Mini, pointing out key components such as the power switch, LED charge indicators (25%, 50%, 75%, 100%), jump start output port, USB Output 1, USB Output 2, and Type-C Input port.
Smart Battery Clamps

Figure 4: Smart Clamp Protection Indicators
A close-up of the smart battery clamps, illustrating the built-in safety features and indicators for low voltage (LV), overvoltage, reverse polarity (RC), short circuit (SC), and over-temperature (HT) protection.
5. Charging the Jump Starter
Before first use, fully charge the UTRAI Jstar Mini. It is recommended to recharge the device every 3-6 months to maintain battery health, even if not in use.
- Connect the USB charging cable to the Type-C Input port on the jump starter.
- Connect the other end of the USB cable to a 5V/3A USB wall adapter or car charger (not included).
- The LED indicators will illuminate to show the charging progress. All four LEDs will be solid when fully charged.
6. Operating Instructions
6.1. Jump Starting a Vehicle
The UTRAI Jstar Mini can jump start 12V vehicles with up to 6.0L gasoline engines or 4.5L diesel engines.

Figure 5: Engine Compatibility
Illustration of vehicle types (cars, motorcycles, boats) compatible with the jump starter, indicating suitability for up to 6.0L gasoline and 4.5L diesel engines.
- Ensure the jump starter is sufficiently charged (at least 50% recommended).
- Connect the smart clamp cable to the jump start output port on the UTRAI Jstar Mini. Ensure it is fully inserted.
- Connect the RED positive (+) clamp to the vehicle's positive (+) battery terminal.
- Connect the BLACK negative (-) clamp to the vehicle's negative (-) battery terminal.
- Check the indicator on the smart clamp. If it shows a solid green light, it is safe to proceed. Refer to the smart clamp protection indicators for other statuses.
- Start your vehicle's engine.
- Once the vehicle starts, immediately remove the smart clamps from the car battery. First, remove the black clamp, then the red clamp.
- Disconnect the smart clamp cable from the jump starter.
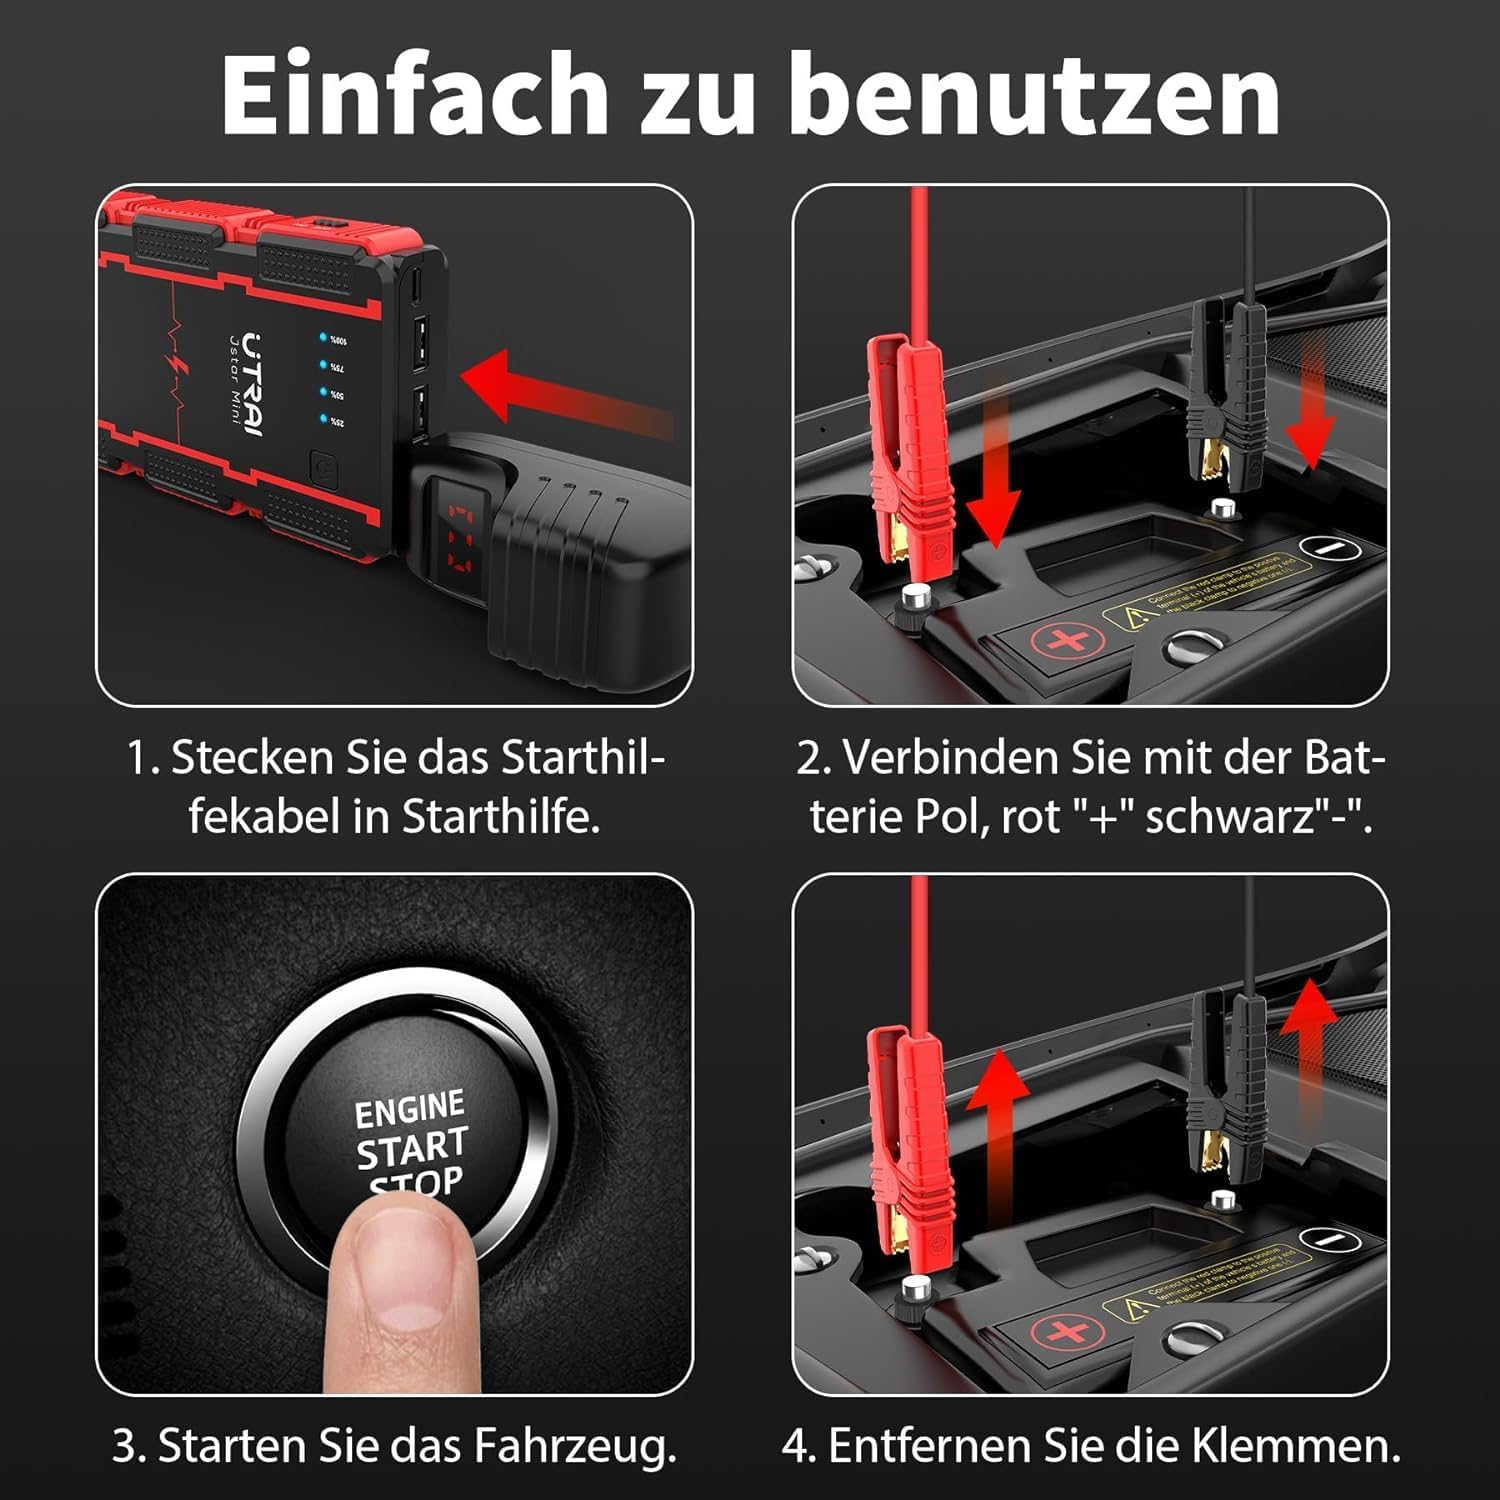
Figure 6: Jump Starting Steps
A step-by-step visual guide demonstrating the process of connecting the jump starter to a car battery, starting the vehicle, and then disconnecting the clamps.
6.2. Using as a Power Bank
The UTRAI Jstar Mini features two USB output ports (5V/3A and 5V/2.1A) for charging electronic devices.
- Connect your device's USB charging cable to one of the USB Output ports on the jump starter.
- The jump starter will automatically begin charging your device.
- The LED indicators will show the remaining battery level of the jump starter.
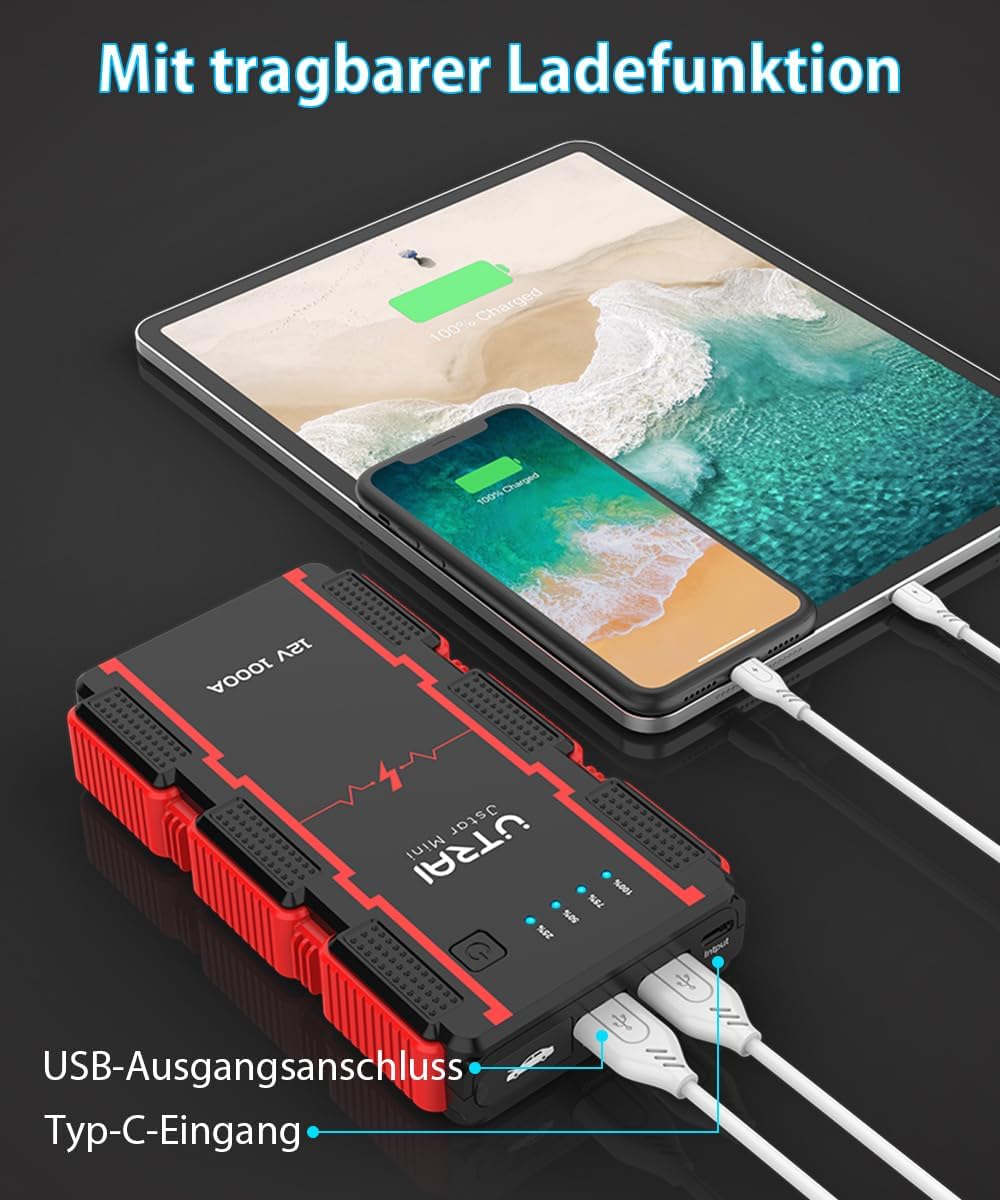
Figure 7: Power Bank Function
The UTRAI Jstar Mini jump starter functioning as a portable power bank, charging a smartphone and a tablet simultaneously using its USB output ports.
6.3. Using the LED Flashlight
The integrated LED flashlight has three modes: constant light, strobe, and SOS signal.
- Press and hold the power button for approximately 3 seconds to turn on the flashlight (constant light mode).
- Press the power button once more to switch to strobe mode.
- Press the power button again to switch to SOS signal mode.
- Press the power button one more time to turn off the flashlight.
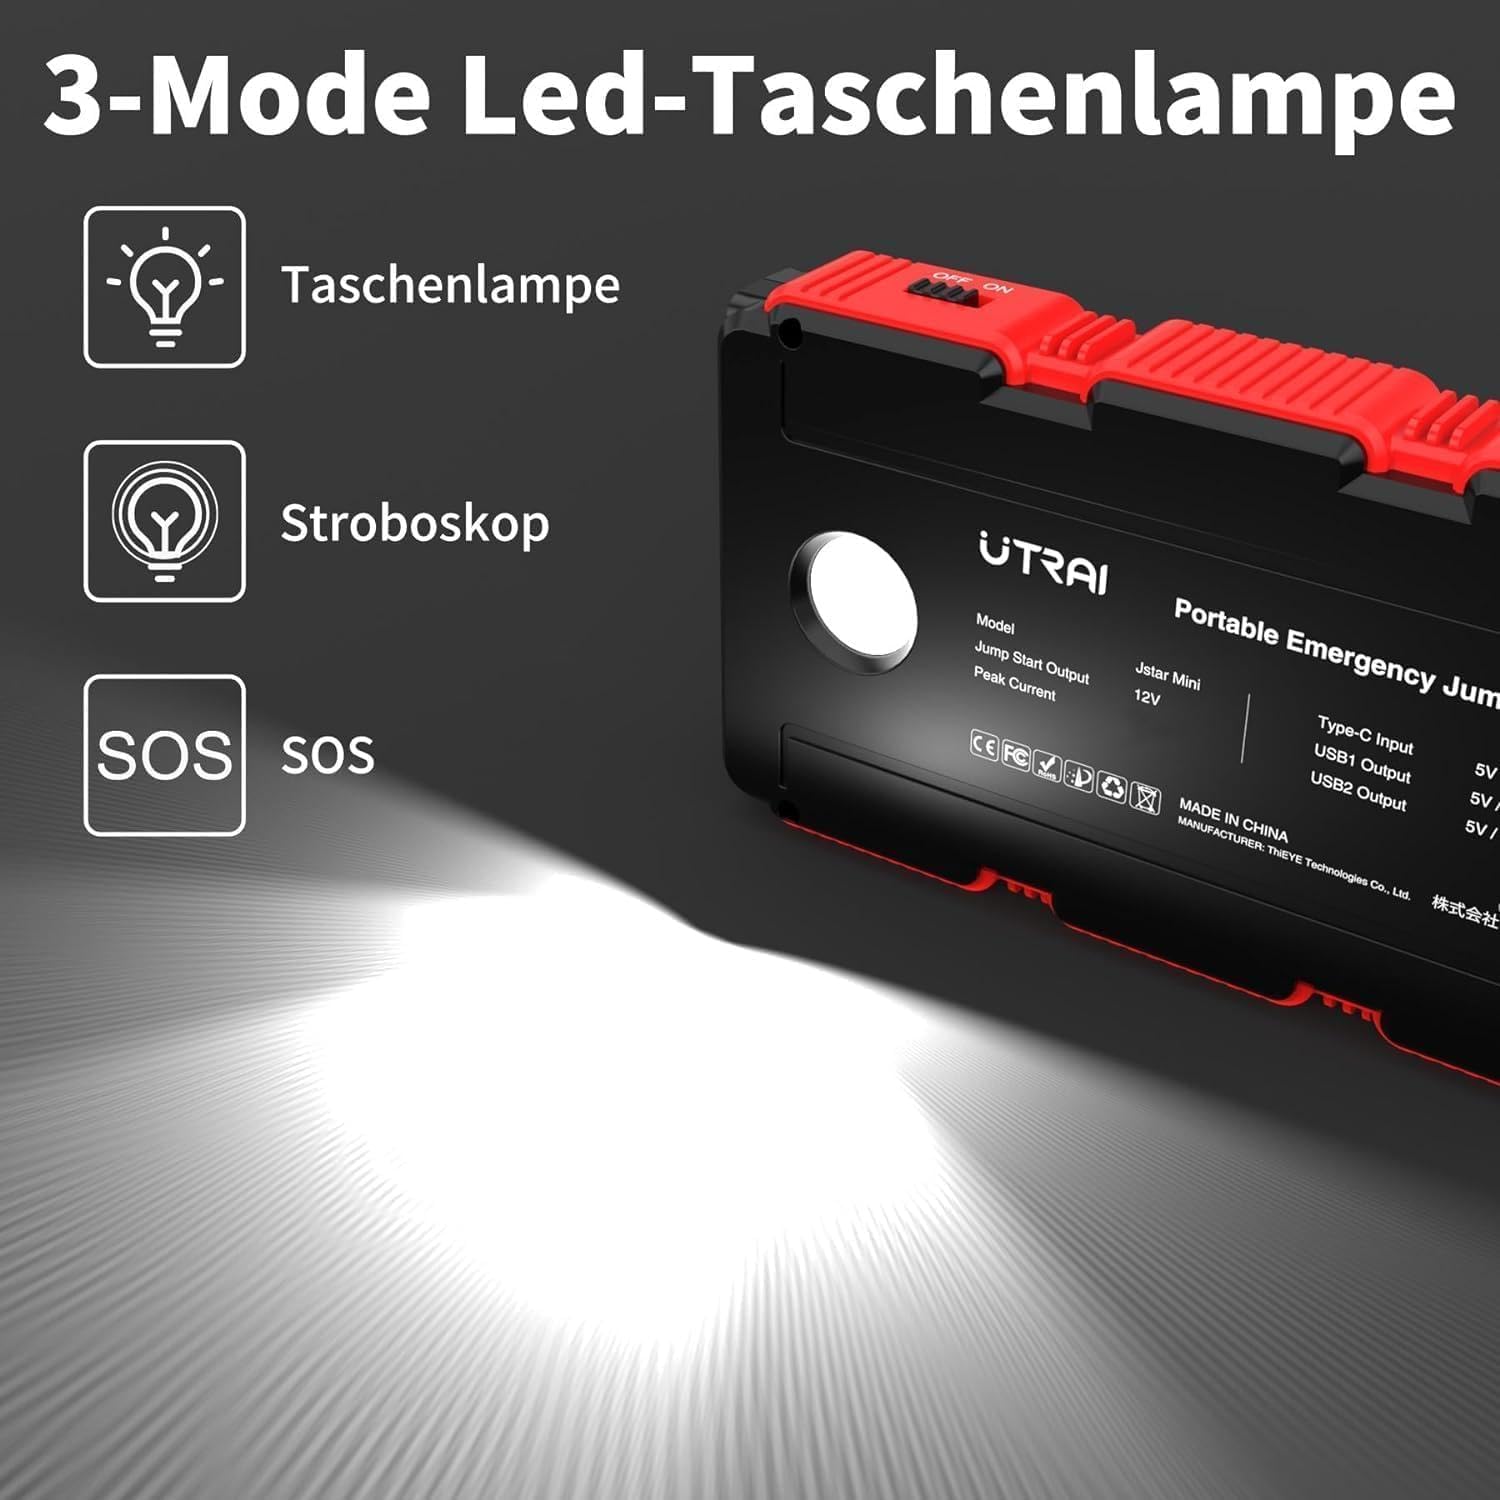
Figure 8: LED Flashlight Modes
A visual representation of the jump starter's integrated LED flashlight, highlighting its three operational modes: standard illumination, strobe light, and SOS signal.
7. Maintenance and Storage
- Clean the device with a dry, soft cloth. Do not use abrasive cleaners or solvents.
- Store the jump starter in a cool, dry place away from direct sunlight and extreme temperatures.
- Recharge the device every 3-6 months to prevent deep discharge and prolong battery life.
- Keep the smart clamps clean and free of corrosion.
8. Troubleshooting
| Problem | Possible Cause | Solution |
|---|---|---|
| Jump starter does not turn on. | Battery is depleted. | Charge the jump starter fully. |
| Vehicle does not start. | Incorrect clamp connection. | Ensure clamps are connected correctly (red to +, black to -). Check smart clamp indicator. |
| Jump starter battery too low. | Ensure jump starter is at least 50% charged. | |
| Vehicle battery severely damaged. | Consult a professional mechanic. | |
| Smart clamp shows error indicator. | Reverse polarity, short circuit, over-temperature, etc. | Refer to the smart clamp indicators (Figure 4) and correct the issue before attempting to jump start. |
| Devices not charging via USB. | Jump starter battery depleted. | Charge the jump starter. |
| Faulty USB cable or device. | Try a different USB cable or device. |
9. Specifications
| Feature | Specification |
|---|---|
| Brand | UTRAI |
| Model | JS MINI |
| Peak Output Current | 1500 Amps |
| Starting Current | 1000 Amps |
| Battery Capacity | 13000mAh |
| Engine Compatibility | Up to 6.0L Gas or 4.5L Diesel |
| USB Output 1 | 5V/3A |
| USB Output 2 | 5V/2.1A |
| Type-C Input | 5V/3A |
| LED Light Modes | Constant, Strobe, SOS |
| Protection Systems | Short circuit, overheat, overvoltage, overload, deep discharge, overcurrent, reverse polarity |
| Item Weight | 1.69 pounds (approx. 0.77 kg) |
| Dimensions | 8.82 x 6.42 x 3.78 inches (Package) |
10. Warranty and Support
For warranty information or technical support, please refer to the contact details provided with your purchase or visit the official UTRAI website. Keep your purchase receipt as proof of purchase for any warranty claims.
Ask a question about this manual
Ask about setup, troubleshooting, compatibility, parts, safety, or missing instructions. Manuals+ will review the question and use this page’s manual context to help answer it.