Introduction
This manual provides essential information for the setup, operation, maintenance, and troubleshooting of your Crumar Mojo Classic Double Manual Organ. Please read this manual thoroughly to ensure proper use and to maximize the lifespan of your instrument.
The Crumar Mojo Classic is a state-of-the-art dual-manual clonewheel organ, designed to replicate the authentic sound and feel of vintage tonewheel organs. It features a cutting-edge DSP platform and the renowned GSi VB3-II tonewheel simulation, offering a rich and responsive playing experience.
Product Overview
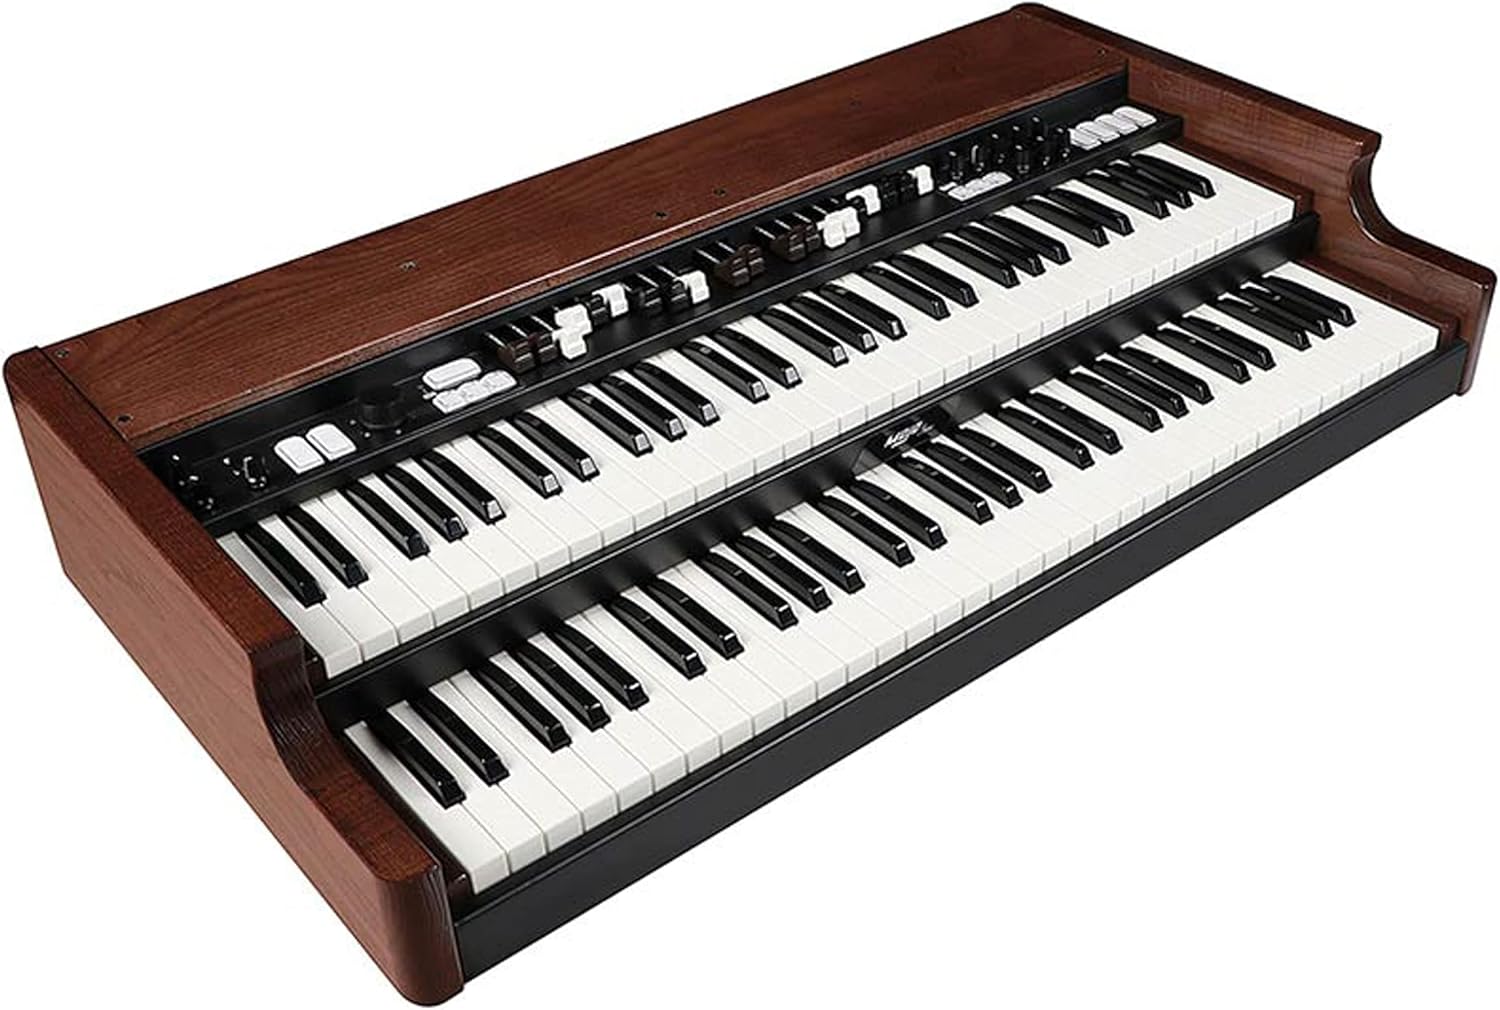
Figure 1: Angled view of the Crumar Mojo Classic Double Manual Organ, showcasing its dual 61-key manuals and wooden end panels.

Figure 2: Top-down view of the Crumar Mojo Classic, highlighting the layout of both 61-key manuals and the control panel above the upper manual.

Figure 3: Side profile view of the Crumar Mojo Classic, emphasizing the depth of the instrument and the waterfall keys.
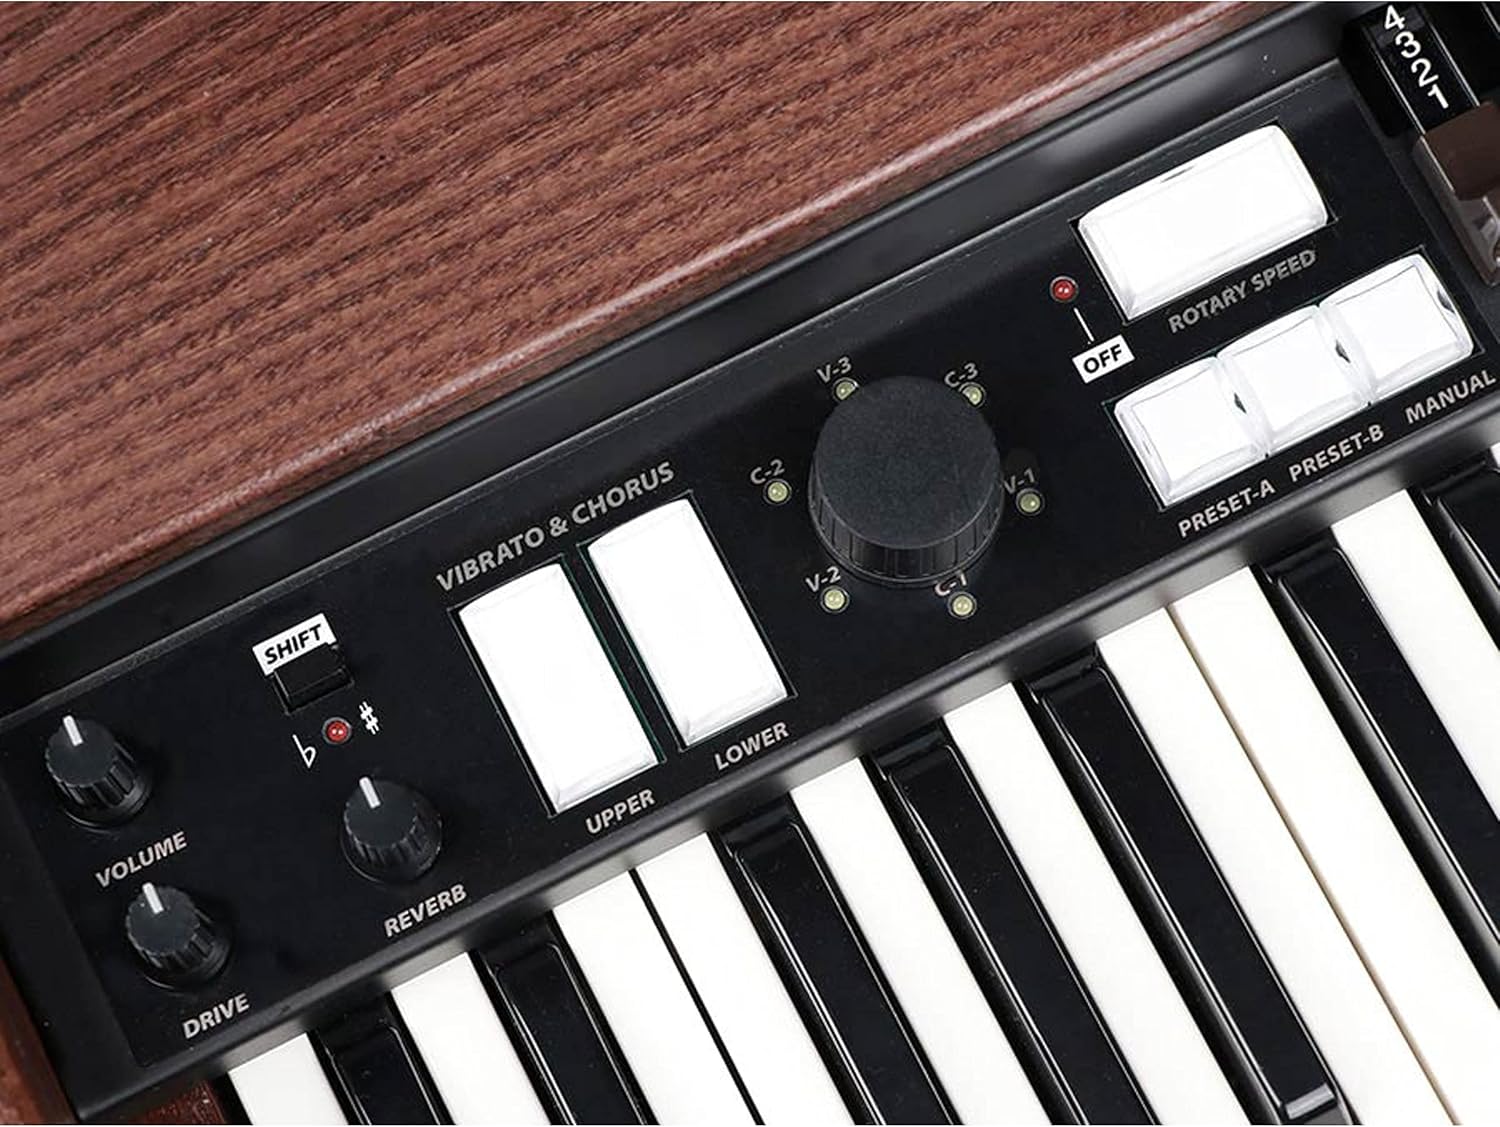
Figure 4: Close-up view of the "Mojo Classic" illuminated logo located between the upper and lower manuals.

Figure 5: Detailed view of the control panel, showing the Vibrato & Chorus switches, Volume, Reverb, Drive knobs, and Rotary Speed controls.

Figure 6: Close-up of the drawbar sets for the upper and lower manuals, essential for shaping the organ's tone.

Figure 7: Detailed view of the Percussion and EQ controls, including knobs for Click, Xtalk, Perc. Vol, Balance, Distance, Bass, Middle, and Treble.

Figure 8: Rear view of the Crumar Mojo Classic, showing the various input/output ports and the Crumar branding.
Setup
Unpacking and Initial Inspection
- Carefully remove the Crumar Mojo Classic from its packaging.
- Inspect the instrument for any signs of damage that may have occurred during shipping. If damage is found, contact your dealer immediately.
- Ensure all components are present: the Mojo Classic organ, power adapter, and this user manual.
Power Connection
- Locate the AC adapter provided with your organ.
- Connect the adapter to the power input jack on the rear panel of the Mojo Classic.
- Plug the AC adapter into a suitable wall outlet. Ensure the outlet provides the correct voltage as specified on the adapter.
Audio Connections
- The Mojo Classic features balanced stereo outputs. Connect these to your amplifier, mixer, or audio interface using appropriate cables.
- For private practice, connect headphones to the 3.5mm or 6.35mm headphone jack.
Operating Instructions
Powering On/Off
- To power on, press the power button located on the rear panel. The display will illuminate.
- To power off, press and hold the power button until the unit shuts down.
Basic Tone Generation with Drawbars
- The Mojo Classic features two groups of nine drawbars for the upper and lower manuals, plus two pedal drawbars.
- Pulling a drawbar out increases the volume of its corresponding harmonic. Experiment with different combinations to create a wide range of organ tones.
- The drawbars are labeled with their harmonic numbers (e.g., 16', 8', 5 1/3', 4', etc.).
Vibrato and Chorus
- Use the Vibrato & Chorus switches to select different vibrato and chorus effects (V-1, V-2, V-3, C-1, C-2, C-3).
- These effects add depth and movement to the organ sound.
Rotary Speaker Emulation
- The Mojo Classic includes a high-quality rotary speaker emulation.
- Use the Rotary Speed switch to toggle between slow and fast rotation speeds, or turn the effect off.
Percussion and EQ
- Activate the percussion effect using the ON switch in the Percussion section.
- Adjust the percussion volume, decay, and harmonic content (e.g., Second, Third) using the dedicated controls.
- Fine-tune your sound using the Bass, Middle, and Treble EQ knobs.
Saving and Recalling Presets
- The Mojo Classic allows you to save and recall your preferred settings instantly. Refer to the full product manual for detailed instructions on preset management.
Maintenance
Cleaning
- Wipe the surface of the organ with a soft, dry cloth.
- For stubborn dirt, slightly dampen the cloth with water. Avoid using harsh chemicals or abrasive cleaners.
- Keep liquids away from the keys and control panel.
Storage
- Store the organ in a cool, dry place, away from direct sunlight and extreme temperatures.
- If transporting, use a protective case to prevent damage.
Troubleshooting
| Problem | Possible Cause | Solution |
|---|---|---|
| No power | Power cable not connected; faulty outlet; power adapter issue. | Ensure power cable is securely connected. Test outlet with another device. Check power adapter for damage. |
| No sound output | Volume too low; audio cables disconnected; external amplifier off/muted. | Increase organ's volume. Check all audio cable connections. Ensure external amplifier/mixer is on and not muted. |
| Keys not responding | Software glitch; internal connection issue. | Try restarting the organ. If problem persists, contact customer support. |
| Unusual noises | Ground loop; faulty cable; internal component issue. | Check audio cables for damage. Ensure proper grounding. If noise persists, contact customer support. |
For issues not listed here, or if troubleshooting steps do not resolve the problem, please contact Crumar customer support.
Specifications
| Feature | Detail |
|---|---|
| Model Name | Mojo Classic |
| Item Model Number | Mojo CL |
| Number of Keys | 2 x 61-key manuals |
| Key Type | Waterfall keys |
| Drawbars | 2 Groups of 9 Drawbars + 2 Pedal Drawbars |
| Tonewheel Simulation | GSi VB3-II |
| Effects | Vibrato & Chorus, Rotary Speaker Emulation, Percussion, Reverb, Drive |
| Connectivity Technology | Auxiliary |
| Connector Type | 3.5mm Jack or 6.35mm Jack (Headphones) |
| Audio Outputs | Balanced Stereo Outs |
| Power Source | AC adapter |
| Item Weight | 51.9 Pounds (23.54 kg) |
| Product Dimensions (L x W x H) | 40.6 x 24.2 x 11.2 inches (103.1 x 61.5 x 28.4 cm) |
| Manufacturer | Crumar |
| ASIN | B08NTMWP6V |
| Global Trade Identification Number | 08719147451645 |
Warranty and Support
For warranty information and technical support, please refer to the official Crumar website or contact your authorized Crumar dealer. Keep your proof of purchase for warranty claims.
Online resources and frequently asked questions may also be available on the manufacturer's support pages.


