
1. Introduction and Overview
Thank you for choosing the Aipsun Crystal Vanity Light. This modern 3-light fixture is designed to enhance the aesthetic and illumination of your bathroom space. This manual provides essential information for safe installation, operation, and maintenance of your new lighting fixture.

Image 1.1: Front view of the Aipsun 3-Light Crystal Vanity Light. The fixture features a black rectangular base with three gold-finished arms extending to hold clear crystal lampshades.
2. Safety Information
WARNING: RISK OF ELECTRIC SHOCK. Disconnect power at the fuse or circuit breaker before installing or servicing.
- Read all instructions carefully before beginning installation.
- All electrical connections must be in accordance with local codes, ordinances, or the National Electric Code (NEC).
- If you are unfamiliar with electrical wiring, consult a qualified electrician.
- Do not exceed the maximum wattage specified for this fixture.
- Ensure the fixture is securely mounted to a structural element.
3. Package Contents
Verify that all components are present before beginning installation:
- Aipsun 3-Light Vanity Light Fixture (1)
- Mounting Hardware Kit (screws, wire nuts, mounting bracket) (1 set)
- Instruction Manual (this document) (1)
Note: Light bulbs are not included with this fixture. Please purchase three standard E26/E27 base bulbs separately.
4. Setup and Installation
4.1 Tools Required (Not Included)
- Phillips Head Screwdriver
- Flathead Screwdriver
- Wire Strippers
- Electrical Tape
- Safety Glasses
4.2 Installation Steps
- Turn off Power: Locate the circuit breaker or fuse box and turn off the power to the light switch or outlet where you will be installing the fixture. Verify power is off using a voltage tester.
- Prepare Mounting Bracket: Attach the mounting bracket to the junction box in the wall using the provided screws. Ensure the bracket is secure.
- Make Electrical Connections: Connect the fixture's wires to the corresponding house wires using wire nuts.
- Connect the black (Live) wire from the fixture to the black (Live) wire from the junction box.
- Connect the white (Neutral) wire from the fixture to the white (Neutral) wire from the junction box.
- Connect the green or bare copper (Ground) wire from the fixture to the green or bare copper (Ground) wire from the junction box.
- Mount the Fixture: Carefully align the fixture base with the mounting bracket and secure it with the decorative nuts or screws provided.
- Install Bulbs: Screw in the appropriate E26/E27 base light bulbs (not included) into each socket. Do not exceed 60 watts per bulb.
- Restore Power: Turn the power back on at the circuit breaker or fuse box. Test the light fixture.
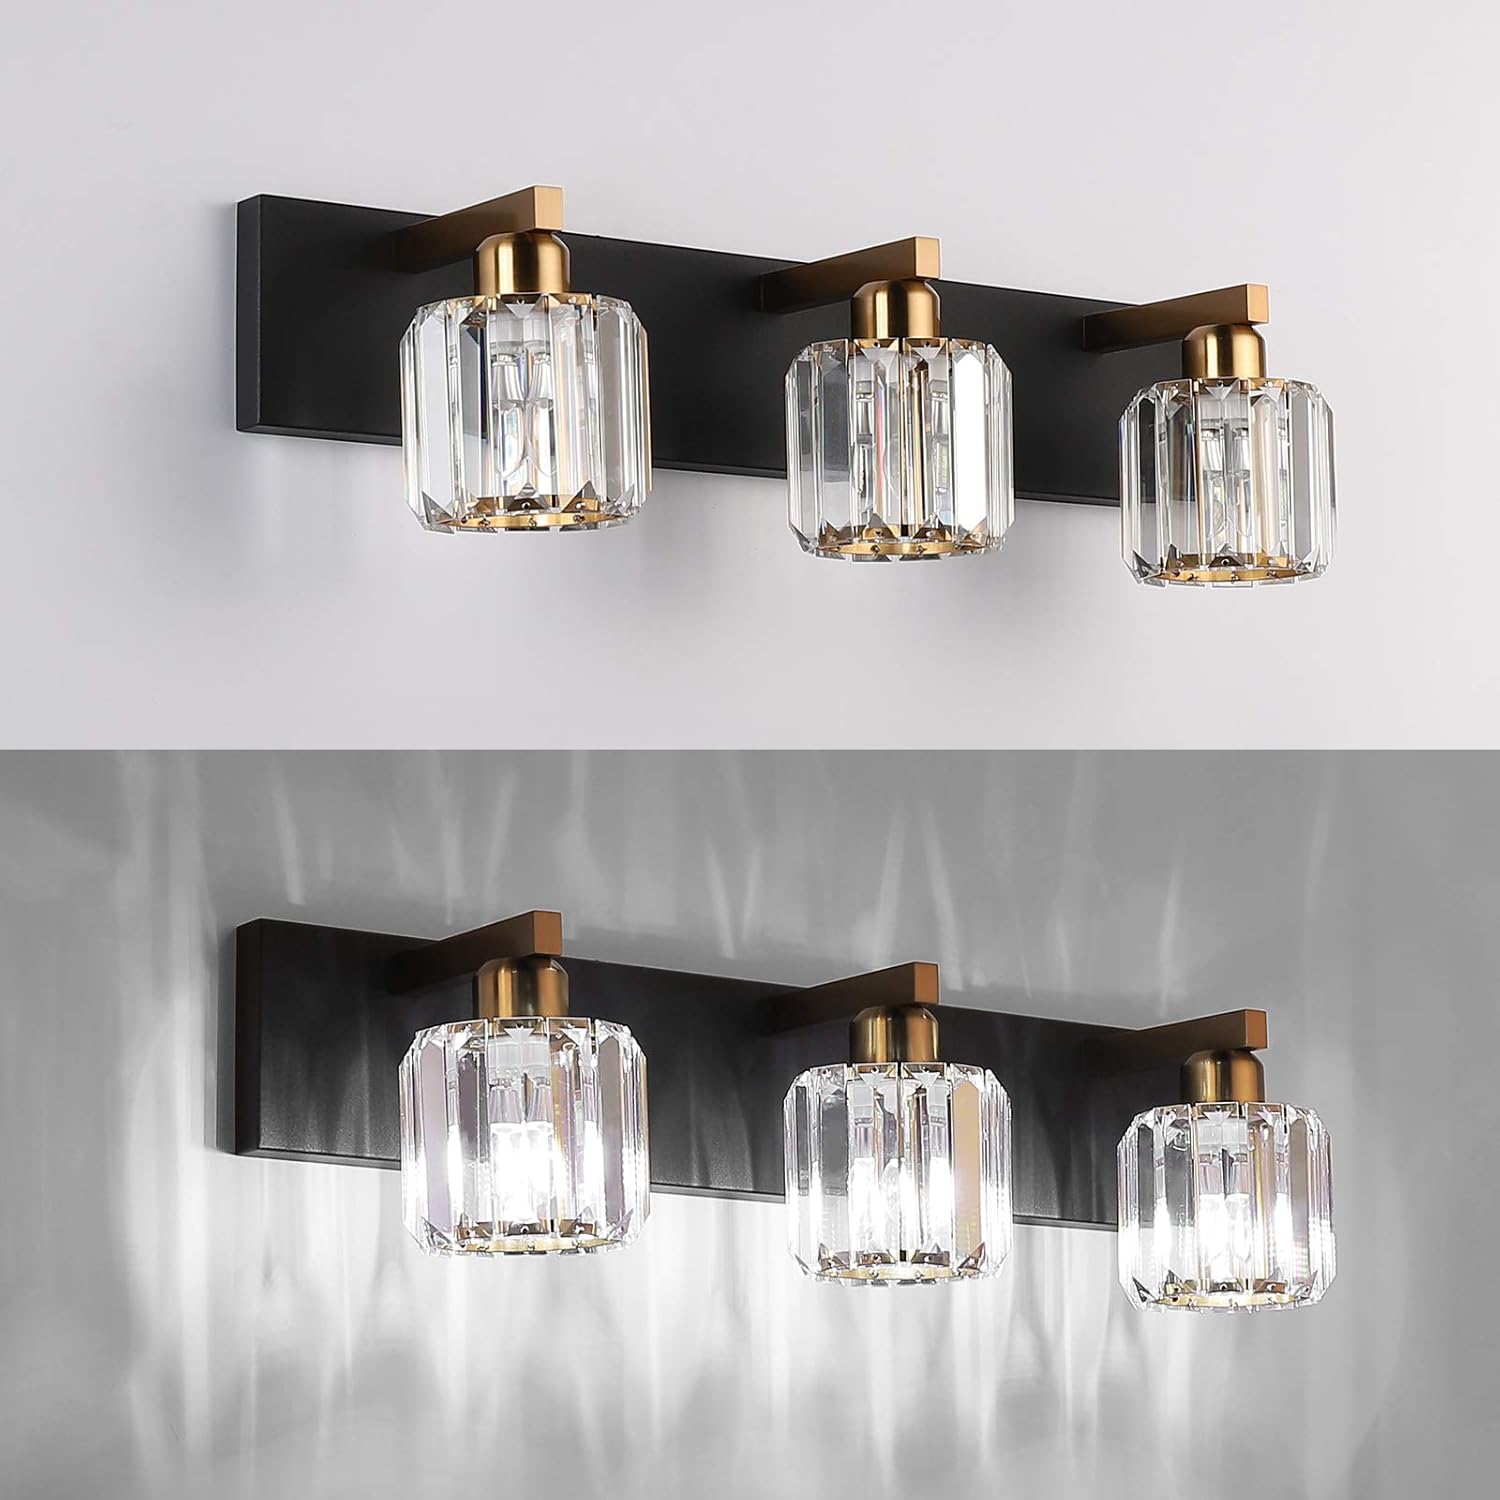
Image 4.1: The Aipsun vanity light installed on a wall, demonstrating its appearance both with the lights off (top) and illuminated (bottom).

Image 4.2: Dimensional drawing of the Aipsun vanity light, showing a total length of 60cm (23 inches), a height of 11cm (4.3 inches) for the base, and individual crystal shade dimensions.
5. Operating Instructions
The Aipsun Crystal Vanity Light operates via a standard wall switch connected to its electrical circuit. Once installed and wired correctly, simply toggle the wall switch to turn the fixture on or off.
- Ensure compatible E26/E27 base bulbs are installed.
- Do not use bulbs exceeding 60 watts per socket (180 watts total for the fixture).
6. Maintenance
6.1 Cleaning
To maintain the appearance of your fixture, clean it regularly:
- Always turn off the power to the fixture before cleaning.
- Wipe the metal parts with a soft, dry cloth.
- For the crystal shades, use a soft, damp cloth with a mild, non-abrasive cleaner if necessary, then dry immediately. Avoid harsh chemicals or abrasive materials, as they may damage the finish or crystals.

Image 6.1: A close-up view highlighting the elegant design and clarity of the crystal lampshade, which is a key feature of the Aipsun vanity light.
6.2 Bulb Replacement
To replace a bulb:
- Ensure the fixture is cool to the touch and the power is off.
- Carefully unscrew the old bulb from the socket.
- Screw in a new E26/E27 base bulb, ensuring it does not exceed 60 watts.
7. Troubleshooting
If you encounter issues with your Aipsun Crystal Vanity Light, refer to the following common problems and solutions:
| Problem | Possible Cause | Solution |
|---|---|---|
| Light does not turn on. | No power to the fixture. Loose wire connection. Faulty bulb. | Check circuit breaker/fuse. Ensure all wire connections are secure (with power off). Replace bulb with a known working one. |
| Light flickers. | Loose bulb. Loose wire connection. Incompatible dimmer switch (if applicable). | Tighten bulb. Check wire connections (with power off). Ensure dimmer switch is compatible with LED/CFL bulbs if using those types. |
| Bulbs burn out quickly. | Over-wattage bulbs. Poor ventilation. | Use bulbs within the specified wattage (max 60W per socket). Ensure proper airflow around the fixture. |
8. Specifications
| Feature | Specification |
|---|---|
| Brand | Aipsun |
| Model Number | NARF5_07496 |
| Dimensions (L x W x H) | 59.94 x 10.92 x 18.03 cm (23.6 x 4.3 x 7.1 inches) |
| Item Weight | 3.24 Kilograms (7.14 lbs) |
| Number of Lights | 3 |
| Max Wattage | 180 Watts (60 Watts per bulb) |
| Voltage | 110 Volts |
| Bulb Base | E26/E27 (Bulbs not included) |
| Manufacturer | NVIDEOFUN |
9. Warranty and Support
For warranty information or technical support, please contact the retailer or manufacturer directly. Keep your purchase receipt as proof of purchase.