
1. Introduction
The Aigostar Elsa 33QNU is a versatile 4-in-1 evaporative air cooler designed to provide a comfortable environment. It functions as an air cooler, fan, humidifier, and air purifier. This unit features 75W power, three distinct ventilation modes, a 12-hour timer, and an 8-liter water tank. Cooling blocks are included to enhance its cooling performance.

Image: The Aigostar Elsa 33QNU operating as a 4-in-1 evaporative cooler, fan, humidifier, and air purifier.
2. Safety Instructions
- Read all instructions before using the appliance.
- Ensure the power supply voltage matches the rating label on the appliance.
- Do not immerse the appliance, cord, or plug in water or other liquids.
- Unplug from the outlet when not in use, before assembling or disassembling parts, and before cleaning.
- Keep the appliance out of reach of children.
- Do not operate any appliance with a damaged cord or plug, or after the appliance malfunctions or has been damaged in any manner.
- Do not block air openings.
- Always place the appliance on a stable, flat surface.
- Do not use the appliance near flammable materials or open flames.
- Only use the appliance for its intended household purpose.
3. Product Overview
Components:
- Main Unit (Air Cooler)
- Smart LED Touch Screen Control Panel
- Remote Control
- 8-Liter Water Tank
- Cooling Blocks (Ice Packs)
- Universal Wheels for mobility
- Air Filter
Control Panel Functions:

Image: Detailed view of the Smart LED Touch Screen control panel.
- MODE: Select between Normal, Natural, and Sleep modes.
- TIMER: Set the operating time from 1 to 12 hours.
- PURIFY: Activates the air purification function.
- ON/OFF: Power the unit on or off.
- COOL: Activates the cooling function (evaporative cooling).
- SWING: Controls the automatic oscillation of the louvers.
- SPEED: Adjusts fan speed (Low, Mid, High).
4. Setup
- Unpacking: Carefully remove the air cooler from its packaging. Retain packaging for future storage or transport.
- Placement: Place the unit on a firm, level surface. Ensure there is adequate space around the unit for proper airflow.
- Fill Water Tank: Pull out the water tank from the bottom of the unit. Fill the tank with clean water up to the maximum level indicator. Do not overfill.
- Prepare Cooling Blocks: For enhanced cooling, place the included cooling blocks in a freezer until completely frozen.
- Insert Cooling Blocks: Once frozen, place the cooling blocks into the water tank.
- Close Water Tank: Securely push the water tank back into the unit.
- Connect Power: Plug the power cord into a suitable electrical outlet (230V).

Image: Steps for preparing the air cooler for operation, including adding water and cooling blocks.
5. Operating Instructions
Using the Control Panel or Remote Control:

Image: The air cooler with its remote control, highlighting the three operating modes.
- Power On/Off: Press the ON/OFF button to turn the unit on or off.
- Select Mode: Press the MODE button repeatedly to cycle through Normal, Natural, and Sleep modes. Each mode offers a different airflow pattern for various comfort levels.
- Adjust Speed: Press the SPEED button to select Low, Mid, or High fan speed.
- Activate Cooling: Press the COOL button to enable the evaporative cooling function. Ensure the water tank is filled and cooling blocks are inserted for optimal performance.
- Set Timer: Press the TIMER button to set the desired operating time from 1 to 12 hours. The unit will automatically turn off after the set time.
- Oscillation: Press the SWING button to activate automatic horizontal oscillation (60 degrees) for wider air distribution. Manual vertical adjustment (120 degrees) is also possible.
- Purify Function: Press the PURIFY button to activate the air purification feature.
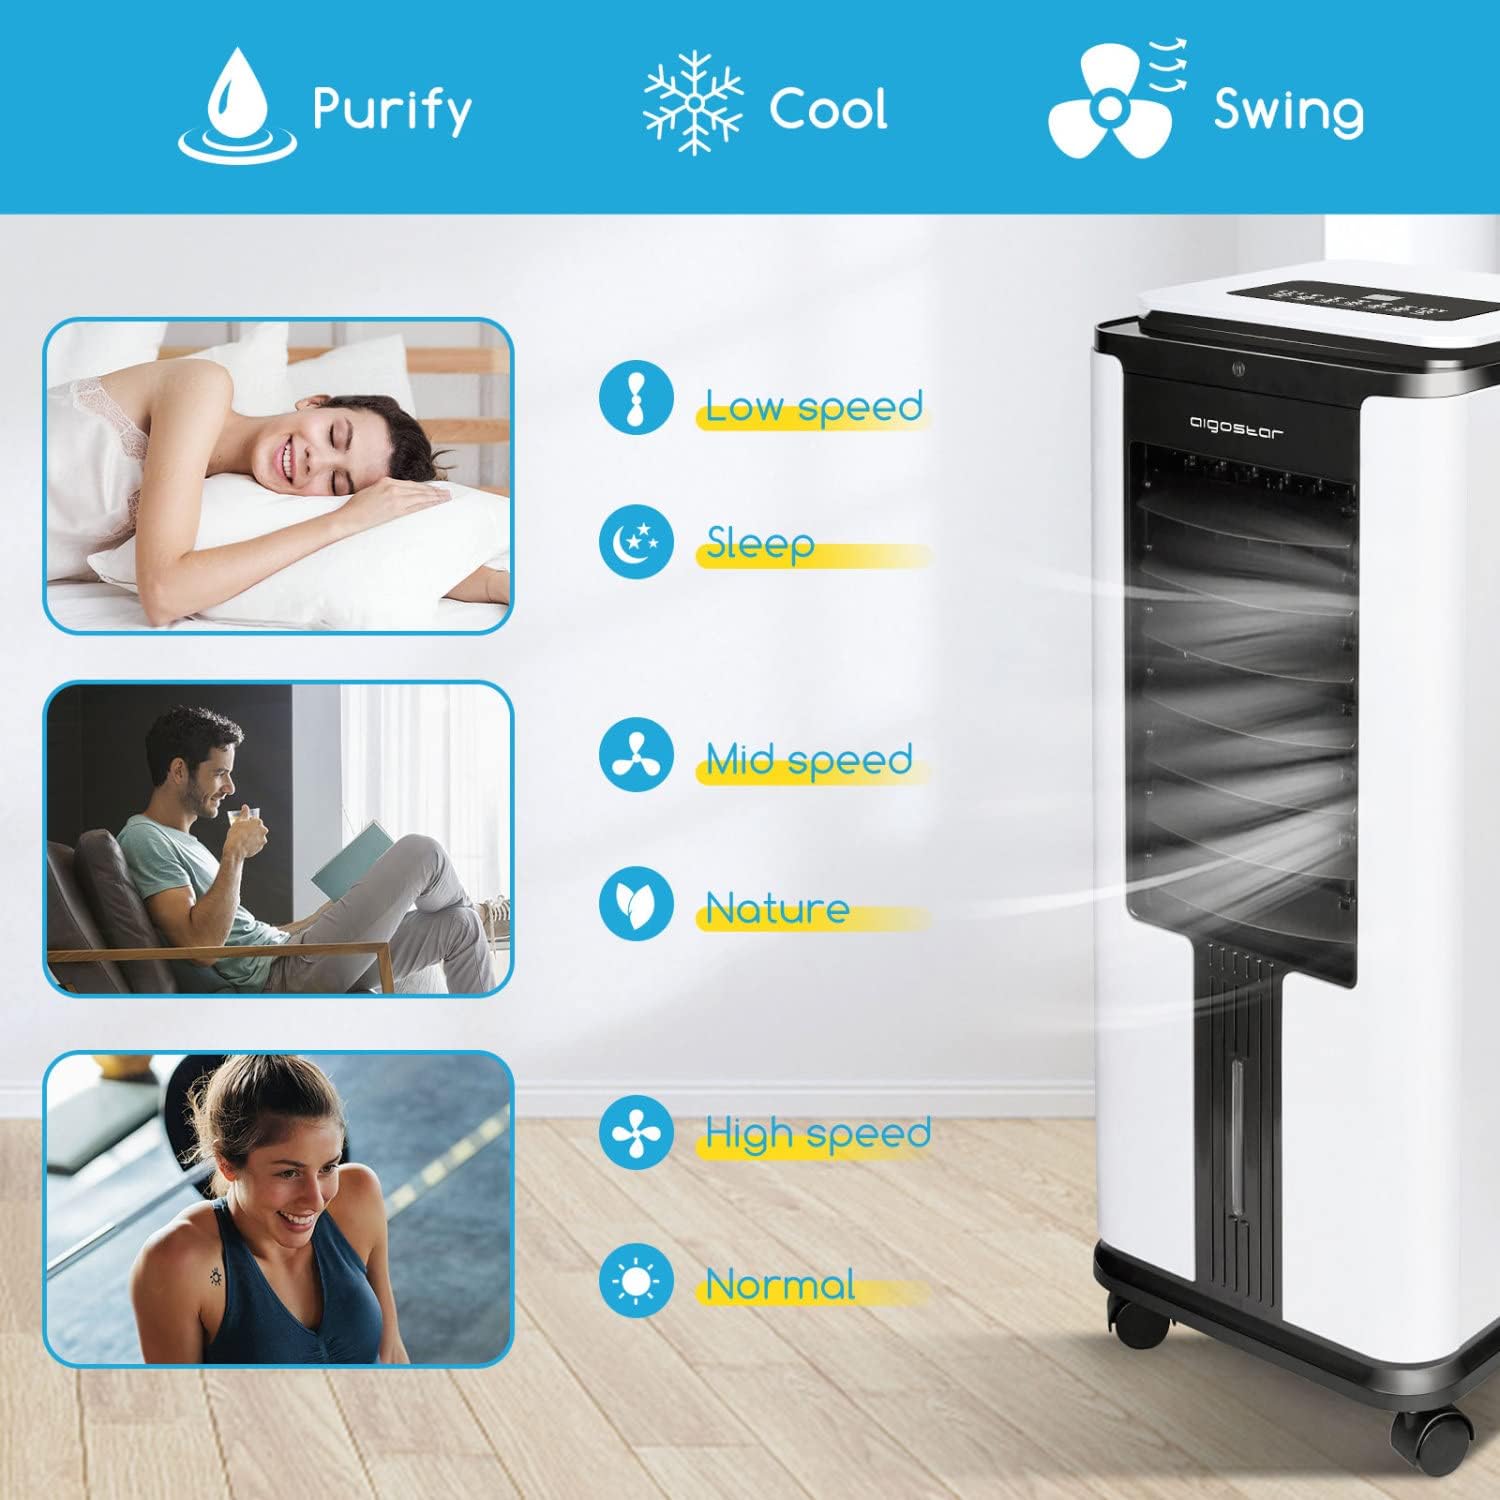
Image: Visual guide to fan speeds and modes for various user preferences.

Image: Illustration of the air cooler's oscillation capabilities for wider coverage.
6. Maintenance
Regular maintenance ensures optimal performance and longevity of your air cooler.
- Cleaning the Water Tank: Periodically remove and clean the water tank to prevent mold and mildew growth. Use mild soap and water, then rinse thoroughly.
- Cleaning the Air Filter: The air filter should be cleaned regularly, especially in dusty environments. Remove the filter, wash it with water, and allow it to dry completely before reinserting.
- Exterior Cleaning: Wipe the exterior of the unit with a soft, damp cloth. Do not use abrasive cleaners or solvents.
- Storage: If storing the unit for an extended period, ensure the water tank is empty and dry, and the unit is clean. Store in a cool, dry place.
7. Troubleshooting
If you encounter issues with your Aigostar Elsa 33QNU, refer to the following common problems and solutions:
| Problem | Possible Cause | Solution |
|---|---|---|
| Unit does not power on. | No power supply; Power cord not properly connected. | Check if the unit is plugged into a working outlet. Ensure the power cord is securely connected. |
| Weak or no airflow. | Air filter is dirty; Air inlet/outlet blocked. | Clean the air filter. Ensure nothing is obstructing the air inlet or outlet. |
| No cooling effect. | Water tank is empty; Cooling blocks not frozen or inserted. | Fill the water tank with water. Freeze and insert the cooling blocks into the water tank. Ensure the COOL function is activated. |
| Unusual noise. | Unit not on a level surface; Internal component obstruction. | Place the unit on a stable, flat surface. If noise persists, contact customer support. |
If the problem persists after attempting these solutions, please contact Aigostar customer support.
8. Specifications
| Feature | Detail |
|---|---|
| Model Number | AIG-8433325211424 |
| Dimensions (L x W x H) | 33 x 33 x 75 cm |
| Weight | 7.84 kg |
| Power | 75 Watts |
| Voltage | 230 Volts |
| Water Tank Capacity | 8 Liters |
| Control Type | Remote Control, Touch Screen |
| Ventilation Modes | 3 (Normal, Natural, Sleep) |
| Timer | 1-12 Hours |
| Oscillation | 60° Automatic (Horizontal), 120° Manual (Vertical) |
| Functions | Air Cooler, Fan, Humidifier, Purifier |
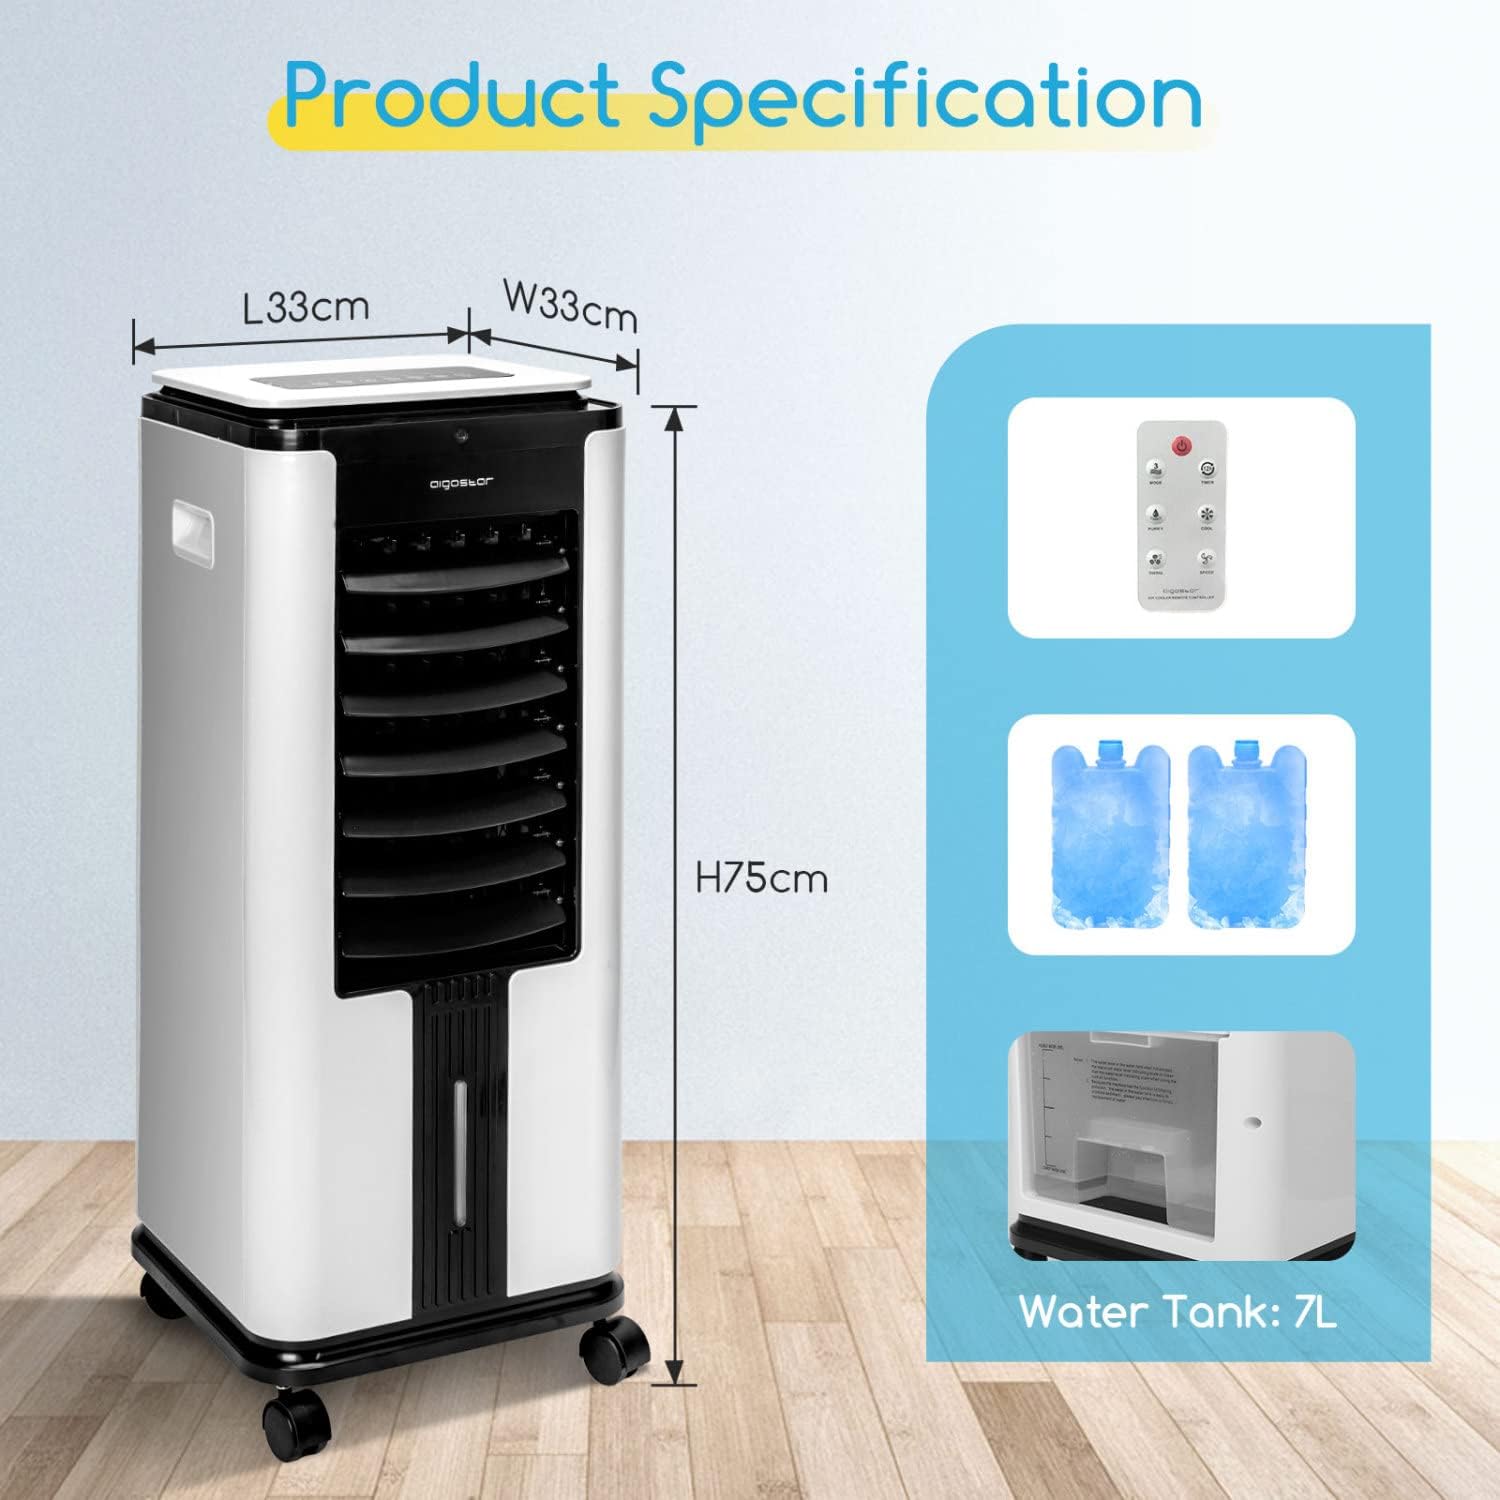
Image: Visual representation of the product dimensions and included accessories.
9. Warranty and Support
For warranty information, please refer to the warranty card included with your purchase or contact the retailer where the product was acquired. For technical support or service inquiries, please contact Aigostar customer service through their official website or the contact information provided in your purchase documentation.


