1. Introduction
Thank you for choosing the Oraymin 36W LED Ceiling Light with Motion Sensor. This product is designed to provide efficient and convenient illumination for various indoor and covered outdoor environments. Featuring advanced motion and daylight sensing technology, this light offers energy savings and enhanced safety. Please read this manual thoroughly before installation and operation to ensure proper use and longevity of the product.
2. Safety Information
- Electrical Safety: Installation should be performed by a qualified electrician or a person with electrical knowledge. Always disconnect power at the circuit breaker before installation or maintenance.
- Voltage: Ensure the supply voltage (220-240V, 50/60Hz) matches the product's requirements.
- Mounting: Mount the fixture securely to a stable surface.
- Environment: This product is IP54 rated, suitable for damp locations but not for direct water immersion. Avoid installation in areas with extreme temperatures outside the operating range (-20°C to 45°C).
- Damage: Do not operate the light if it is damaged. Contact customer support for assistance.
- Disassembly: Do not attempt to disassemble or modify the product, as this will void the warranty and may pose a safety risk.
3. Package Contents
Please check the package contents upon opening. If any items are missing or damaged, contact customer support.
- 1 x Oraymin LED Ceiling Light
- 1 x Accessory Kit (screws, wall plugs)
- 1 x User Manual
4. Specifications
| Parameter | Value |
|---|---|
| Model Number | QC-C330C36-MR |
| Power | 36 W |
| Luminous Flux | 3800 lm |
| Color Temperature | 4000 K (Neutral White) |
| Input Voltage | 220-240 V, 50/60 Hz |
| Beam Angle | 160° |
| IP Rating | IP54 (Dust protected, splash-proof) |
| Material | PC Plastic |
| Dimensions (Ø x H) | 32.7 cm x 4.9 cm (12.87 in x 1.92 in) |
| Weight | 1.15 kg |
| Operating Temperature | -20°C to 45°C |
| Lifespan | 25,000 hours |
| Certification | CE / RoHS |
| Energy Efficiency Class | F |
For more detailed energy information, please refer to the EPREL database (QR code 1504469).

Image: Energy Efficiency Label for the Oraymin LED Ceiling Light, showing class F and 36 kWh/1000h consumption.
5. Setup and Installation
Important: Ensure power is disconnected at the main circuit breaker before beginning installation.
- Preparation: Unpack the ceiling light and ensure all components are present.
- Marking: Hold the mounting bracket against the ceiling at the desired installation location. Mark the positions for drilling holes.
- Drilling: Drill holes at the marked positions. Insert the wall plugs (if necessary) into the drilled holes.
- Mounting Bracket: Secure the mounting bracket to the ceiling using the provided screws.
- Wiring: Connect the household electrical wires to the terminal block on the ceiling light. Ensure correct polarity (Live, Neutral). This fixture is Class II, so no earth wire is required.
- Attach Fixture: Align the ceiling light with the mounting bracket and secure it in place, typically by twisting or locking mechanisms.
- Restore Power: Once installation is complete and secure, restore power at the circuit breaker.

Image: Diagram illustrating the dimensions (Ø 32.7cm, H 4.9cm), 160° beam angle, 3-5m installation height, and 2-8m induction range of the Oraymin LED Ceiling Light.
6. Operating Instructions
Motion Sensor Functionality
The Oraymin LED Ceiling Light features an integrated motion sensor and daylight sensor for automatic operation. The light will turn on when motion is detected within its range and ambient light levels are below a set threshold. It will turn off after a set hold time if no further motion is detected.

Image: Comparison showing the convenience of a motion sensor light automatically turning on, versus a non-sensor light requiring manual activation in the dark.
Adjusting Sensor Settings
The motion sensor has adjustable settings for sensing range, hold time, and daylight sensitivity. These adjustments are typically made via small switches or dials on the sensor module before the light is fully installed or sealed. Refer to the diagram below for typical settings.

Image: Diagram detailing the adjustable motion sensor settings: Sensing Range (25% / 2m, 50% / 4m (default), 75% / 6m, 100% / 8m), Hold Time (5s, 30s (default), 60s, 300s), and Daylight Sensor (2 Lux, 10 Lux, 50 Lux (default), Disable).
- Sensing Range: Adjusts the detection distance of the motion sensor. Options typically include 2m (25%), 4m (50% - default), 6m (75%), and 8m (100%).
- Hold Time: Determines how long the light remains on after motion is no longer detected. Options typically include 5 seconds, 30 seconds (default), 60 seconds, and 300 seconds.
- Daylight Sensor: Sets the ambient light threshold at which the motion sensor becomes active.
- 2 Lux: Light will only activate in very dark conditions.
- 10 Lux: Light will activate in dim conditions.
- 50 Lux (Default): Light will activate in moderately dim conditions.
- Disable: Light will activate regardless of ambient light levels (motion sensor always active).
Note: It is recommended to set the sensor parameters before final installation, as access to the adjustment switches may be limited once mounted.
7. Maintenance
- Cleaning: Disconnect power before cleaning. Use a soft, dry, or slightly damp cloth to wipe the surface of the light. Do not use abrasive cleaners or solvents.
- Inspection: Periodically check the fixture for any signs of damage or loose connections.
- No User-Serviceable Parts: The LED module is integrated and not user-replaceable. Do not attempt to open the fixture.
8. Troubleshooting
| Problem | Possible Cause | Solution |
|---|---|---|
| Light does not turn on. | No power supply. Daylight sensor setting too high. Motion not detected. | Check circuit breaker and wiring. Adjust daylight sensor to a lower Lux setting or 'Disable'. Ensure motion is within sensing range. |
| Light stays on continuously. | Continuous motion detected. Hold time set too long. Sensor faulty. | Ensure no constant movement in the detection area. Adjust hold time to a shorter duration. Contact customer support. |
| Light turns on unexpectedly. | Sensor too sensitive. Environmental factors (e.g., drafts, small animals). | Reduce sensing range. Adjust placement or sensitivity if possible. |
| Light flickers. | Unstable power supply. Loose wiring connection. | Consult an electrician to check power stability. Check and secure all wiring connections (with power off). |
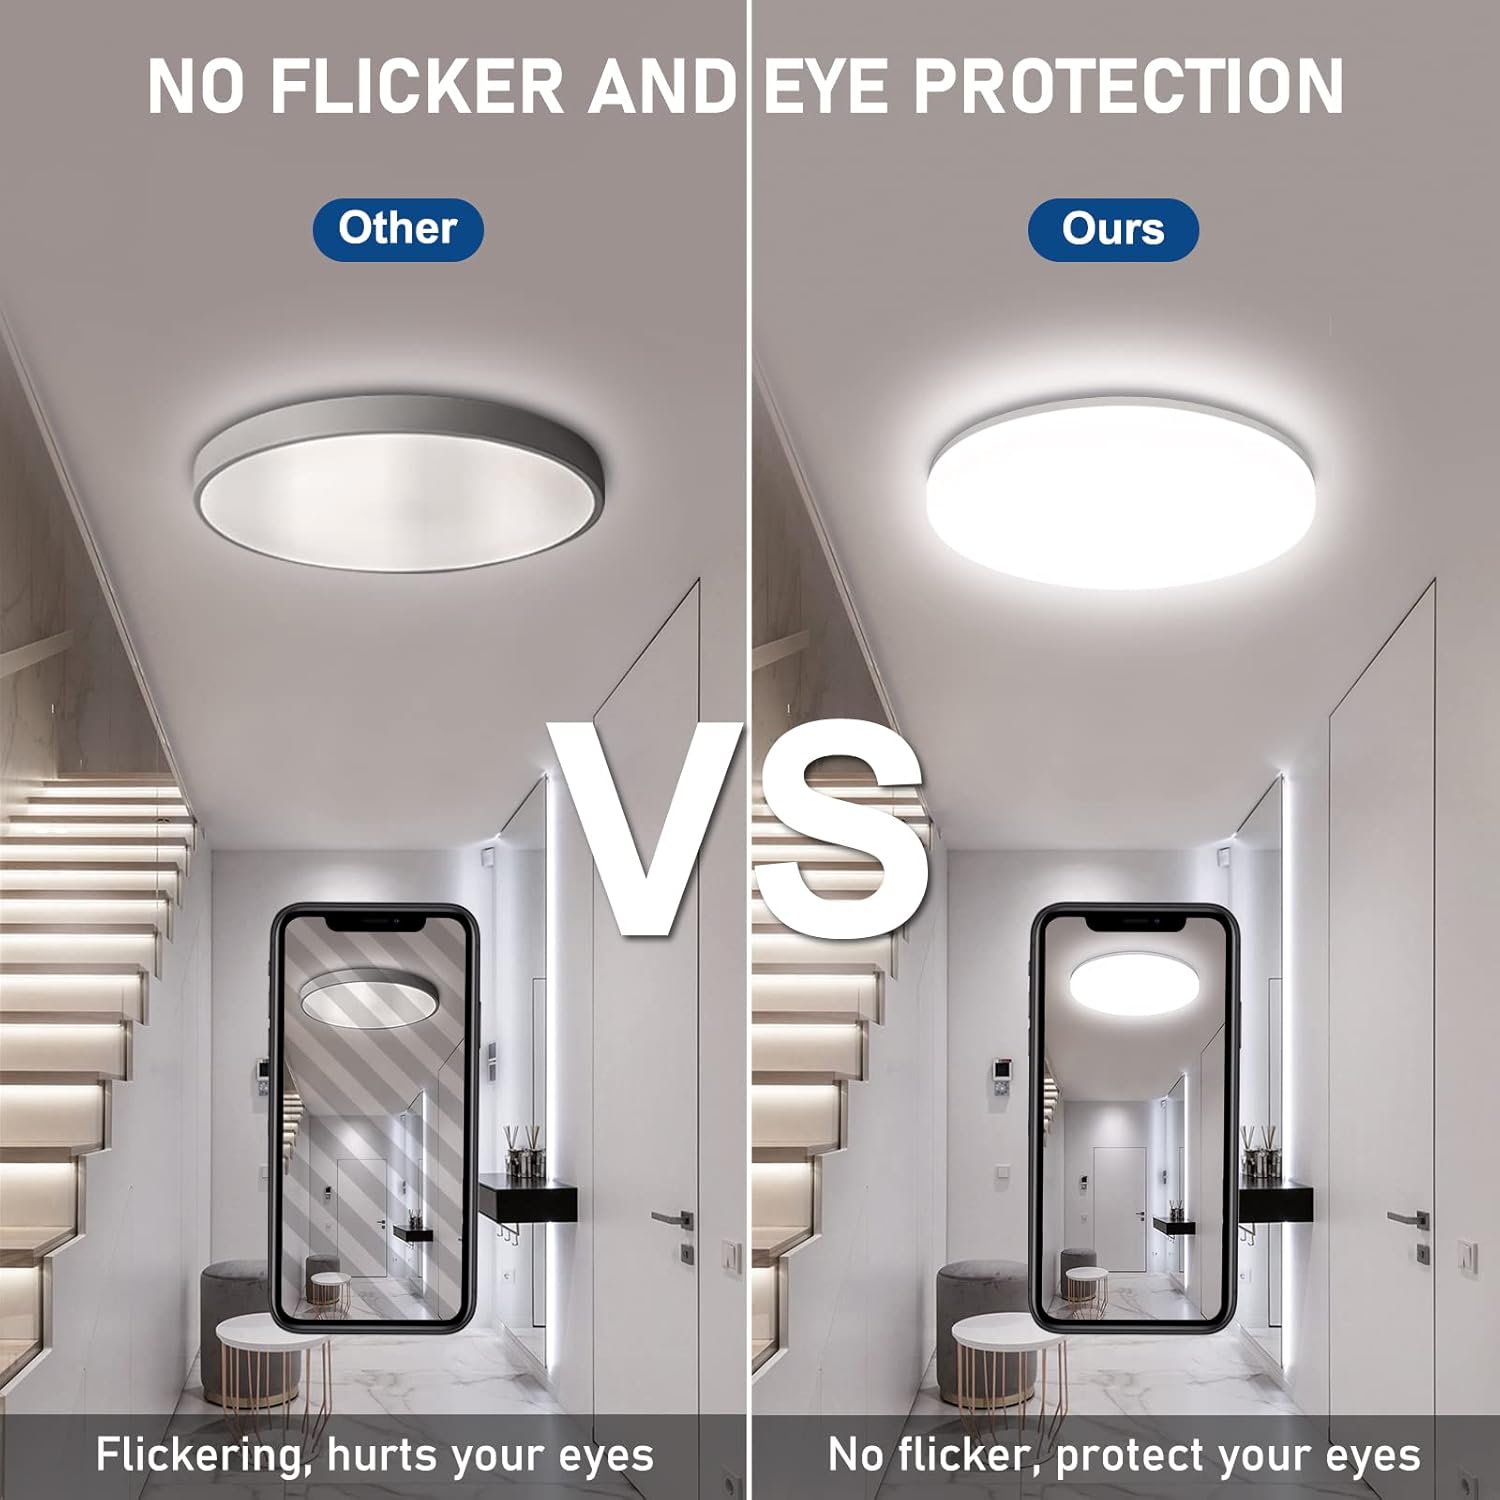
Image: Visual comparison demonstrating the absence of flicker in the Oraymin LED Ceiling Light, promoting eye protection, versus a flickering light.
9. Warranty and Support
This Oraymin LED Ceiling Light comes with a 2-year warranty from the date of purchase, covering defects in materials and workmanship under normal use.
For warranty claims, technical assistance, or any questions regarding your product, please contact Oraymin customer support. Please have your purchase receipt and model number (QC-C330C36-MR) ready when contacting support.
Contact Information: Refer to the product packaging or the retailer's website for the most current customer support contact details.
10. Product Application Examples
The Oraymin LED Ceiling Light is suitable for a variety of locations due to its IP54 rating and motion sensing capabilities.
- Staircases
- Hallways
- Garages
- Basements
- Carports
- Verandas (covered outdoor areas)
- Bathrooms (damp locations)

Image: The Oraymin LED Ceiling Light installed in a bathroom, demonstrating its suitability for damp locations with an IP54 rating.

Image: Collage showing the Oraymin LED Ceiling Light installed in various environments: a bathroom, a garage, an entrance, and a hallway, illustrating its versatile application.


