Introduction
This user manual provides comprehensive instructions for the installation, operation, and maintenance of your Quantum Audio QEA2500.1 Class-D Monoblock Car Subwoofer Amplifier. To ensure optimal performance and longevity of your amplifier, please read this manual thoroughly before installation and operation. Keep this manual for future reference.
Product Overview
The Quantum Audio QEA2500.1 is a high-performance Class-D monoblock amplifier designed to deliver powerful and clear bass to your car audio system. Its compact design and robust construction ensure reliable operation.
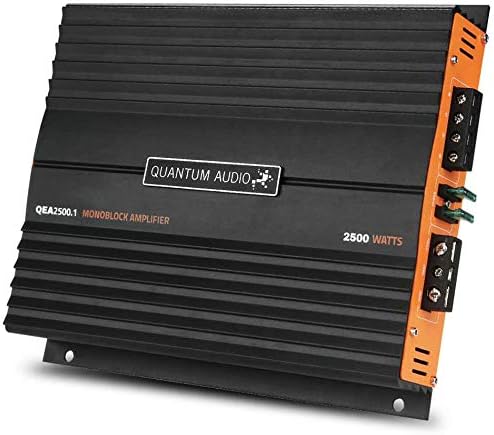
Figure 1: Front view of the Quantum Audio QEA2500.1 Monoblock Amplifier, showcasing its sleek black design with the Quantum Audio logo and model number.
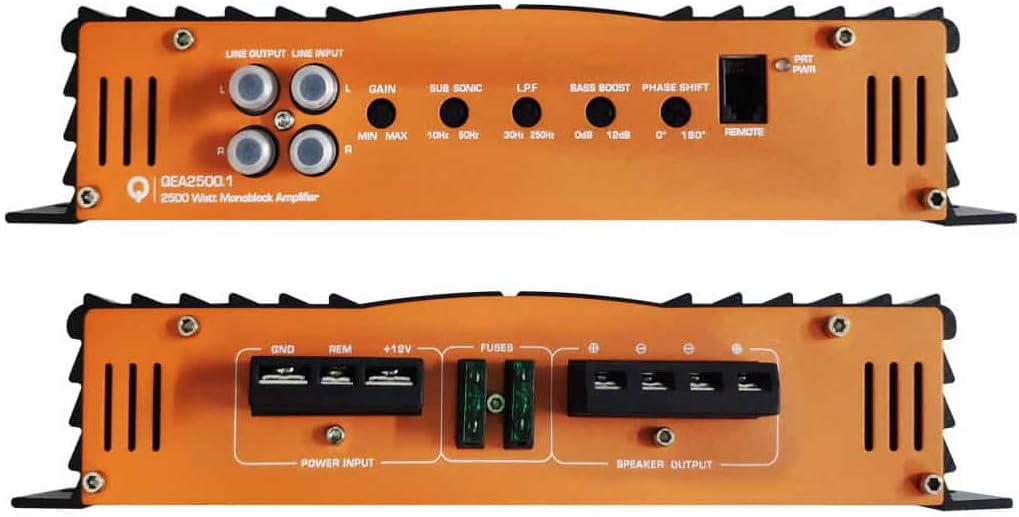
Figure 2: Rear view of the Quantum Audio QEA2500.1 Monoblock Amplifier, displaying the various input and output terminals, including line output, line input, gain control, bass boost, phase shift, remote bass control knob port, power input, and speaker output terminals.
Setup and Installation
Proper installation is crucial for the performance and safety of your amplifier. It is recommended that installation be performed by a qualified professional.
Safety Precautions:
- Disconnect the vehicle's negative battery terminal before starting any electrical work.
- Ensure all wiring is properly insulated and secured to prevent short circuits.
- Mount the amplifier in a location that allows for adequate ventilation and is protected from moisture and direct sunlight.
- Use appropriate gauge wiring for power, ground, and speaker connections as specified in the wiring diagrams.
Wiring Connections:
- Power Connection (+12V): Connect a heavy-gauge power cable from the vehicle's positive battery terminal to the +12V terminal on the amplifier. An inline fuse (not supplied) must be installed within 18 inches of the battery.
- Ground Connection (GND): Connect a heavy-gauge ground cable from the GND terminal on the amplifier to a clean, unpainted metal surface on the vehicle's chassis. Ensure a solid, low-resistance connection.
- Remote Turn-On (REM): Connect a remote turn-on wire from your head unit's remote output to the REM terminal on the amplifier. This wire signals the amplifier to turn on when the head unit is active.
- RCA Input (LINE INPUT): Connect RCA cables from your head unit's subwoofer or pre-amp output to the LINE INPUT terminals on the amplifier.
- Speaker Output: Connect your subwoofer(s) to the SPEAKER OUTPUT terminals. Ensure correct polarity (+ to + and - to -) for optimal sound. Refer to your subwoofer's specifications for impedance matching.
- Remote Bass Control Knob: Connect the remote bass control knob to the "REMOTE" port for convenient bass level adjustment from the driver's seat.
Operating Instructions
Once installed, follow these steps to operate your Quantum Audio amplifier:
- Initial Power-Up: After all connections are made and verified, reconnect the vehicle's negative battery terminal. Turn on your head unit. The amplifier's power indicator should illuminate.
- Gain Adjustment (GAIN): Start with the GAIN control set to minimum. Play a familiar piece of music with strong bass. Slowly increase the GAIN control until you hear distortion, then back off slightly. This sets the amplifier's input sensitivity to match your head unit's output.
- Low Pass Filter (LPF): Adjust the LPF (Low Pass Filter) to control the upper frequency limit of the bass output. Typically, this is set between 80Hz and 120Hz for subwoofers.
- Sub Sonic Filter (SUB SONIC): The SUB SONIC filter removes extremely low frequencies that are inaudible and can damage your subwoofer. Adjust this setting to protect your subwoofer from over-excursion.
- Bass Boost: Use the BASS BOOST control to enhance bass output at a specific frequency. Use sparingly to avoid distortion or damage to your speakers.
- Phase Shift: The PHASE SHIFT control (0°/180°) helps align the phase of the subwoofer's output with the rest of your car's audio system. Experiment with both settings to find the one that provides the most coherent bass response.
- Remote Bass Control: Use the wired remote bass control knob to conveniently adjust the subwoofer's output level from the driver's seat.
Note: Always make small adjustments and listen carefully to avoid damaging your audio components.
Maintenance
Your Quantum Audio amplifier requires minimal maintenance. Follow these guidelines to keep it in optimal condition:
- Cleaning: Periodically wipe the amplifier's exterior with a soft, dry cloth to remove dust and debris. Do not use liquid cleaners or solvents.
- Ventilation: Ensure that the amplifier's cooling fins are free from obstructions to allow for proper heat dissipation.
- Connections: Occasionally check all wiring connections to ensure they are secure and free from corrosion. Loose connections can lead to poor performance or damage.
- Fuse Replacement: If the amplifier's fuse blows, replace it only with a fuse of the same type and rating. Using an incorrect fuse can cause serious damage to the amplifier or vehicle's electrical system. The amplifier uses two 30A fuses.
Troubleshooting
If you experience issues with your amplifier, refer to the following common problems and solutions:
| Problem | Possible Cause | Solution |
|---|---|---|
| No Power / Amplifier Not Turning On | Blown fuse; Loose power/ground/remote wire; No remote signal from head unit. | Check and replace fuses; Verify all power, ground, and remote connections are secure; Check head unit's remote output. |
| No Sound Output | Loose RCA cables; Incorrect gain setting; Speaker wires disconnected or shorted; Amplifier in protection mode. | Check RCA connections; Adjust gain; Inspect speaker wiring for shorts or disconnections; Turn off amplifier, check connections, and restart. |
| Distorted Sound | Gain set too high; Incorrect LPF/Sub Sonic settings; Poor ground connection; Damaged speaker. | Reduce gain; Adjust LPF/Sub Sonic filters; Ensure solid ground connection; Inspect speaker for damage. |
| Amplifier Overheating / Goes into Protection Mode | Insufficient ventilation; Speaker impedance too low; Prolonged high-volume use. | Ensure proper airflow around amplifier; Verify speaker impedance matches amplifier's rating; Reduce volume or allow amplifier to cool. |
If the problem persists after attempting these solutions, consult a qualified car audio technician.
Specifications
| Feature | Specification |
|---|---|
| Brand | Quantum Audio |
| Model Number | QEA2500.1D |
| Number of Channels | 1 (Mono) |
| Output Power | 2500 Watts Max |
| Voltage | 6 Volts (Operating Voltage Range typically 12-14.4V for car audio) |
| Mounting Type | Surface Mount |
| UPC | 811536032980 |
| Manufacturer | Quantum Audio |
Warranty and Support
For detailed warranty information and customer support, please refer to the warranty card included with your purchase or visit the official Quantum Audio website. Keep your proof of purchase for warranty claims.
Online Resources:
- Quantum Audio Official Website (Example link, actual URL may vary)
- Product Page on Amazon


