
Introduction
This manual provides detailed instructions for the safe and efficient installation, operation, and maintenance of your ocioc 15.7-inch LED Flush Mount Ceiling Light. Please read this manual thoroughly before installation and retain it for future reference.
Safety Information
WARNING: Risk of electric shock. Disconnect power at the fuse box or circuit breaker before installation or servicing.
- This product must be installed in accordance with the applicable installation code by a person familiar with the construction and operation of the product and the hazards involved.
- Do not use with dimmer switches. This product is designed for use with standard ON/OFF wall switches only.
- Ensure all electrical connections are secure and comply with local codes and ordinances.
- Do not modify the fixture. Any modifications may void the warranty and create safety hazards.
Package Contents
Verify that all components are present before beginning installation:
- 1 x ocioc 15.7-inch LED Ceiling Light (36W/400mmx24mm)
- 2 x Wire Nuts
- 2 x Flat Head Screws
- 2 x Tapping Screws
- 2 x Anchorings

Image: Product dimensions and included accessories.
Specifications
| Brand | ocioc |
| Model Number | 8303 |
| Size | 15.7 inches (400mm) diameter, 0.94 inches (24mm) thickness |
| Wattage | 36W |
| Color Temperature | 5000K Daylight |
| Voltage | 120 Volts |
| Light Source | LED |
| Mounting Type | Surface Mount, Flush Mount |
| Material | Plastic (fire-retardant shell) |
| Lifespan | >5 years (based on 8 hours/day usage) |
| Special Features | Energy Efficient, Water splash and dust proof (integrated seal design) |
| Compatibility | Standard ON/OFF wall switches only (NOT compatible with dimmer switches) |
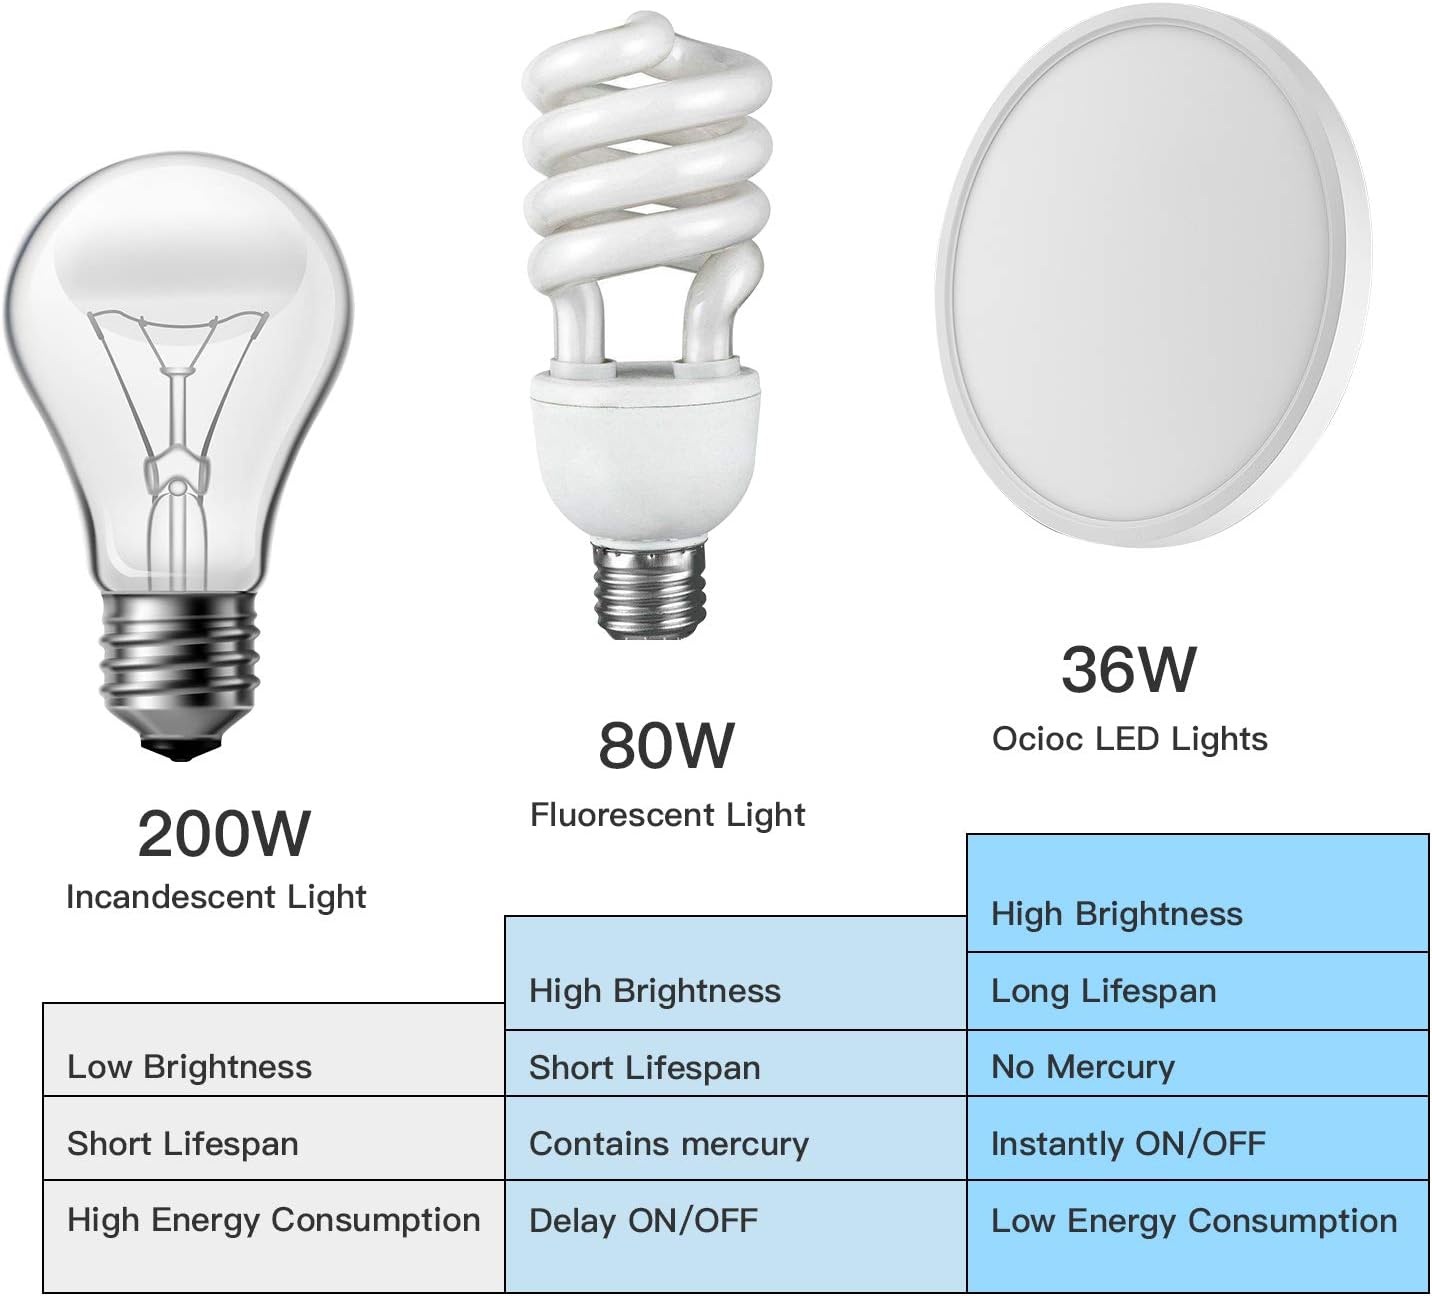
Image: Energy efficiency comparison of ocioc LED light.
Setup and Installation
Before beginning installation, ensure the power supply is turned off at the circuit breaker to prevent electric shock.
- Step 1: Install the Mounting Base. Secure the light base to the ceiling junction box using the provided screws. Ensure the base is firmly attached.
- Step 2: Connect Wiring. Connect the household electrical wires to the light fixture wires using the provided wire nuts. Typically, black wire to black wire, and white wire to white wire. Ensure connections are secure.
- Step 3: Attach the Light Fixture. Align the light fixture with the installed mounting base. Push the wire nuts upwards into the junction box. Rotate the light fixture clockwise onto the base plate until it locks securely into place.
Note: The ultra-thin design (0.94 inches) is ideal for low ceilings.
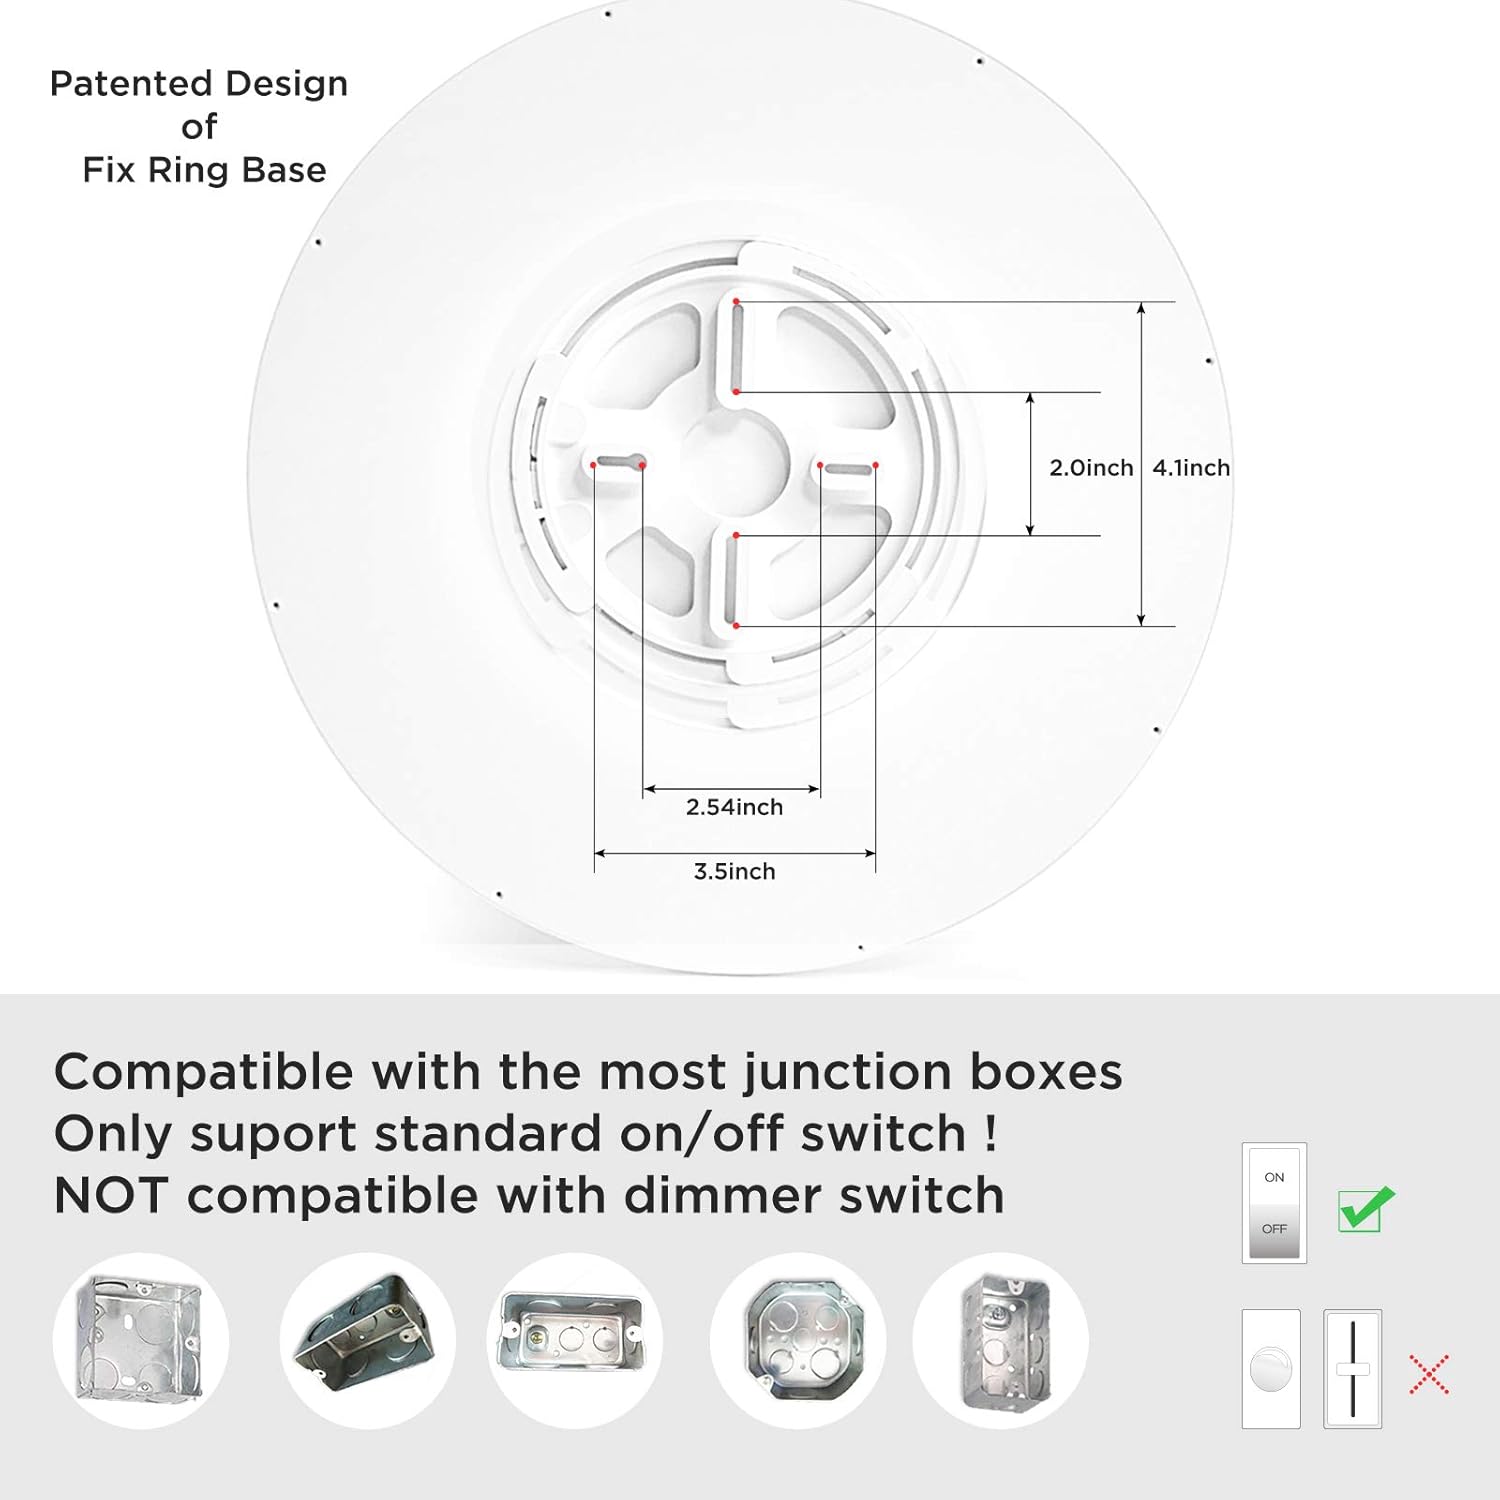
Image: Patented fix ring base design and dimmer switch compatibility information.
Video: Official video demonstrating the installation process of the ocioc 15.7-inch LED Flush Mount Ceiling Light.
Operating Instructions
Once installed, restore power at the circuit breaker. The ocioc LED Ceiling Light operates with a standard ON/OFF wall switch. Simply toggle the switch to turn the light on or off. This light provides a uniform and super bright 5000K daylight illumination.

Image: Examples of the ocioc LED Ceiling Light in various room settings.
Maintenance
- To clean the fixture, ensure the power is off. Wipe the surface with a soft, dry or slightly damp cloth. Do not use abrasive cleaners or solvents.
- The integrated LED light source is designed for a long lifespan and does not require bulb replacement.
- The integrated seal design provides water splash and dust resistance, reducing the need for frequent cleaning inside the fixture.
Troubleshooting
- Light does not turn on:
- Check if the power supply is on at the circuit breaker.
- Verify all wire connections are secure.
- Ensure the wall switch is in the ON position.
- Light flickers:
- Confirm the light is not connected to a dimmer switch. This fixture is not compatible with dimmer switches.
- Check for loose wire connections.
- Insufficient brightness:
- Ensure the fixture is clean and free of dust or obstructions.
- Verify the power supply is stable.
Warranty Information
This ocioc product comes with a standard manufacturer's warranty. Please refer to the product packaging or contact customer support for specific warranty terms and conditions.
Support and Contact Information
For technical assistance, warranty claims, or product inquiries, please contact ocioc customer support through the retailer's platform or visit the official ocioc brand store.


