Introduction
This manual provides comprehensive instructions for the safe and efficient operation, maintenance, and care of your Solis Grind & Infuse Compact 1018 Espresso Machine. Please read this manual thoroughly before first use and keep it for future reference.
Important Safety Instructions
Always follow basic safety precautions when using electrical appliances to reduce the risk of fire, electric shock, and injury to persons.
- Read all instructions.
- Do not touch hot surfaces. Use handles or knobs.
- To protect against fire, electric shock, and injury to persons, do not immerse cord, plugs, or appliance in water or other liquid.
- Close supervision is necessary when any appliance is used by or near children.
- Unplug from outlet when not in use and before cleaning. Allow to cool before putting on or taking off parts, and before cleaning the appliance.
- Do not operate any appliance with a damaged cord or plug or after the appliance malfunctions, or has been damaged in any manner.
- The use of accessory attachments not recommended by the appliance manufacturer may result in fire, electric shock, or injury to persons.
- Do not use outdoors.
- Do not let cord hang over edge of table or counter, or touch hot surfaces.
- Do not place on or near a hot gas or electric burner, or in a heated oven.
- Always attach plug to appliance first, then plug cord into the wall outlet. To disconnect, turn any control to "off", then remove plug from wall outlet.
- Do not use appliance for other than intended use.
Package Contents
Verify that all items are present in the packaging:
- Solis Grind & Infuse Compact 1018 Espresso Machine (Black)
- Single-wall filter baskets (1-cup and 2-cup)
- Double-wall filter baskets (1-cup and 2-cup)
- Filter basket for 44mm pods
- Tamper
- Coffee spoon
- Milk jug
- Water filter cartridge
- Water hardness test strips
- Cleaning tools

Figure 1: Included Accessories. This image displays all the accessories that come with the Solis Grind & Infuse Compact 1018 espresso machine, including various filter baskets, a tamper, a milk jug, and cleaning tools.
Product Overview
Familiarize yourself with the components of your espresso machine.

Figure 2: Front View of the Espresso Machine. This image shows the overall front view of the Solis Grind & Infuse Compact 1018, highlighting its compact design and main controls.

Figure 3: Key Components. This image points out the integrated grinder and the manometer for optimal extraction control on the Solis Grind & Infuse Compact 1018.

Figure 4: Manometer Detail. A close-up view of the manometer, which helps monitor the extraction pressure during brewing.

Figure 5: Integrated Grinder Hopper. This image shows the top of the machine with coffee beans visible in the integrated grinder's hopper.
Main Features:
- Integrated Grinder: 11 adjustable grind settings for optimal coffee extraction.
- PID Temperature Control: Ensures precise water temperature for consistent brewing.
- 15 Bar Pump: Provides optimal pressure for rich espresso extraction.
- Manometer: Allows monitoring of extraction pressure.
- 51mm Portafilter: Stainless steel portafilter with double spout.
- Steam/Hot Water Wand: Swiveling nozzle for milk frothing and hot water dispensing.
- 2.5 L Water Tank: Transparent and removable for easy refilling.
- Programmable Cup Size: Customize espresso volume.
- Pre-infusion Function: Gently wets coffee grounds for enhanced aroma.
- Automatic Shut-off: Powers off after 30 minutes of inactivity.
Setup
- Unpacking: Carefully remove all components from the packaging. Retain packaging for future transport or storage.
- Placement: Place the machine on a flat, stable, heat-resistant surface, away from water sources and heat. Ensure adequate ventilation.
- Water Tank: Remove the transparent water tank from the back of the machine. Rinse it with fresh water and fill it to the MAX line with cold, filtered water. Insert the water filter cartridge if desired. Place the tank back securely.
- Initial Rinse: Before first use, perform an initial rinse cycle.
- Fill the water tank.
- Ensure the portafilter is not inserted.
- Place a large container under the brew head and steam wand.
- Turn on the machine.
- Once heated, press the 1-cup button to dispense water through the brew head.
- Turn the steam/hot water knob to dispense hot water through the wand.
- Repeat until the water tank is nearly empty. This primes the pump and cleans internal components.
- Grinder Setup: Fill the bean hopper with fresh whole coffee beans. Adjust the grind setting according to your preference (start with a medium-fine setting).
Operating Instructions
1. Making Espresso
- Prepare the Portafilter: Select the appropriate filter basket (1-cup or 2-cup) and insert it into the portafilter.
- Grind Coffee: Place the portafilter under the grinder chute. Press the grind button to dispense freshly ground coffee into the filter basket. Adjust grind time or grind setting as needed to achieve the desired dose and fineness.
- Tamp the Coffee: Use the tamper to press the ground coffee firmly and evenly into the filter basket. Ensure the surface is level.
- Insert Portafilter: Wipe any excess coffee from the rim of the portafilter. Insert the portafilter into the brew head and turn it firmly to the right until it is securely locked.
- Place Cup: Place one or two pre-warmed espresso cups under the portafilter spouts.
- Brew Espresso: Press the 1-cup or 2-cup button. The machine will pre-infuse the coffee, then begin extraction. Monitor the manometer for optimal pressure (typically in the middle of the "optimal" range).
- Stop Extraction: The machine will stop automatically based on the programmed cup size. You can manually stop extraction by pressing the button again.
- Remove Portafilter: Carefully remove the portafilter by turning it to the left. Discard the used coffee puck.

Figure 6: Preparing Espresso. This image shows the portafilter filled with ground coffee, ready to be inserted into the machine for brewing.
2. Frothing Milk
- Prepare Milk: Fill a cold stainless steel milk jug with cold milk (dairy or non-dairy) up to just below the spout.
- Activate Steam: Turn the steam/hot water knob to the steam position. Wait for the steam light to indicate readiness.
- Purge Steam Wand: Briefly open the steam knob to release any condensed water from the wand. Close it immediately.
- Froth Milk: Immerse the tip of the steam wand just below the surface of the milk. Open the steam knob fully. Angle the jug to create a swirling motion. For microfoam, keep the tip near the surface to incorporate air, then lower it to heat the milk.
- Monitor Temperature: Heat the milk until the jug is too hot to touch (approximately 60-65°C or 140-150°F).
- Stop Steaming: Close the steam knob, then remove the milk jug.
- Clean Steam Wand: Immediately wipe the steam wand with a damp cloth to remove any milk residue. Briefly open the steam knob again to clear any milk from inside the wand.

Figure 7: Milk Frothing. A hand is shown using the steam wand to froth milk in a stainless steel jug, demonstrating the process for creating milk foam.
3. Hot Water Dispensing
To dispense hot water for tea or Americanos:
- Place a cup under the steam/hot water wand.
- Turn the steam/hot water knob to the hot water position.
- Hot water will dispense from the wand. Turn the knob back to stop.
Maintenance and Cleaning
Regular cleaning and maintenance ensure optimal performance and longevity of your espresso machine.
Daily Cleaning:
- Portafilter and Filter Baskets: After each use, remove the portafilter and discard the coffee grounds. Rinse the portafilter and filter basket under hot water.
- Steam Wand: Always wipe the steam wand immediately after frothing milk. Briefly purge steam to clear any internal residue.
- Drip Tray: Empty and rinse the drip tray daily.
- Exterior: Wipe the exterior of the machine with a soft, damp cloth. Do not use abrasive cleaners or solvents.
Weekly Cleaning:
- Brew Head: Use a cleaning brush to scrub the brew head and gasket to remove coffee residue.
- Water Tank: Remove, empty, and thoroughly clean the water tank with mild detergent and rinse well.
Descaling:
The frequency of descaling depends on your water hardness and usage. Use the provided water hardness test strips to determine your water hardness. Descale the machine every 1-3 months, or when indicated by the machine (if applicable).
- Empty the water tank and fill it with a descaling solution mixed according to the manufacturer's instructions.
- Place a large container under the brew head and steam wand.
- Turn on the machine.
- Run approximately half of the descaling solution through the brew head by pressing the 2-cup button.
- Run the remaining solution through the steam wand by opening the steam knob.
- Turn off the machine and let it sit for 15-20 minutes to allow the descaling solution to work.
- Empty the water tank, rinse it thoroughly, and refill with fresh water.
- Perform several rinse cycles by dispensing water through both the brew head and steam wand until the tank is empty, ensuring all descaling solution is flushed out.
Troubleshooting
Refer to this section for common issues and their solutions.
| Problem | Possible Cause | Solution |
|---|---|---|
| No coffee dispenses / Slow flow |
|
|
| Coffee dispenses too fast / Weak espresso |
|
|
| No steam from wand |
|
|
| Water leaking from machine |
|
|
Specifications
| Feature | Detail |
|---|---|
| Brand | Solis |
| Model Number | 98015 |
| Color | Black |
| Product Dimensions (L x W x H) | 19 x 25 x 34 cm |
| Water Tank Volume | 2.5 Liters |
| Power | 1600 Watts |
| Material | Stainless Steel |
| Automatic Shut-off | Yes (after 30 minutes) |
| Special Features | Integrated Milk Frother, Programmable Cup Size, PID Temperature Control, Manometer, Pre-infusion |
| Item Weight | 7.6 Kilograms |
| Pump Pressure | 15 Bar |
| Portafilter Size | 51 mm |
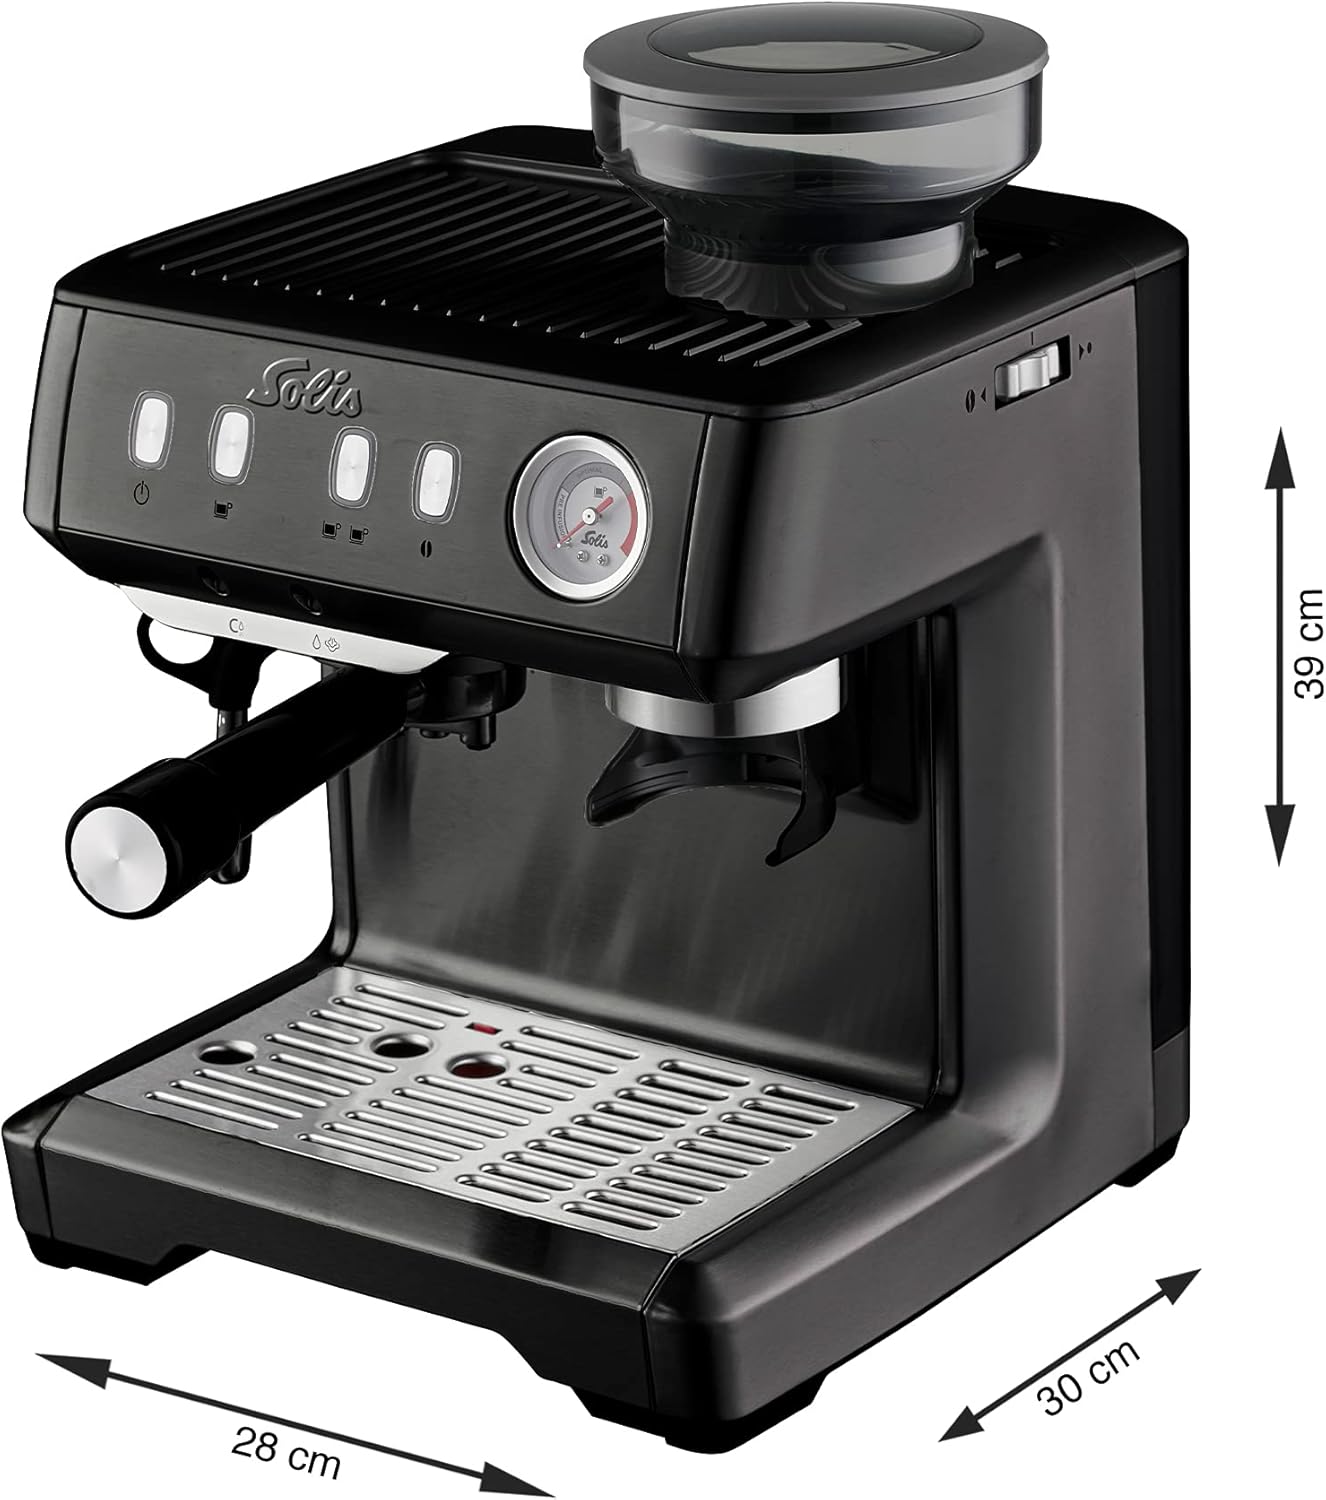
Figure 8: Product Dimensions. This image illustrates the length, width, and height of the Solis Grind & Infuse Compact 1018 espresso machine.
Warranty and Support
Your Solis Grind & Infuse Compact 1018 Espresso Machine is covered by a manufacturer's warranty. Please refer to the warranty card included in your packaging for specific terms and conditions, including the warranty period and coverage details.
For technical support, service, or to order replacement parts, please contact Solis customer service. Contact information can typically be found on the manufacturer's website or on the warranty card.
When contacting support, please have your model number (98015) and purchase date available.


