1. Introduction
This manual provides essential instructions for the safe and efficient operation, maintenance, and care of your new SUNVIVI 22-Quart Electric Roaster Oven. Please read all instructions carefully before first use and retain this manual for future reference.
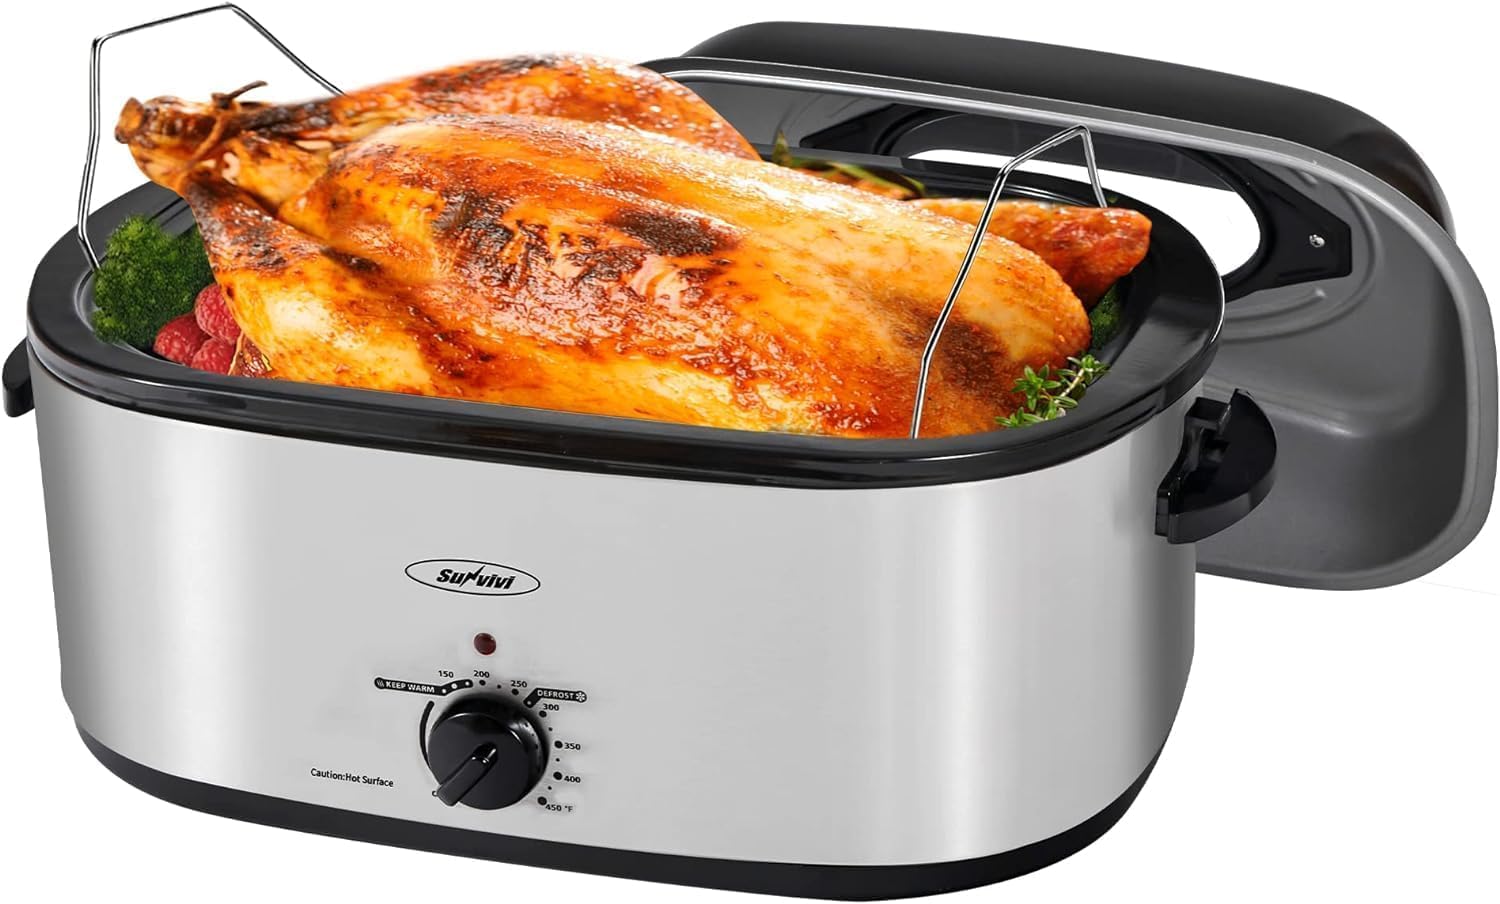
Image 1.1: The SUNVIVI 22-Quart Electric Roaster Oven.
2. Important Safety Instructions
WARNING: To reduce the risk of fire, electric shock, or injury, always follow these basic safety precautions.
- Read all instructions before operating the appliance.
- Do not touch hot surfaces. Use handles or knobs.
- To protect against electrical shock, do not immerse cord, plugs, or the appliance in water or other liquid.
- Close supervision is necessary when any appliance is used by or near children.
- Unplug from outlet when not in use and before cleaning. Allow to cool before putting on or taking off parts.
- Do not operate any appliance with a damaged cord or plug, or after the appliance malfunctions or has been damaged in any manner. Contact customer service for examination, repair, or adjustment.
- The use of accessory attachments not recommended by the appliance manufacturer may cause injuries.
- Do not use outdoors.
- Do not let cord hang over edge of table or counter, or touch hot surfaces.
- Do not place on or near a hot gas or electric burner, or in a heated oven.
- Extreme caution must be used when moving an appliance containing hot oil or other hot liquids.
- Always attach plug to appliance first, then plug cord into the wall outlet. To disconnect, turn any control to "off", then remove plug from wall outlet.
- Do not use appliance for other than intended household use.
- Do not clean with metal scouring pads. Pieces can break off the pad and touch electrical parts, creating a risk of electric shock.
- Do not store any materials, other than manufacturer's recommended accessories, in this oven when not in use.
- Do not place any of the following materials in the oven: paper, cardboard, plastic, or similar materials.
- Do not cover the drip tray or any part of the oven with metal foil. This will cause overheating of the oven.
3. Product Components
Your SUNVIVI Electric Roaster Oven includes the following components:
- Oven Base: The main unit housing the heating element and controls.
- Removable Enamel Inner Pot: The cooking vessel where food is placed.
- Visible Lid: A lid with a glass window for monitoring cooking progress.
- Roasting Rack: A metal rack designed to lift food off the bottom of the inner pot for even cooking.
- Cool-Touch Handles: Handles on the lid and body designed to remain cool during operation for safe handling.

Image 3.1: The removable inner pot for easy cleaning.
4. Setup and First Use
- Unpack: Carefully remove all packaging materials and accessories.
- Clean: Wash the removable inner pot, roasting rack, and lid in warm, soapy water. Rinse thoroughly and dry completely. Wipe the exterior of the oven base with a damp cloth.
- Initial Burn-Off: Before first use, operate the roaster oven empty for 30 minutes at 350°F (175°C) to eliminate any manufacturing odors. Ensure adequate ventilation during this process.
- Placement: Place the roaster oven on a stable, heat-resistant surface, away from walls and other appliances, ensuring proper air circulation.
Video 4.1: An overview of the Sunvivi roaster oven, demonstrating its features and setup.
5. Operating Instructions
5.1 General Roasting
- Place the removable inner pot into the oven base.
- Insert the roasting rack into the inner pot.
- Place food on the roasting rack.
- Cover with the visible lid.
- Plug the power cord into a standard electrical outlet.
- Turn the temperature control knob to the desired temperature (150°F to 450°F). The indicator light will illuminate.
- The indicator light will turn off once the set temperature is reached and cycle on/off during cooking to maintain temperature.
- When cooking is complete, turn the knob to "OFF" and unplug the unit.

Image 5.1: The temperature control dial, ranging from 150°F to 450°F, with defrost and keep warm settings.
5.2 Thaw and Warming Settings
- Defrost Setting: Use the "DEFROST" setting to safely thaw frozen foods, such as turkeys, before roasting. This setting provides a low, consistent heat.
- Keep Warm Setting: After cooking, turn the knob to "KEEP WARM" to maintain food at an ideal serving temperature without overcooking.

Image 5.2: Visual representation of the defrost and warming functions.
5.3 Visible & Self-Basting Lid
The roaster features a visible glassed lid, allowing you to monitor cooking progress without lifting the lid and losing heat. The self-basting design continually recirculates moisture, ensuring tender and juicy results, and helps prevent food from sticking to the pan.

Image 5.3: The self-basting lid design, which helps keep food moist.
Video 5.4: Demonstration of the roaster oven's use for various dishes, highlighting its versatility.
6. Maintenance and Cleaning
Always unplug the roaster oven and allow it to cool completely before cleaning.
- Removable Inner Pot and Roasting Rack: These parts are dishwasher safe or can be washed by hand in warm, soapy water. For stubborn food residue, soak the inner pot before cleaning.
- Lid: Wash the lid in warm, soapy water and rinse thoroughly. The visible glass window can be cleaned with a non-abrasive cleaner.
- Oven Base: Wipe the exterior of the oven base with a damp cloth. Do not immerse the oven base in water or any other liquid.
- Storage: Ensure all parts are completely dry before reassembling and storing the roaster oven.
Video 6.1: A demonstration of the easy cleaning process for the removable inner pot and rack.
7. Troubleshooting
| Problem | Possible Cause | Solution |
|---|---|---|
| Roaster does not turn on. | Not plugged in; power outlet malfunction; temperature knob set to "OFF". | Ensure the unit is securely plugged into a working outlet. Turn the temperature knob to a desired setting. |
| Food cooks unevenly. | Food not centered on rack; lid not properly sealed; incorrect temperature setting. | Ensure food is centered. Check that the lid is securely in place. Verify the temperature setting is appropriate for the food being cooked. |
| Smoke or odor during first use. | Residual manufacturing oils burning off. | This is normal for initial use. Ensure good ventilation. The odor should dissipate after the first use. |
| Food sticking to inner pot. | Not enough liquid; liner used at too high a temperature. | Ensure adequate liquid for slow cooking. If using a liner, ensure temperatures are below 350°F and water is used to prevent sticking. |
8. Product Specifications
- Brand: SUNVIVI
- Model Name: Electric Roaster
- Capacity: 22 Quarts (fits up to 26 lb turkey)
- Power Source: Electric (1450W)
- Temperature Control: 150°F to 450°F, with Defrost and Keep Warm settings
- Material: Reinforced Stainless Steel exterior, Enamel Inner Pot
- Product Dimensions: 15.5"D x 23.5"W x 12.9"H
- Item Weight: 17 pounds
- Control Type: Knob
- Special Features: Visible Lid, Self-Basting, Cool-Touch Handles, Removable Pot
- UPC: 611851814977
- ASIN: B08MW4B6PC
9. Warranty and Support
The SUNVIVI Electric Roaster Oven comes with a one-year warranty. For any questions regarding your electric roaster or for warranty claims, please contact SUNVIVI customer service. You can find contact information on the official SUNVIVI website or through your purchase platform.
For more information and support, visit the SUNVIVI Store on Amazon.


