1. Introduction
This manual provides essential instructions for the proper installation, operation, and maintenance of your Tera 9100 Omnidirectional 2D QR Barcode Scanner. Please read this manual thoroughly before using the device to ensure optimal performance and longevity.
2. Product Features
- Stable Non-Slip Base: Equipped with four small anti-slip pads on the bottom, ensuring stability during use on any desktop surface.
- Plug and Play Connectivity: No drivers or applications are required. Simply connect the USB data cable to a computer, POS system, cash register, laptop, or PC to begin scanning. Compatible with Windows XP/7/8/10, Mac OS, and Linux.
- Hands-Free Automatic Scanning: Designed for desktop placement, eliminating the need to hold the scanner. This feature enhances efficiency for scanning items at checkout and for customers scanning digital barcodes from smartphones.
- Excellent 1D/2D QR Decoding Capability: Supports screen scanning and accurately captures common 1D and 2D QR codes, including PDF417 codes found on driver's licenses or ID cards. Capable of reading blurry or incomplete barcodes.
- 1D Decoding: Codabar, Code 11, Code 93, MSI, Code 128, UCC/EAN-128, Code 39, EAN-8, EAN-13, UPC-A, ISBN, Industrial 25, Interleaved 25, Standard 25, 2/5 Matrix.
- 2D Decoding: QR, PDF417, Data Matrix, Aztec Code, Maxi Code.
- Multi-Language Support: Supports various keyboard languages, including US, UK, German, French, Italian, Spanish, and Japanese. Features virtual COM port support, hidden prefix/suffix settings, and volume adjustment.
3. Setup Instructions
The Tera 9100 Barcode Scanner is designed for quick and easy setup. Follow these steps to get started:
- Unpack the Scanner: Carefully remove the scanner and its accessories from the packaging.
- Connect the USB Cable: Insert the USB data cable into the designated port on the scanner and then into an available USB port on your computer, POS system, or cash register.
- System Recognition: Your operating system (Windows, Mac OS, Linux) should automatically detect and install the necessary drivers. No manual driver installation is typically required.
- Placement: Place the scanner on a stable, flat surface, such as a desktop or counter. The non-slip base will help secure it in position.

Once connected, the scanner is ready for immediate use.
4. Operating Instructions
The Tera 9100 scanner offers efficient and versatile scanning capabilities. Here's how to operate it:
4.1 Basic Scanning
Position the item with the barcode facing the scanner's window. The scanner will automatically detect and read the barcode. A successful scan is typically indicated by an audible beep and/or a visual confirmation light.

4.2 Adjustable Head
The scanner features a 15-degree adjustable head, allowing you to tilt the scanning window to find the optimal angle for different items or scanning environments. Gently adjust the head to your preferred position.

4.3 Barcode Compatibility
The Tera 9100 supports a wide range of 1D and 2D barcodes, including Aztec, Code 128, UPC-A, PDF417, QR, Data Matrix, and Codabar. Ensure the barcode is within the scanner's field of view for accurate reading.

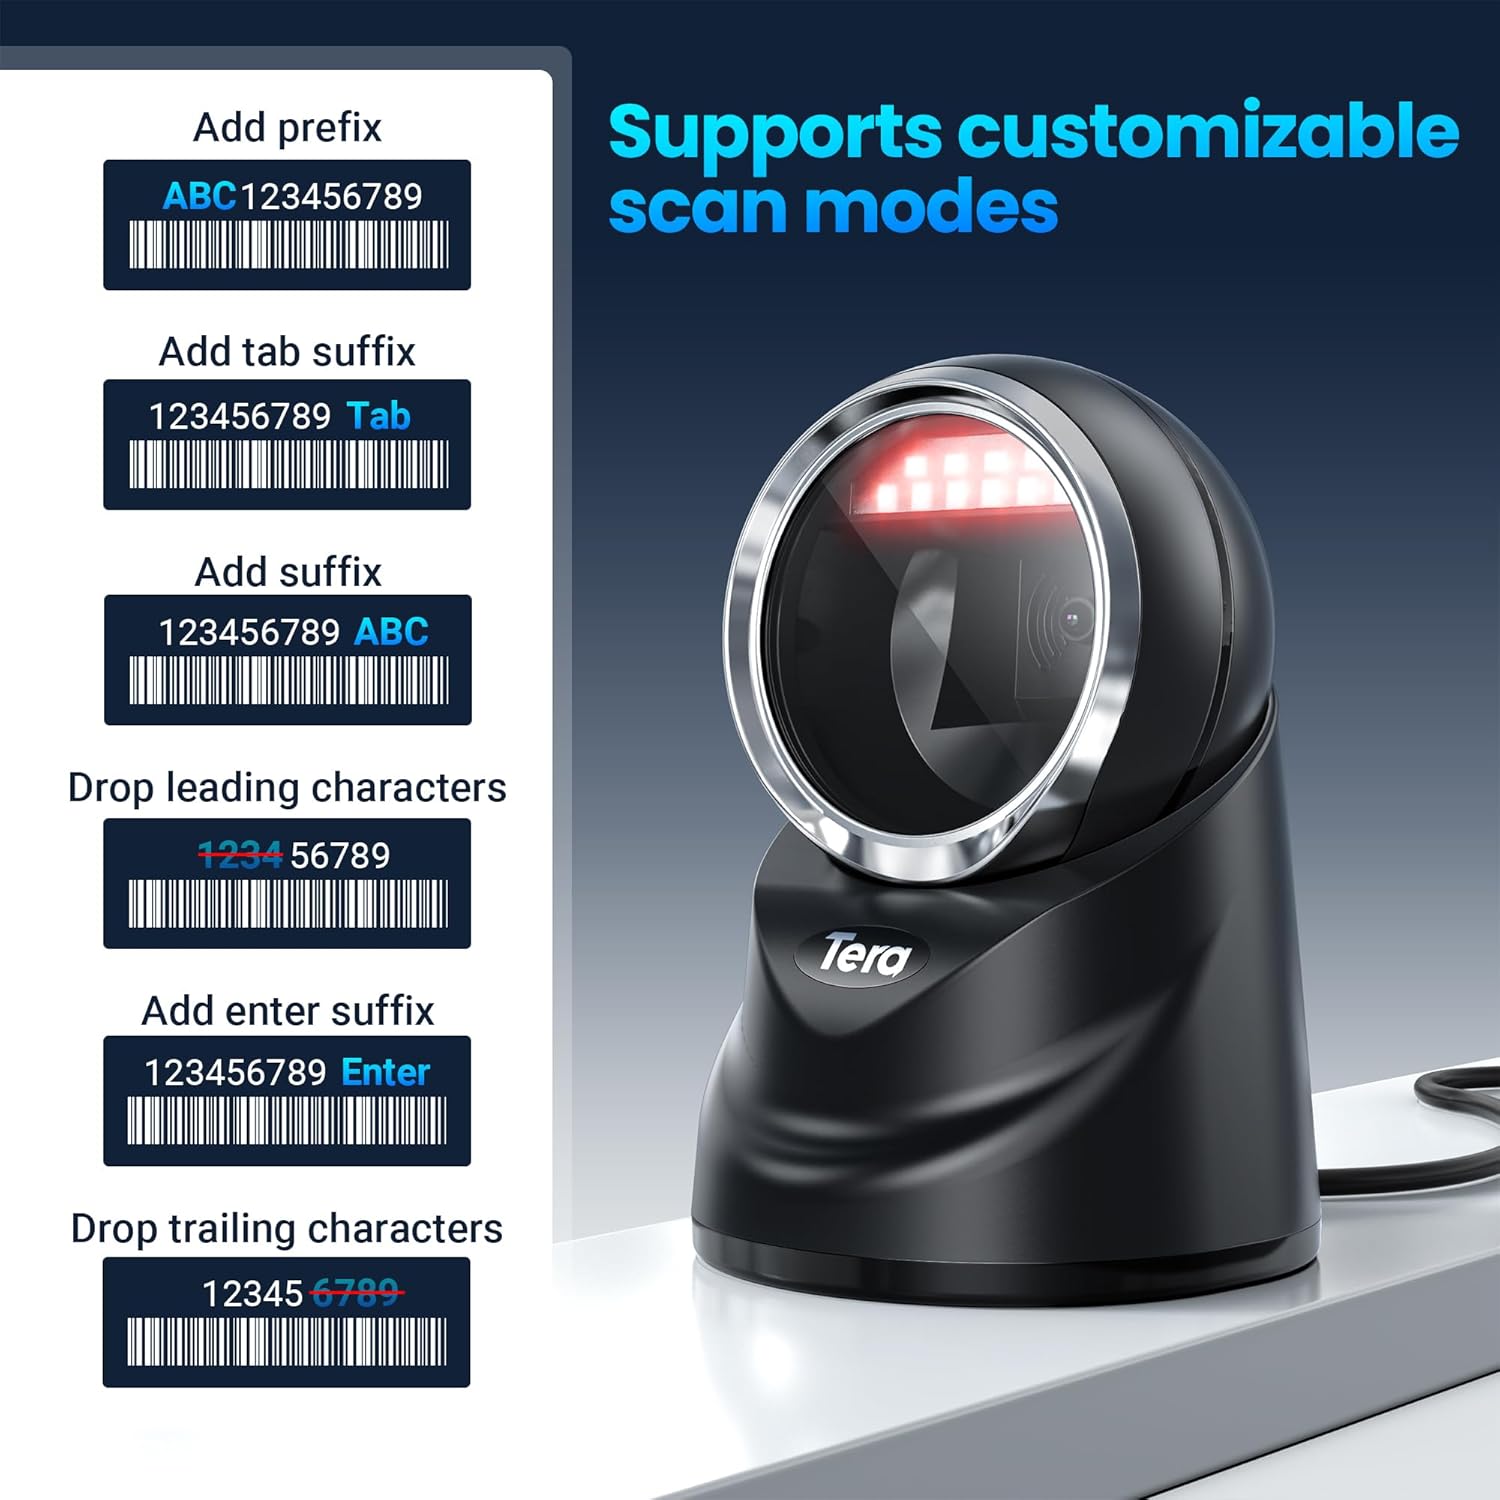
4.4 Customizable Scan Modes
The scanner supports various customizable scan modes, allowing you to modify data output. These include adding prefixes or suffixes, dropping leading or trailing characters, and adding an 'Enter' suffix. Refer to the detailed programming guide (usually found in the product packaging or online) for specific barcode configurations to enable these features.
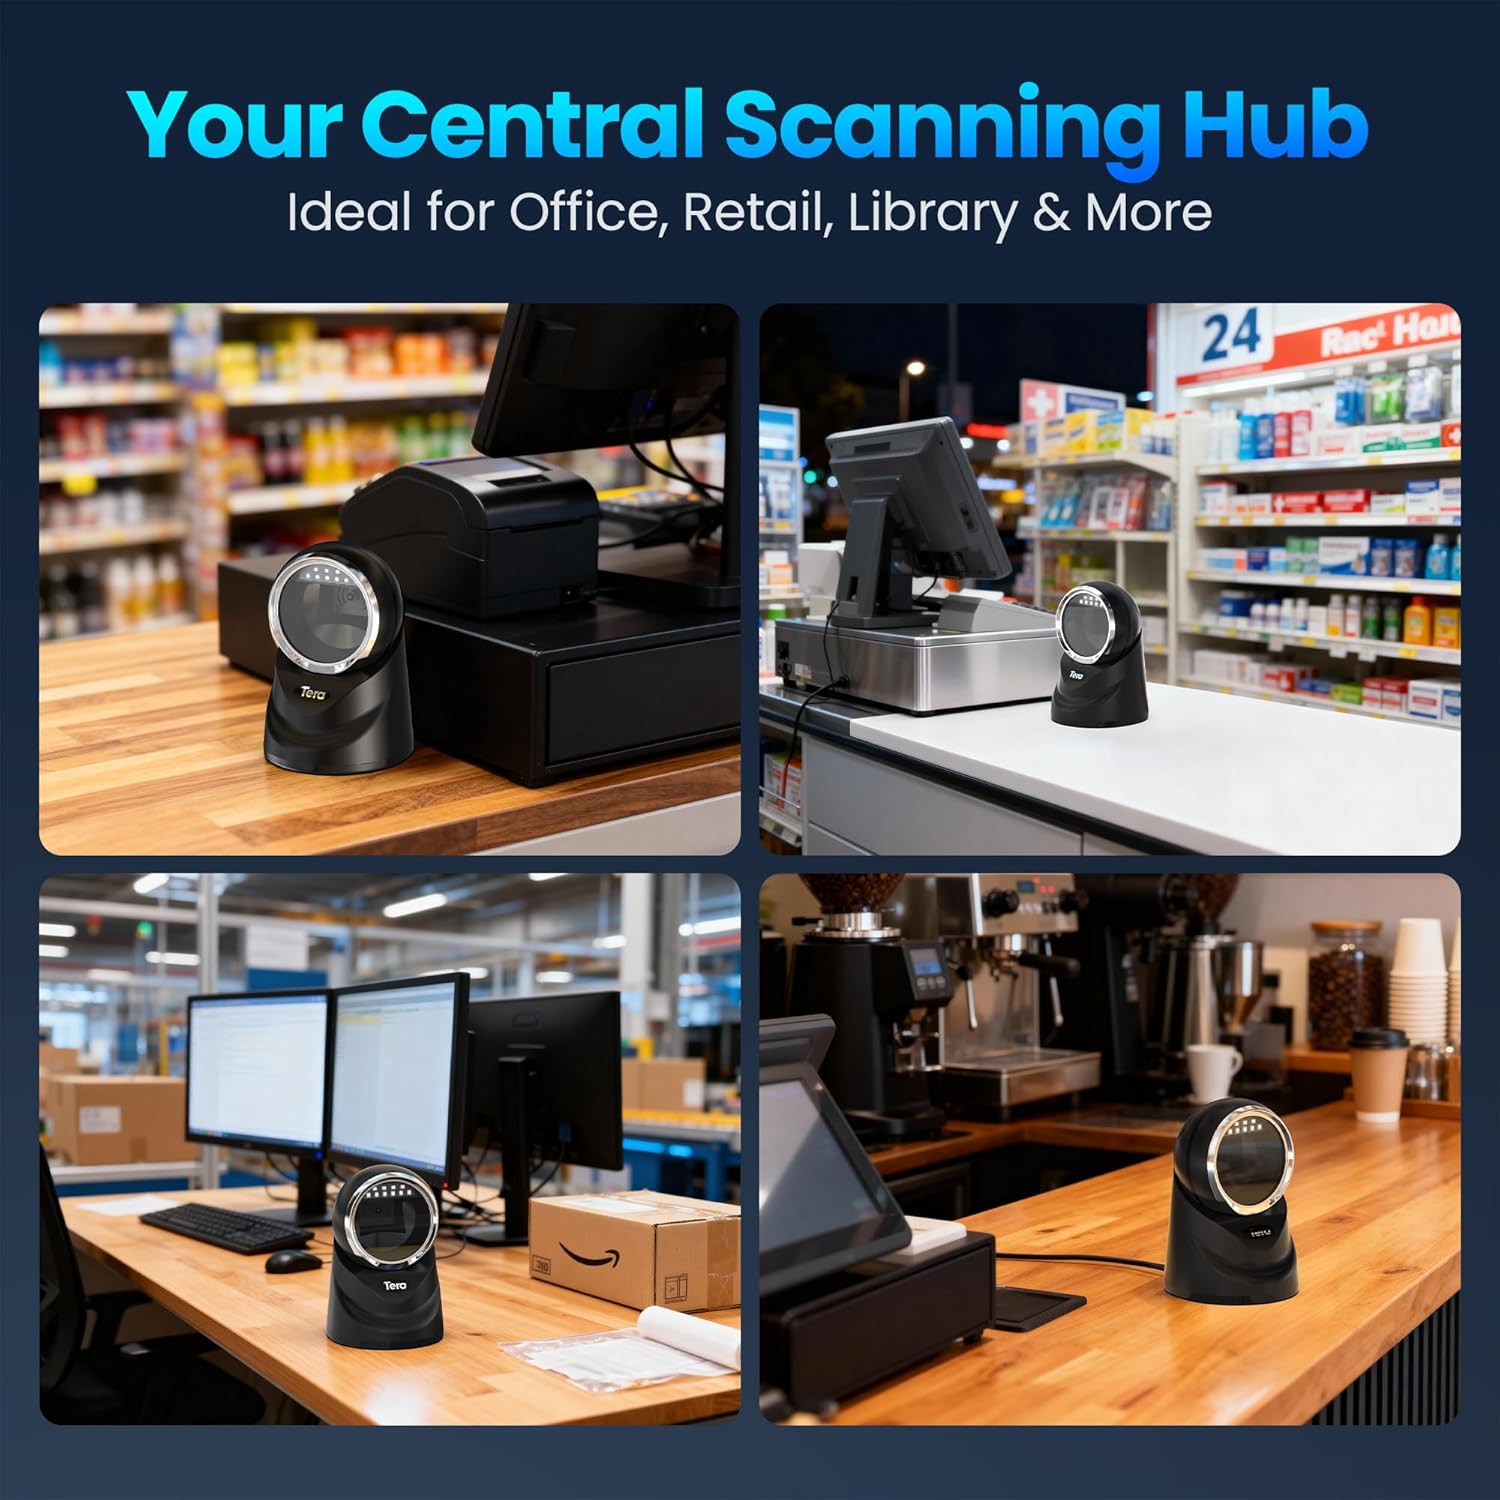
4.5 Application Environments
The Tera 9100 is ideal for various settings, including offices, retail stores, libraries, and other environments requiring efficient barcode scanning.
5. Maintenance
To ensure the longevity and optimal performance of your Tera 9100 Barcode Scanner, follow these simple maintenance guidelines:
- Cleaning the Scanning Window: Regularly clean the scanning window with a soft, lint-free cloth. If necessary, dampen the cloth slightly with water or a mild, non-abrasive cleaner. Avoid harsh chemicals or abrasive materials that could scratch the window.
- General Cleaning: Wipe the exterior of the scanner with a dry or slightly damp cloth to remove dust and dirt.
- Cable Inspection: Periodically check the USB cable for any signs of wear, cuts, or damage. Replace the cable if any damage is observed to prevent connectivity issues.
- Storage: When not in use for extended periods, store the scanner in a clean, dry environment away from extreme temperatures and direct sunlight.
6. Troubleshooting
If you encounter issues with your Tera 9100 Barcode Scanner, refer to the following common problems and solutions:
| Problem | Possible Cause | Solution |
|---|---|---|
| Scanner does not power on. | USB cable not properly connected or damaged. | Ensure the USB cable is securely connected to both the scanner and the computer. Try a different USB port or cable. |
| Scanner does not read barcodes. | Barcode is damaged, blurry, or not supported. Scanning window is dirty. Incorrect symbology settings. | Ensure the barcode is clear and undamaged. Clean the scanning window. Verify the barcode type is supported. Refer to the programming guide to enable/disable symbologies. |
| Scanned data is incorrect or incomplete. | Incorrect keyboard language setting. Data formatting settings (prefix/suffix) are active. | Ensure the scanner's keyboard language matches your computer's keyboard layout. Refer to the programming guide to adjust data formatting settings. |
| Scanner beeps but no data is transmitted. | Application not in focus or not accepting input. Virtual COM port mode enabled but not configured. | Click on the input field of your application. If using virtual COM port, ensure the correct driver is installed and the application is configured to read from the COM port. |
If the problem persists after attempting these solutions, please contact customer support for further assistance.
7. Specifications
| Feature | Detail |
|---|---|
| Brand | Tera |
| Model Number | 9100 (ASIN: B08MVW98C5) |
| Color | Black |
| Connectivity Technology | USB Cable |
| Compatible Devices | Smartphone, Laptop, Desktop Computer |
| Operating System Compatibility | Windows XP/7/8/10, Mac OS, Linux |
| Scan Rate | 300 images per second |
| Real View Angle | 360 degrees |
| Power Source | Corded Electric (USB) |
| UPC | 787803926453 |
8. Warranty and Support
Tera products are designed for reliability and performance. For information regarding warranty coverage, technical support, or service, please refer to the documentation included with your purchase or visit the official Tera website. Please have your model number (9100) and purchase date available when contacting support.