
1. Introduction
The Gardena Garden Pump 3000/4 Basic is a powerful and energy-saving irrigation pump designed for various garden watering tasks. Its robust construction, including a thermal switch, stainless steel shaft, and brass threaded connections, ensures a long operational lifespan. This pump is suitable for use with garden showers or sprinklers and can handle longer hoses due to its maximum pressure of 3.5 bar. An additional filling opening simplifies the process of filling and emptying the pump.
This manual provides essential information for the safe and efficient operation, setup, maintenance, and troubleshooting of your Gardena Garden Pump 3000/4 Basic.
2. Safety Information
Please read all safety warnings and instructions carefully before operating the pump. Failure to follow these instructions may result in electric shock, fire, and/or serious injury.
- Electrical Safety: Ensure the power supply matches the pump's specifications. Do not operate the pump with a damaged cord or plug. Always use a ground fault circuit interrupter (GFCI) when operating the pump outdoors.
- Water Safety: Do not pump flammable, explosive, or corrosive liquids. The pump is designed for clear water only. Avoid running the pump dry, as this can cause damage.
- Personal Safety: Keep children and unauthorized persons away from the operating pump. Wear appropriate personal protective equipment if necessary.
- Maintenance: Always disconnect the pump from the power supply before performing any maintenance or cleaning.
3. Product Overview
The Gardena Garden Pump 3000/4 Basic is designed for ease of use and durability. Key components include:
- Pump housing with integrated handle
- Motor with cooling fan
- Suction connection (inlet)
- Pressure connection (outlet)
- Filling opening
- Drain plug
- On/Off power switch
- Thermal protection switch
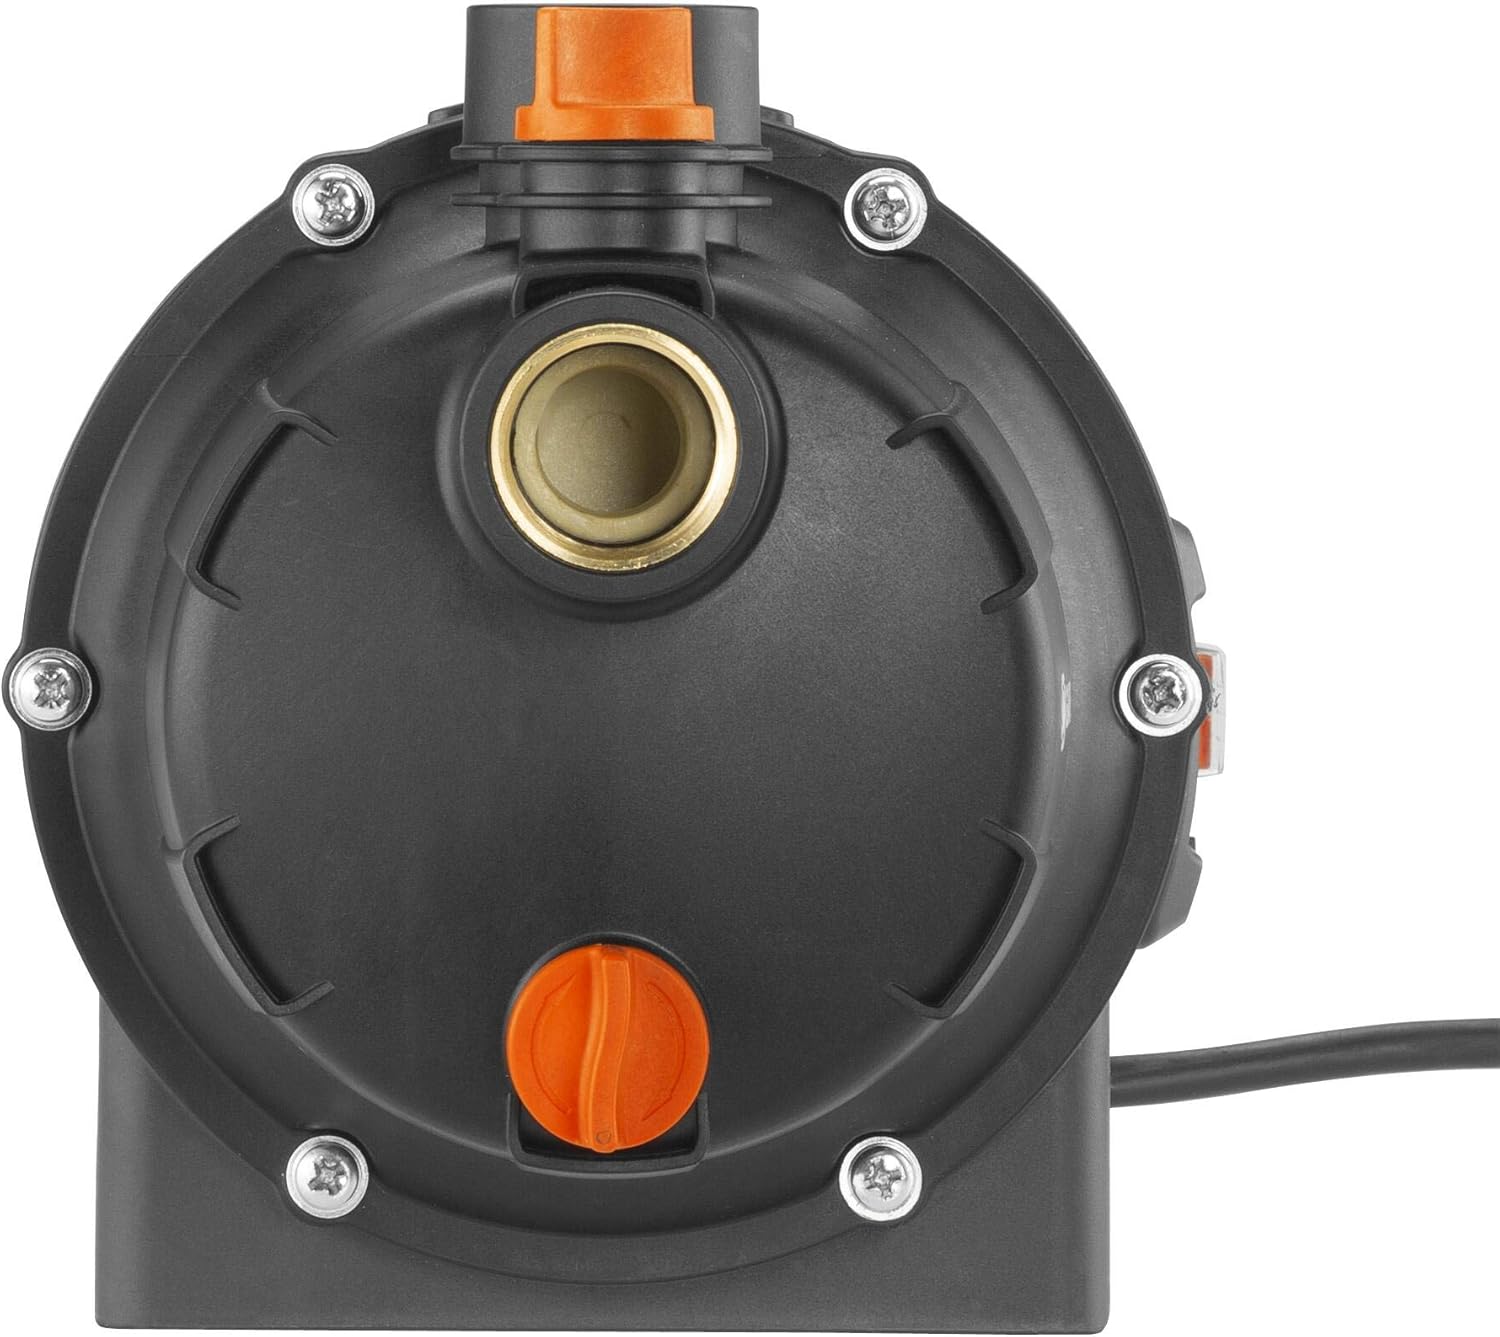
Figure 1: Angled view of the Gardena Garden Pump 3000/4 Basic, showing the main body and connections.
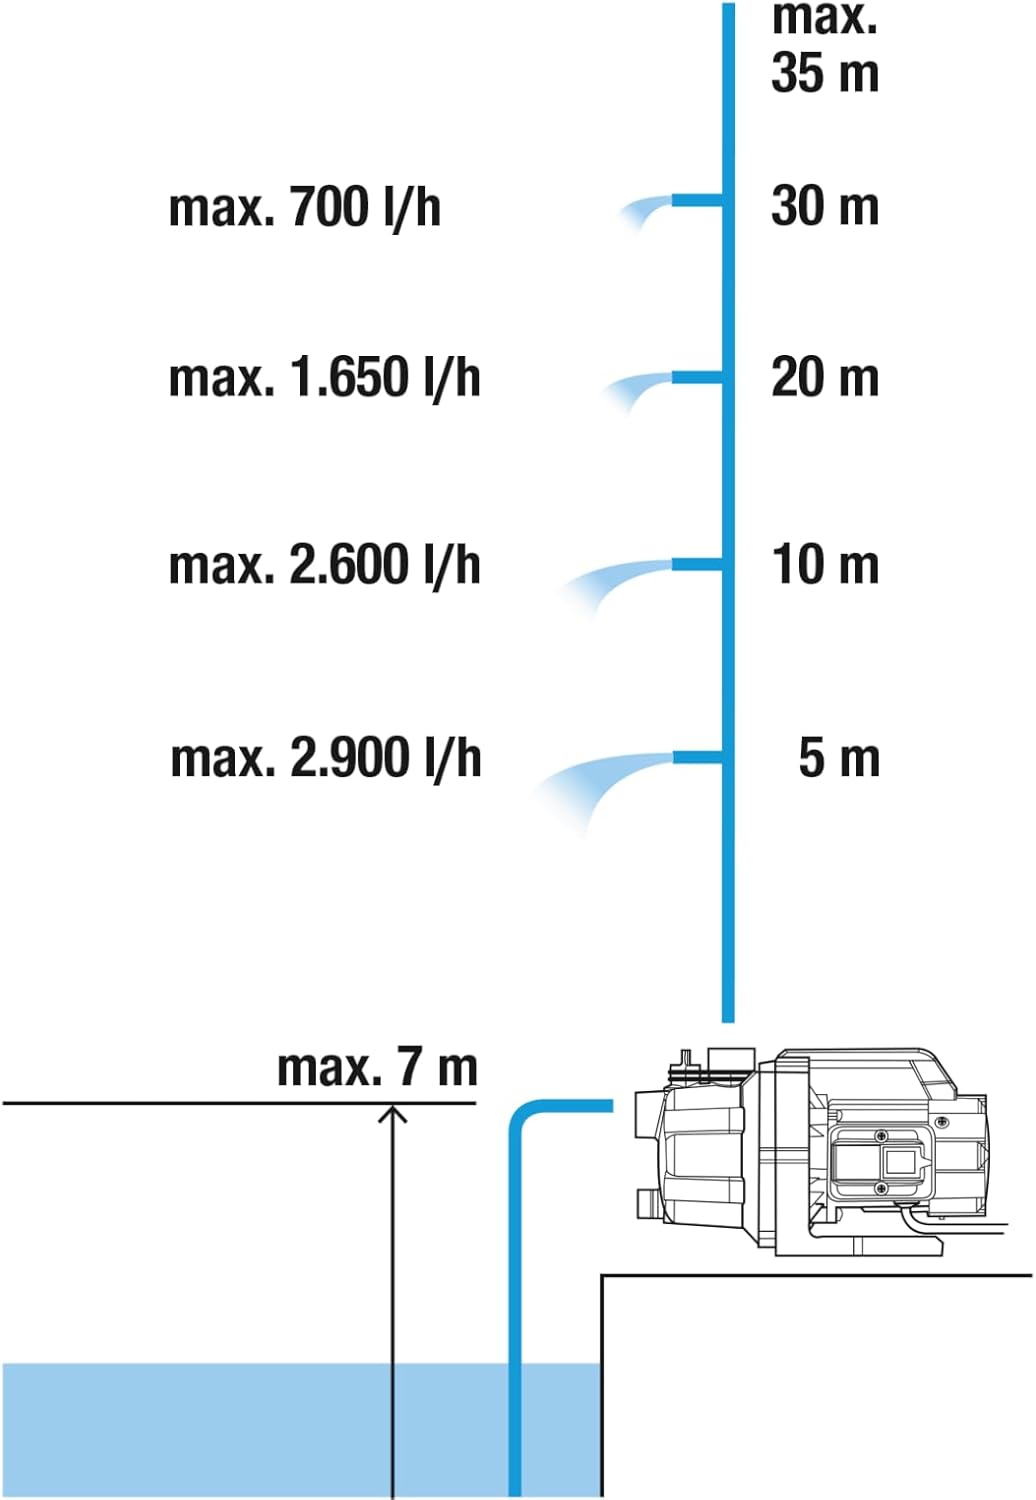
Figure 2: Front view of the pump, highlighting the robust brass threaded connections for inlet and outlet hoses.

Figure 3: Side view of the pump, illustrating the easily accessible On/Off power switch.
4. Setup
Proper setup is crucial for optimal performance and safety.
4.1 Placement
- Place the pump on a stable, level surface, protected from direct sunlight and rain.
- Ensure the pump is positioned close to the water source, with a maximum suction height of 7 meters.
- The maximum delivery height for water is 15 meters.
4.2 Connecting Hoses
- Suction Hose: Connect a robust, vacuum-resistant suction hose to the pump's inlet (suction connection). Ensure all connections are airtight to prevent air from entering the system, which can reduce pump efficiency. A non-return valve at the end of the suction hose is recommended to maintain prime.
- Pressure Hose: Connect the pressure hose (e.g., to a garden shower or sprinkler) to the pump's outlet (pressure connection). The pump includes two G1" double nipples for connecting fittings with internal threads.

Figure 4: Diagram showing pump setup with maximum suction and delivery heights, and sprinkler operation.

Figure 5: Recommended equipment for pump setup, including suction hose, non-return valve, and filter for optimal performance.
4.3 Priming the Pump
Before initial use, the pump must be primed (filled with water) to ensure proper operation.
- Open the filling opening on the top of the pump.
- Pour water into the pump until the pump housing is completely filled. The extra filling opening allows for easy filling without a funnel.
- Close the filling opening securely.
- Ensure all connected hoses are free of kinks and fully submerged in the water source if applicable.
5. Operating
Once the pump is set up and primed, you can begin operation.
5.1 Starting the Pump
- Ensure the suction hose is submerged in the water source and the pressure hose is correctly connected to your watering device.
- Plug the pump into a suitable electrical outlet.
- Switch the pump ON using the power switch. The pump will start drawing water.
- Allow a few moments for the pump to build pressure and for water to flow consistently. If no water flows after a short period, switch off the pump and re-prime it.
5.2 Monitoring Operation
- Observe the water flow and pressure. The pump can achieve a maximum pressure of 3.5 bar, suitable for various sprinklers.
- Listen for unusual noises or vibrations, which may indicate an issue.
- The integrated thermal switch protects the motor from overheating. If the pump stops unexpectedly, it may be due to thermal overload. Allow it to cool down before restarting.

Figure 6: Flow rate diagram illustrating the pump's performance at various delivery heights.
5.3 Shutting Down
- Switch the pump OFF using the power switch.
- Unplug the pump from the electrical outlet.
- If storing the pump, proceed to the maintenance section for emptying.
6. Maintenance
Regular maintenance ensures the longevity and efficiency of your pump.
6.1 Cleaning
- After each use, especially if pumping dirty water, flush the pump with clean water to remove any debris.
- Clean the exterior of the pump with a damp cloth. Do not use harsh detergents or solvents.
- Regularly check the suction filter (if installed) and clean it as needed to prevent blockages.
6.2 Winter Storage
Before the first frost, prepare the pump for winter storage to prevent damage from freezing water.
- Disconnect the pump from the power supply.
- Disconnect all hoses.
- Open the drain plug at the bottom of the pump to completely empty all water from the pump housing. The extra filling opening can also be used to facilitate emptying.
- Store the pump in a dry, frost-free location.
7. Troubleshooting
If you encounter issues with your pump, refer to the following troubleshooting guide:
| Problem | Possible Cause | Solution |
|---|---|---|
| Pump does not start | No power supply; Thermal overload; Motor fault | Check power connection/outlet; Allow pump to cool down; Contact service. |
| Pump runs but no water flows | Pump not primed; Air in suction line; Suction hose kinked/blocked; Water source empty | Re-prime the pump; Check all suction connections for airtightness; Clear any blockages; Ensure sufficient water in source. |
| Low water pressure | Partial blockage in suction/pressure line; Air in system; Worn pump components | Check and clear hoses; Re-prime the pump; Contact service for inspection. |
| Pump leaks | Loose connections; Damaged seals | Tighten all connections; Inspect and replace damaged seals. |
8. Specifications
| Feature | Specification |
|---|---|
| Brand | Gardena |
| Model Number | 09010-47 |
| Power | 600 W |
| Power Source | Corded Electric |
| Maximum Flow Rate | 3000 Liters Per Hour (3000 l/h) |
| Maximum Delivery Head | 15 Meters |
| Maximum Suction Height | 7 Meters |
| Maximum Pressure | 3.5 bar |
| Product Dimensions (L x W x H) | 29L x 25B x 46H Centimeters |
| Item Weight | 6065 Grams (approx. 6.07 kg) |
| Material | Brass (connections) |
| Color | Black |
| Included Components | 1x Irrigation Pump 3000/4, 2x G1" double nipples |
9. Warranty and Support
GARDENA products are manufactured with high-quality materials and undergo strict quality control. For warranty information, please refer to the documentation included with your purchase or visit the official Gardena website. For technical support, spare parts, or service inquiries, please contact Gardena customer service or an authorized service center in your region. Keep your proof of purchase for warranty claims.